After my recent post about microscopy of a mammal eye, it got me on the lookout (sorry, couldn’t resist) for other eye microscope slides. Within a few days I had a cross section of Dragonfly eye on its way to me. This is a slide by Watson, and I was hoping I’d be able to do some cross polarized imaging on it. Today’s post shows the results of my work.
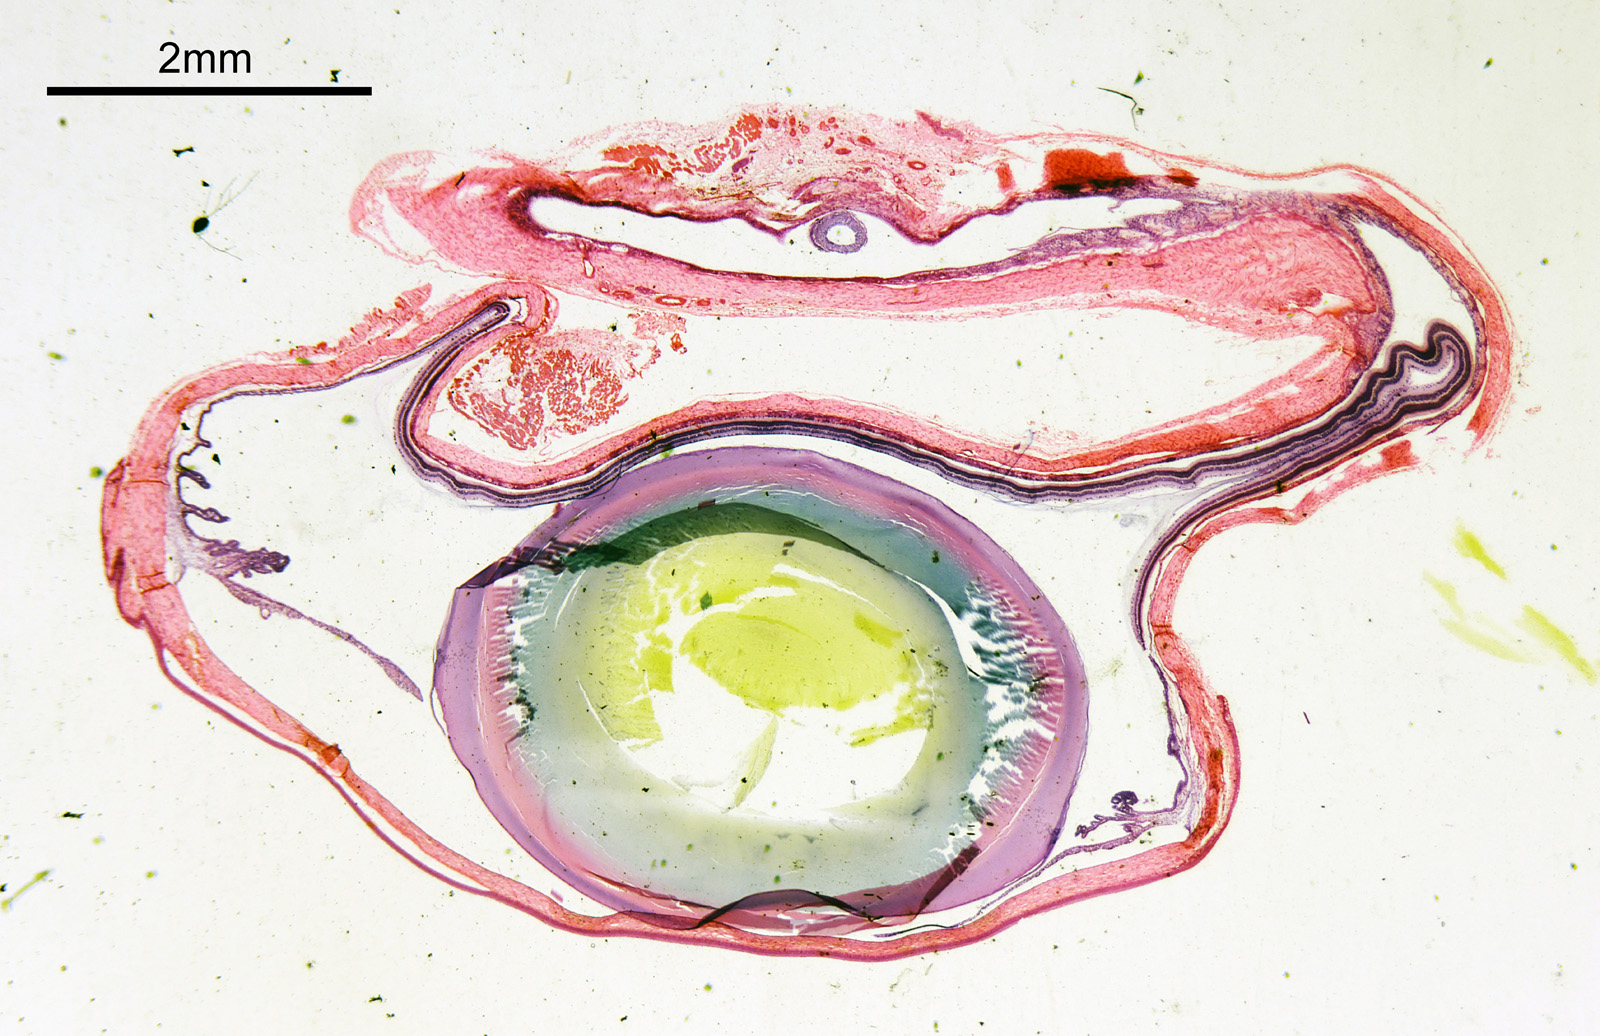
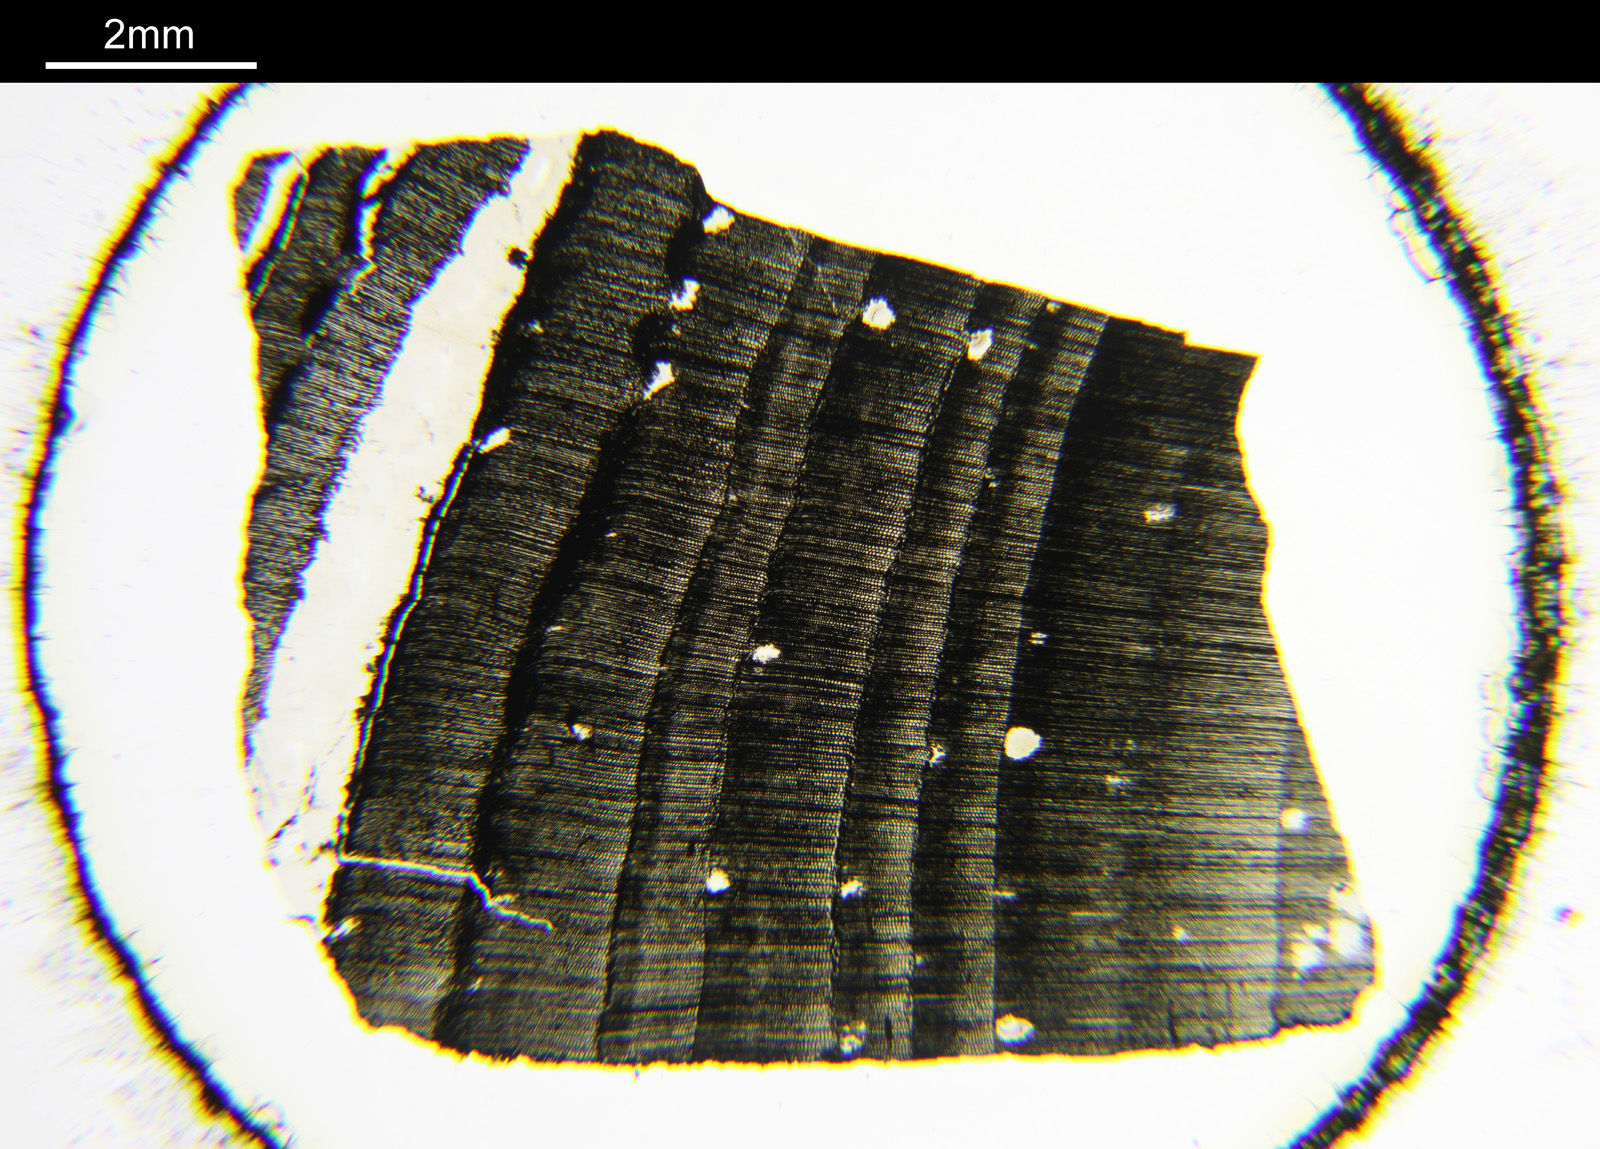
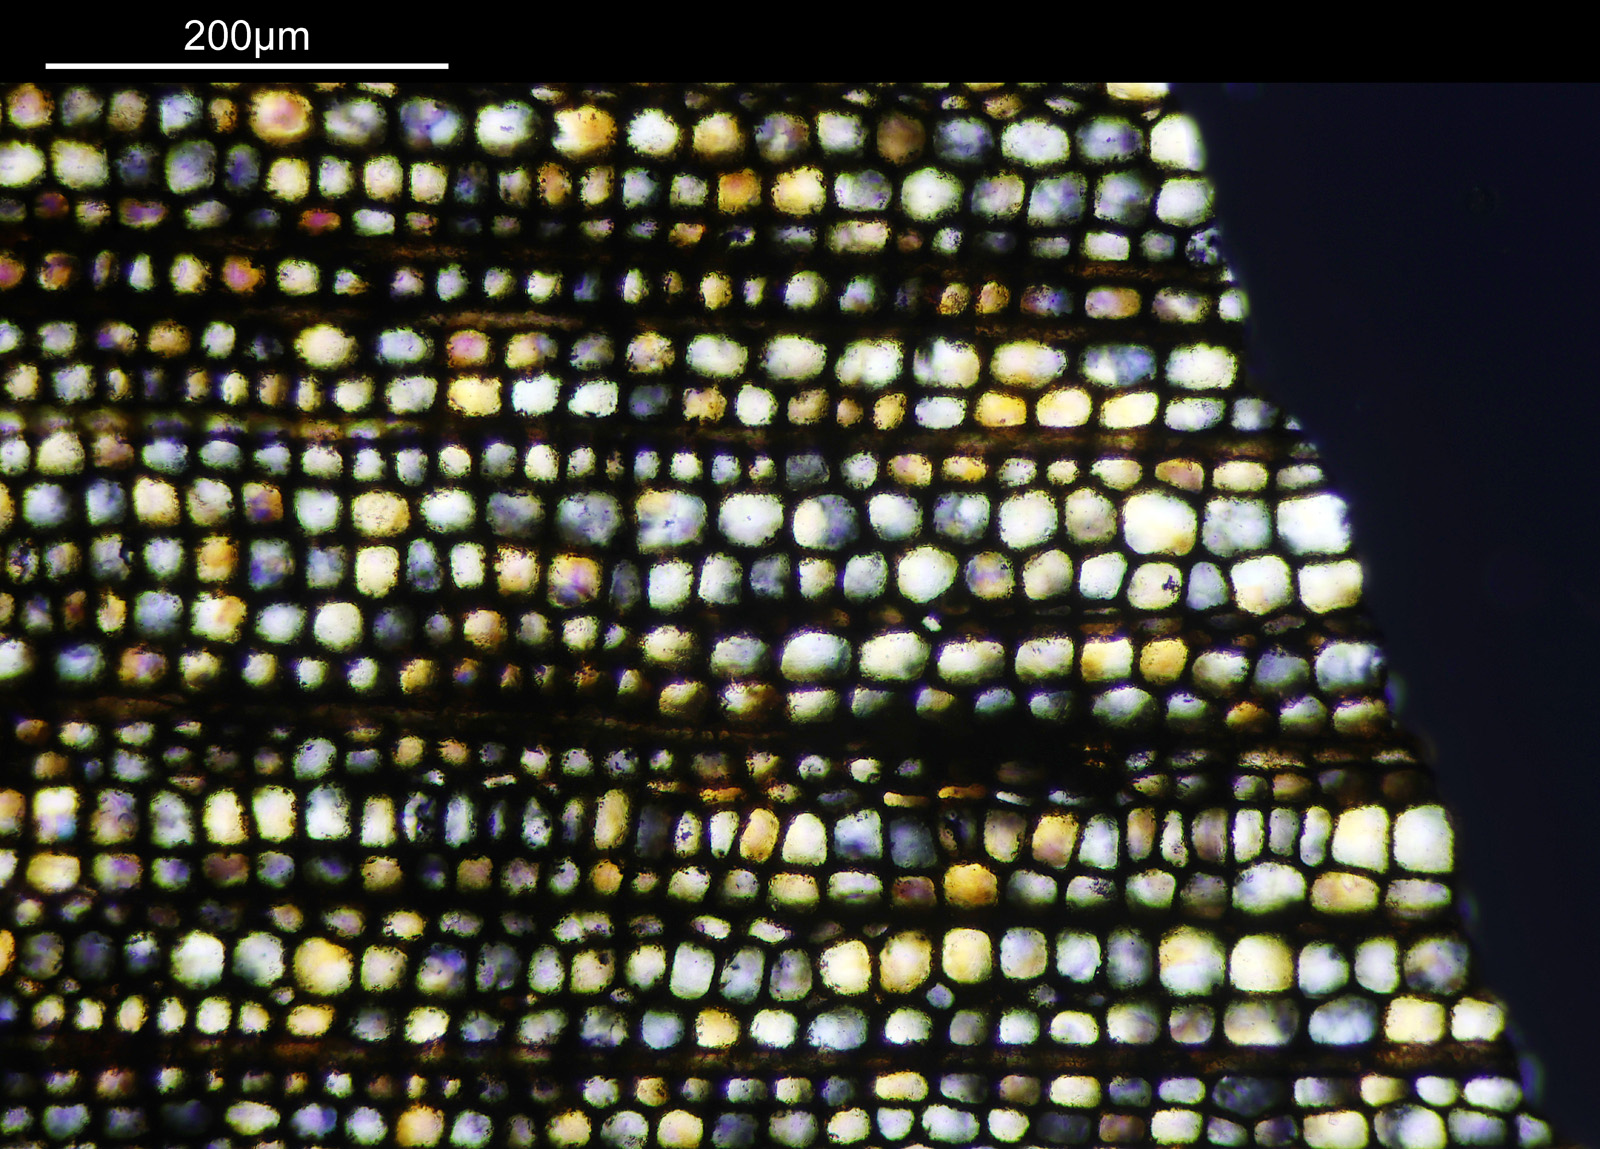
First a large field of view image showing the whole sample, using a 2x Olympus Splan Fl objective. Here are the images – cross polarized and plane polarized.
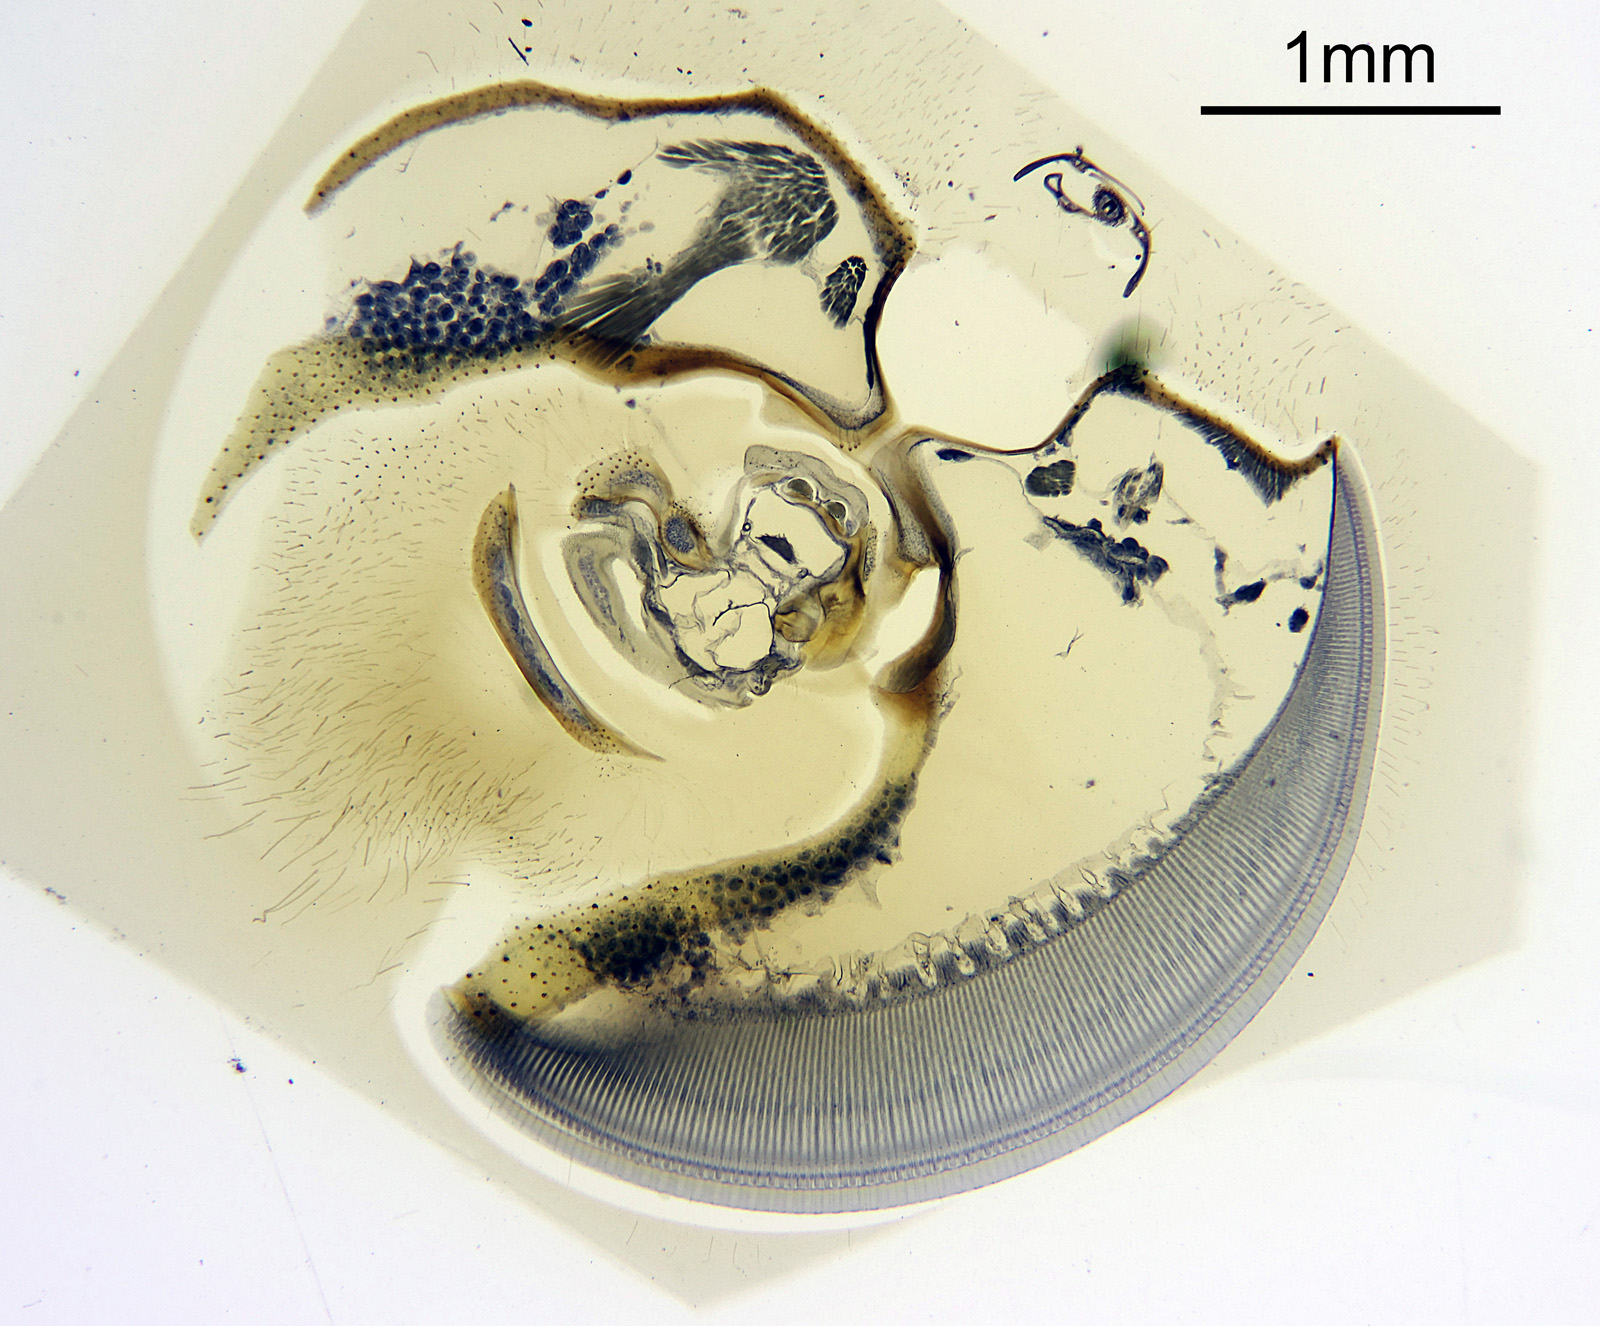
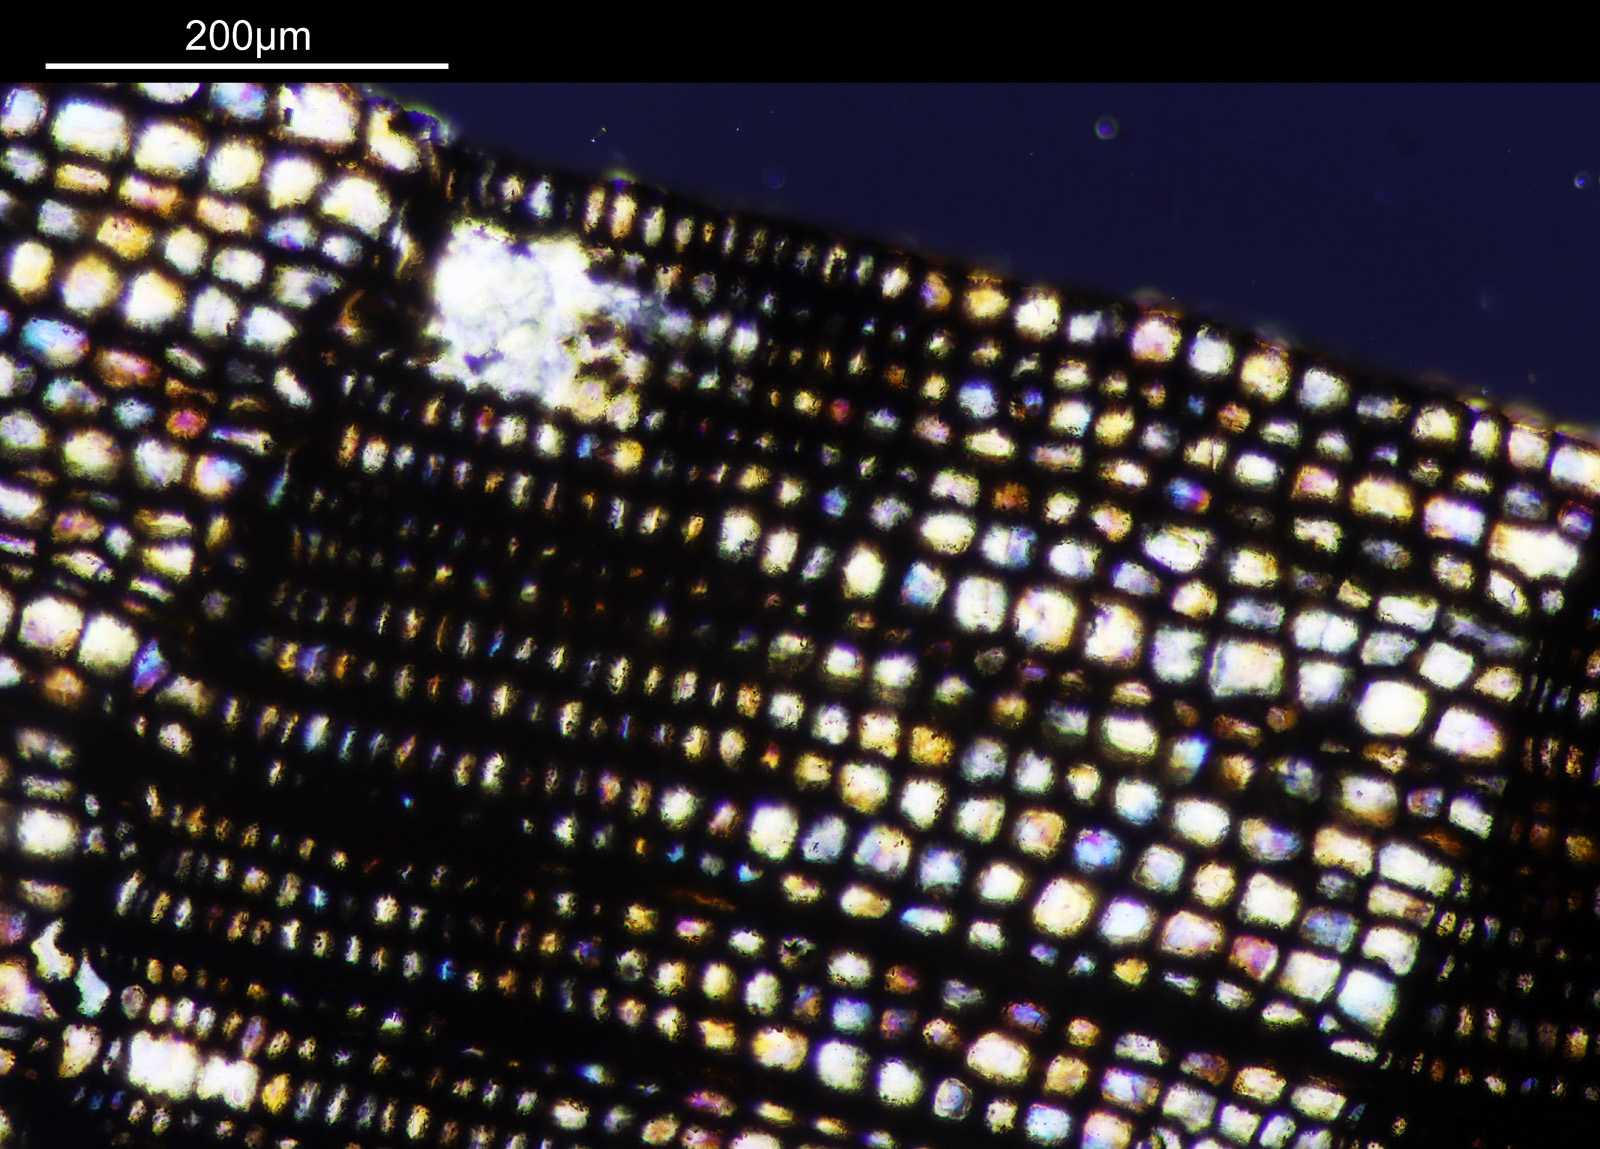
In the images above, the eye itself is towards the bottom of the slide, and the rest of the head towards the top. The eye shows some amazing structure from its compound arrangement. It looks like the very surface of it is most optically active. Within the head there are more regions of optical activity. I’ll come on to those later.
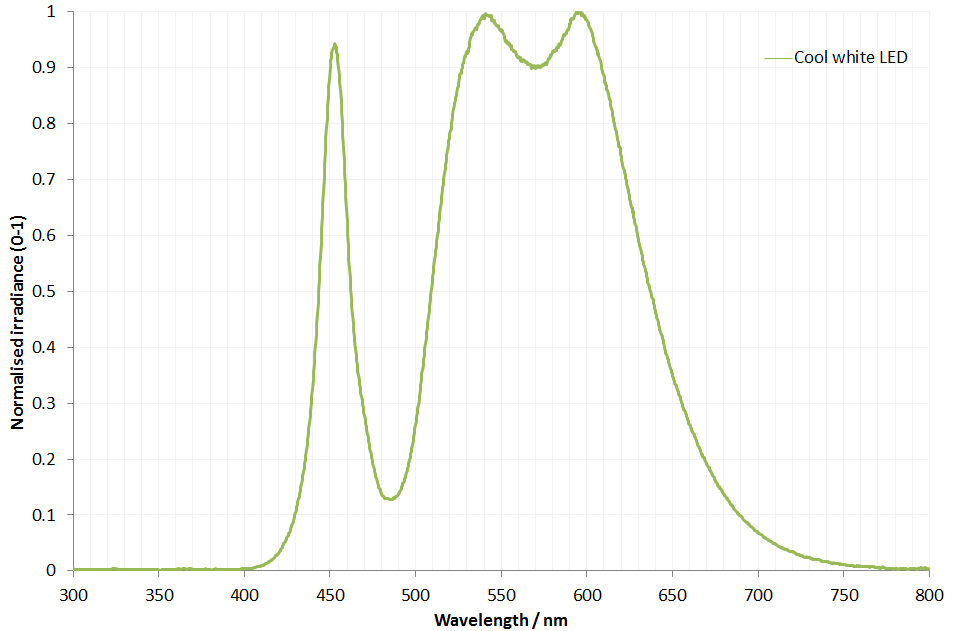
Something to note, the cross polarized images aren’t completely black in the background. I did not use Pol objectives, and some of them had fluorite in which may well be messing with the polarization a bit. Essentially I set the polarizer angles to give the nicest images and show the regions of optical activity. Photos were taken using a Canon Eos R7 camera just using auto white balance. Light source was a white LED light, and the microscope my modified Olympus BHB. Plane polarized imaged are essentially like non-polarized ones in appearance. It was easier to do that than keep removing the polarizer from the photoeyepiece.
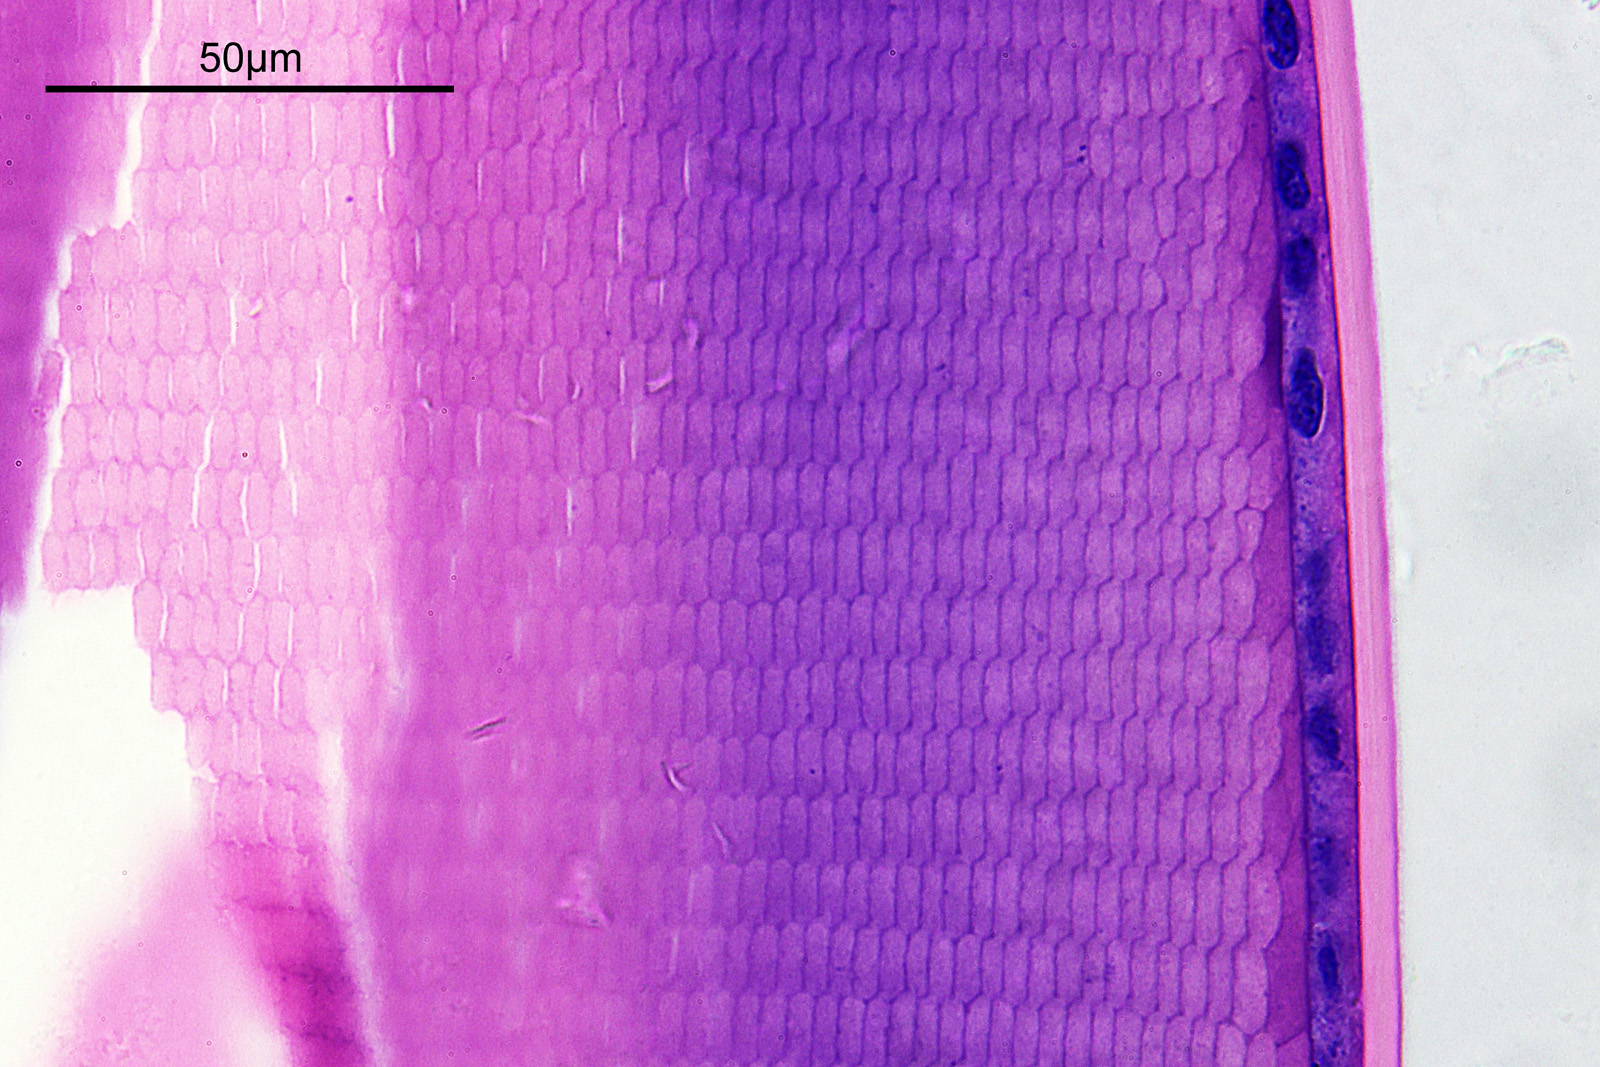
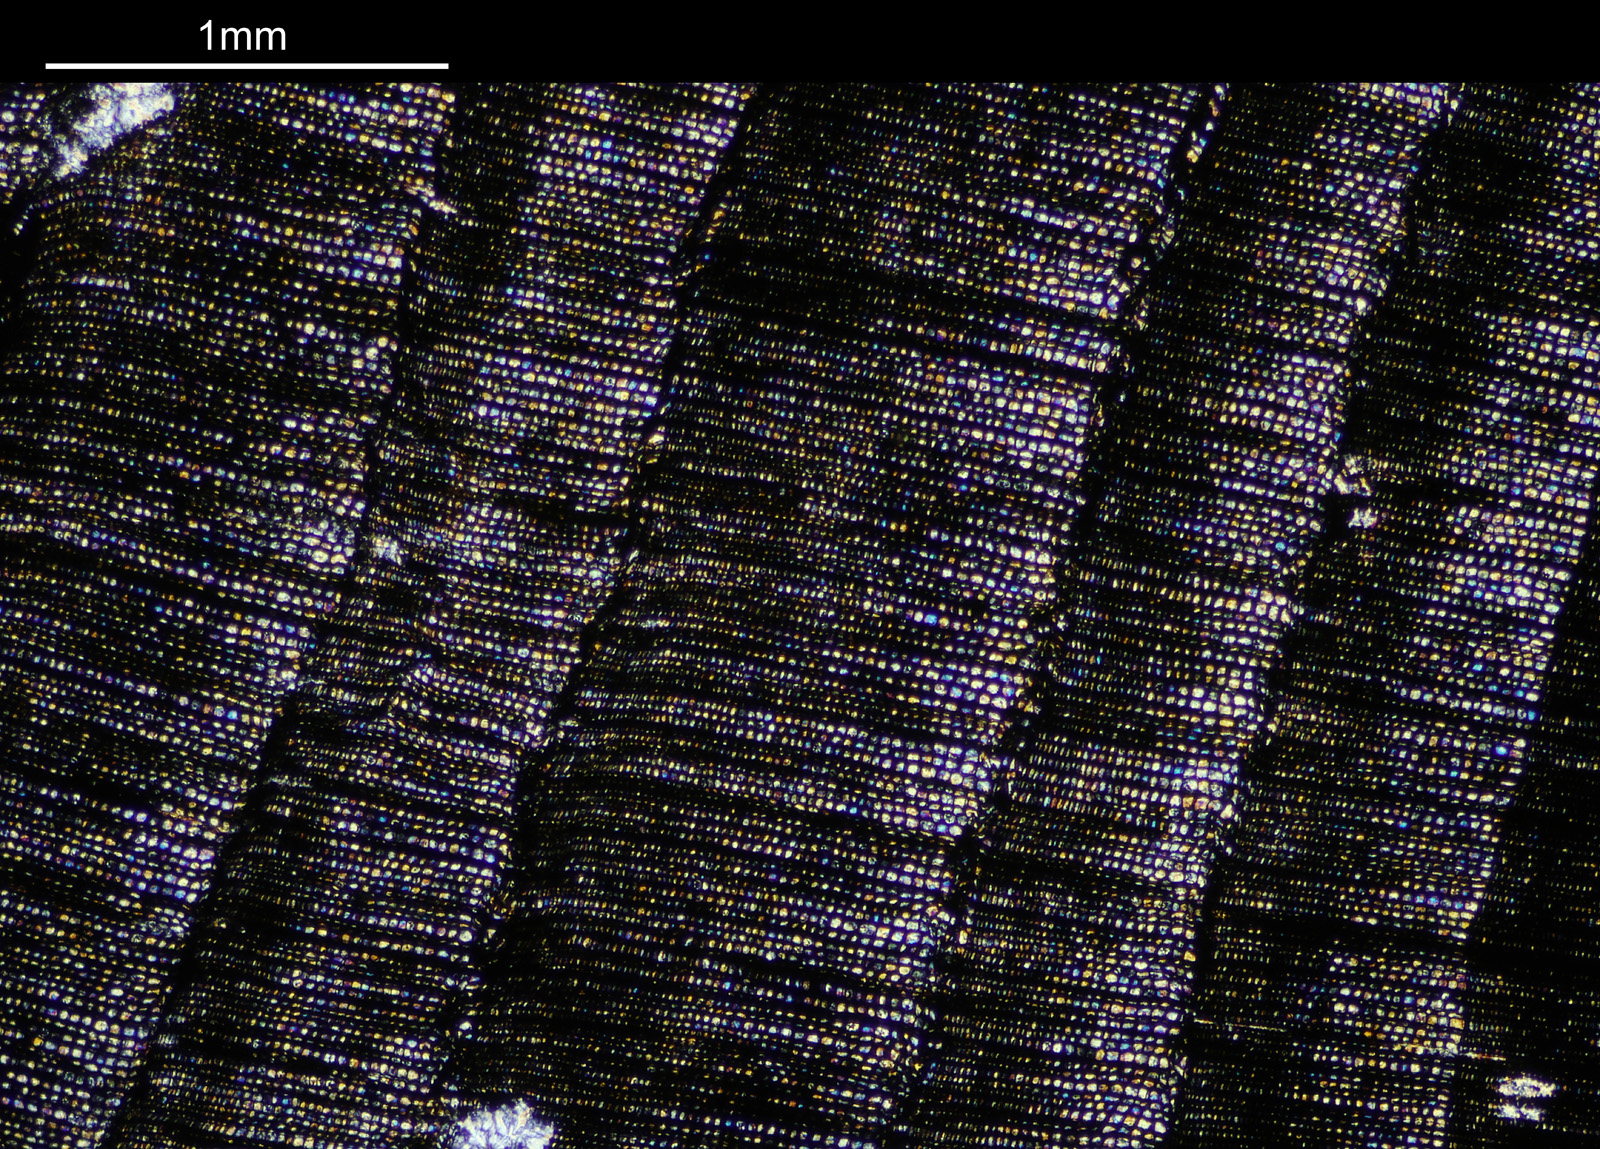
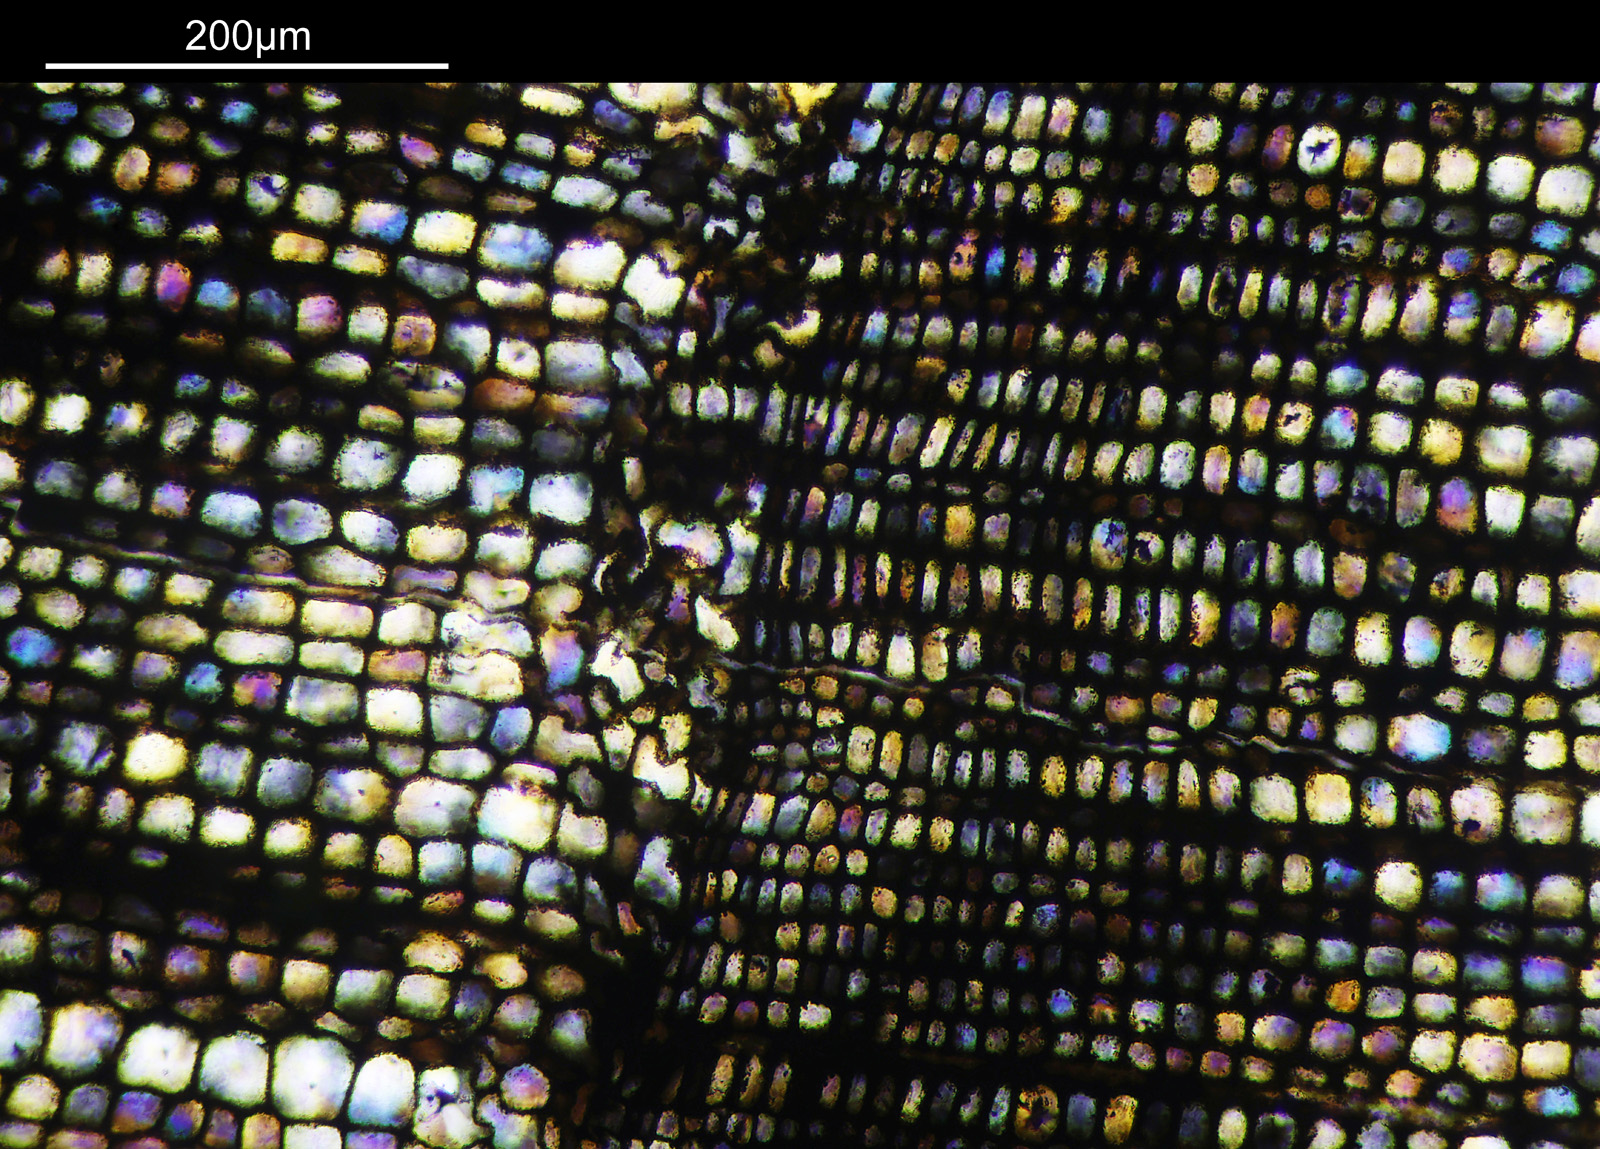
Going in a bit closer now. First on the surface of the eye, with a 4x Zeiss Planapo objective, and a 10x Olympus UVFL objective, and again, cross polarized and plane polarized.
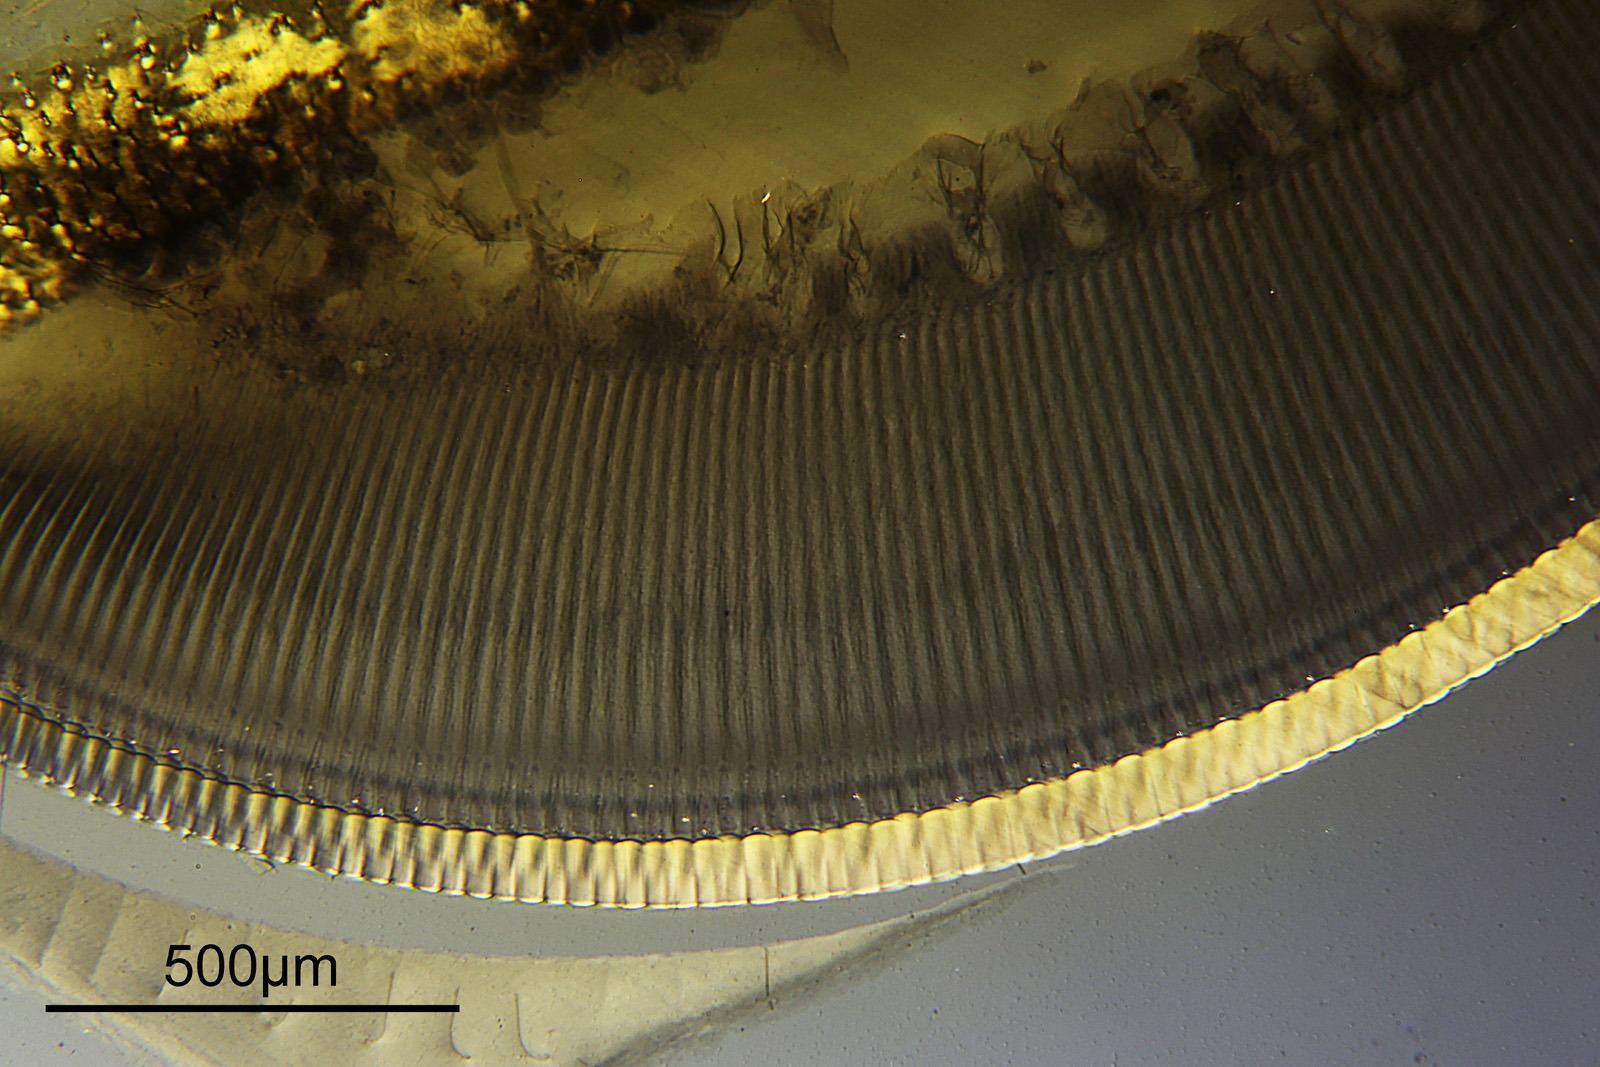
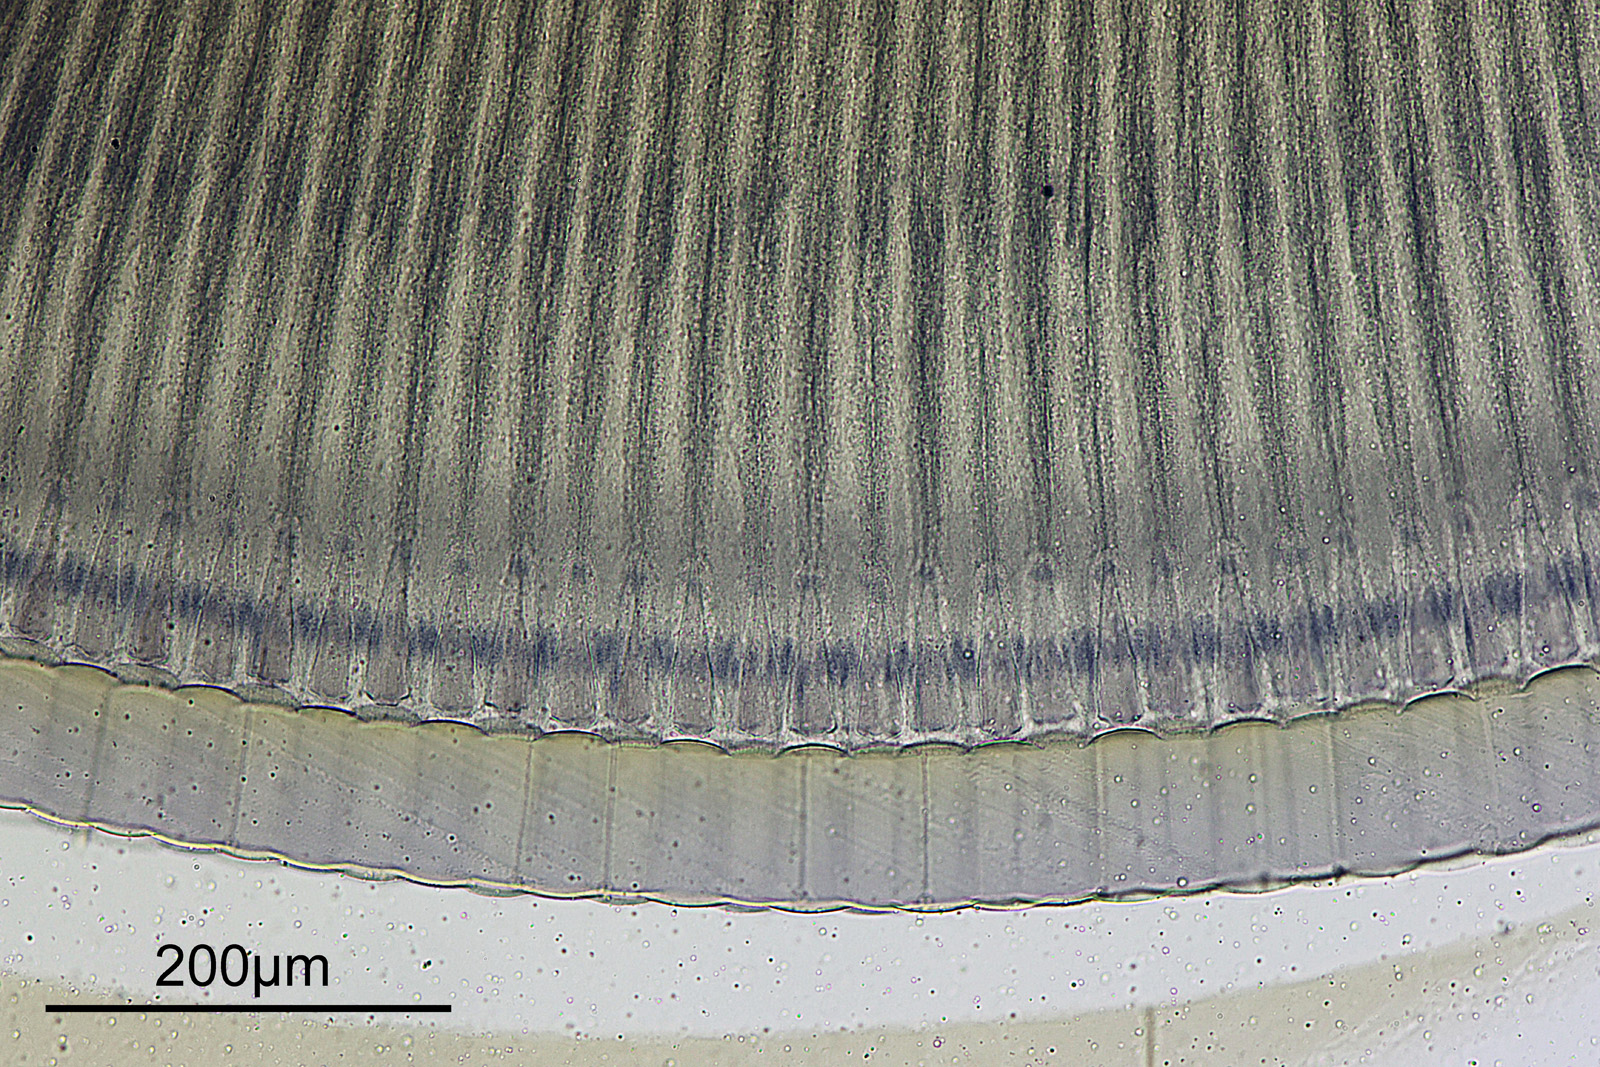
Cross polarization shows the nice optical activity in the surface of the compound eye.
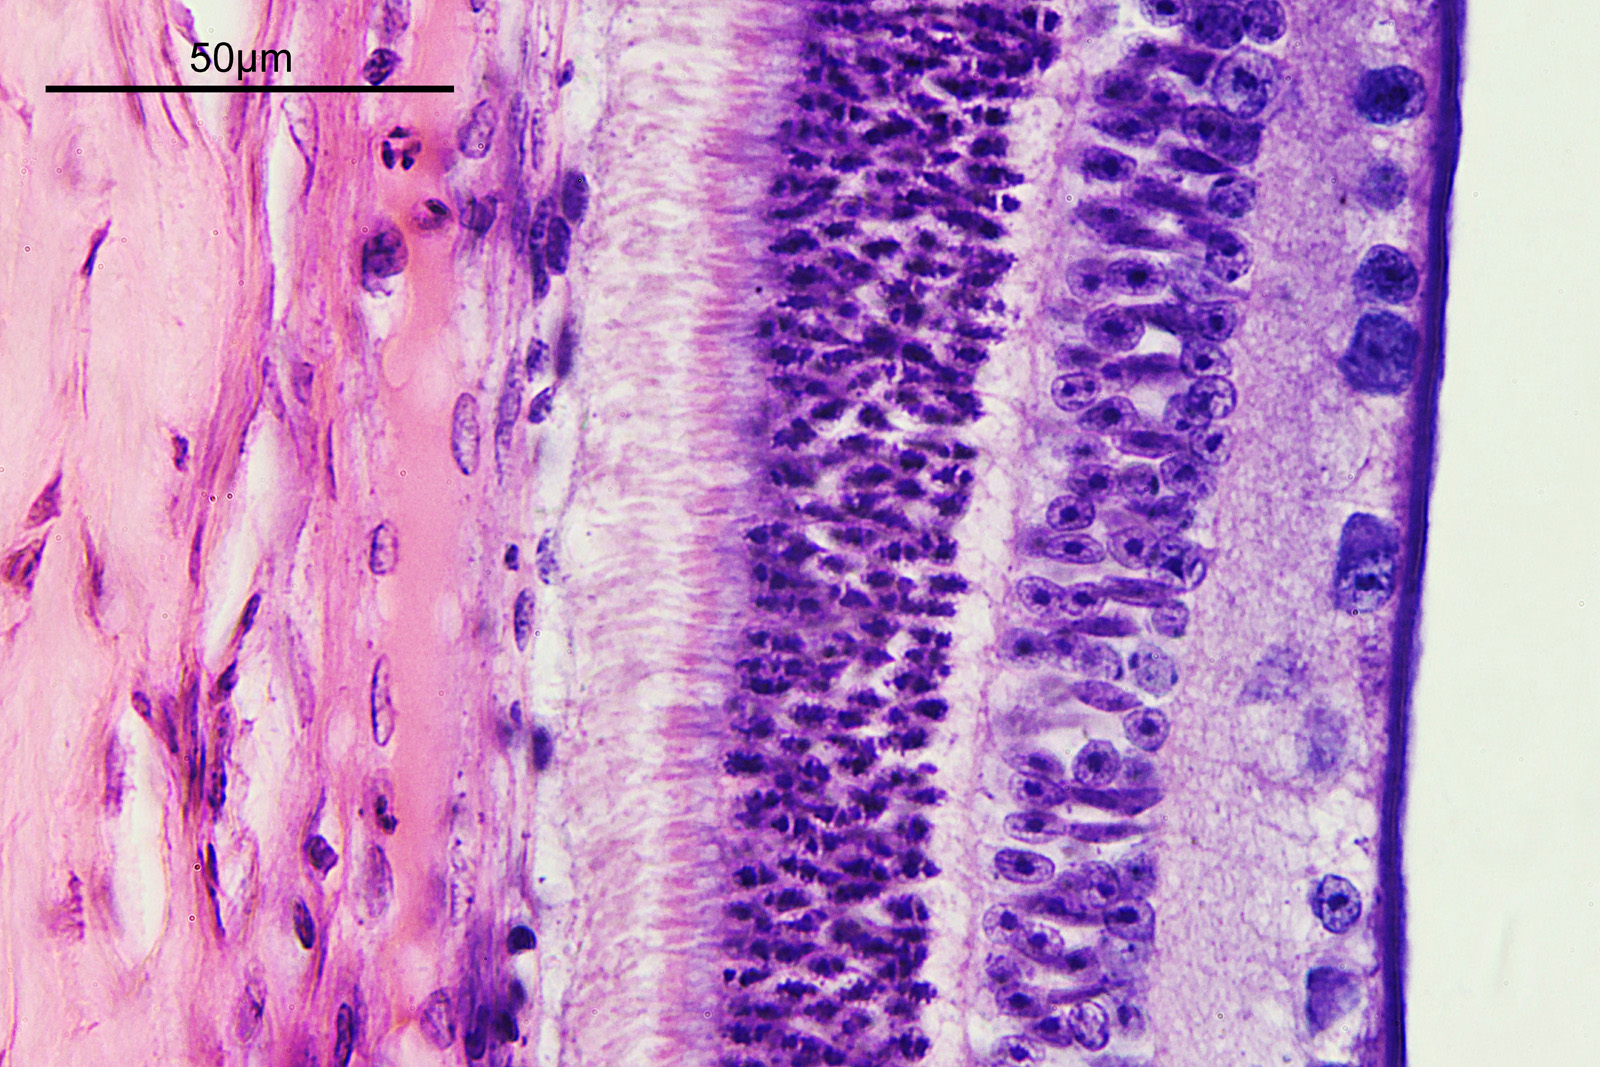
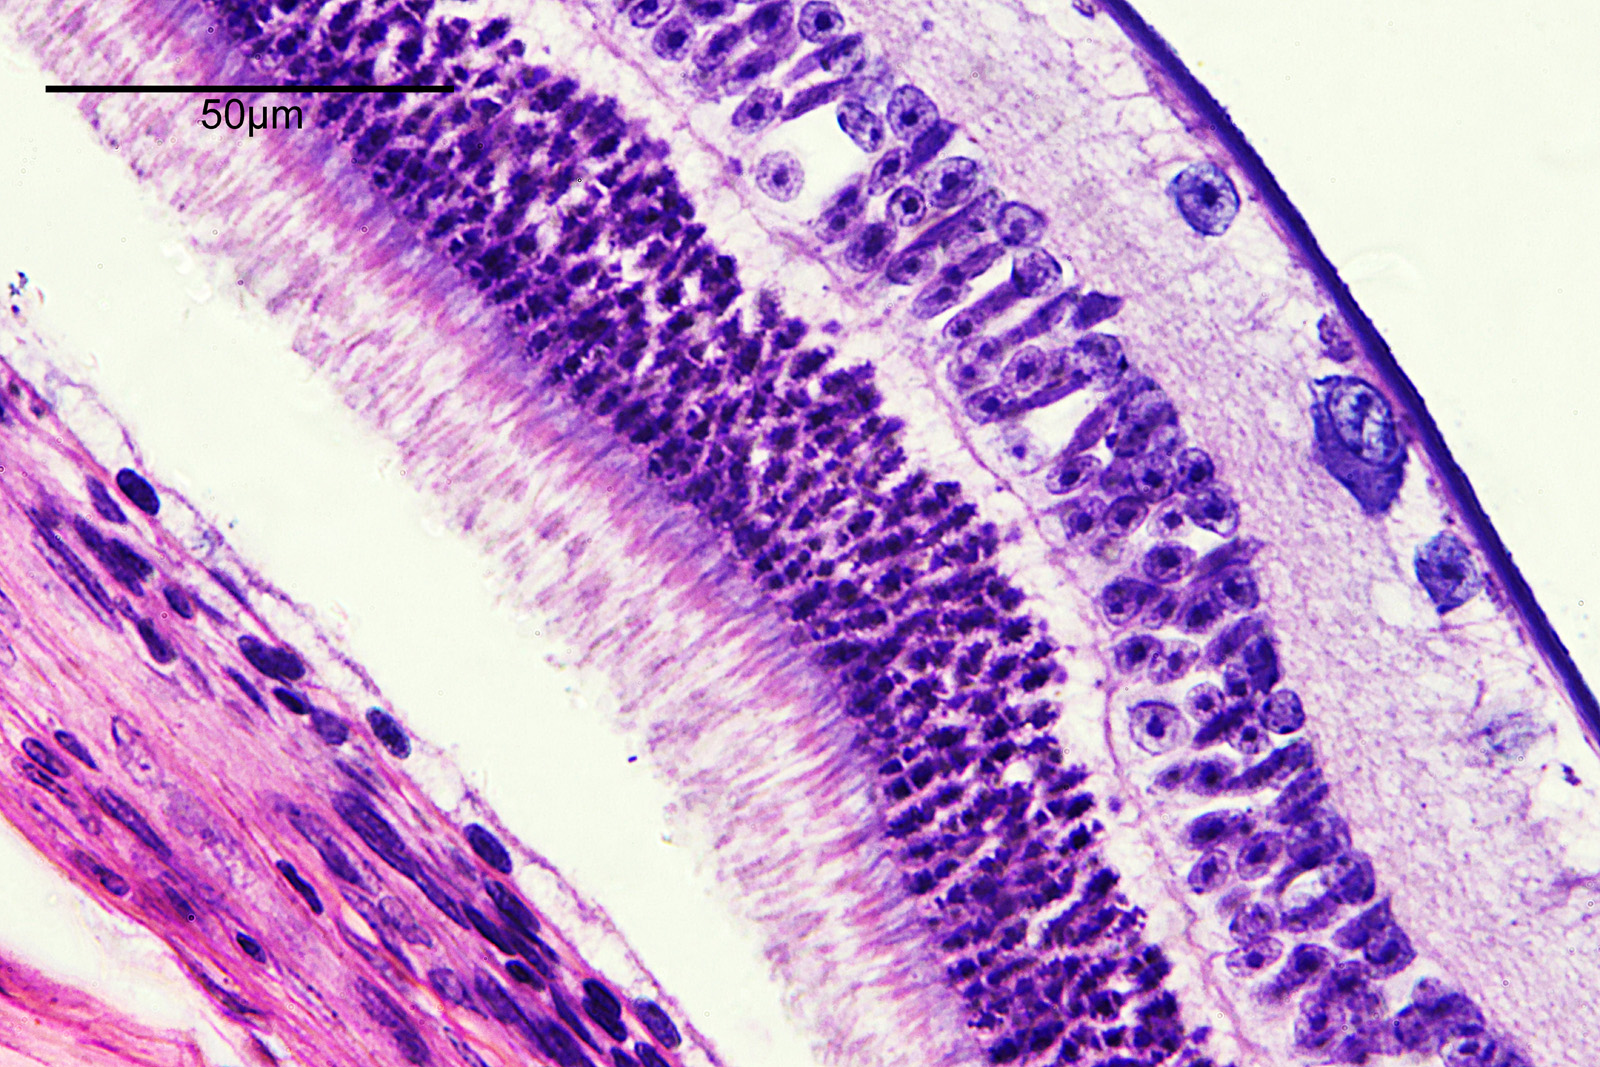
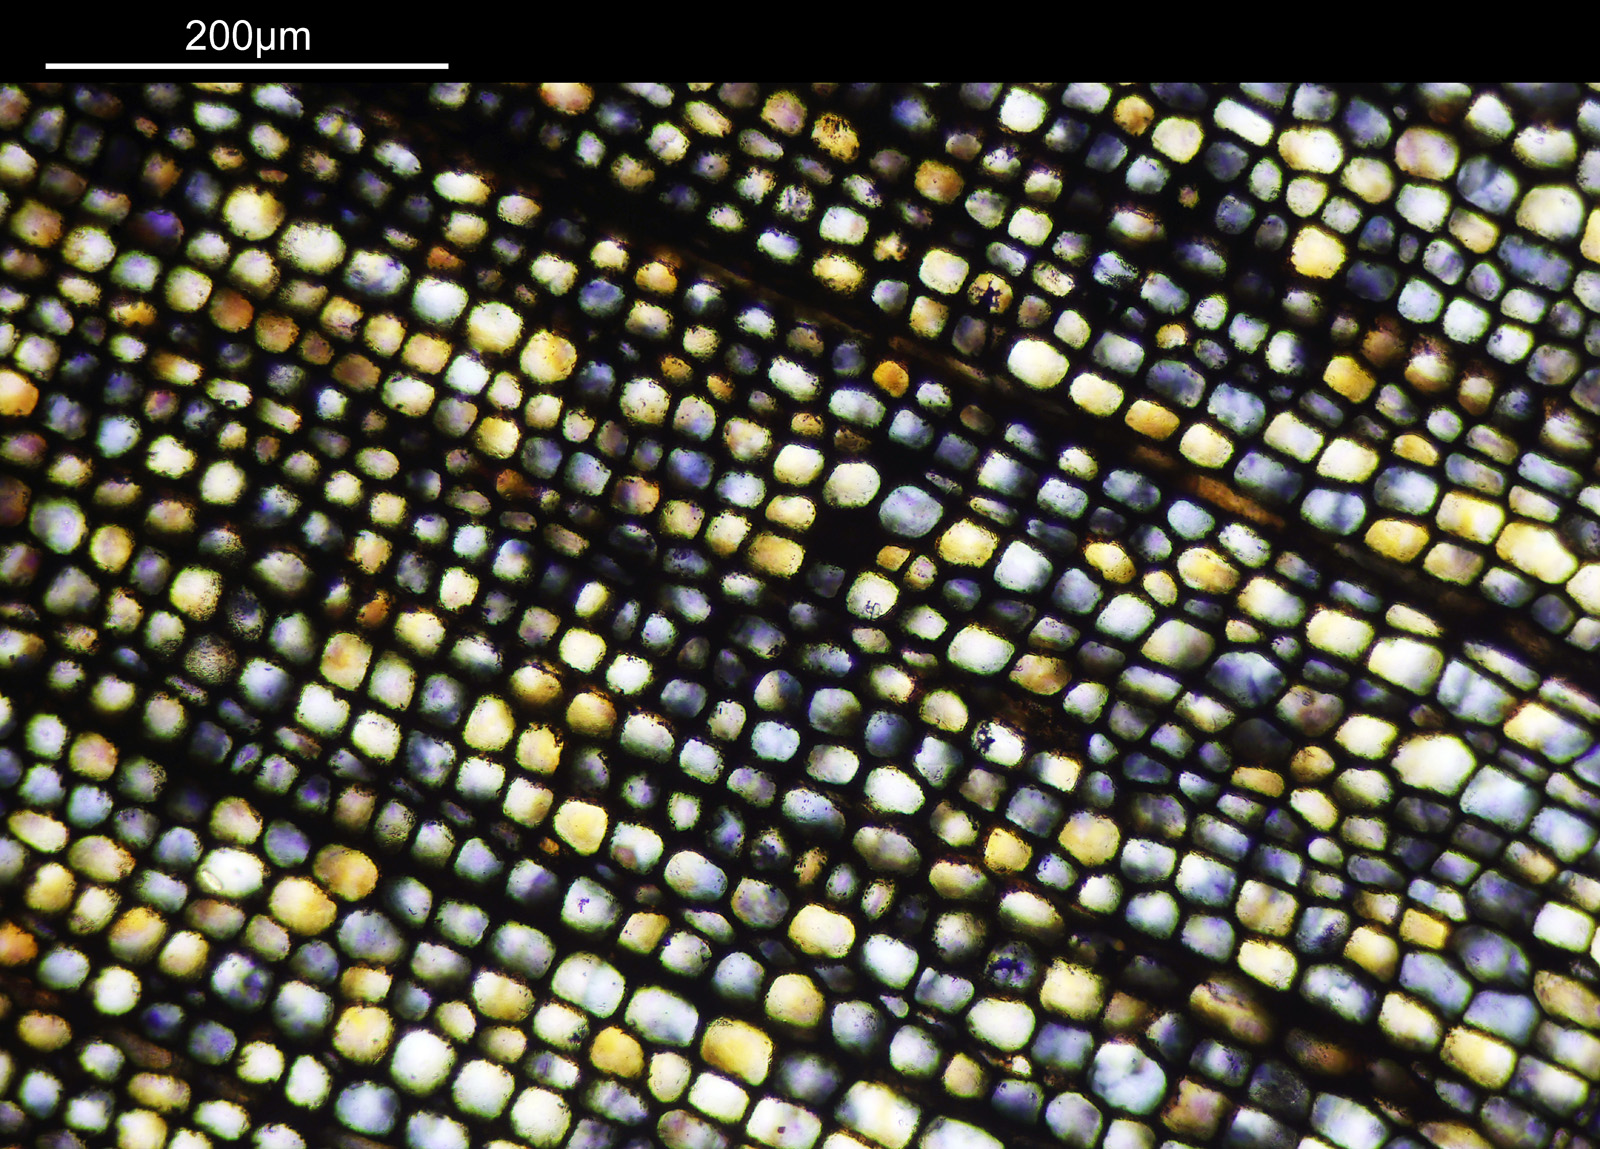
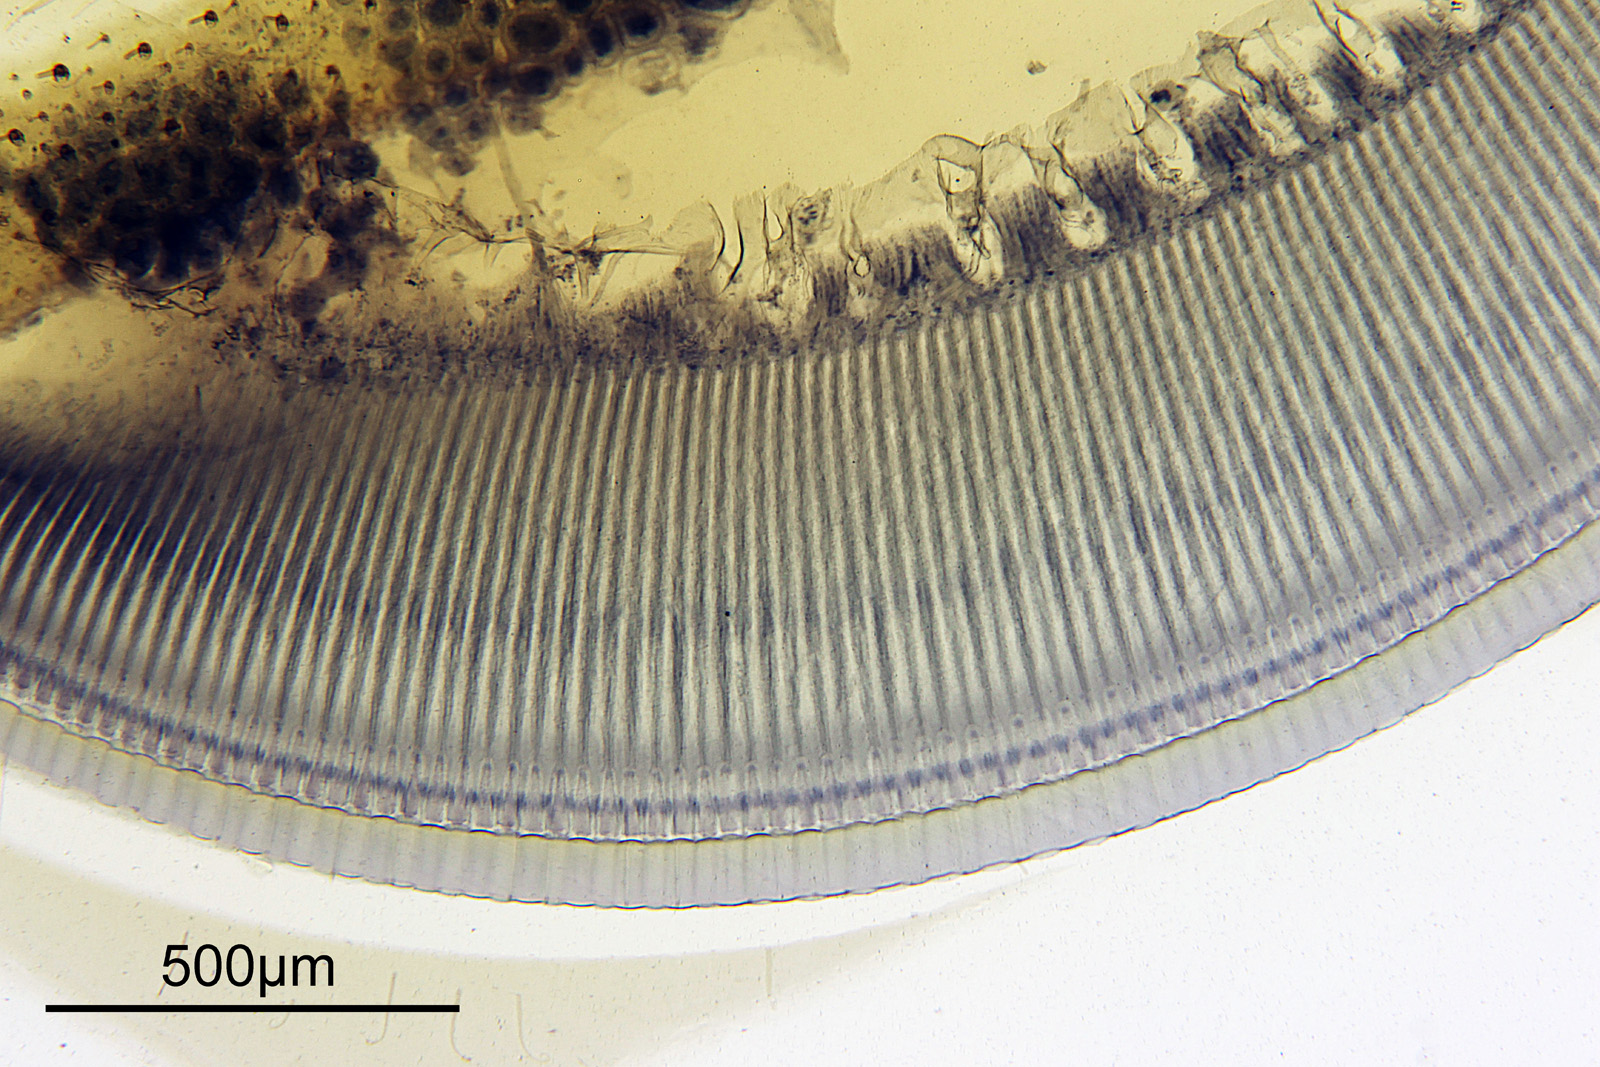
Now going into the head itself let’s a have a look there, again with the 4x and 10x objectives.
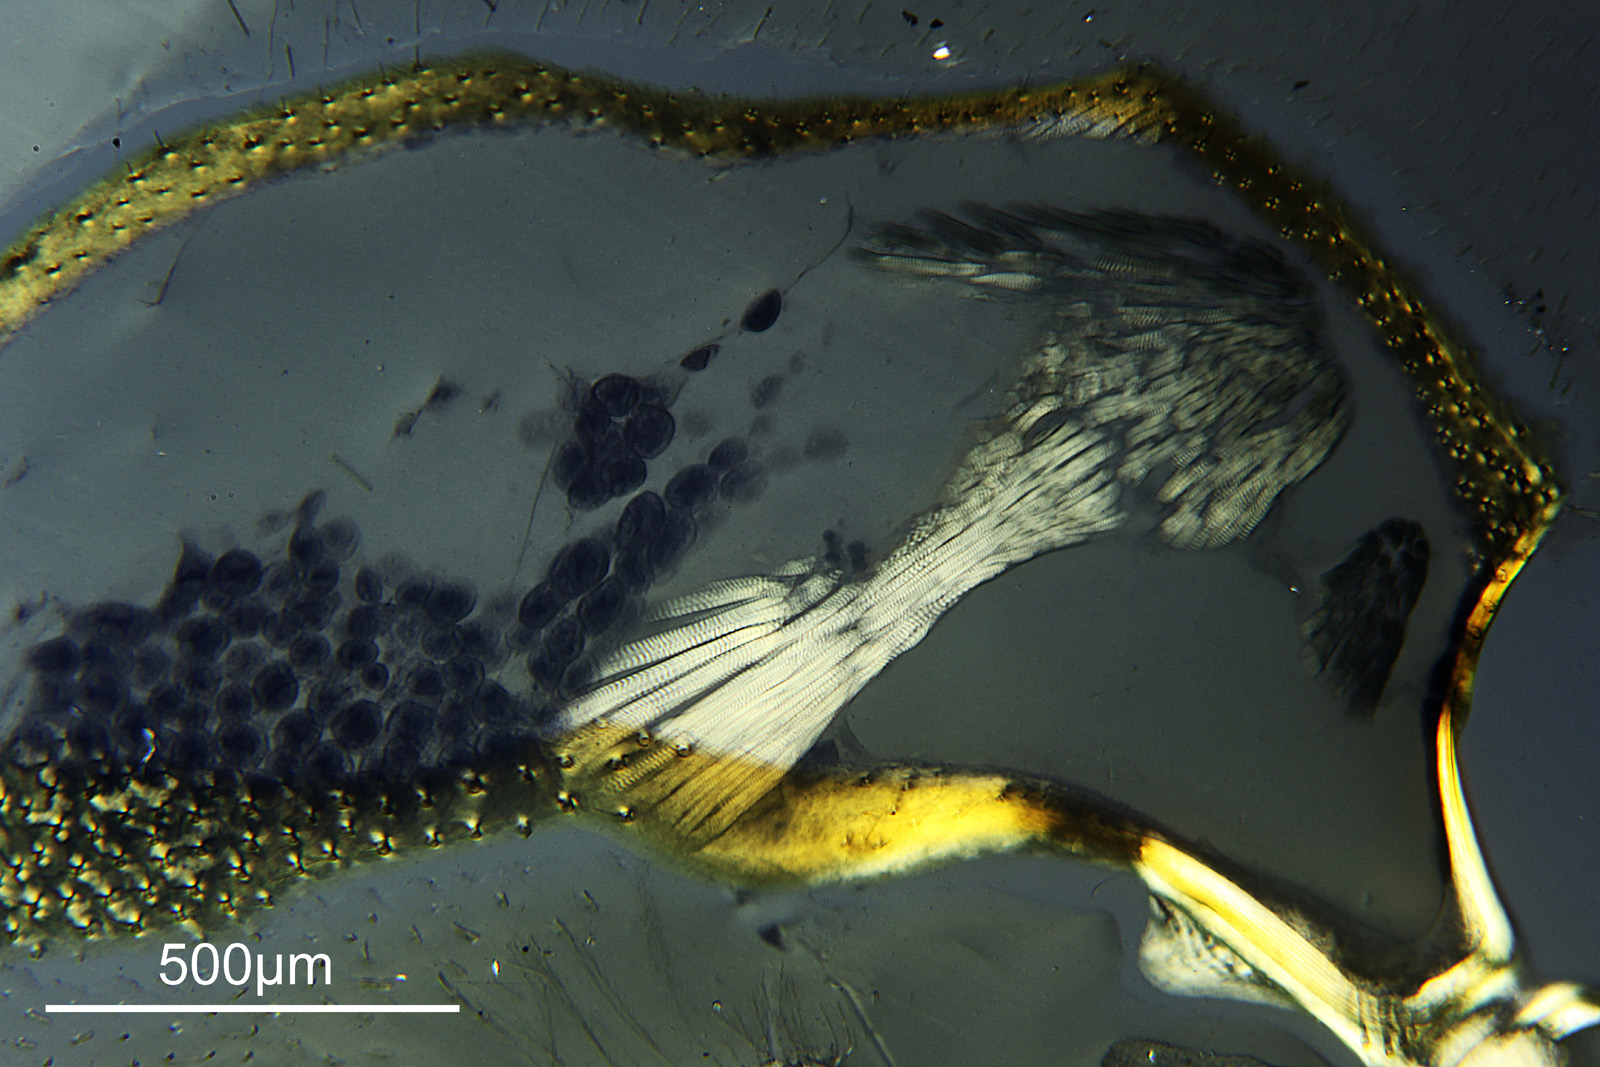

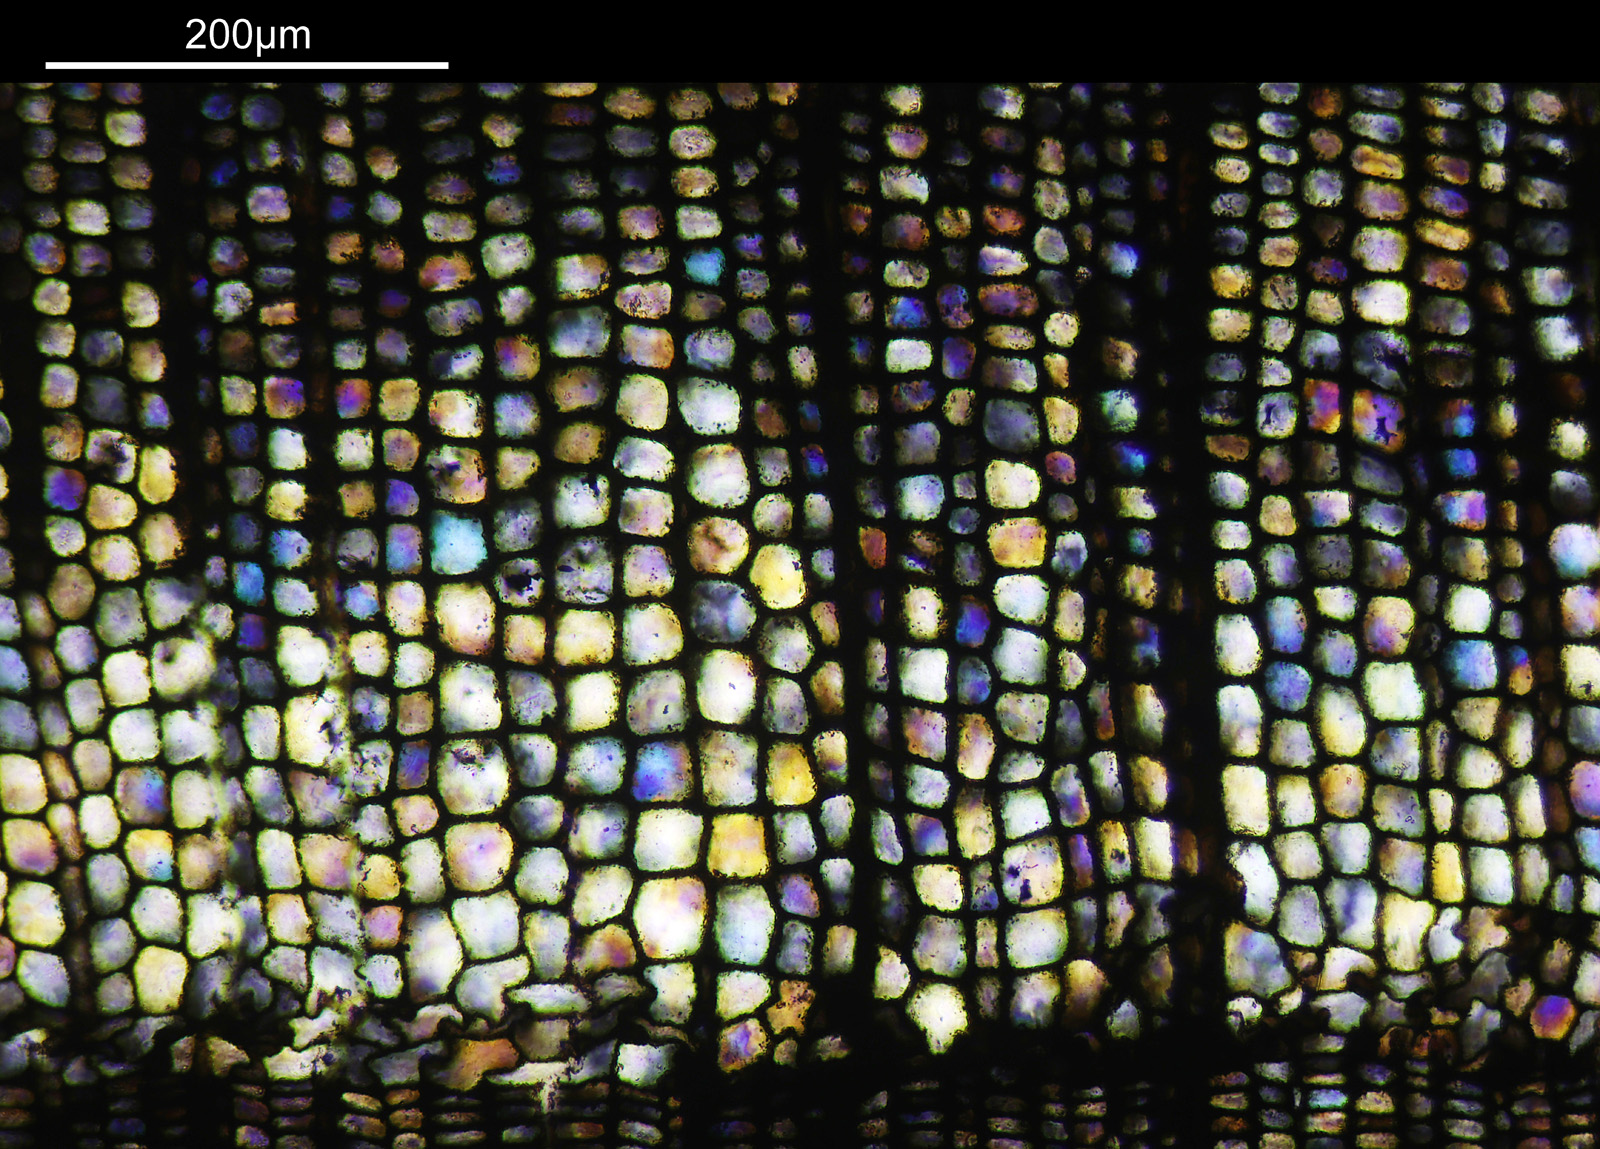
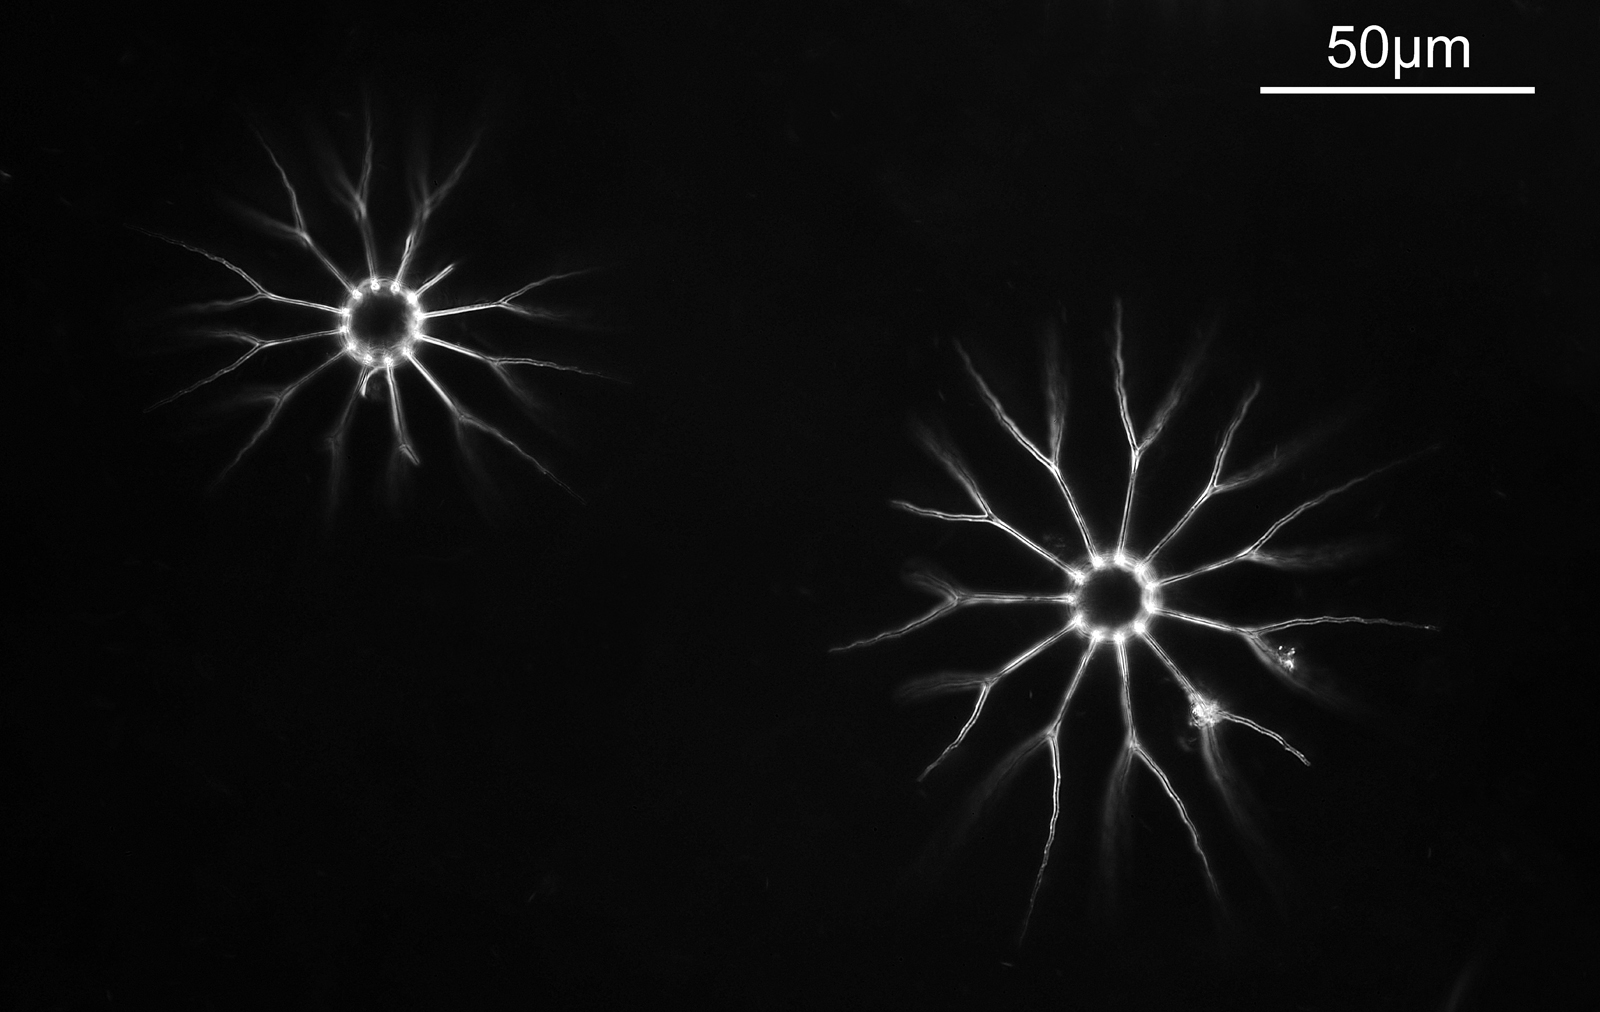
Moving in closer to the bundle of fibers in the middle of the image we get these.

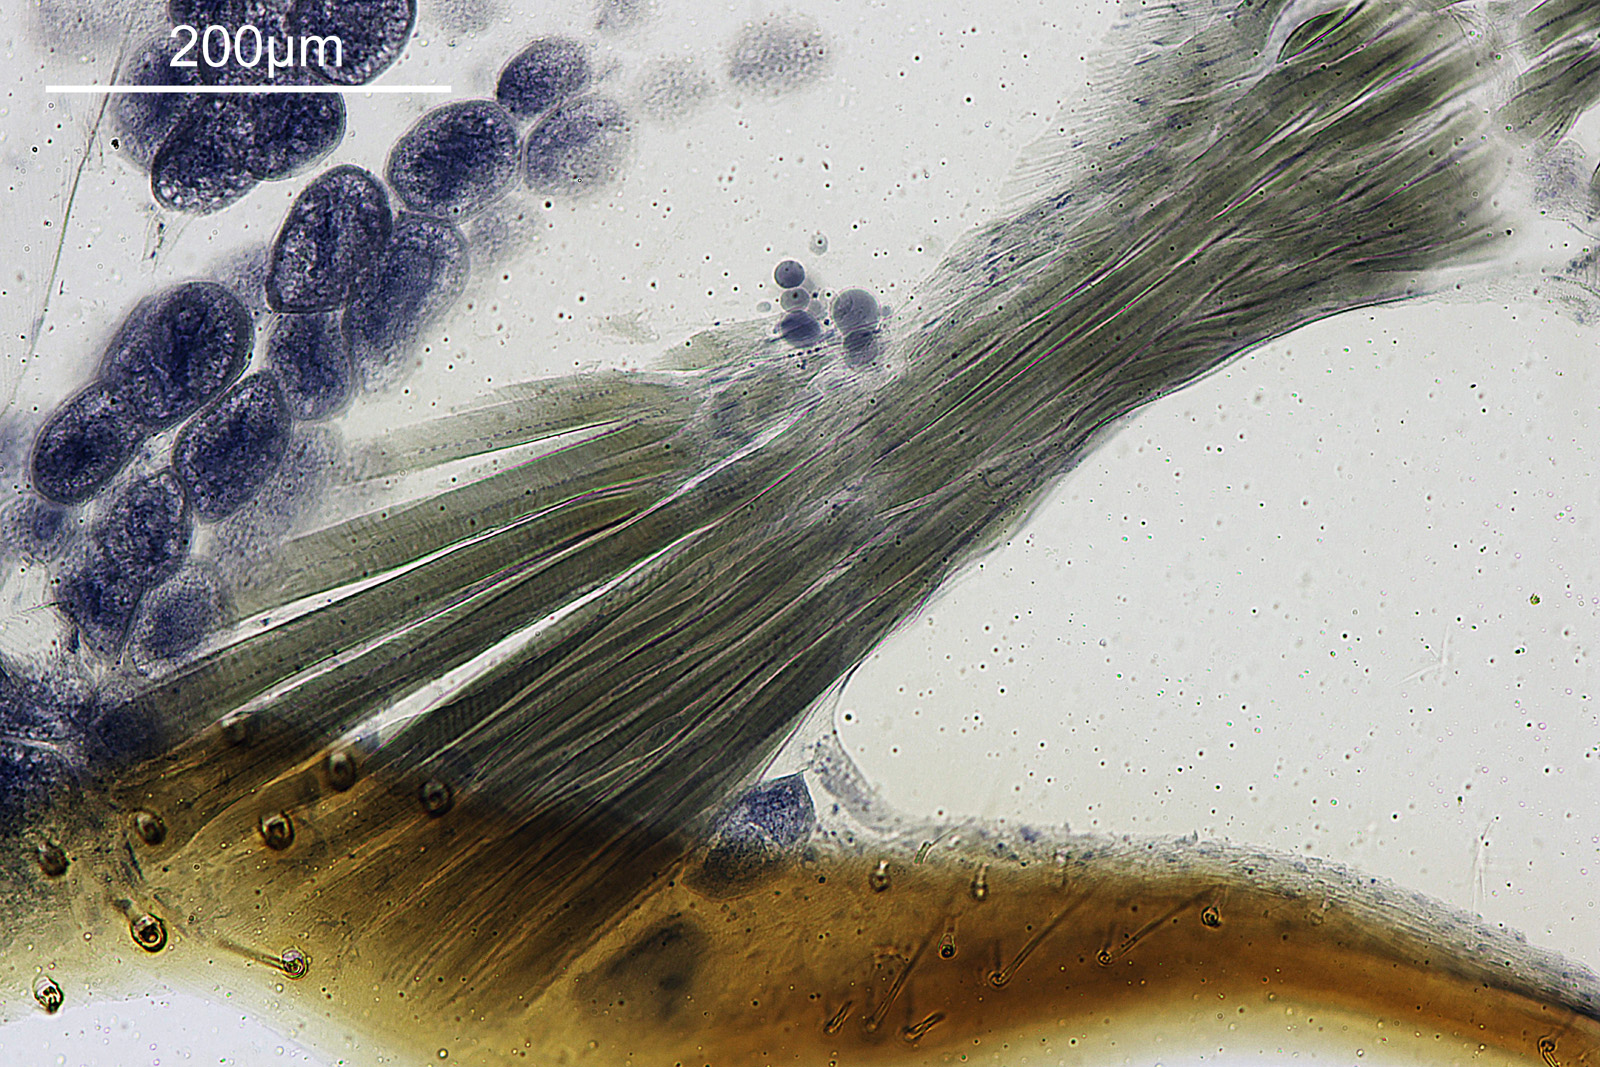
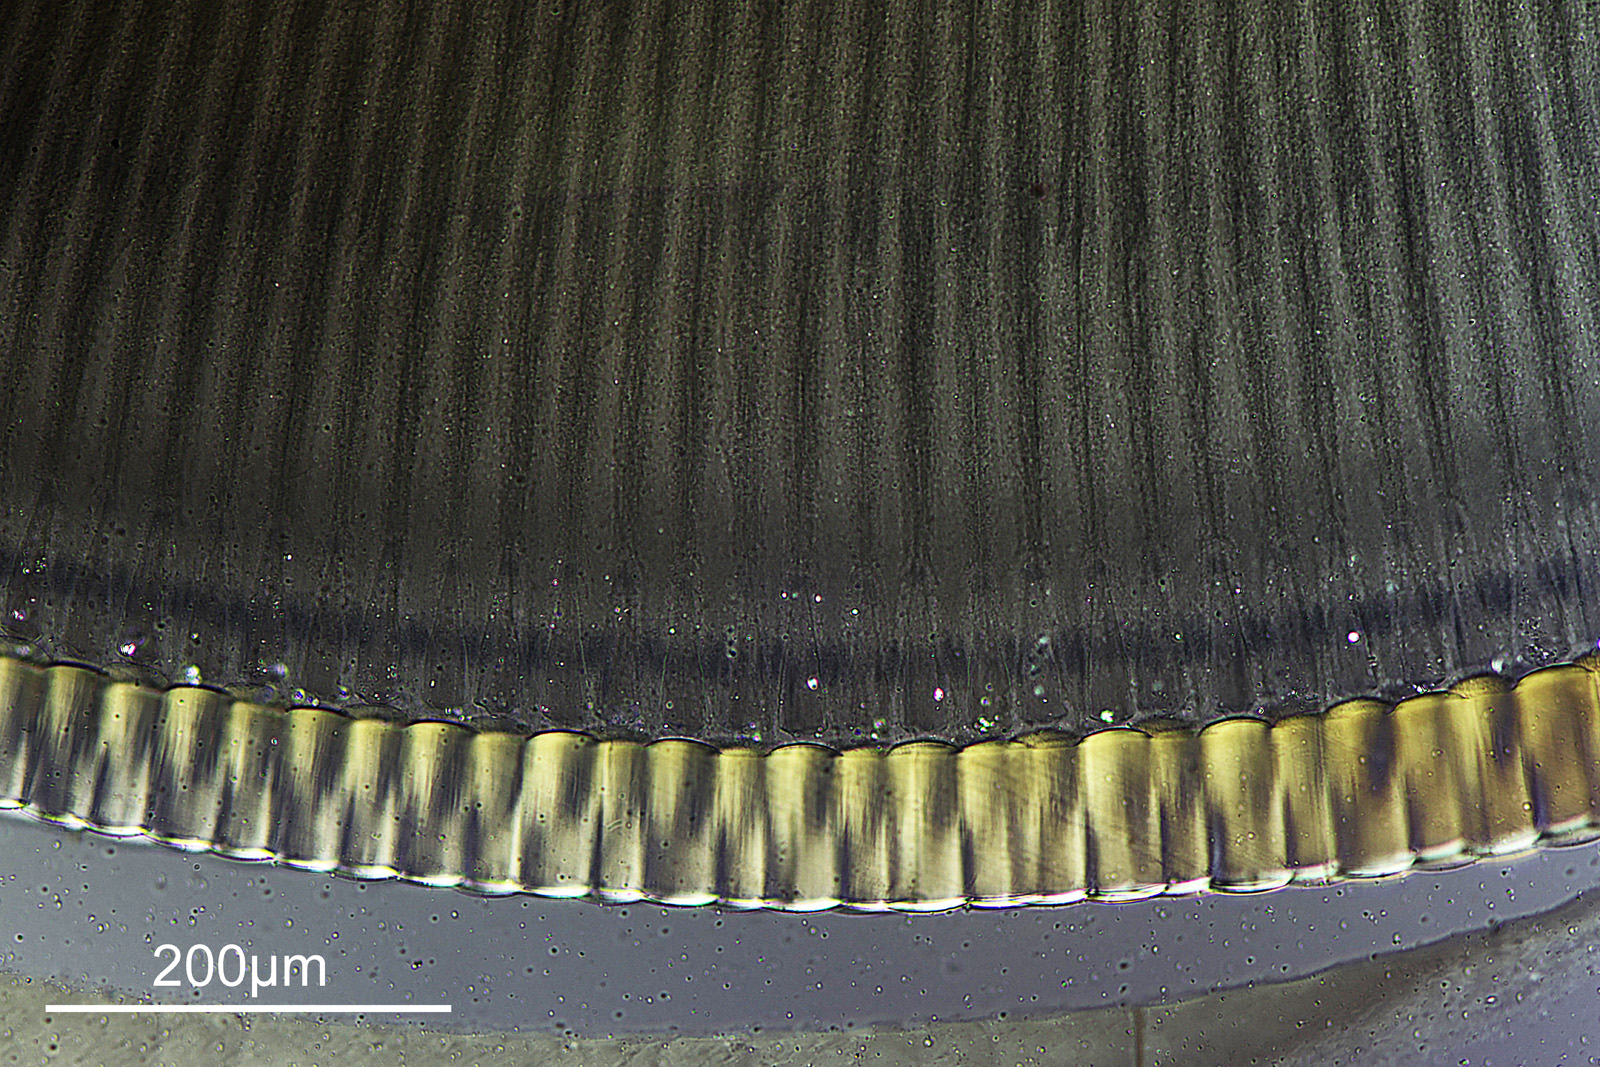
I’m guessing these are a bundle of muscle fibers used to move the eye around. They are very optically active under cross polarized imaging.
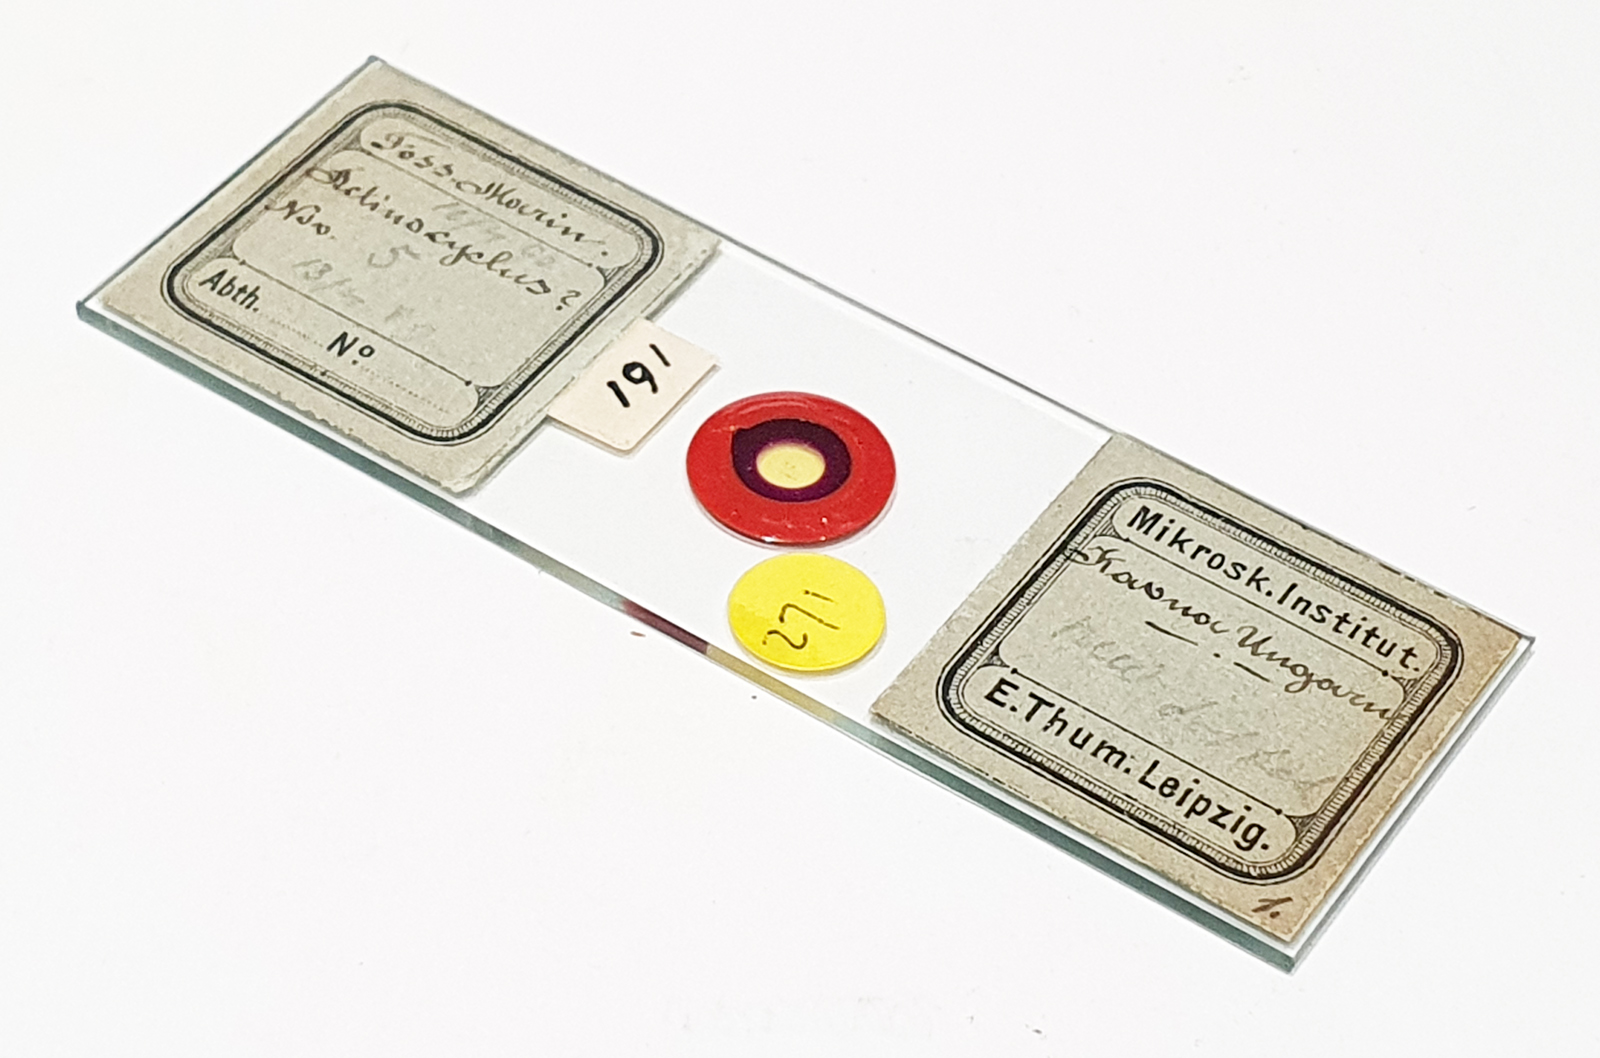
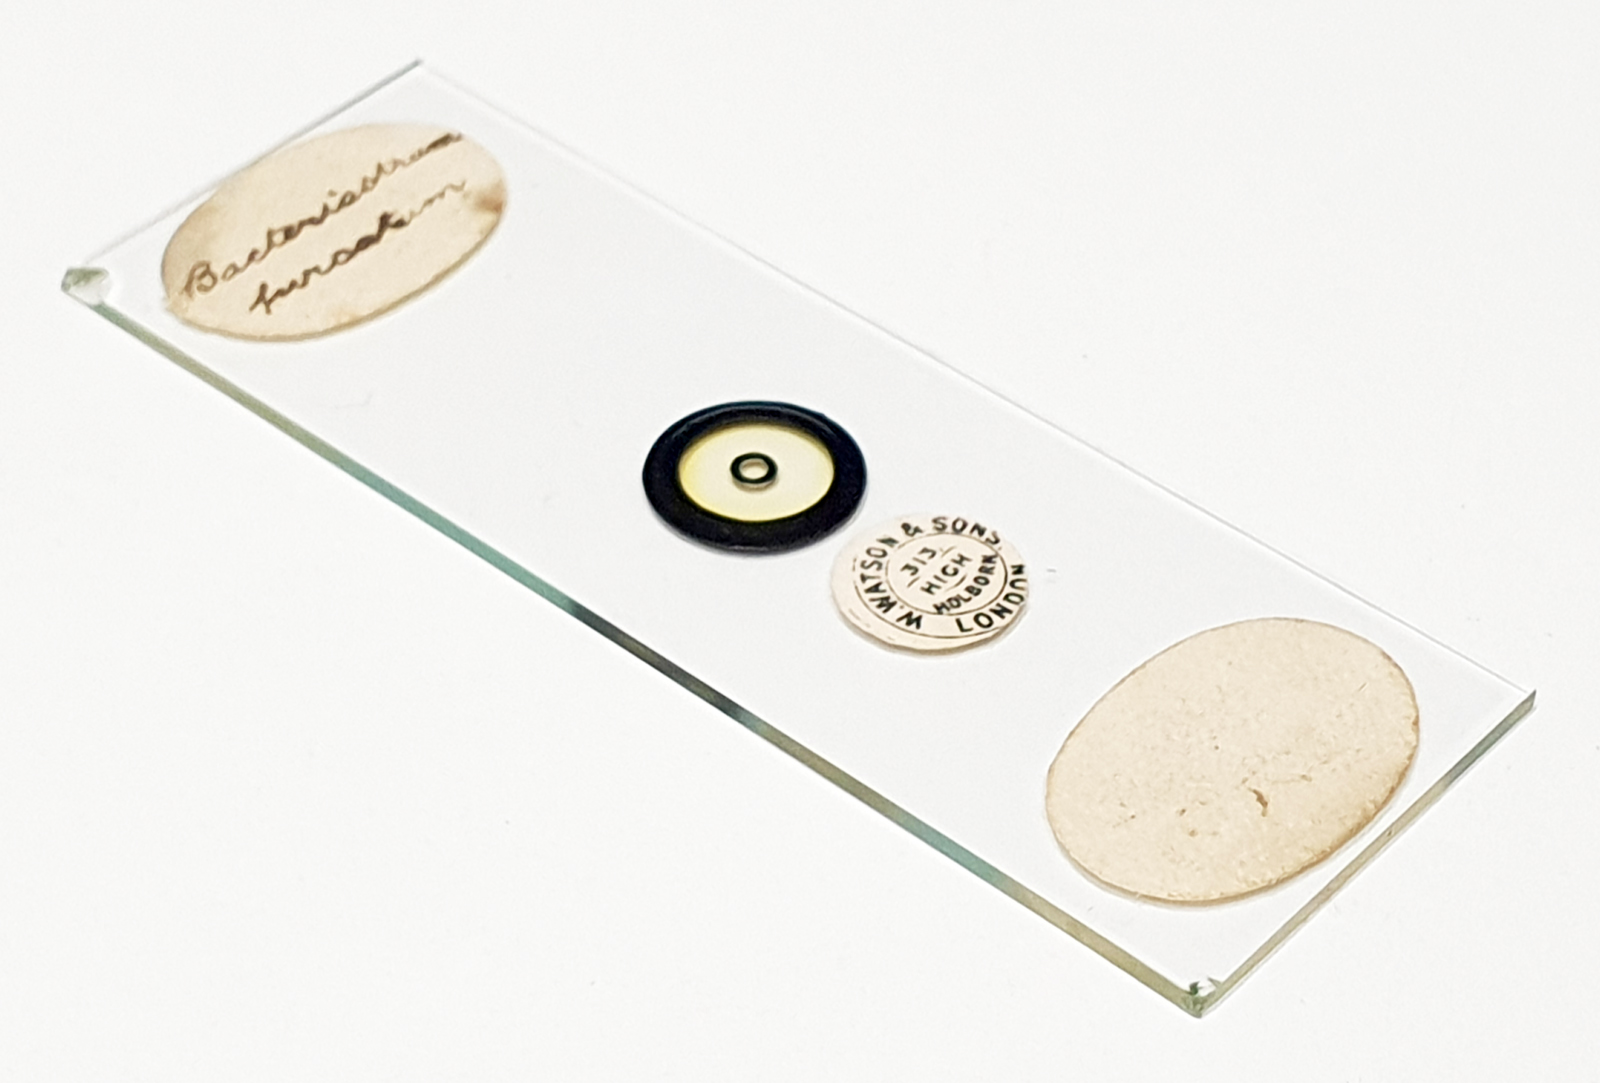
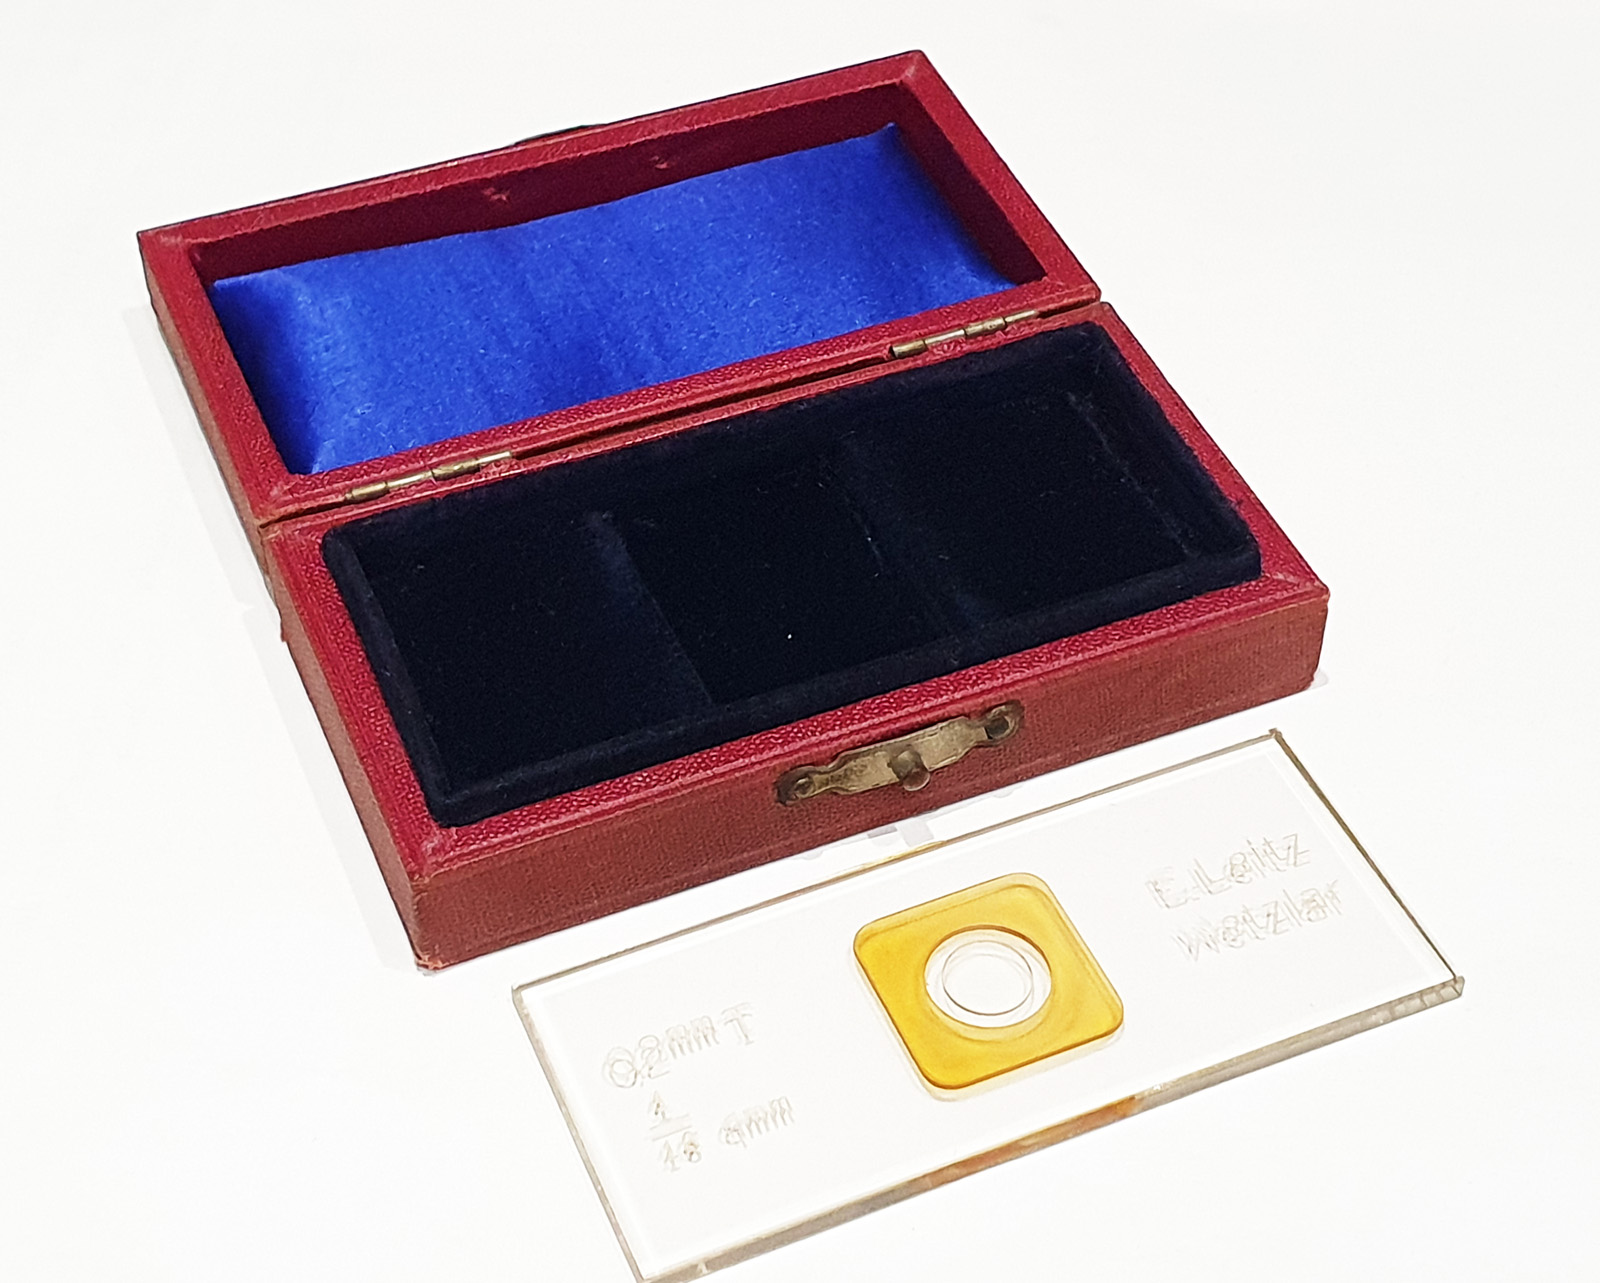
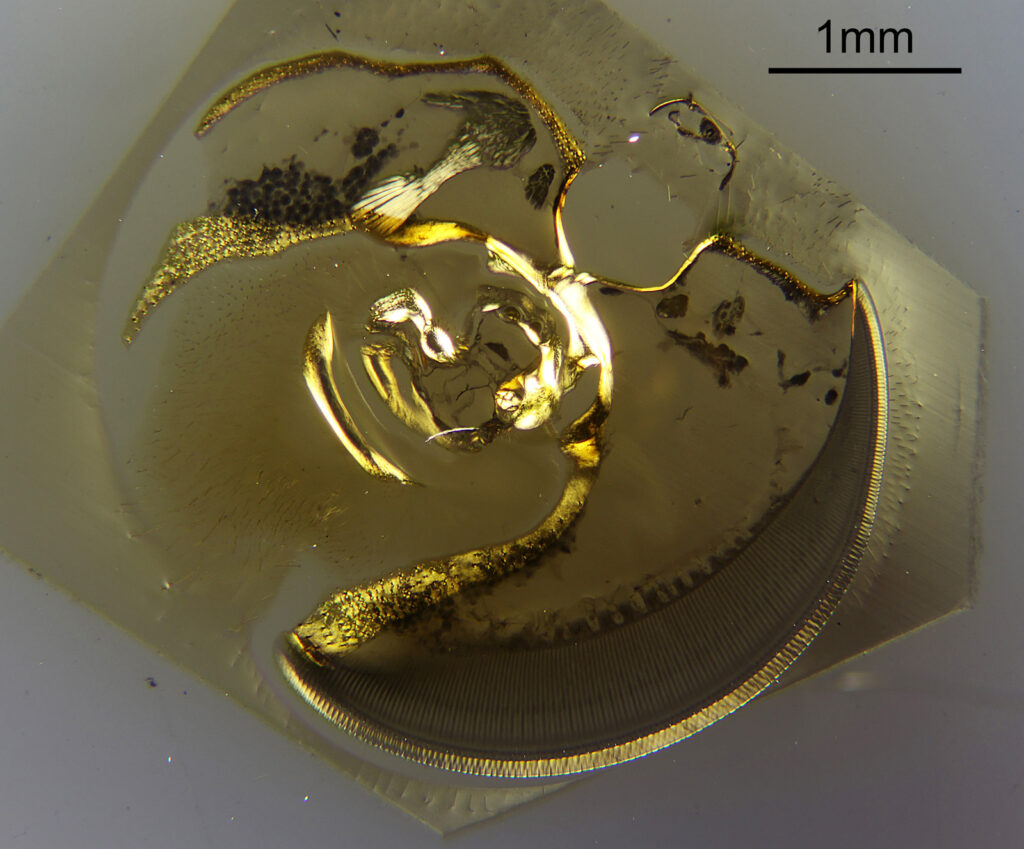
Before I wrap this up, here’s the slide itself (a Watson one).

I was hoping that this slide would allow me to image it in cross polarized lighting (unlike the mammal eye one which had an optically active mount) and it did not disappoint. What we capture in an image depends strongly on how we image the subject, and changing things like polarization of the light can have a huge impact on what becomes emphasized in the final photograph. These old slides continue to amaze me, and I look forward to sharing more of them in the future. As always, thanks for reading, and if you’d like to know more about my work I can be reached here.