
With my UV microscopy, I’ve noticed a dramatic improvement in resolution as the wavelength decreases. A well known effect, but the UV gives a great demo of how big a change can be observed – for example see my work on a test slide here. However converting a microscope to be able to image in the short wavelength UV region is no small task as glass absorbs the light. Is there a benefit to filtering visible light to image in the short wavelength blue region? There certainly is, and again this is well known, and is something I regularly do. However I thought I would share an example to show the effect, and also how to go about doing it in practice.
The test slide was a piperine mounted diatom slide, and the subject a Pleurosigma angulatum that was present on it. I set up my Olympus BHB with a 40x Olympus Dplan Apo UV objective (set the coverslip thickness collar to as thick as it would go, as the sample had a thick coverslip, and this gave the best setting). Camera was a monochrome converted Nikon D800. Light source a white light LED (more on that later). Condenser an Olympus Aplanat Achromat, set to oblique. Single image, no stacking. Everything was kept the same for the images, except a Thorlabs 450nm (40nm FWHM) filter was added above the photoeyepiece for the 450nm image. Images from the white light and the filtered 450nm light were processed the same way, and the full images have been reduced for sharing here.
First the white light image.

Next, the 450nm light image.

At first glance there doesn’t look to be much between the two images, however going in closer on parts of the images tells a different story. Here are a couple of sets of crops from different parts of the diatom. In each crop the white light image is on the left, and the 450nm image on the right.
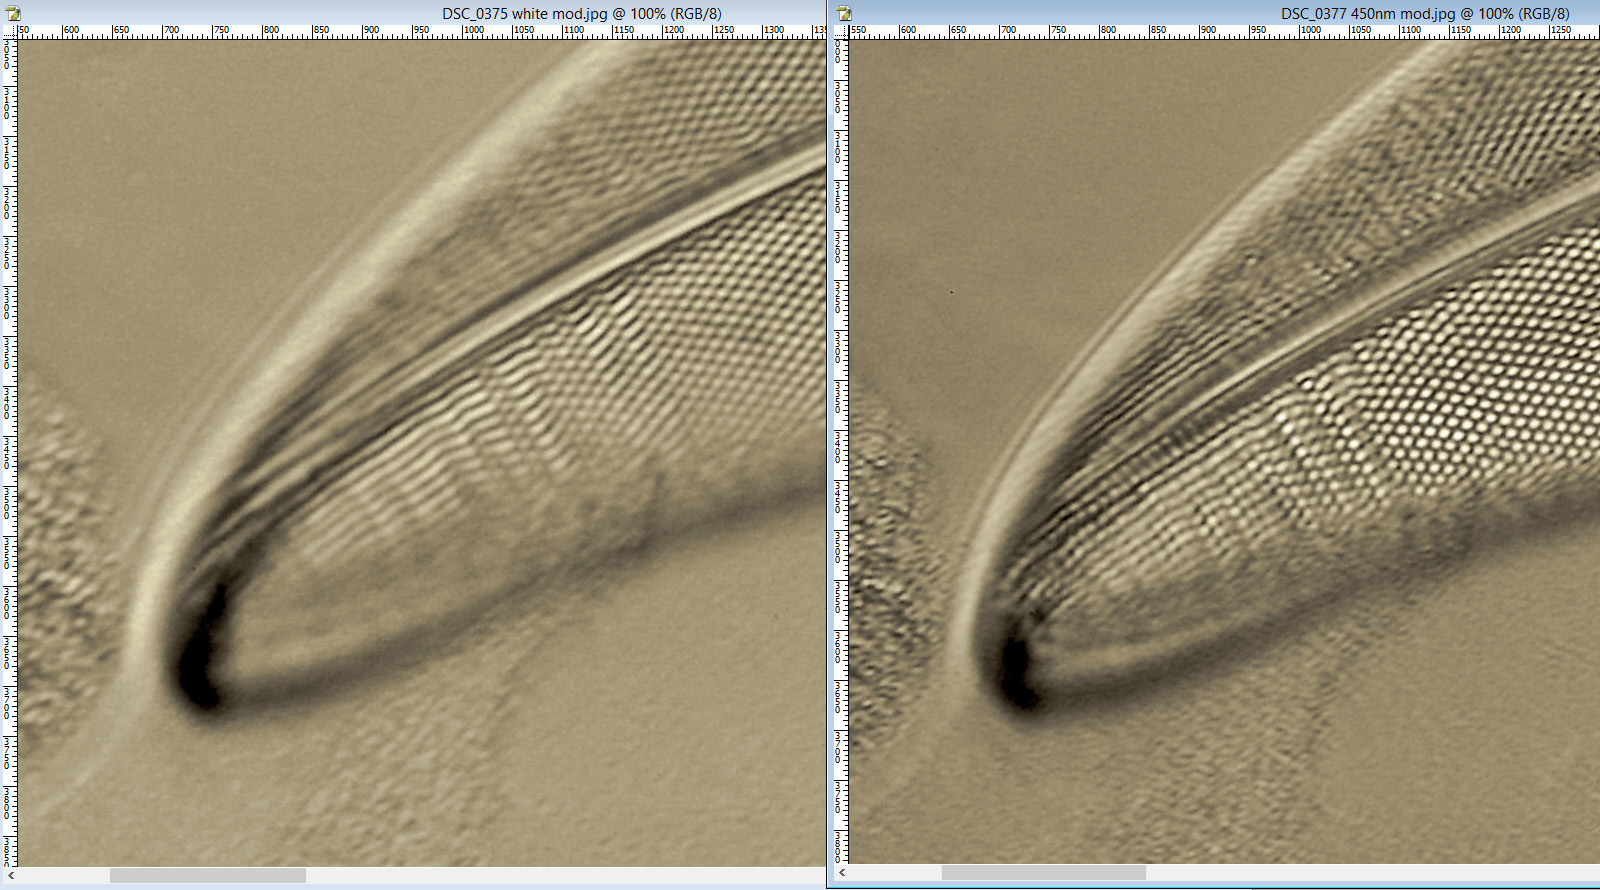
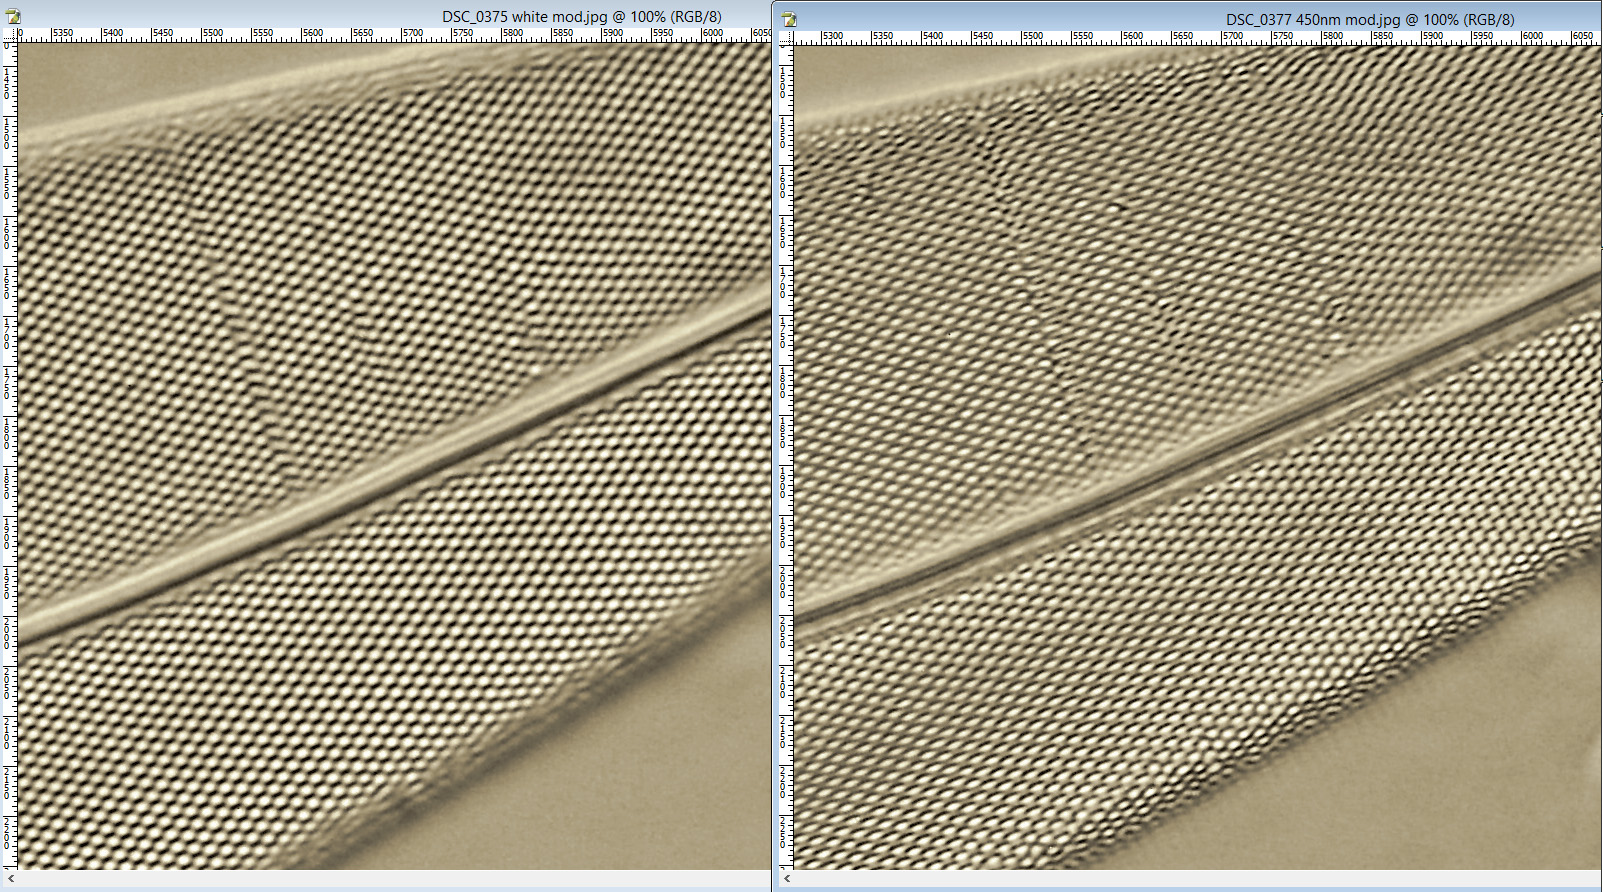
Note, the crops above were taken as screen grabs, and have a slight warm tinge to them as that is how I like my monitor. It is subtle, but there is a slight improvement in resolution as a result of using 450nm light vs the full spectrum of the white light.
For the 450nm image, I used a 25mm diameter Thorlabs 450nm (40nm FWHM) premium bandpass filter, and simply placed it on top of the photoeyepiece.

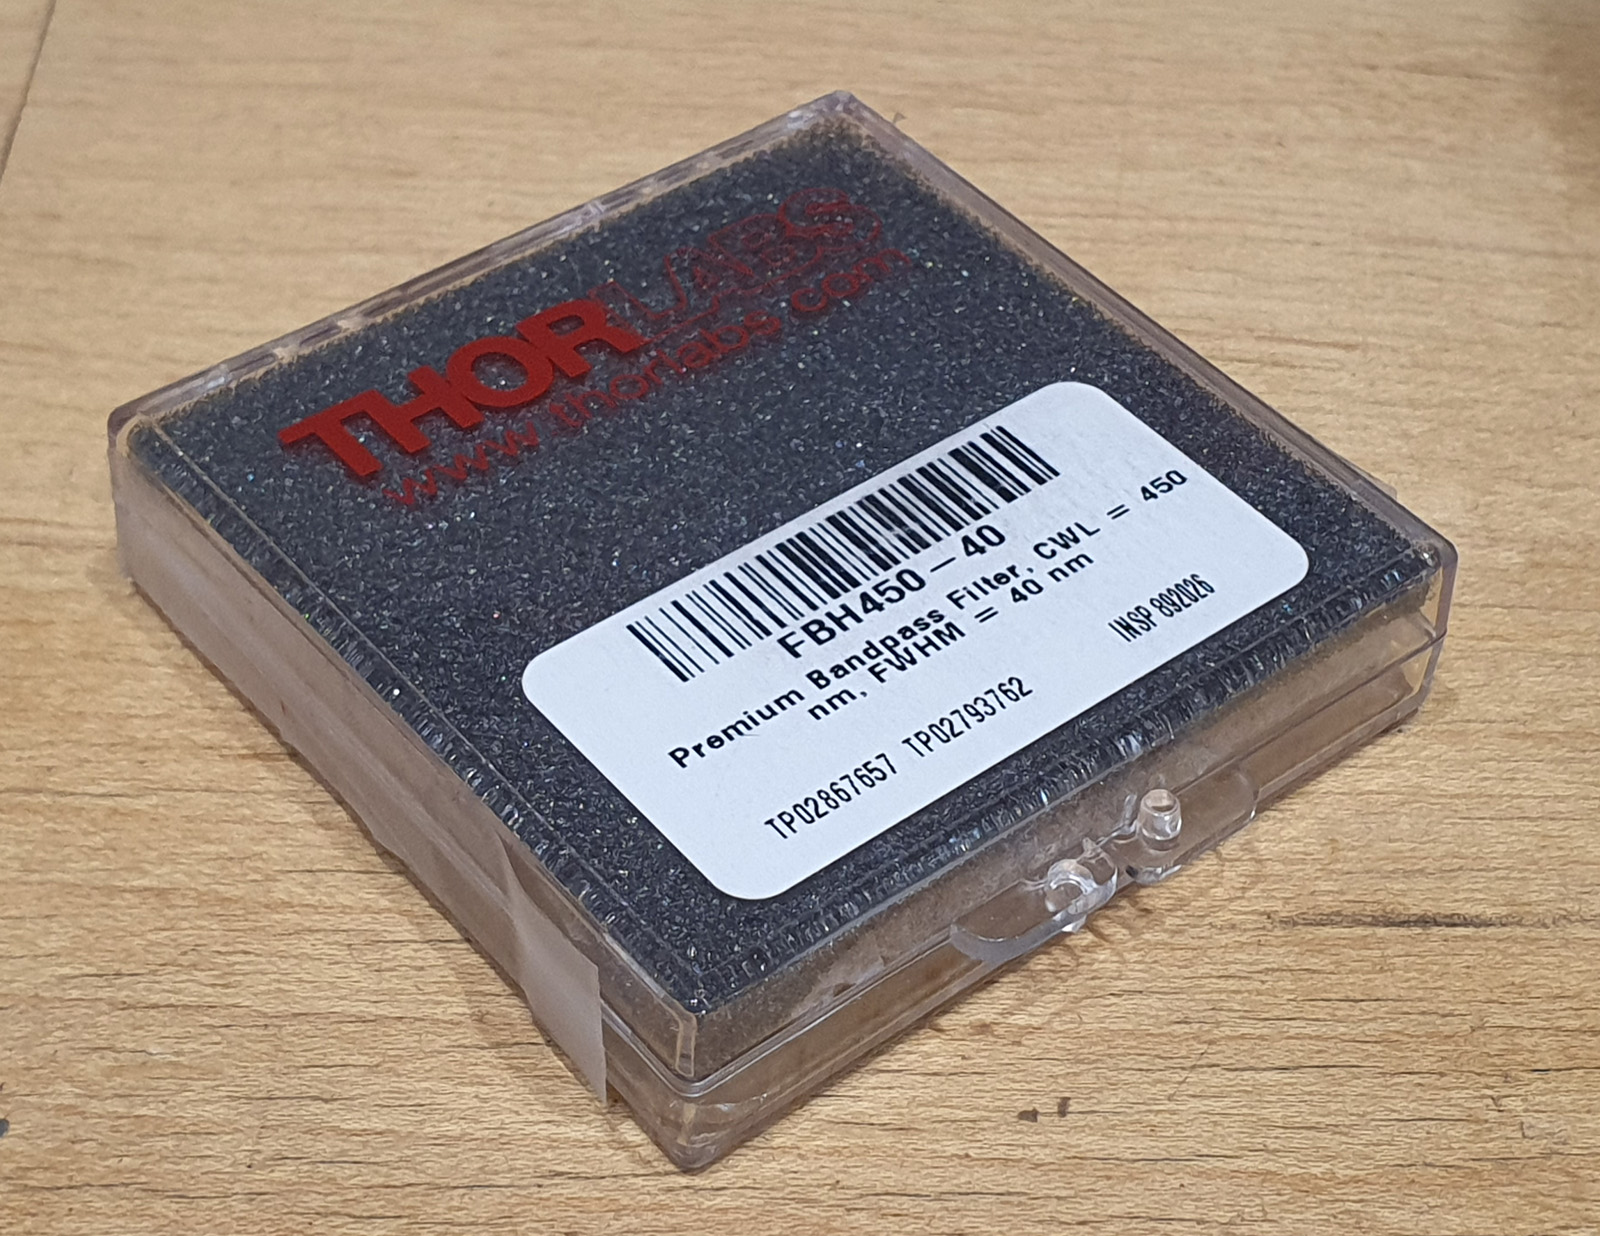
The filter is dichroic and has a preferred direction for the light going through it. This is shown by the arrow on the side of it. The LED is use is a cool white one I got from ebay and made an adapter to fit my light. This is its irradiance spectrum (measured on my Ocean Insight FX USB spectrometer).
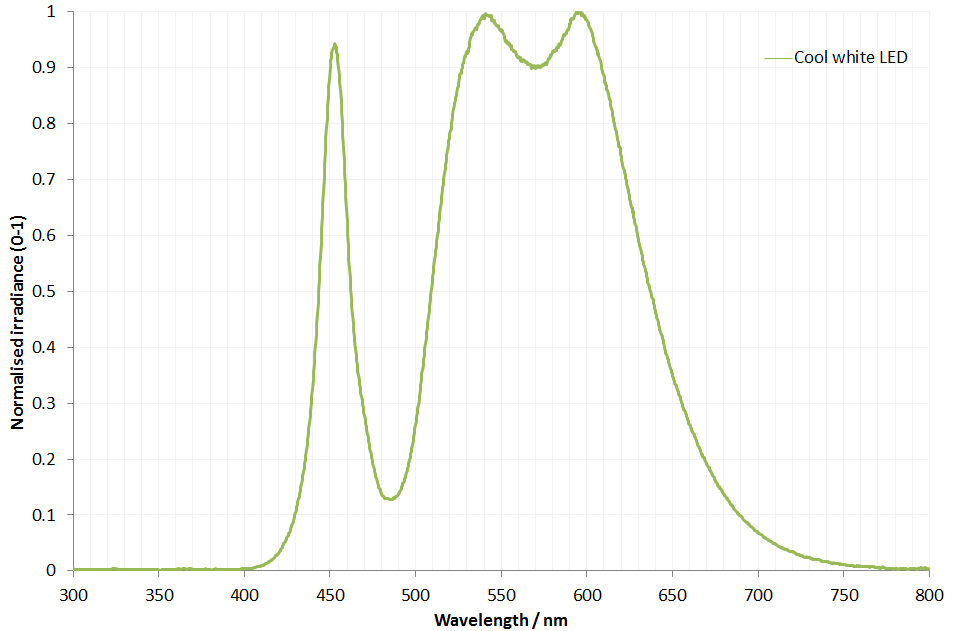
As can be seen the LED gives a broad wavelength range, but actually a nice strong peak at around 450nm. This is why I chose this filter and not a 405nm or 400nm one. Also using 450nm vs 405nm or 400nm is good for normal unmodified cameras as typically the internal filters on them will start blocking light at around 400nm. As a result 450nm is a good compromise – short wavelength, but detectable by normal cameras. Also the Thorlabs 450nm filter I used had a wide bandpass of 40nm, allowing plenty of light through. A 10nm bandpass filter would give a narrower range of wavelengths, but much less total light.
This can also be done (and was done historically) by putting a blue filter below the stage. I prefer to have the filter as the last stage before the light reached the camera though, which is why I put the filter on top of the eyepiece.
Of course a blue LED could be used, but as the white LED had a strong peak, I went down the route of filtering the light rather than having yet another light source.
A simple modification, but a helpful one when it comes to diatom imaging, adding a blue filter can produce higher resolution images for a given optical setup when compared with normal white light imaging. As always, thanks for reading, and if you’d like to know more about my work I can be reached here. Oh, I nearly forgot. Here is the slide I used for the images. While is says ‘Surirella gemma‘ on it there are plenty of Pleurosigma angulatum as well.
