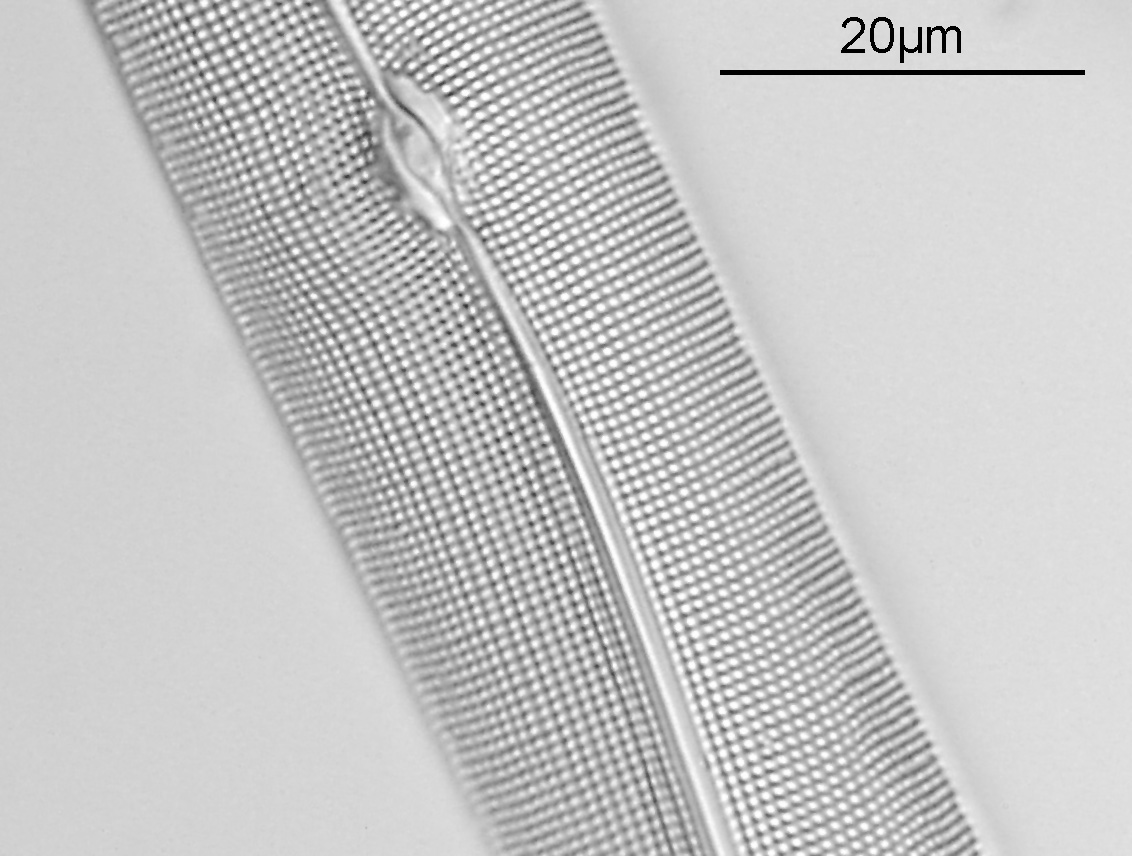
Yesterday I wrote about the use of a Reichert Neo dark ground condenser which I had had a mount made for so it could be used on my Olympus BHB microscope (see here). Today’s post also used the Reichert Neo condenser, but this time in combination with a 100x Leitz Pl Apo NA 0.60-1.32 objective. Kept wide open (or nearly wide open) as this objective has such a high NA, the result is that instead of dark ground, I get a circular oblique illumination.
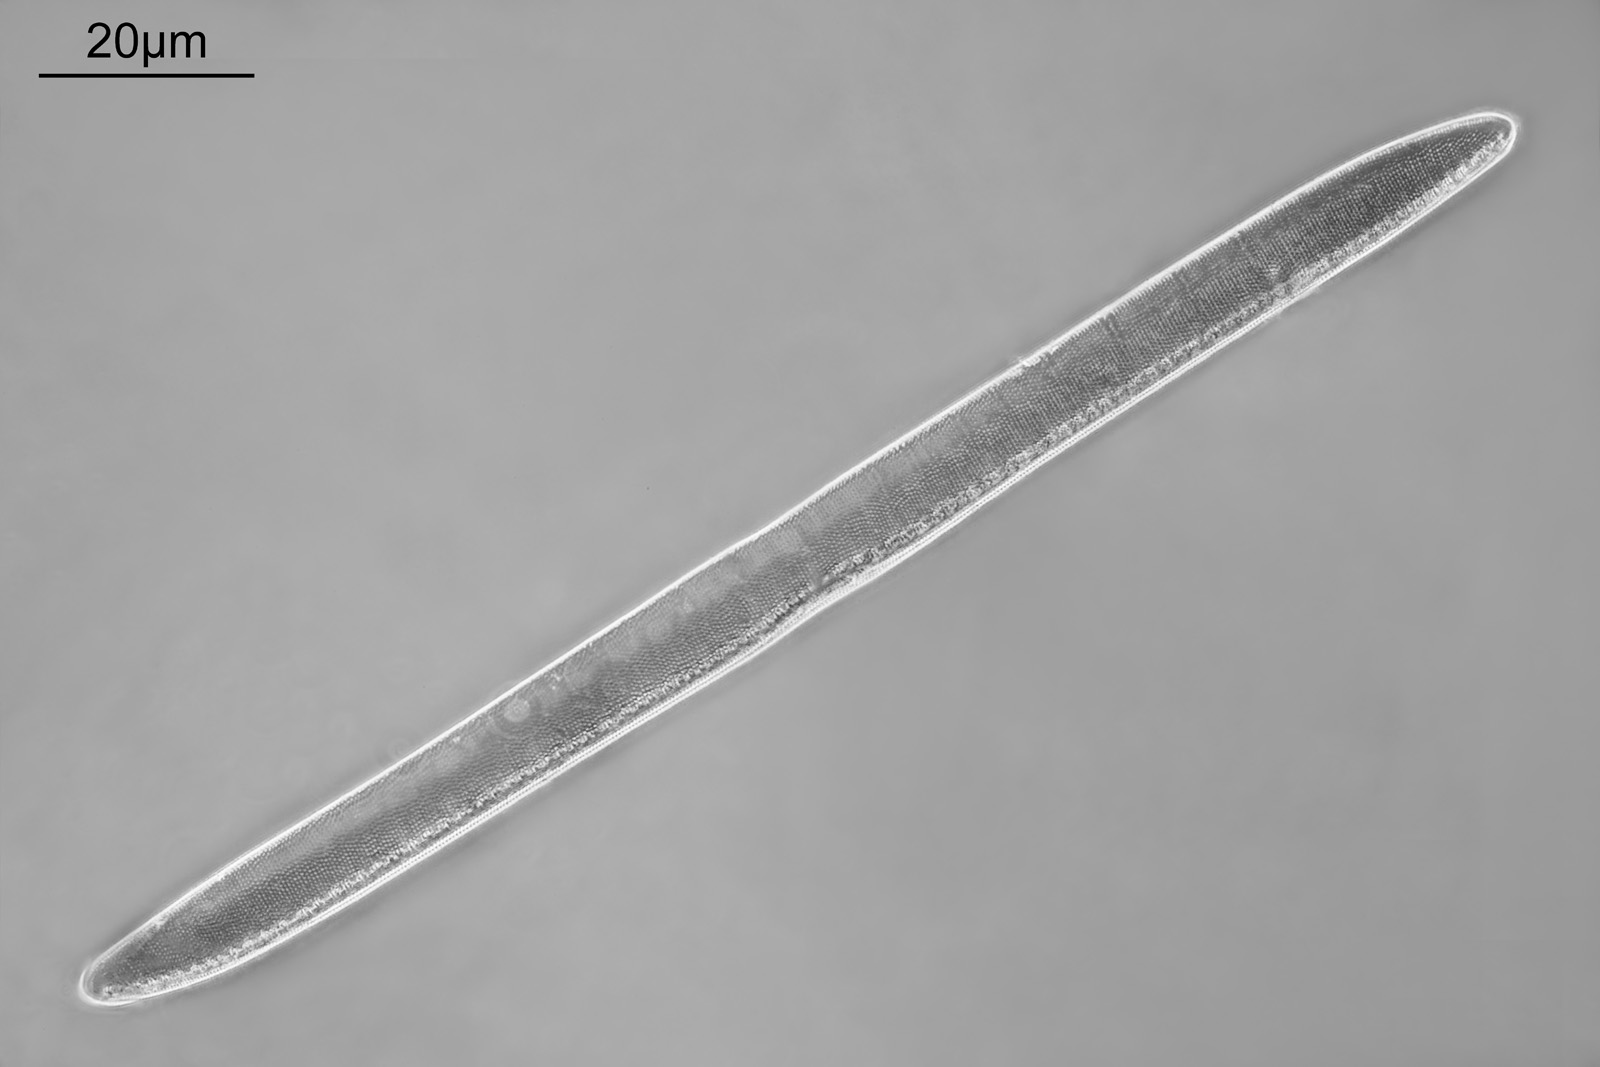
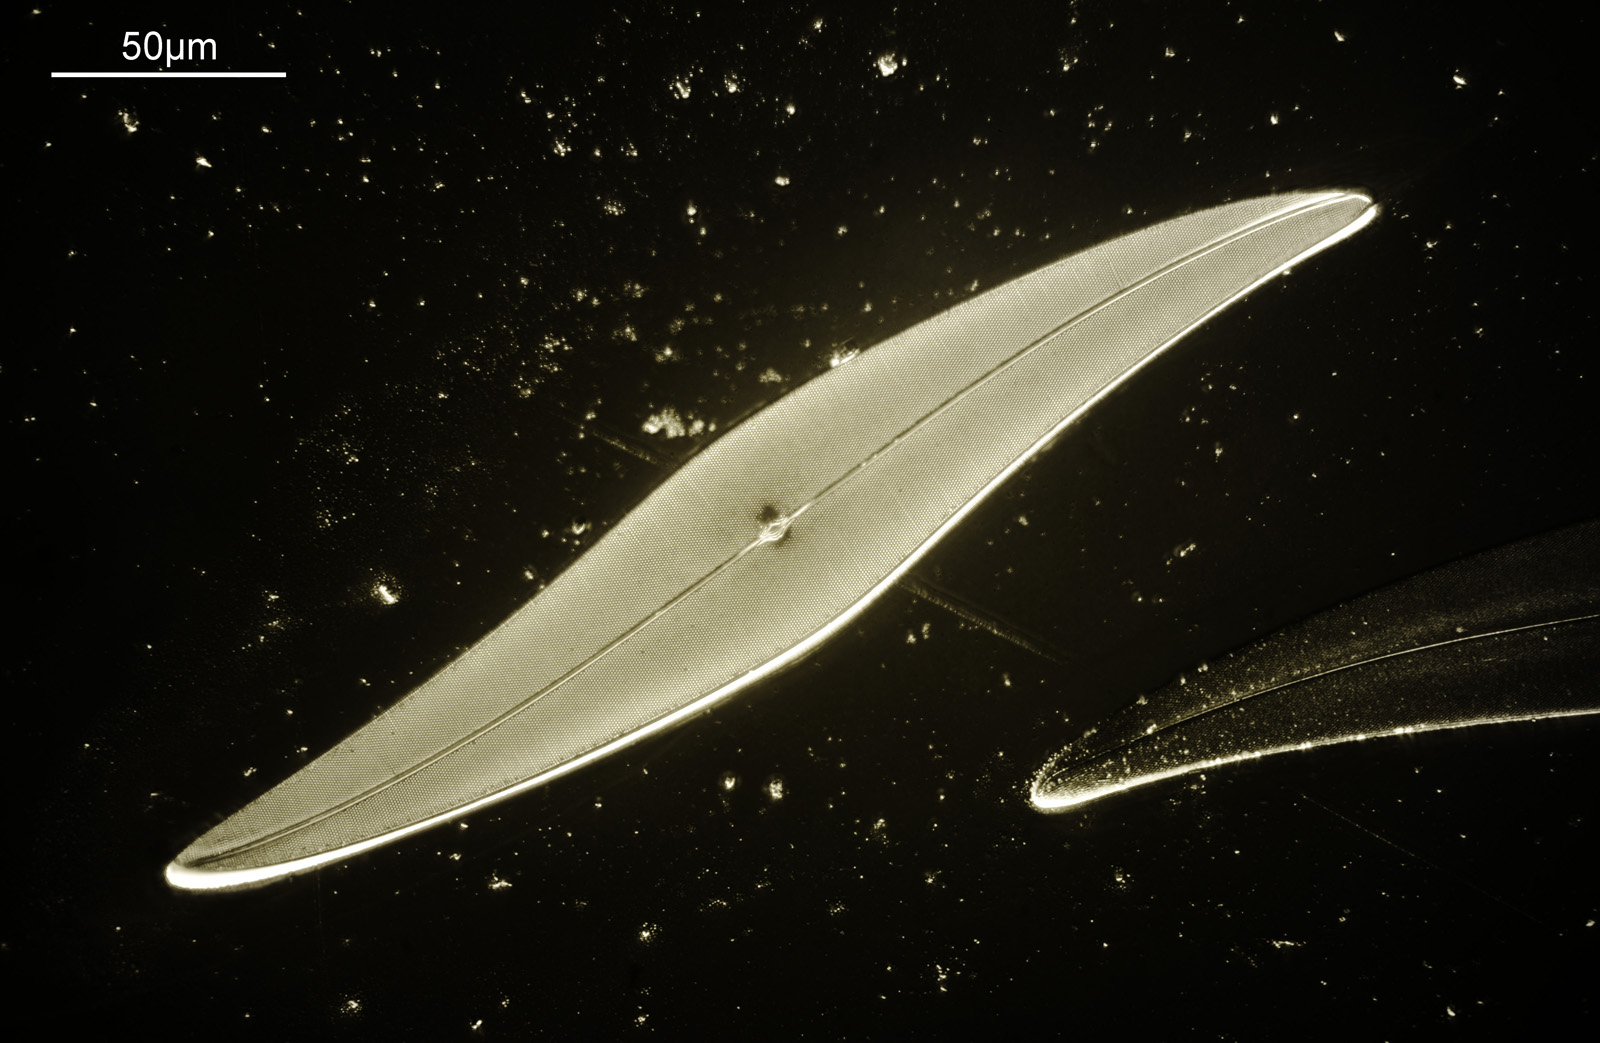
First slide is an N.B.S. strew test slide of Nitzschia obtusa. It is a stack of 10 images in Zerene and used 450nm light. This is the full image frame, but has been reduced in resolution for sharing here.
Nitzschia obtusa using 450nm circular oblique lighting and a 100x Leitz Pl Apo NA 0.60-1.32 objective
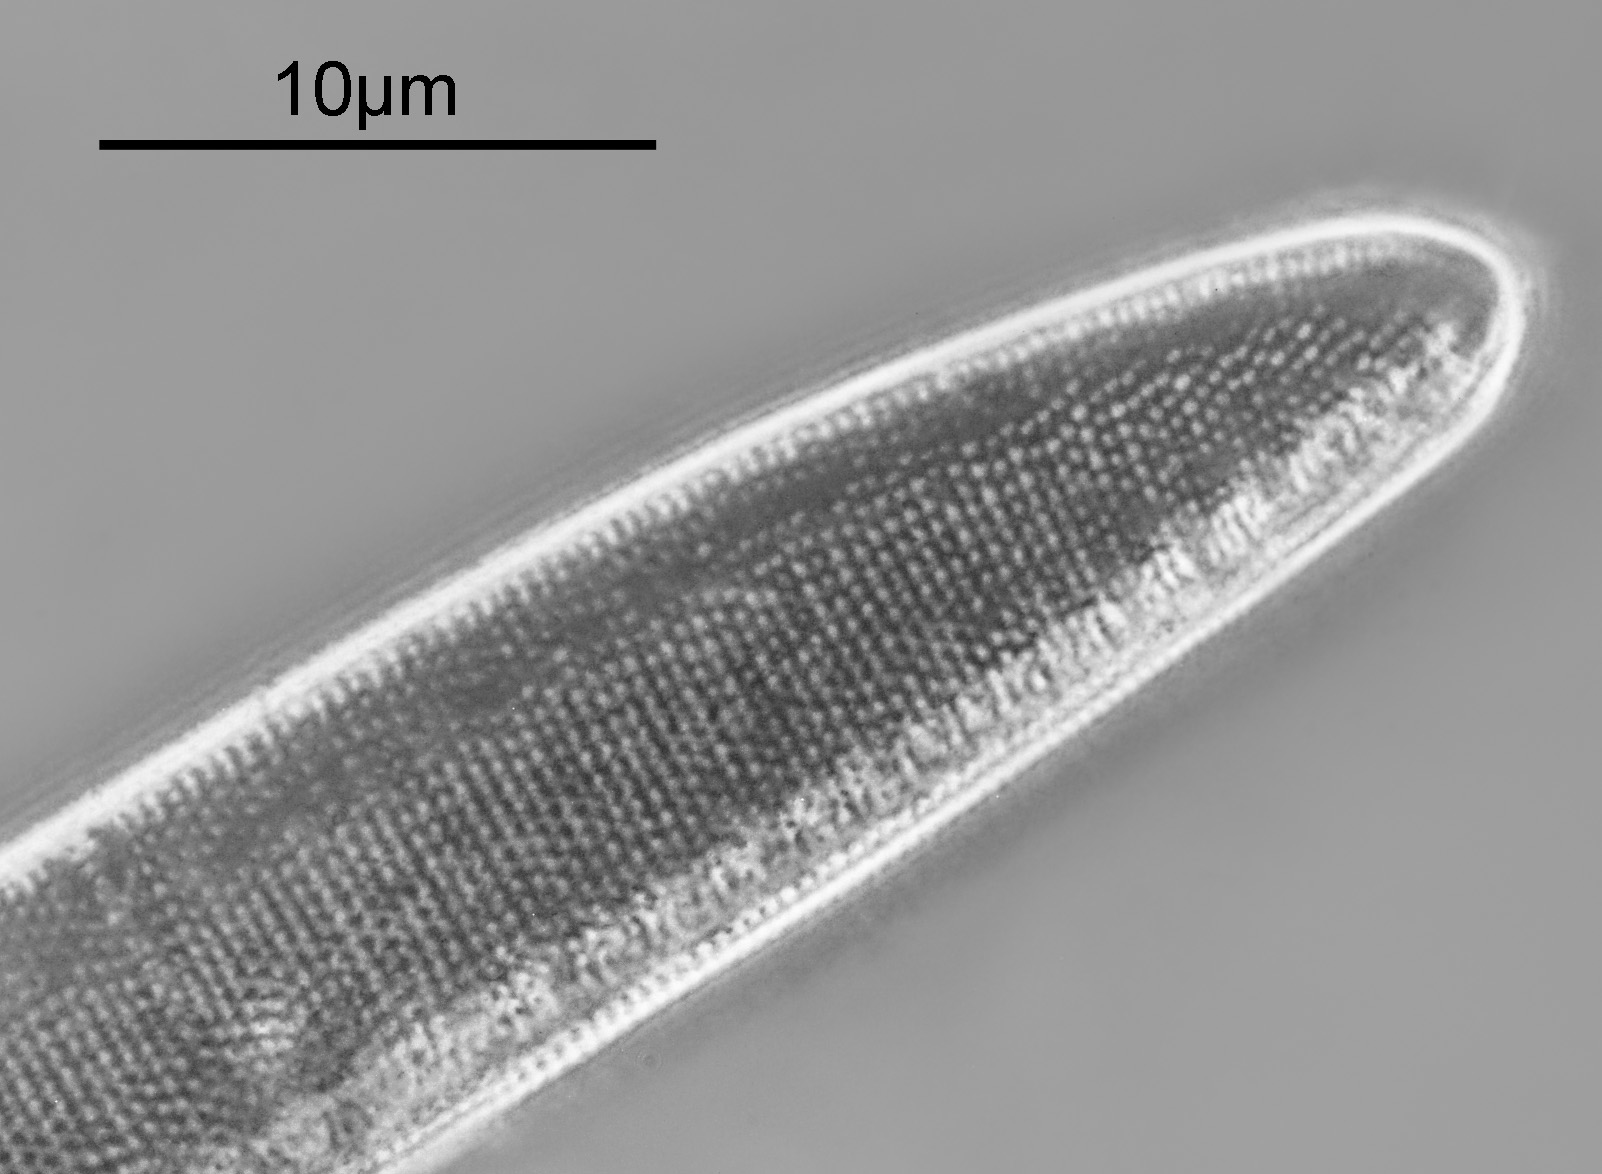
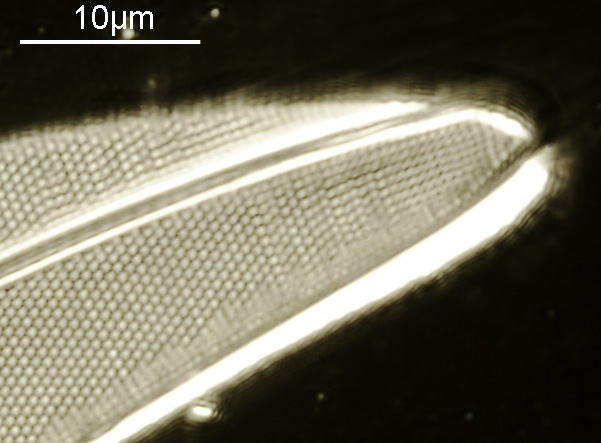
Below is a crop of the top end of the diatom, shown at original pixel resolution to allow the details to be more easily seen.
Crop of Nitzschia obtusa using 450nm circular oblique lighting and a 100x Leitz Pl Apo NA 0.60-1.32 objective
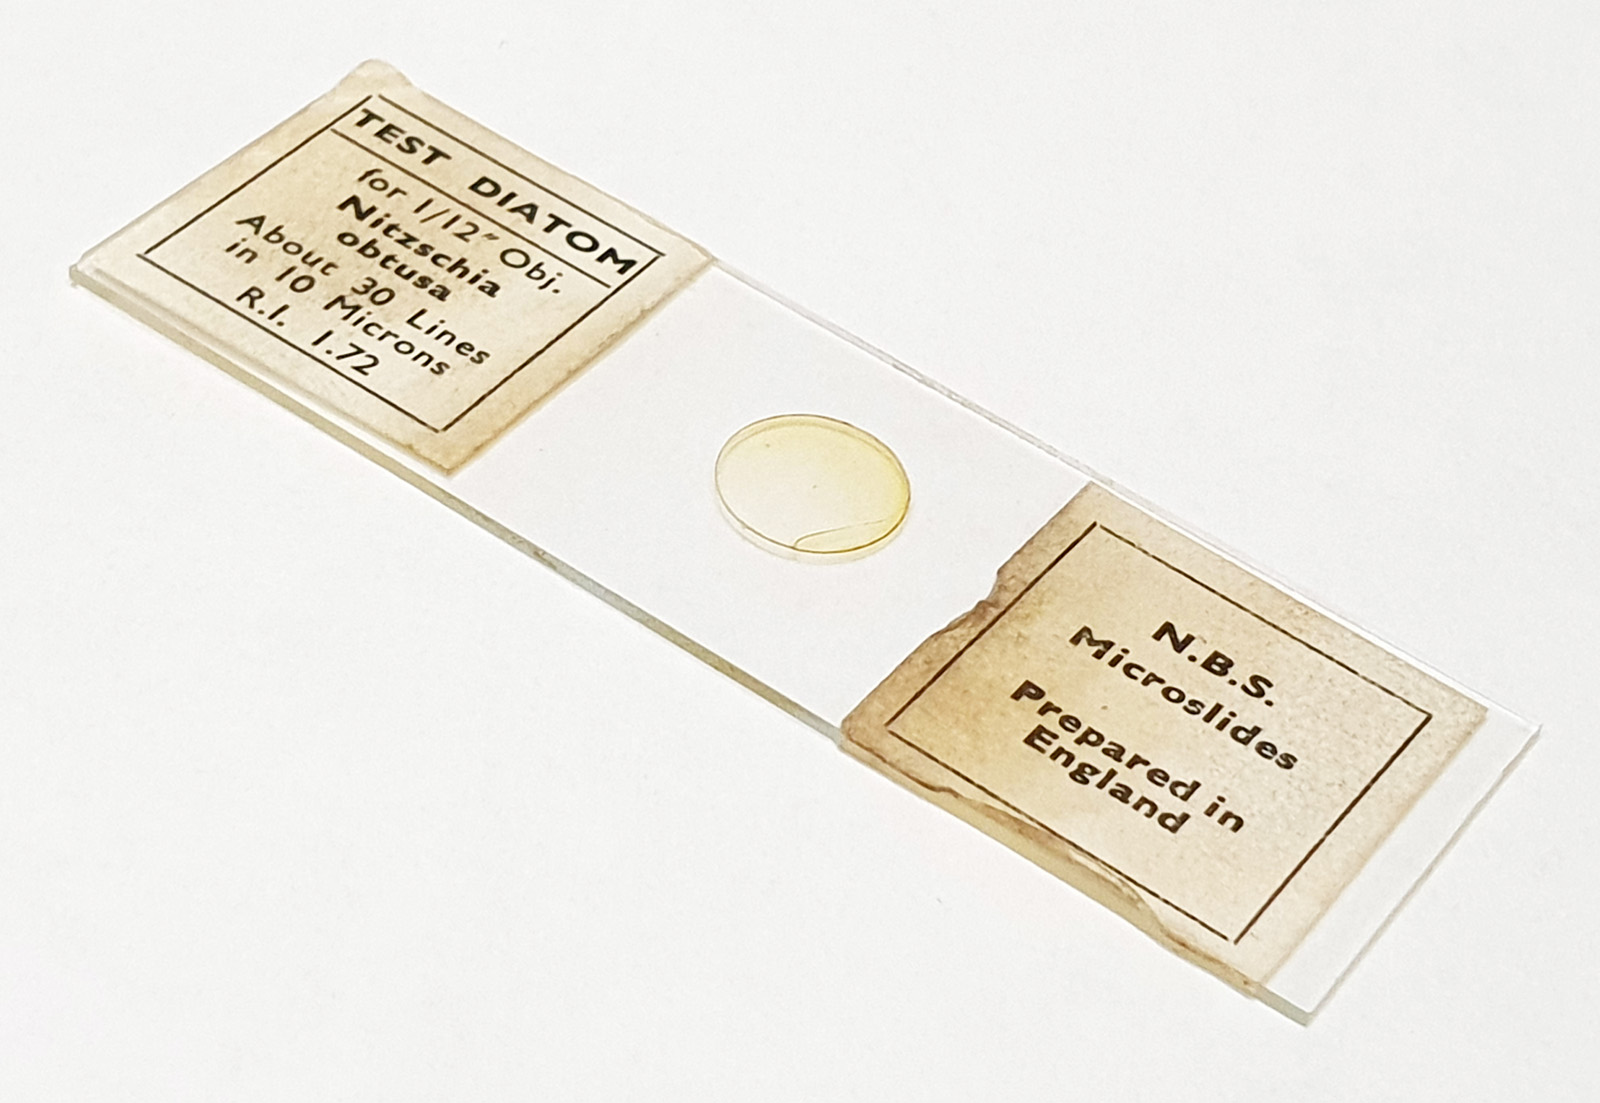
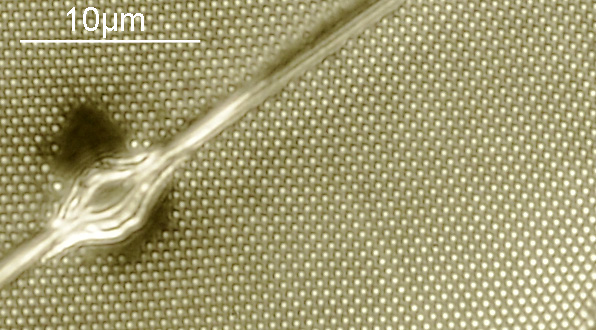
Measuring the striae distance in Image J gave me 3 in 1.058µm, which equates to 28.4 per 10µm. A little below the information on the slide (30 per 10µm), but not too far away. Here’s the slide.
Nitzschia obtusa slide from N.B.S.
Note the refractive index of the mount is high – 1.72 – and that has helped here with the imaging.
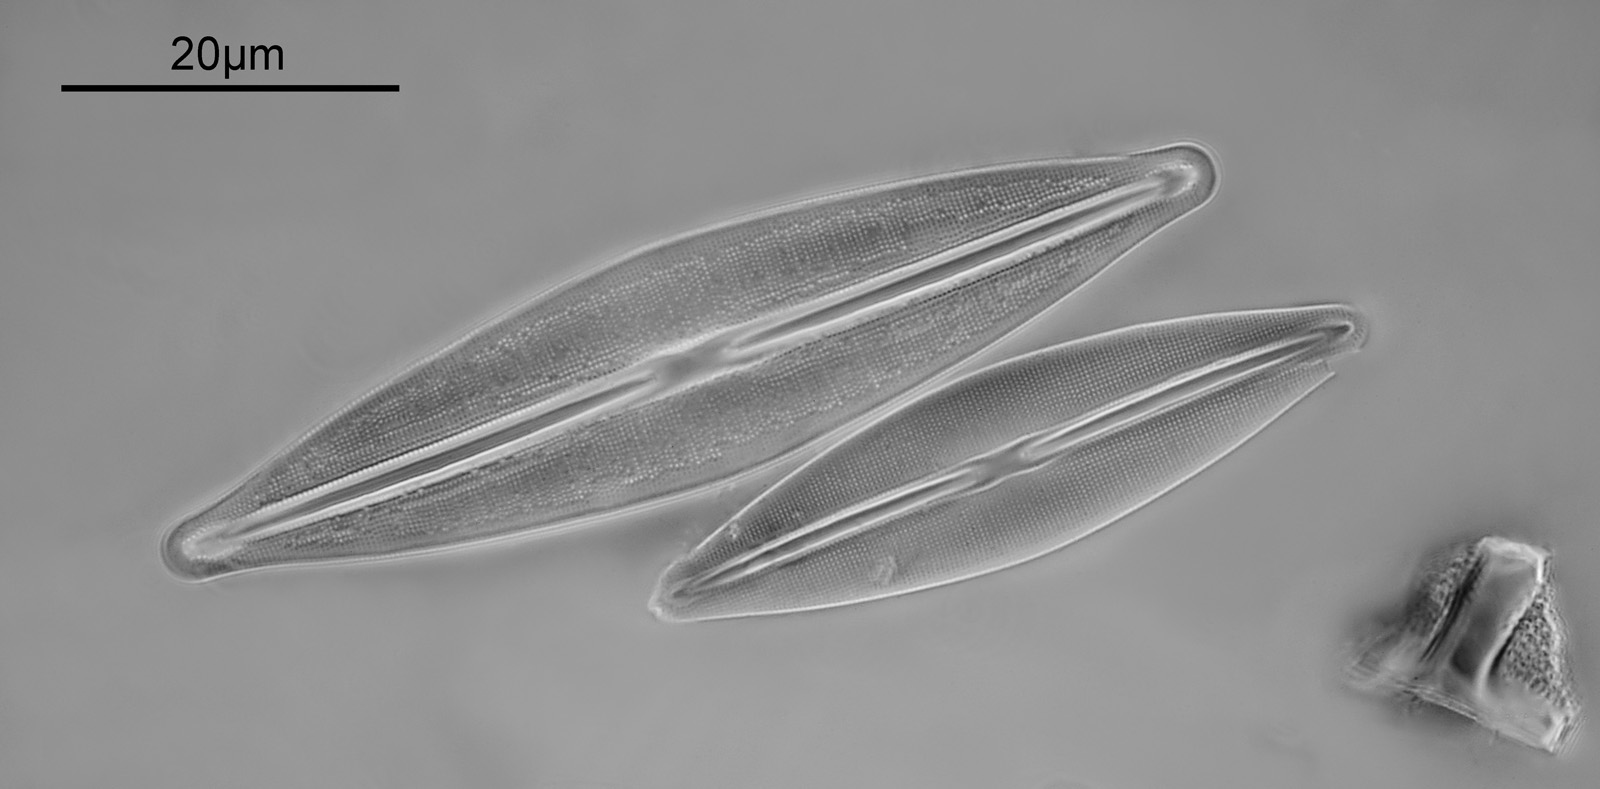
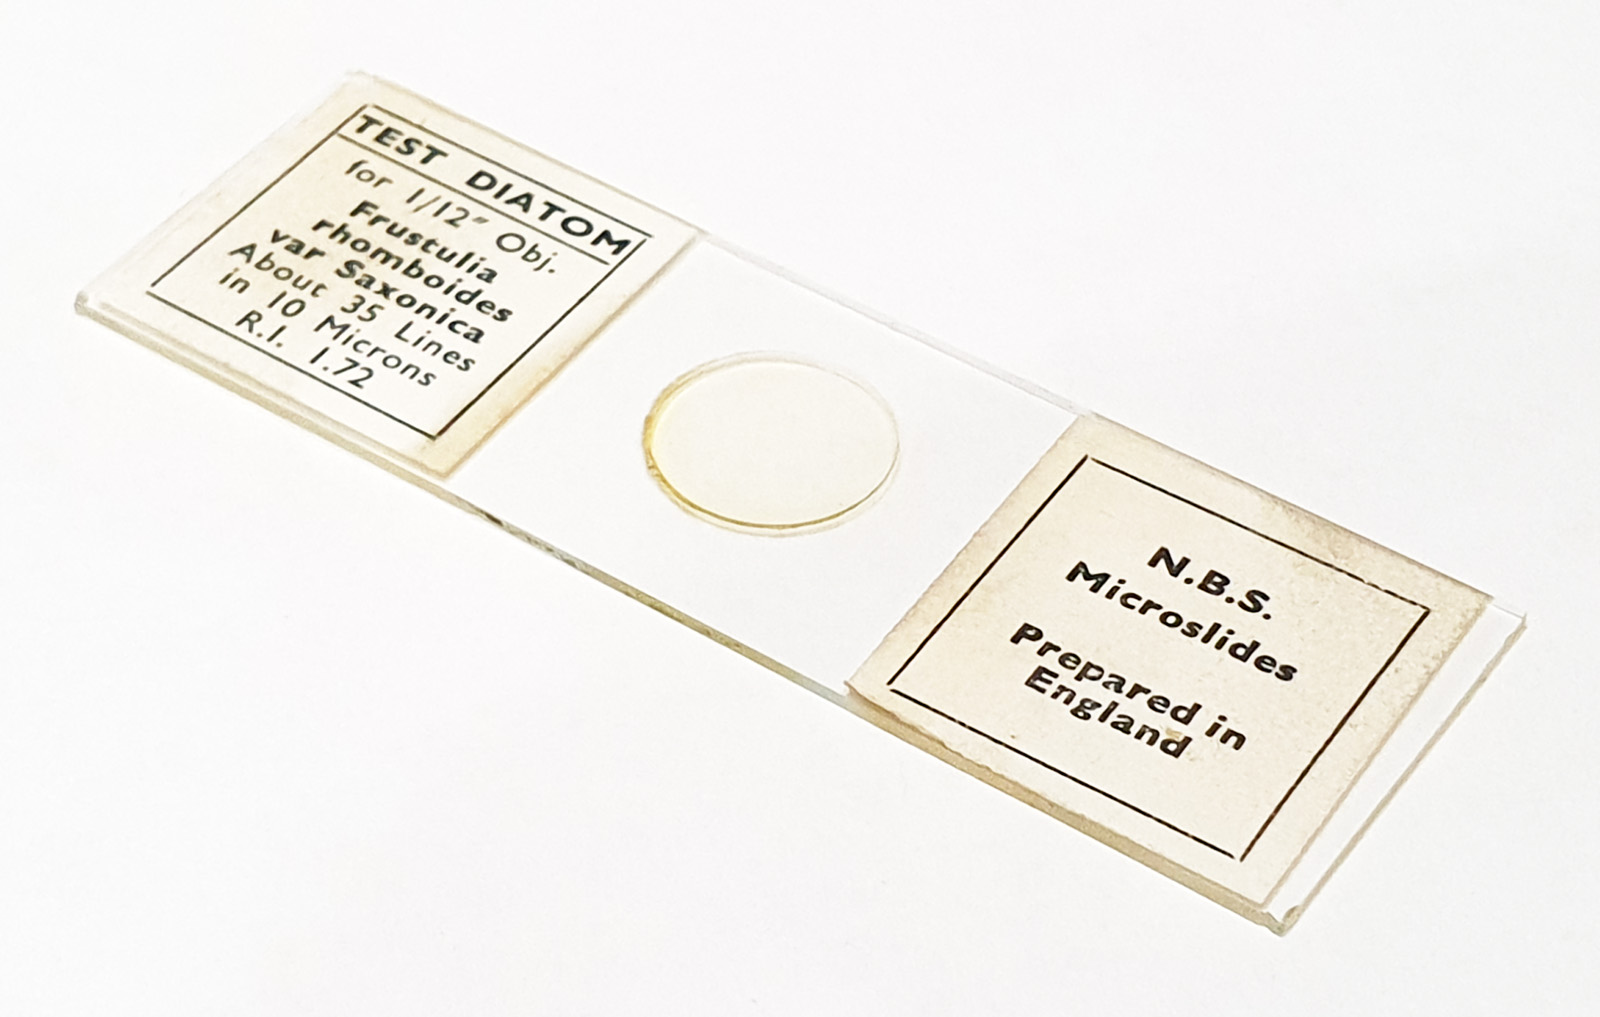
After the success with the Nitzscia slide, I had a look at my collection, and found another N.B.S. one with a more challenging diatom – Frustulia rhomboides var. Saxonica – which the slide claimed to be 35 lines per 10µm. Setup was the same as above (other than I left the iris on the objective fully open), but this time it was just 2 images stacked, and the frame has been cropped slightly before resizing for sharing, as the individual diatoms were smaller than the Nitzschia.
Frustulia rhomboides var. Saxonica using 450nm circular oblique lighting and a 100x Leitz Pl Apo NA 0.60-1.32 objective
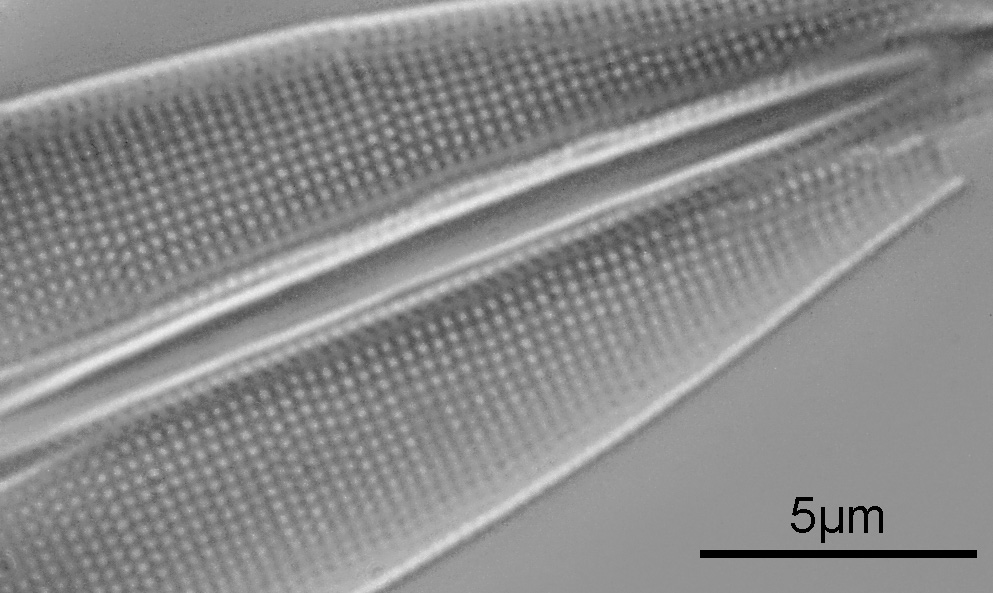
Again, there is lots of detail in the image, and here is a crop showing part of the lower diatom at original resolution.
Crop of Frustulia rhomboides var. Saxonica using 450nm circular oblique lighting and a 100x Leitz Pl Apo NA 0.60-1.32 objective
Putting this into ImageJ, I got a measurement of 2.87µm for 10 striae, which equates to 34.8 striae (lines) per 10µm. The slide said 35 lines per 10µm, so I am happy with that.
Frustulia rhomboides var. Saxonica slide from N.B.S.
Overall, I really like this setup for imaging diatoms with small features at high resolution. The circular oblique lighting is a little lower contrast than I would prefer, but certainly shows up the features, and it shows what can be done with relatively straightforward visible light microscopy (instead of my usual UV work). As always, thanks for reading, and if you’d like to know more about my work I can be reached here.
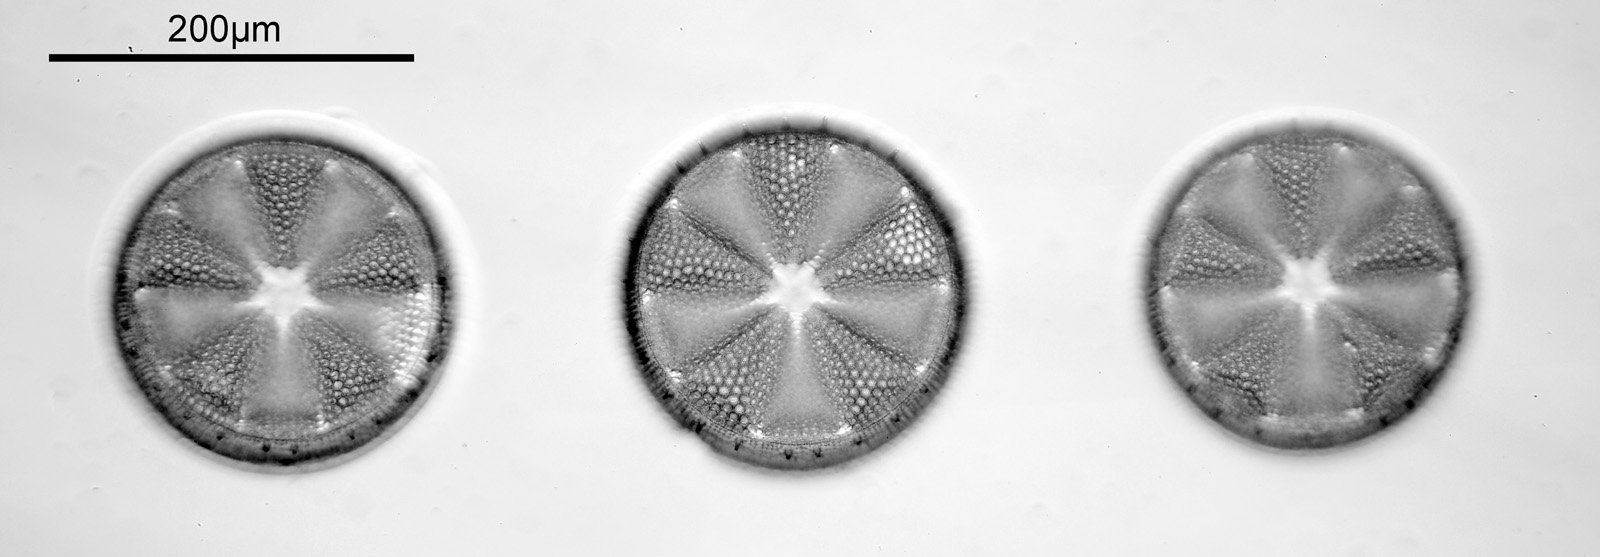
A two part post today, first the imaging of a beautifully made slide by W.A. Firth containing 3 examples of the diatom Actinocyclus ehrenbergii, and then a piece on adapting microscope equipment from different manufacturers to be able to use them together.
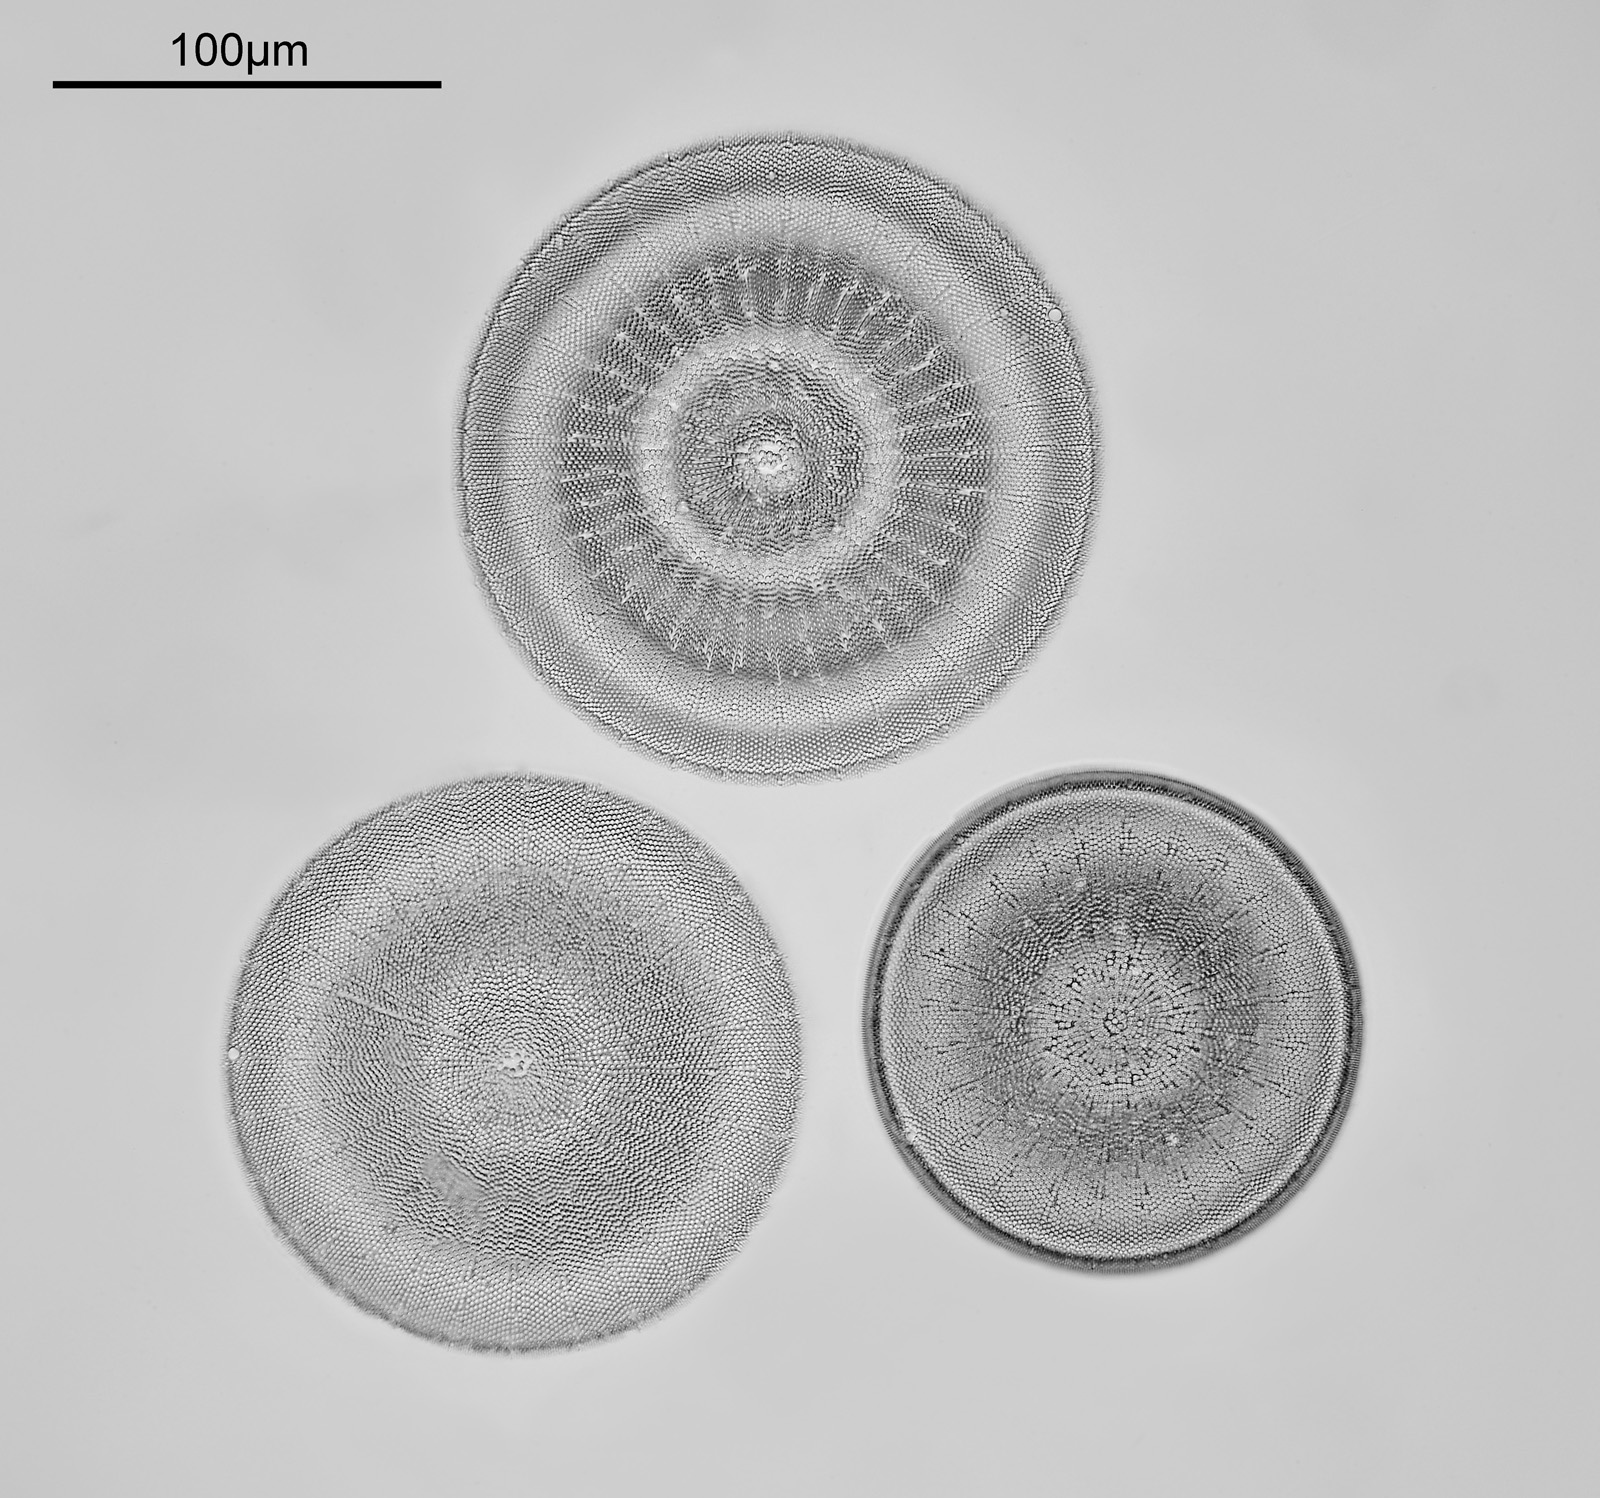
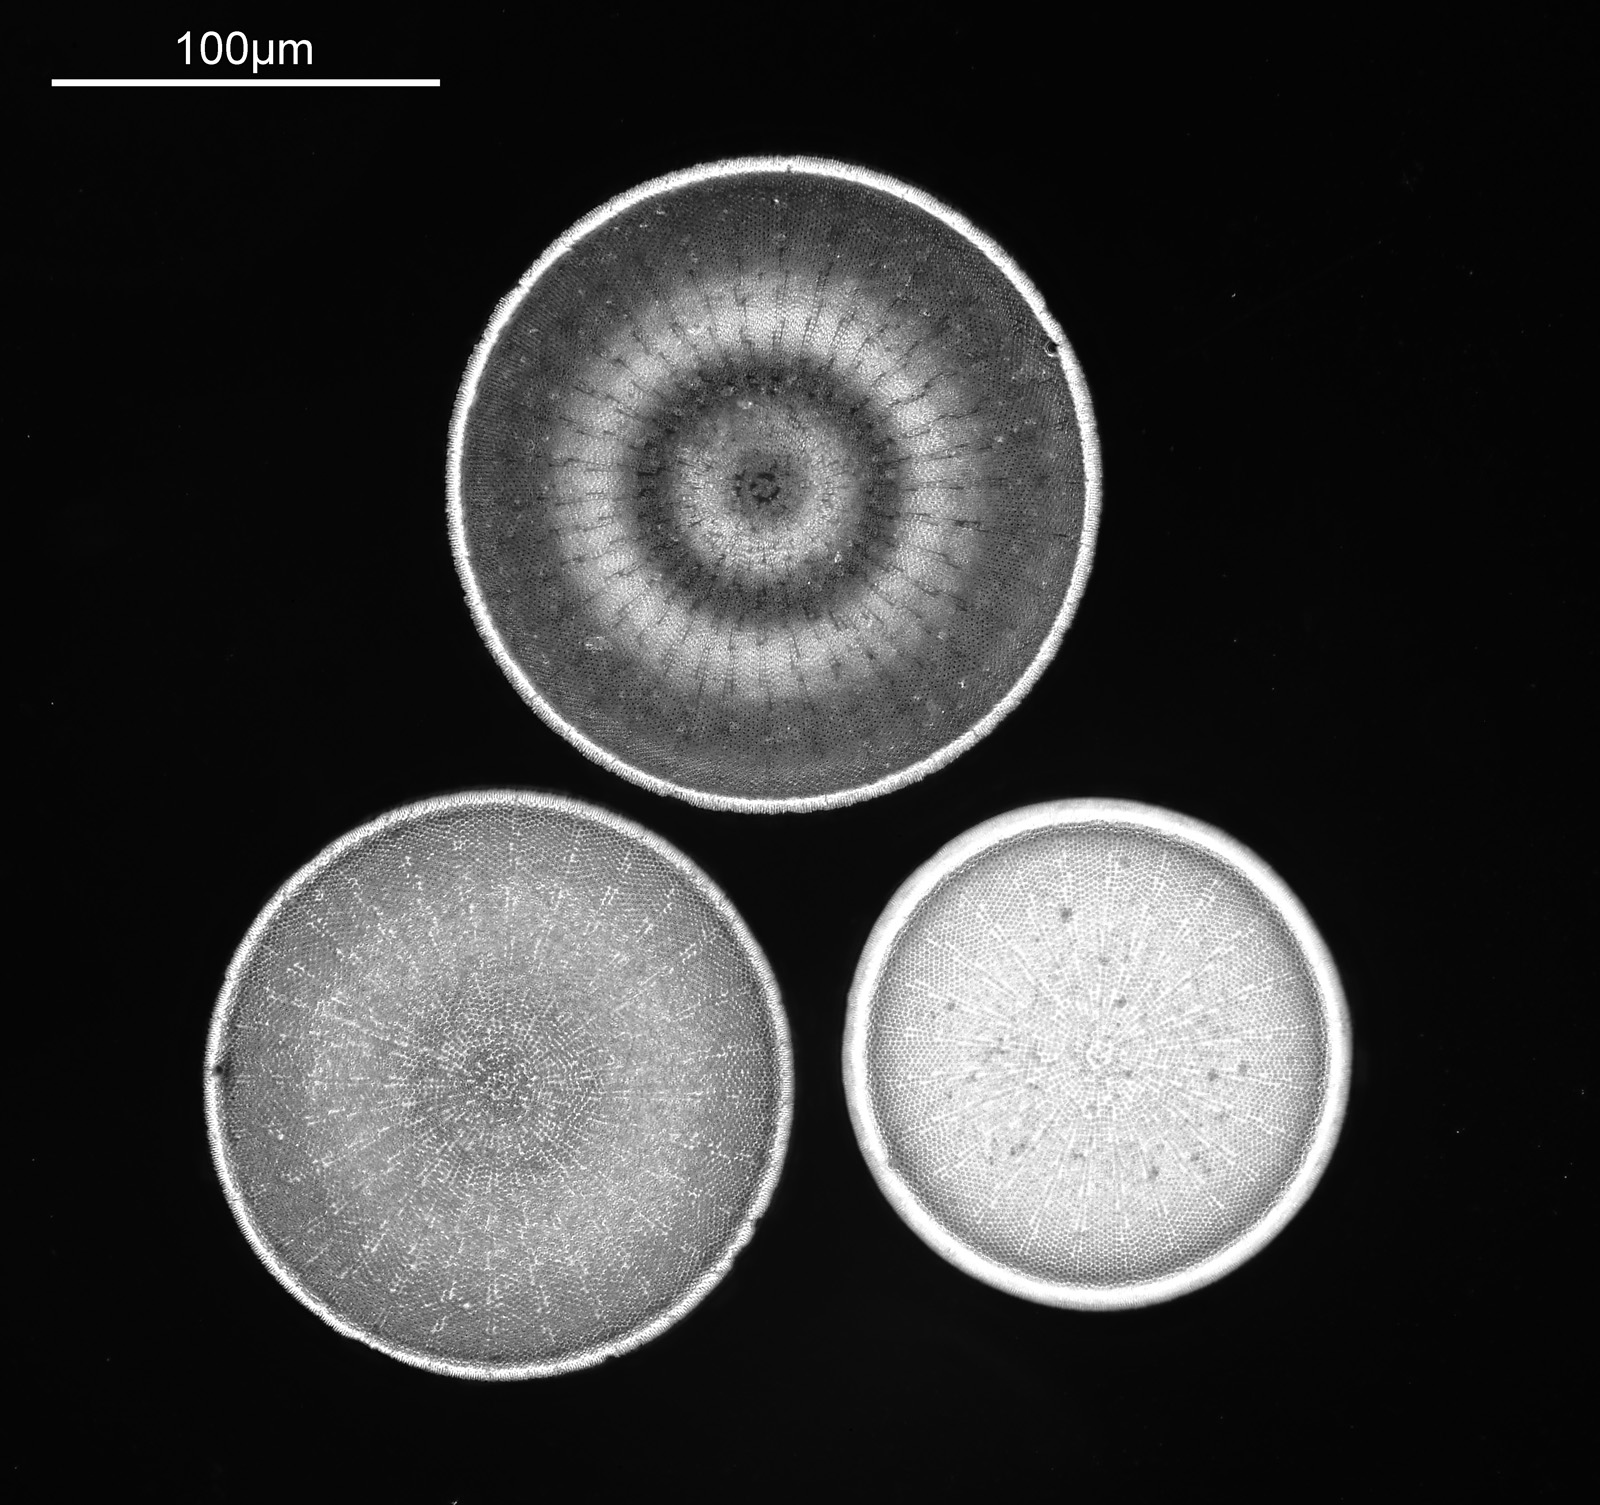
First the slide. This was imaged on my Olympus BHB microscope, using 450nm LED light. A 20x Nikon Plan Apo NA 0.65 objective was used, in combination with an Olympus Aplanat Achromat condenser set to slightly oblique. A 2.5x Nikon CF PL photoeyepiece was used, and the camera was a monochrome converted Nikon d850 camera. This is a stack of 9 images (Zerene stacker), and has been reduced from the original resolution for sharing (this is 1600 pixels across vs. 4632 pixels for the original) which has obviously impacted viewing resolution. Here’s the image.
W.A. Firth slide with 3 examples of Actinocyclus ehrenbergii, 20x objective
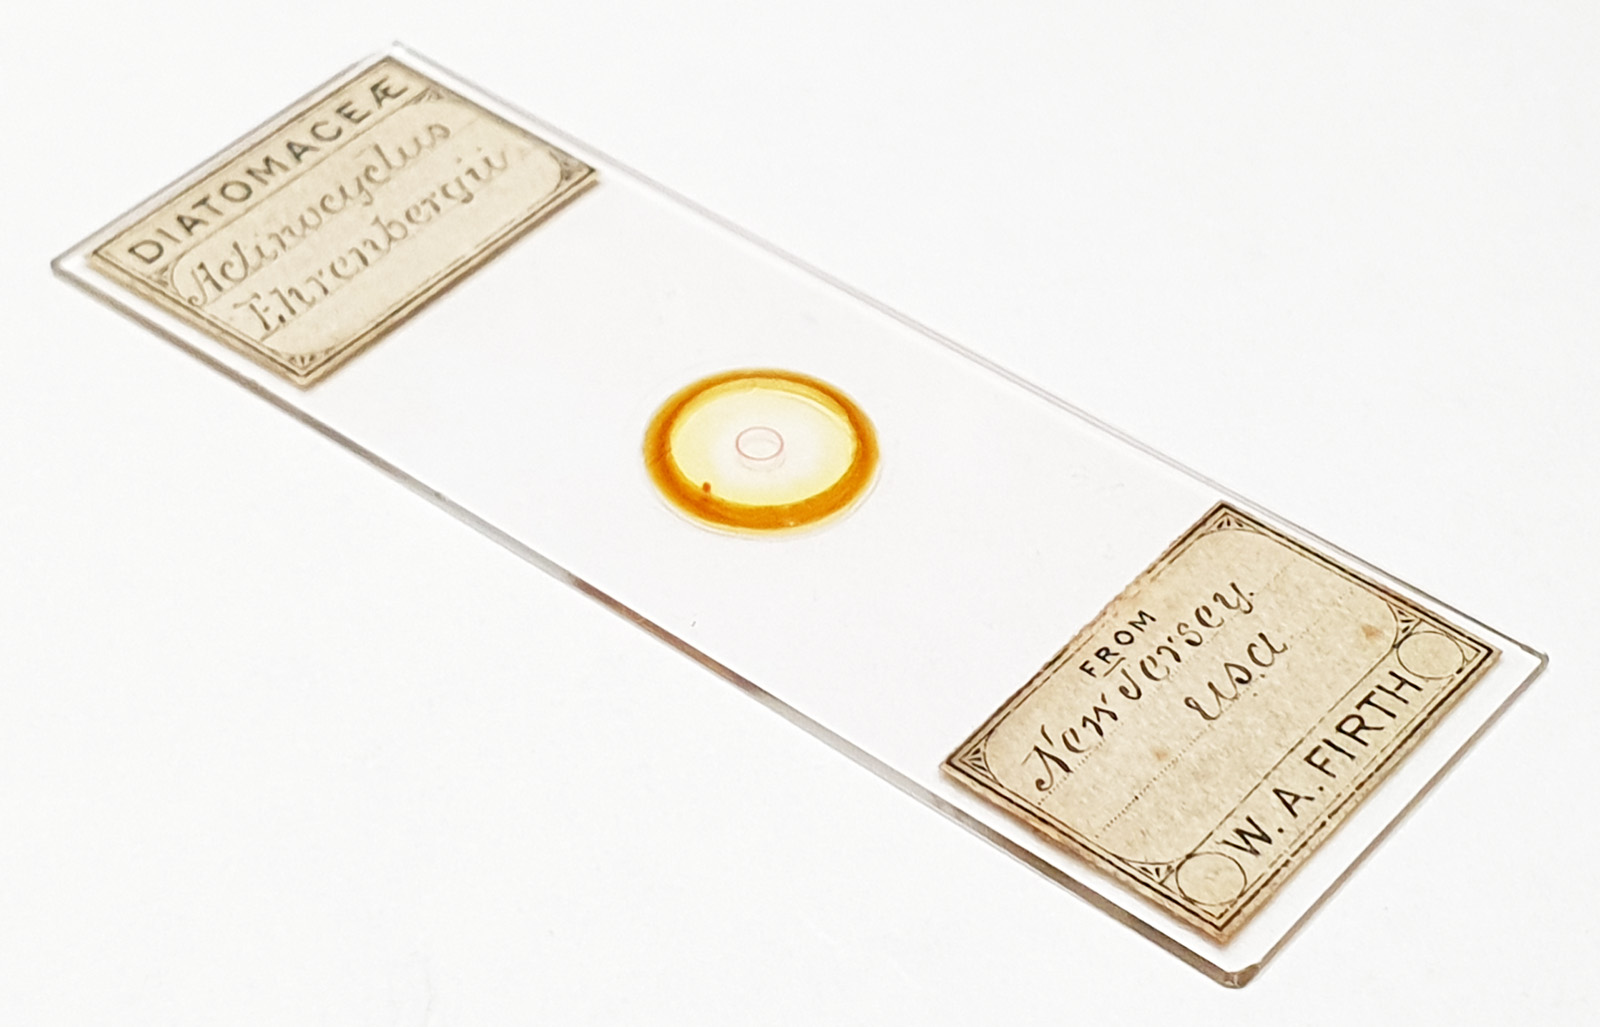
The slide is beautifully made (and W.A. Firth is well known for excellent slides – see here for more information), and oblique illumination has done a good job of showing the features. Here’s the slide.
W.A. Firth slide with 3 examples of Actinocyclus ehrenbergii
Being a bit of an optics geek, I enjoy trying out equipment from different manufacturers, hence the use of a Nikon objective and photoeyepiece on my Olympus microscope. With regards to condensers, very often different manufacturers have different specifications in terms of how they are mounted to microscope, so unlike objectives which are often RMS threaded, trying different condensers can be more of a challenge.
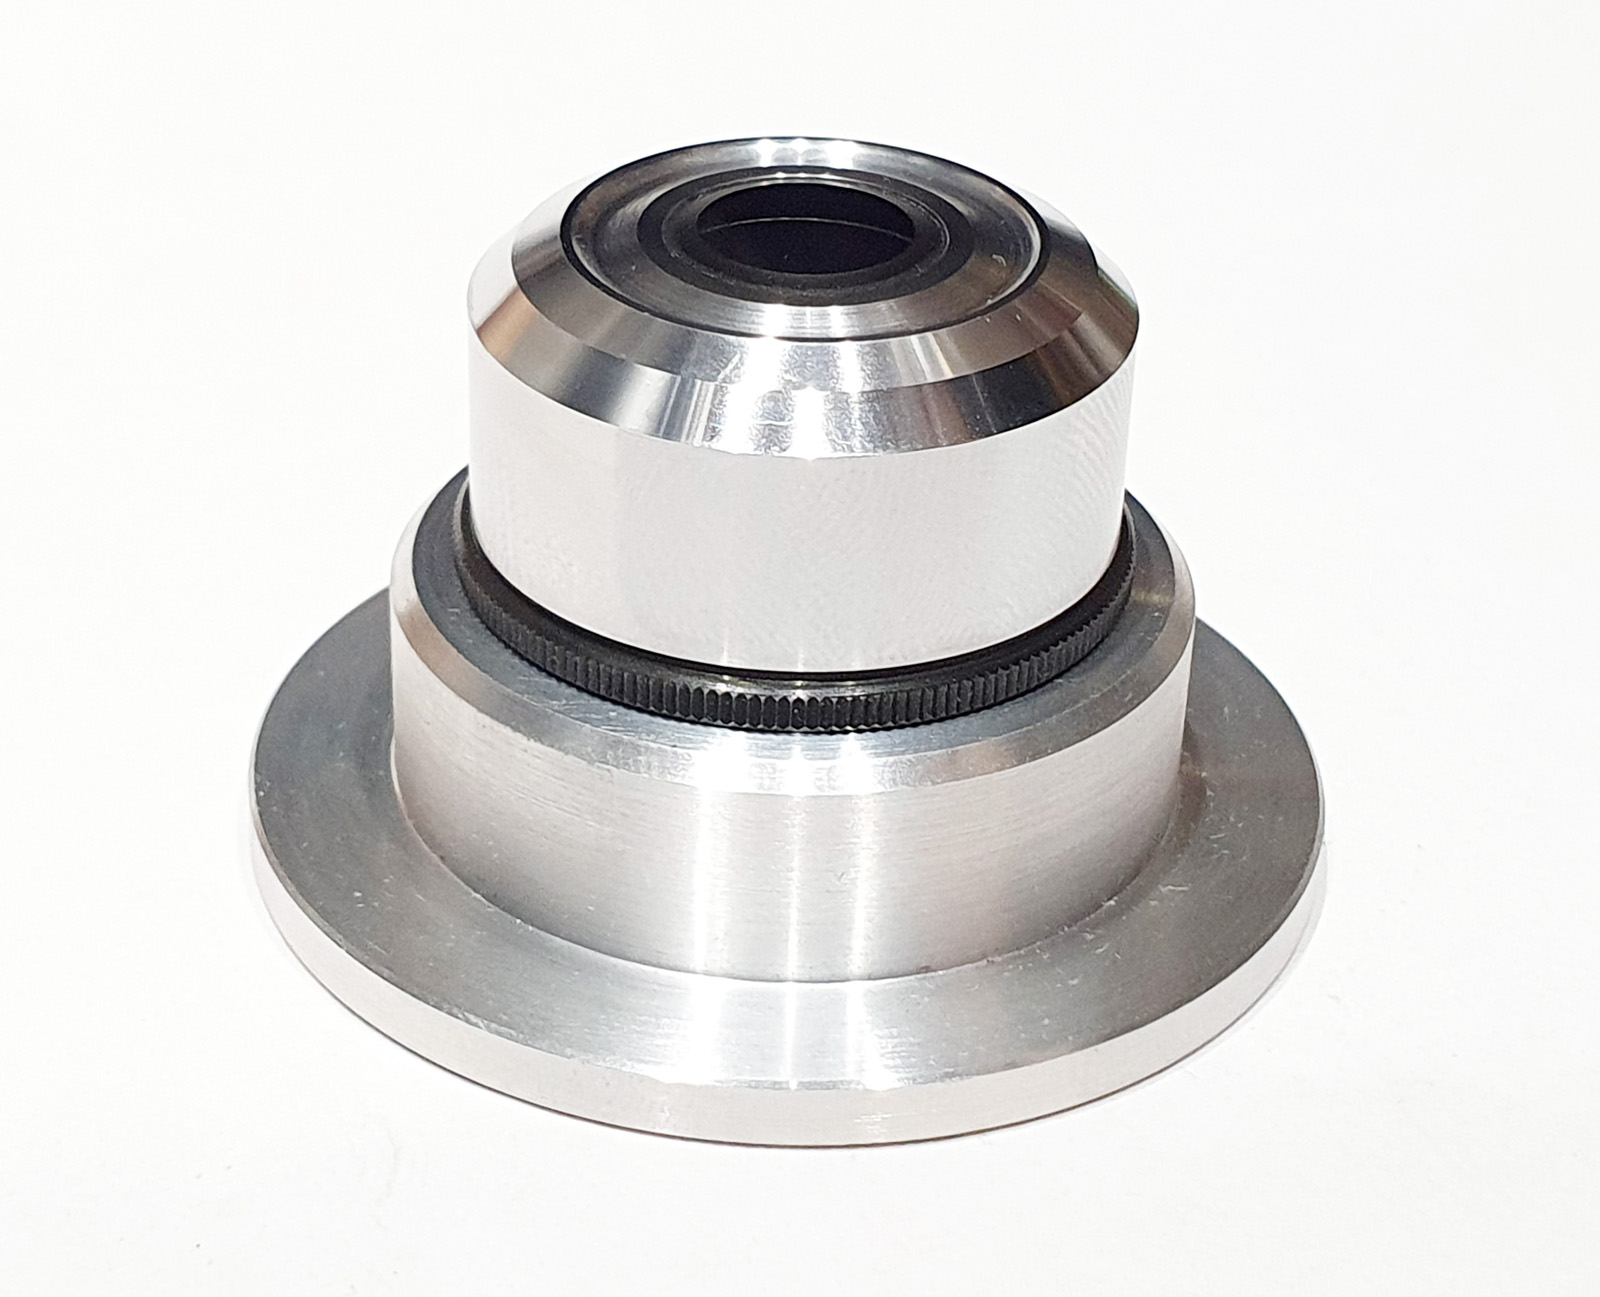
A few weeks back I bit the bullet and contacted a machinist I have used before – Machined Precision Components Ltd, based in Norfolk, UK – to make me some adapters to allow different condensers to be mounted on my Olympus BHB. The first one I’ve got back is for a Reichert Neo 1.18/1.42 dark ground condenser. Here’s the condenser in its custom made mount (condenser at the top – black knurled section and above, mount at the bottom).
Reichert Neo 1.18/1.42 dark ground condenser in its custom mount
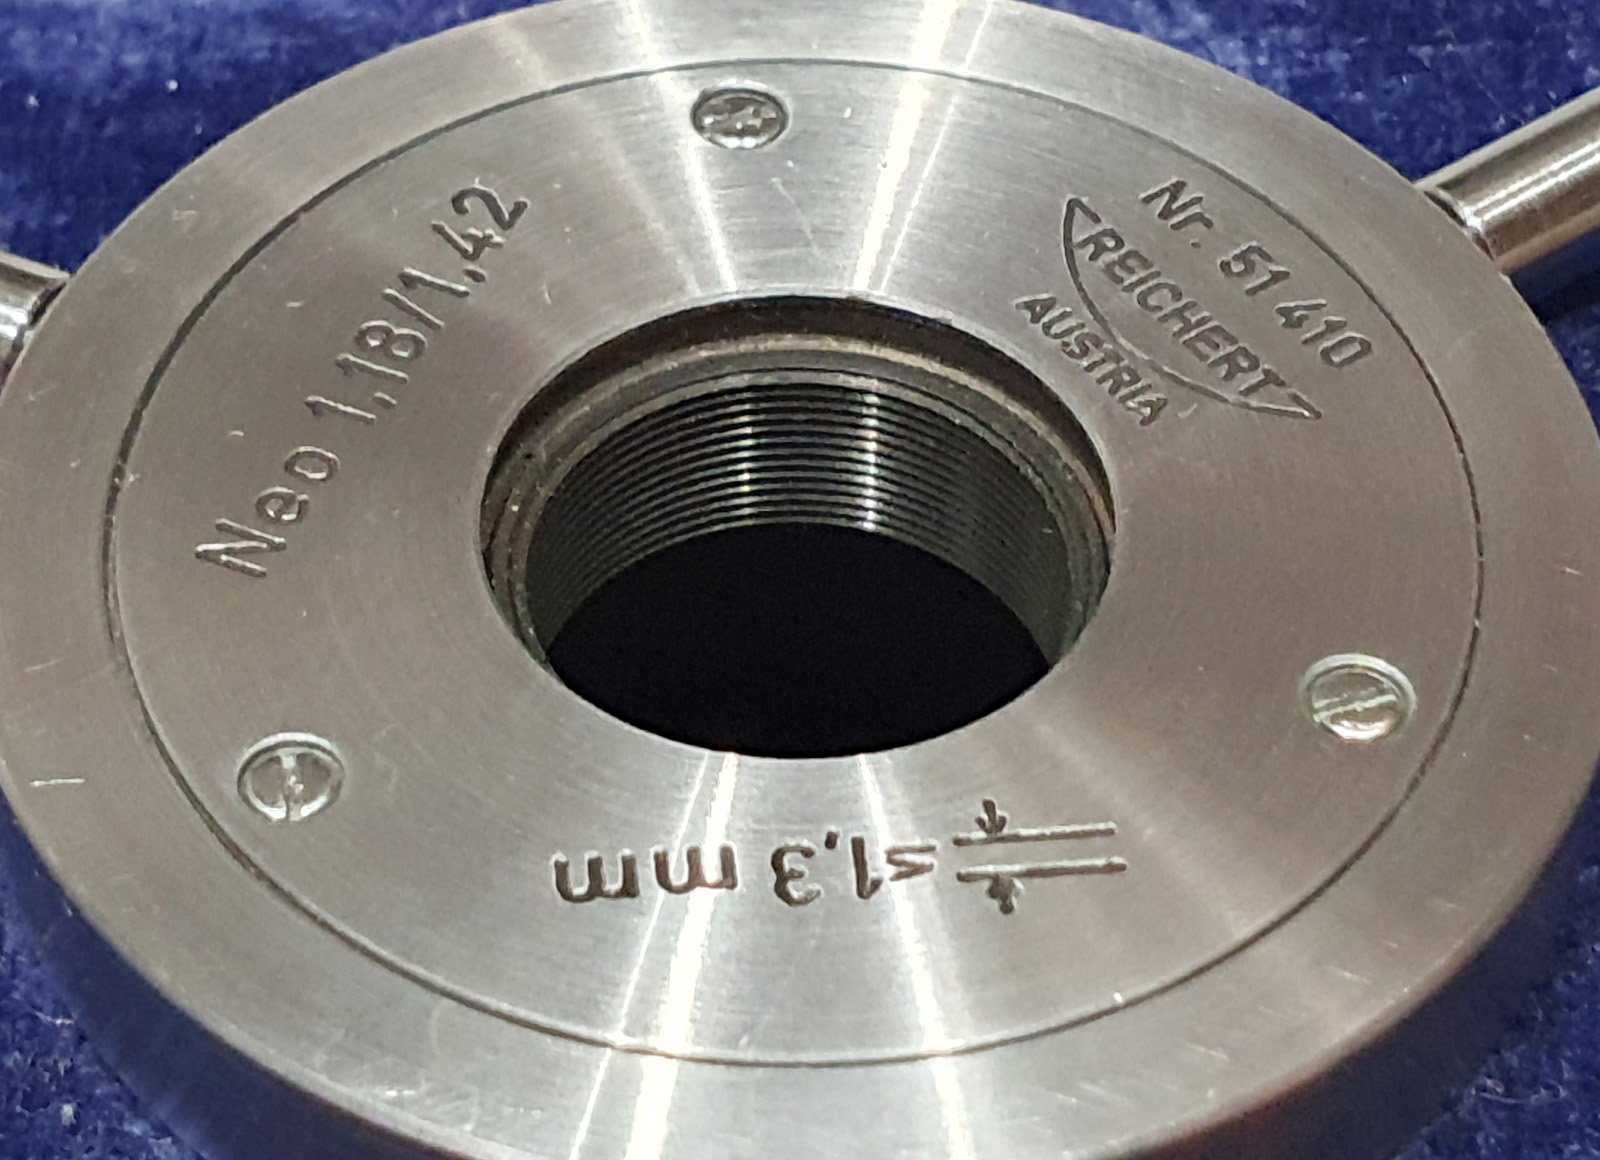
Here’s the information about the condenser, from the underside of its original Reichert mount.
Reichert Neo 1.18/1.42 condenser information
What a wonderfully made piece of equipment this condenser is, but then Reichert are well know for high quality microscope components. The custom made mount fits the condenser really well, and is a nice snug fit in the Olympus microscope. The condenser was oiled to the underside of the W.A. Firth slide, and other than that the same setup was used as for the image above (7 images were used for the stack was used this time) to produce a dark ground image shown below.
W.A. Firth slide with 3 examples of Actinocyclus ehrenbergii, 20x objective, Reichert Neo dark ground condenser
The Reichert Neo dark ground condenser produced a really nice dark ground image, which did need a bit of tidying up – a few bright spots in the background, probably from dust on the slide, and a bit of haloing around the bright diatoms (not unexpected). While perhaps not obvious on the images here the dark ground image looks be slightly lower resolution than the oblique illumination image. It is commonly thought that dark ground imaging is a way of getting higher resolution, however as I understand it is more of an ‘apparent increase’ in resolution as a result of improved contrast making things more easy to see. In the oblique illuminated image contrast is already very good, hence the dark ground image actually looks a little softer in comparison.
As a practical man I like to make my own equipment whenever I can, but not having a lathe (or at the moment, the skill to use one) finding a good machinist is a key part of my research. I’d like to thank Machined Precision Components for putting up with my complex demands, and less than perfect sketches when I send through requests, and I look forward to reporting back on the other items that are being made.
As always, thanks for reading, and if you’d like to know more about my work, I can be reached here.
Those that know me, know I have built myself a UV capable microscope primarily for imaging sunscreens at 365nm and 313nm. I also enjoy imaging other things and diatoms are great for UV imaging as the achievable resolution for a given setup improves as the wavelength decreases. However there can be issues with UV imaging – glass absorbs short wavelength UV, so optics and slides need to be made of quartz or fused silica when going deeper into the UV. Normal slide mountants absorb short wavelength UV, so things like glycerin need to be used. UV dedicated objectives tend to need non standard thickness coverslips, which can be expensive and awkward for getting slides made up. However there is a bit of a middle ground – imaging slightly into the UV at 365nm means that often fairly conventional microscope optics can be used, and normal slides are usable (depending on the mountants). In today’s post I return to a favourite of mine – the diatom Amphitpleura pellucida – which has particularly small features, and is a real challenge to image with optical microscopes.
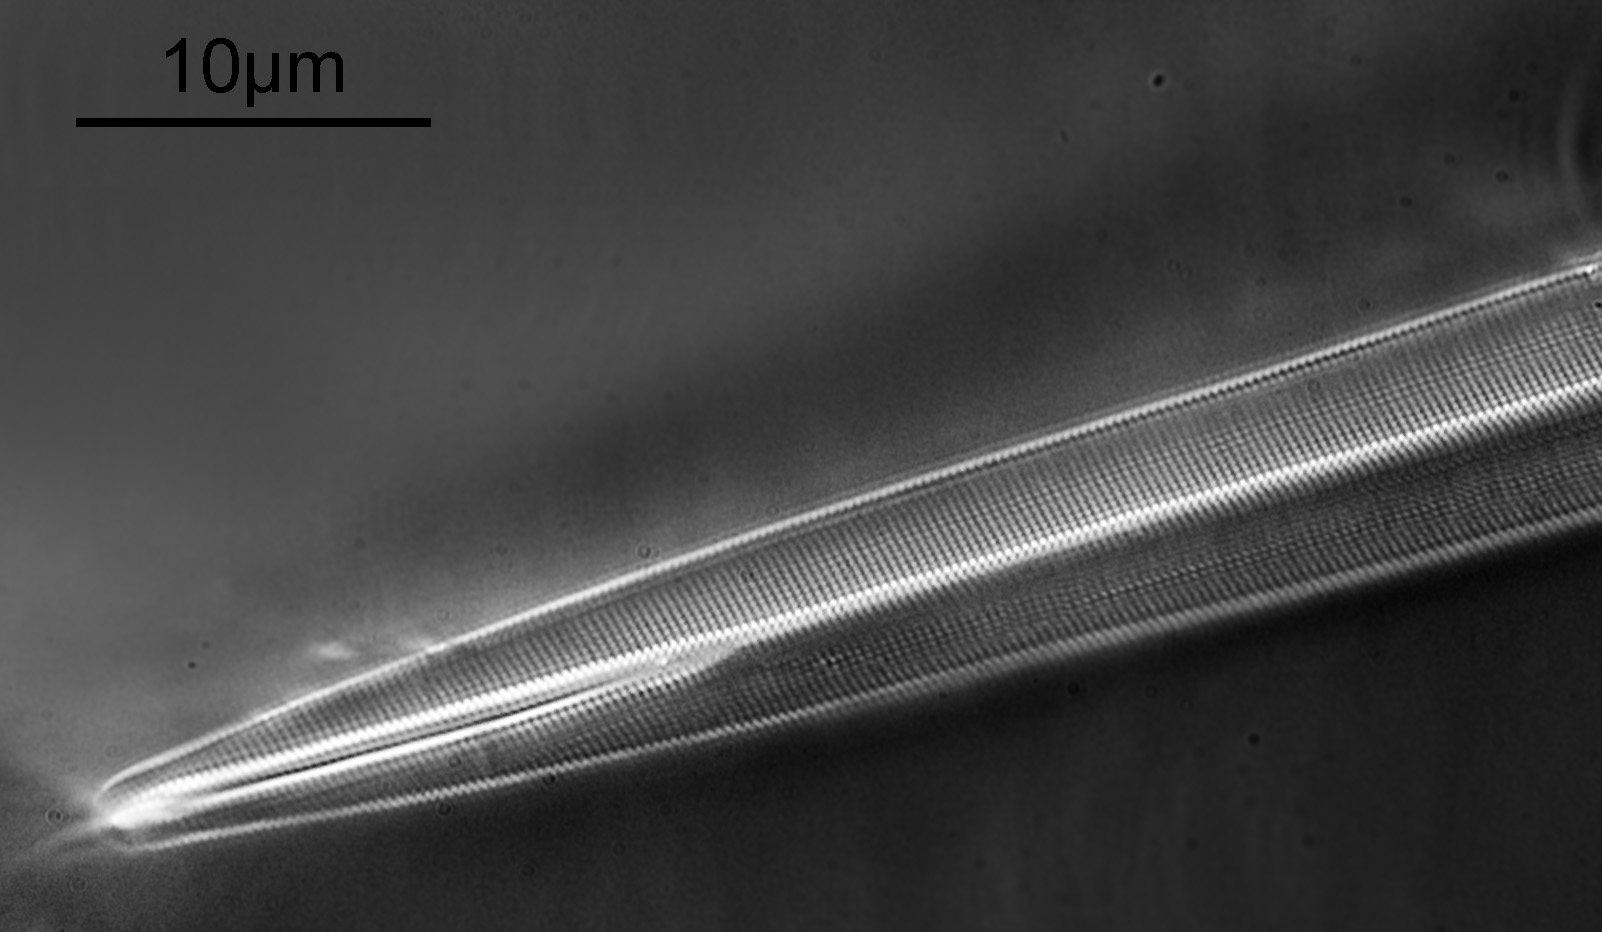
The microscope I used was my modified Olympus BHB. The objective was a 63x Leitz Pl Apo NA 1.4 (oil immersion). The condenser a Watson Quartz Cassegrain. The light source a 365nm LED torch. A 2.5x Nikon CF photoeyepiece was used, and 2x 365nm, 10nm bandpass, Edmund Optics filters were stacked together to filter the light going to the camera. The camera was a monochrome converted Nikon d850 by MaxMax. No stacking at different focus depths was used, however 10 images were averaged within the d850 using its own handy multiple exposure feature. The image is cropped from the full sized one, but is shown at original pixel resolution. Finally after all that, here’s the image showing one end of an A. pellucida diatom.
Amphipleura pellucida, imaging using 365nm light
A. pellucida is a challenging diatom to image as the striations and puncta are so close together (distances of about 200nm apart) with the striations being slightly further apart than the puncta. Usually a combination of oblique and polarized light are needed to resolve both striations and puncta when using visible light. I used a standard (although very high quality), non UV specific objective, a 63x Leitz Pl Apo NA 1.4 in combination with a Watson Quartz Cassegrain dark field condenser which I currently have access to. This condenser has a high NA of about 1.4, and when used in combination with the high NA Leitz objective gives me a circular oblique illumination (not quite full dark field). I did not use any polarization, and just used a cheapy eBay 365nm torch as the light source. The end result was clearly defined striations and puncta and I was able to get some measurements on the distances between them using ImageJ. Firstly, the striae.
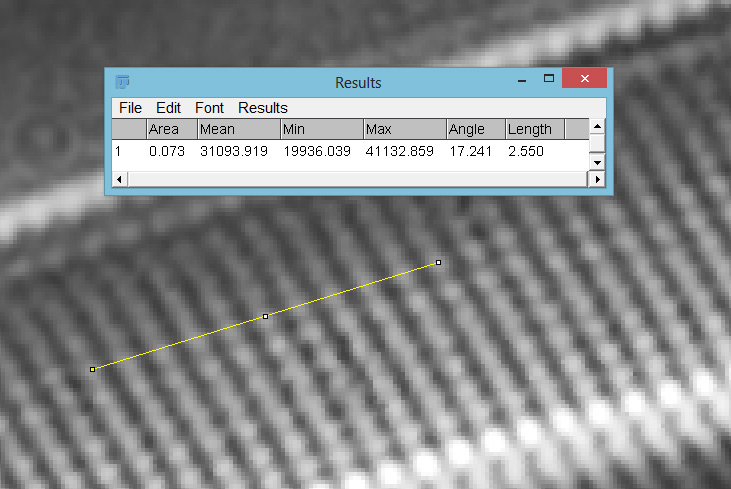
Striae measurements
Between 10 striae there was 2.55 microns, corresponding to a 255 nm distance between each one.
Next the puncta.
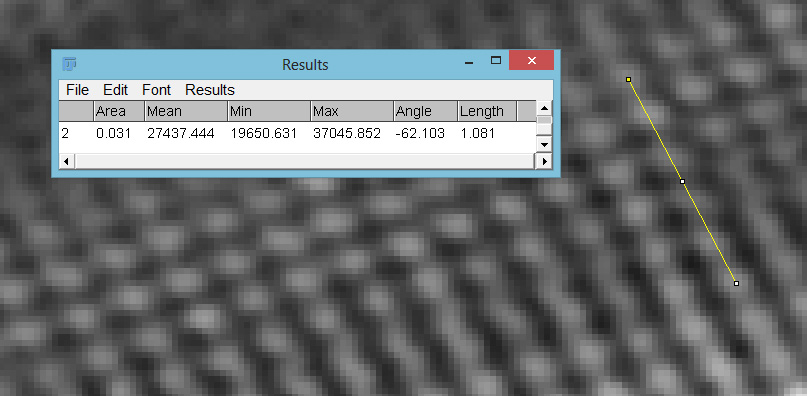
Puncta measurement
Between 5 punctae there was a distance of 1.081 microns, corresponding to a distance of 216 nm between each one (given how narrow the diatom is I wasn’t able to get a reliable reading between 10 like for the striae, hence I just did 5). So a striae spacing of 255 nm and a puncta spacing of 216 nm, which is in the same ball park as the values I have seen in the literature for this diatom. Let than sink in for a moment, the features in the image above are just over 200 nm apart, that is 250x less than the diameter of a typical human hair (50 microns), 40x less than the diameter of a red blood cell (8 microns), and more like the size of a single virus.
The camera used was my monochrome converted Nikon d850, and I did do something more than usual when capturing the image. The image was taken as a 10 shot average stack done within the camera, where 10 images are combined together and averaged to produce the final image. This was done to reduce noise (even though ISO100 was used, exposure times were about 1s) and to help define the small features in the diatom. I saved it as a RAW file (NEF format). This was then put into Monochrome to DNG which can take a RAW file from a monochrome converted camera and process it to take into account the de-bayered sensor, the results being an improvement in resolution vs. not doing this. Different people claim different amounts of improvement but the effects are certainly noticeable here as I also tried processing the image without do this. After this the DNG file went into Darktable and processed as I would with a normal RAW file, before being exported as a 16 bit TIFF file. This then went into Photoshop for final cropping and processing. All in all it took about 45mins to do this processing, and there was the benefit here of not working with stacking images which can be very time consuming for my old PC.
I have tried imaging A. pellucida before with UV (for example here) and have never been really happy with the results. The image shared here today is the best I have managed to get of it so far, and I love the 3D effect the lighting gave to it combined with the fantastic resolution. What amazed me more though was actually I didn’t use that much in terms of ‘dedicated UV’ optics for this. The objective and the slide are standard not UV specific, as is the photoeyepiece. The condenser is, but there are options for high NA dark field condensers which have reasonable transmission at 365nm. The camera obviously need modifying, and the bandpass filters need buying, but the light source cost me about £30 on eBay.
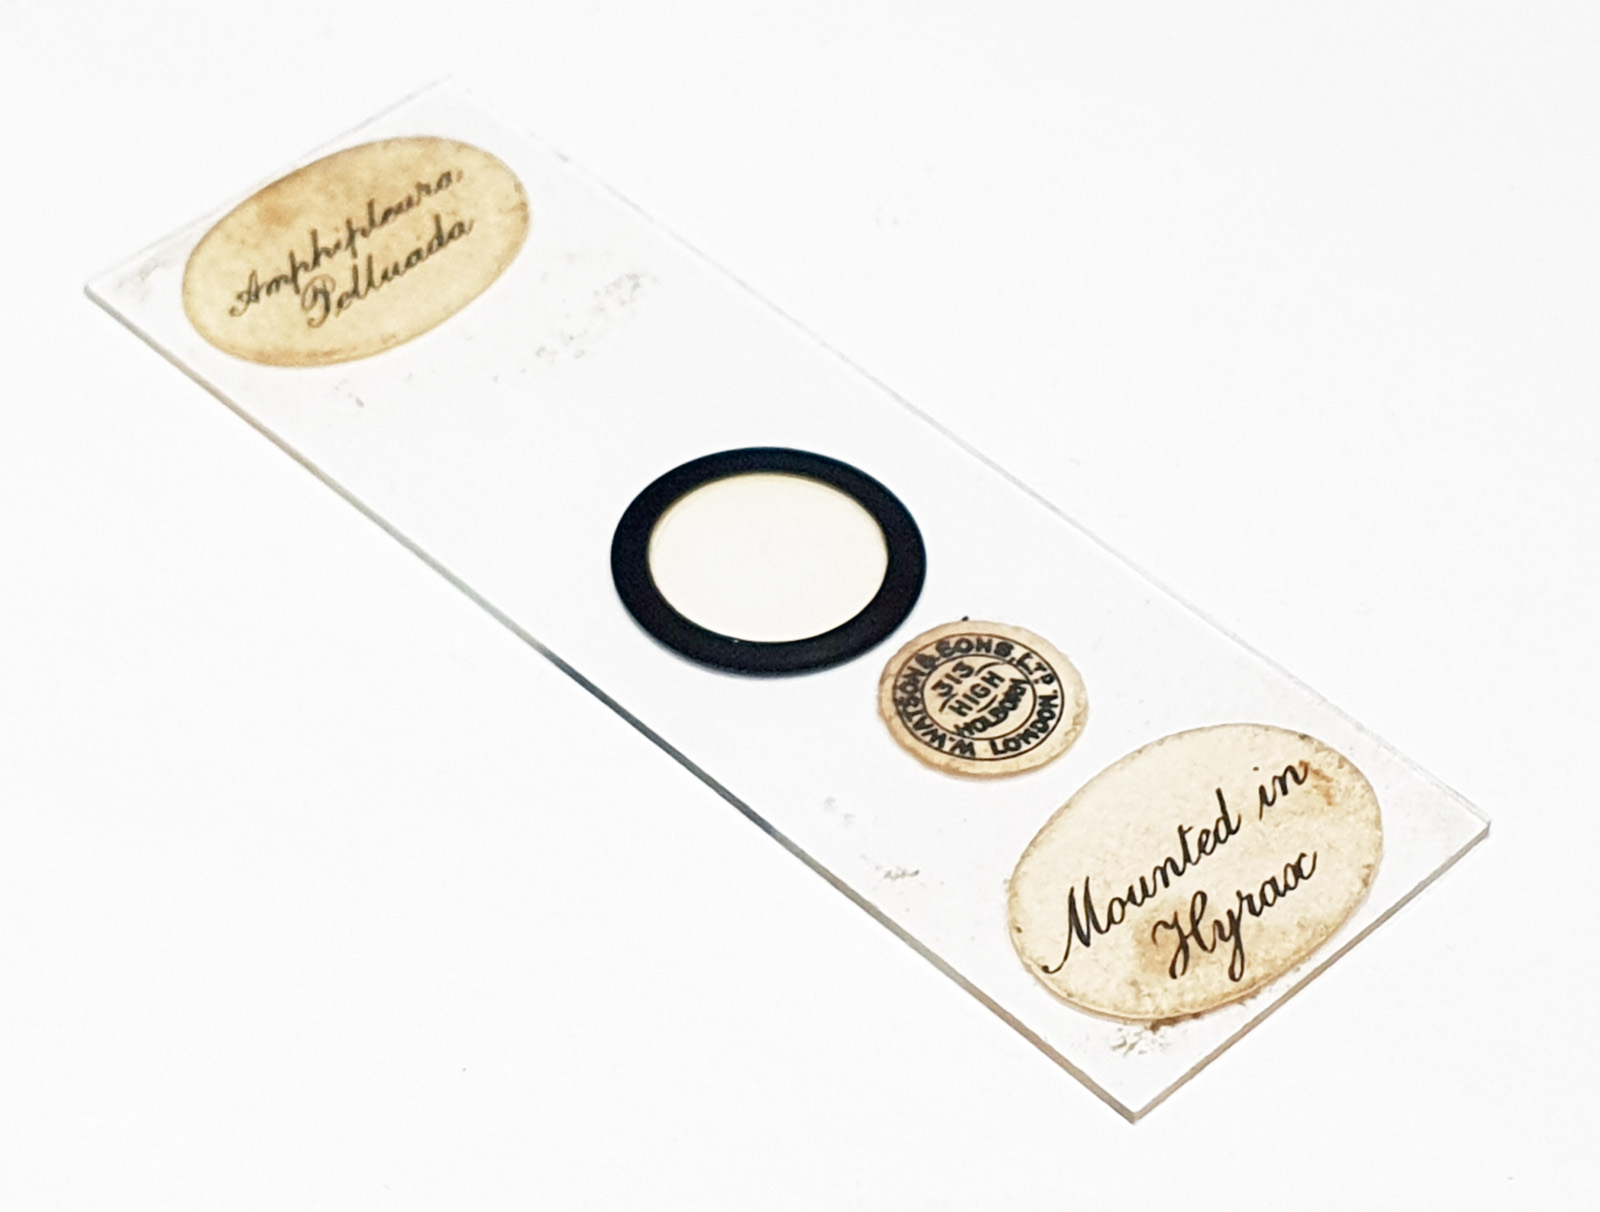
Before I go, here is the slide.
A. pellucida slide by Watson
It’s a Watson slide, and is a strew of diatoms mounted in Hyrax. As always thanks for reading, and if you’d like to know more about my work, I can be reached here.
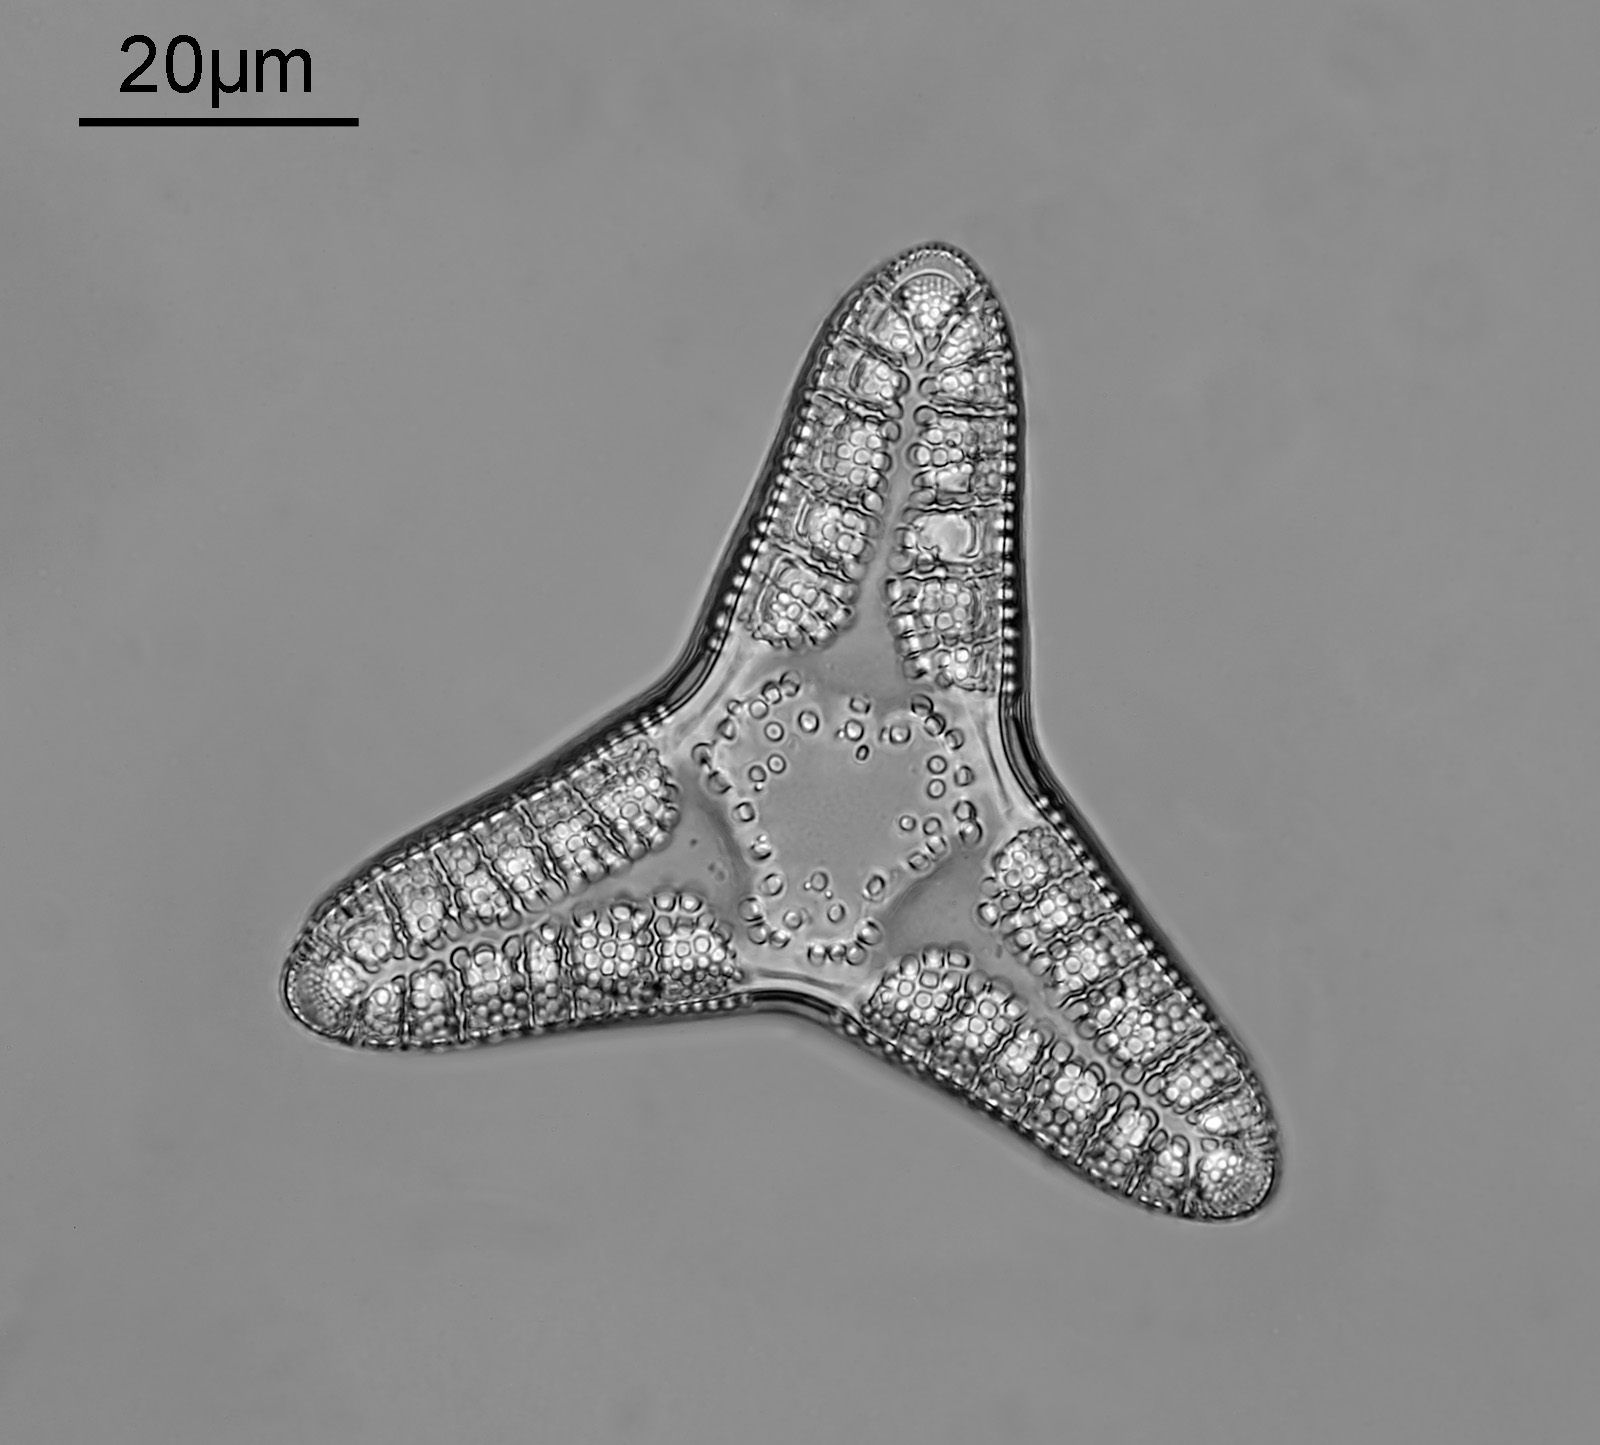
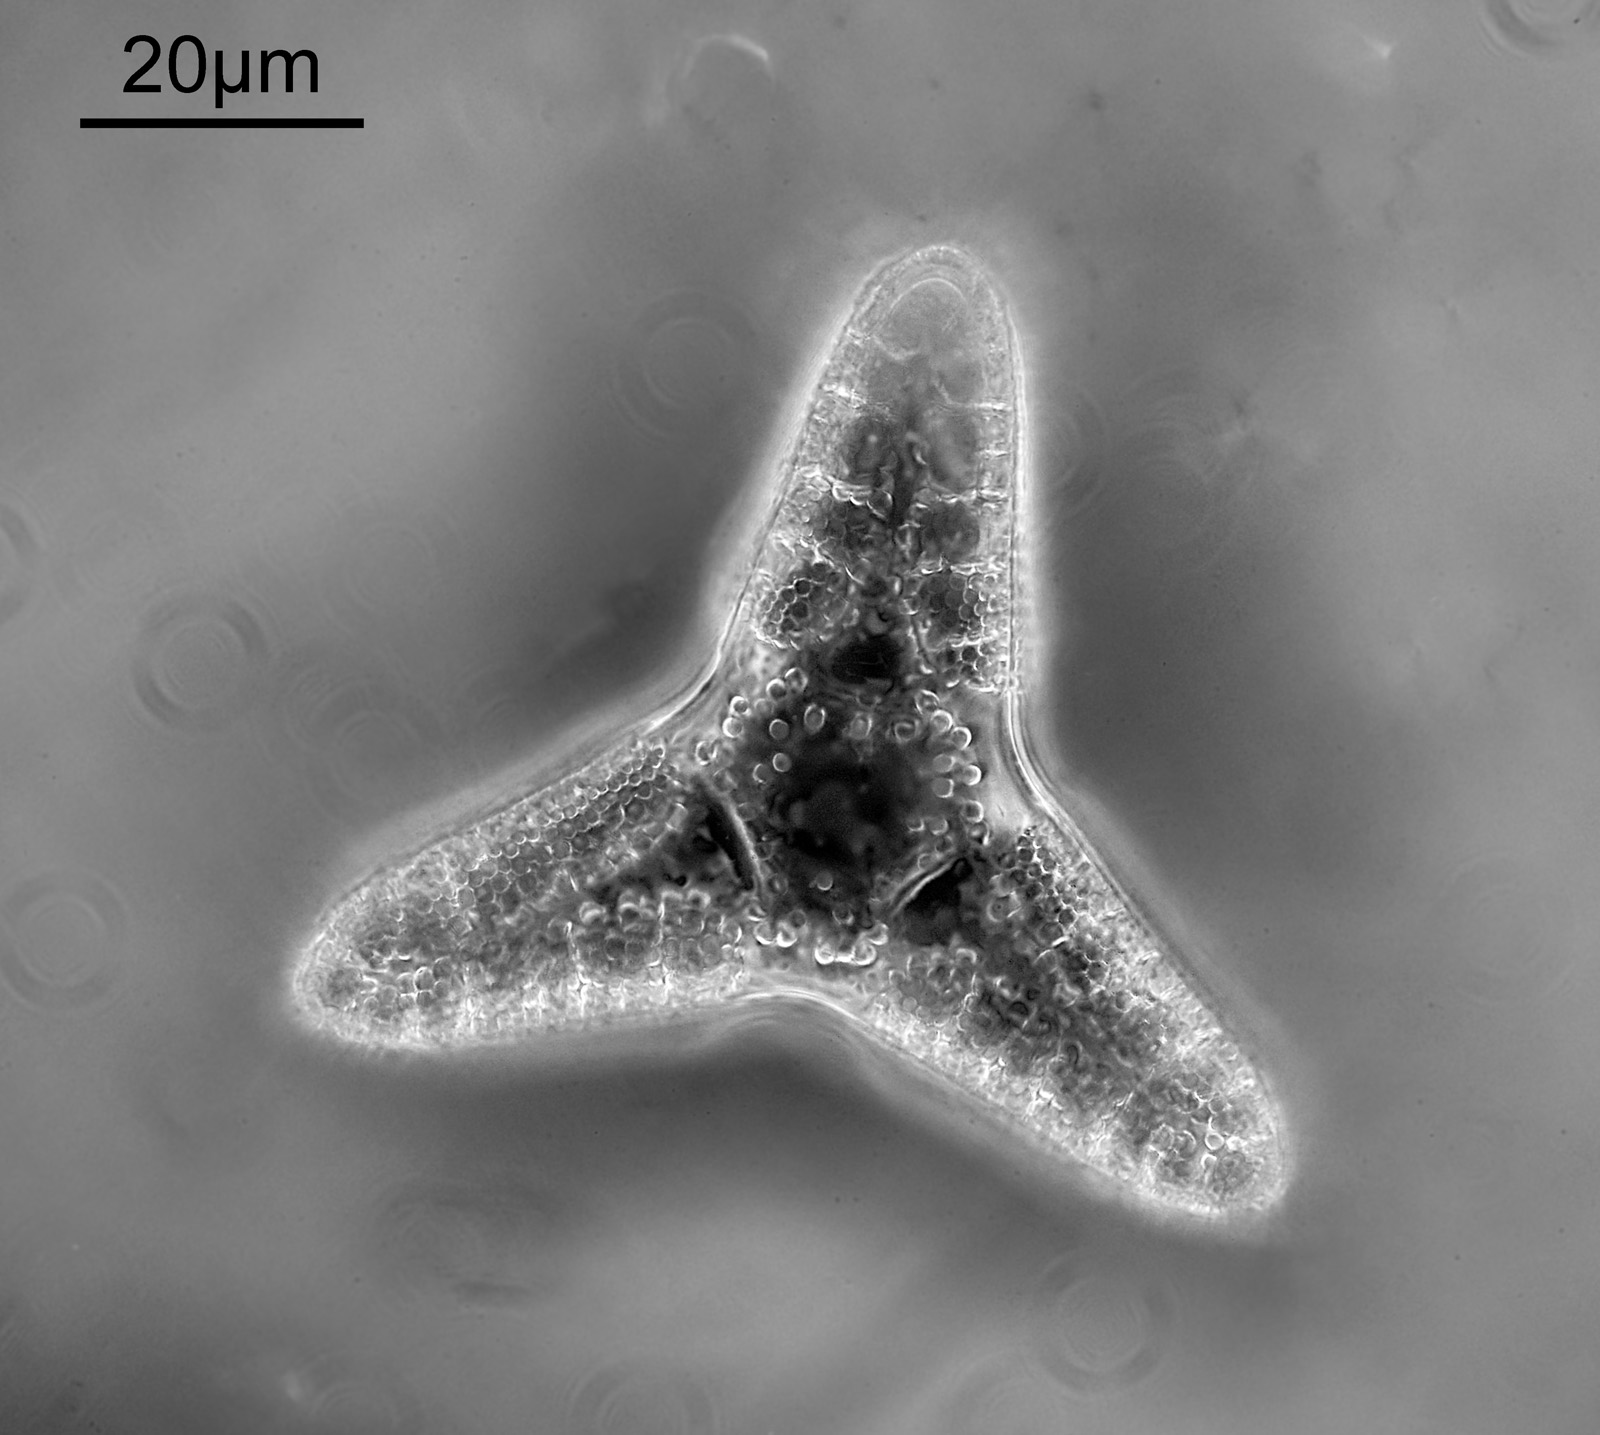
The microscope images today come from a Triceratium nitescens slide by the maker R.I. Firth. The slide is marked as ‘Barbados’ and ‘Very rare’, is mounted in Styrax and was made in 1943. There is a single example of the diatom on the slide. The microscope used was my modified Olympus BHB. The condenser was an Olympus Aplanat Achromat, set to slightly oblique and oiled to the underside of the slide. The objective was a 63x Leitz Pl Apo NA 1.40, oiled to the top of the slide. The photoeyepiece was a 2.5x Nikon CF. Lighting was 450nm LED (white LED source with a Thorlabs 450nm, 40nm bandpass filter). 17 images were stacked in Zerene stacker. Camera was a monochrome converted Nikon d850 done by MaxMax. The image has been reduced in resolution for sharing here, although a crop of the main image at original resolution is also shared. Here’s the final image.
Triceratium nitescens diatom from R.I. Firth slide
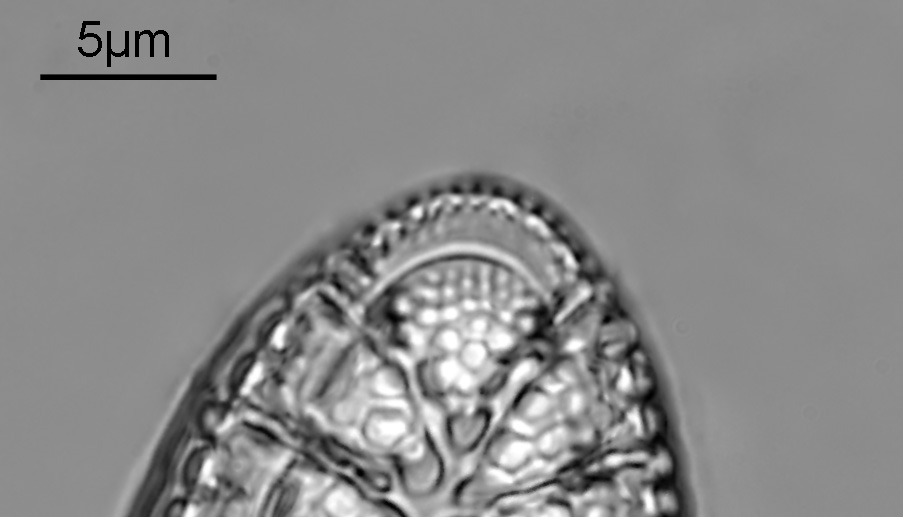
And a crop of the image shown at original pixel resolution.
Triceratium nitescens diatom, crop at original resolution
A friend asked me about why I do stacking, and it reminded me that I have written something which briefly covered the reason before (see here). Essentially though, at high magnifications with high NA objectives, the depth of field of a single image is tiny – way less than a micron in the setup used here – making it impossible to get the whole diatom in focus in a single photograph. So I take multiple photos, moving the stage very slightly between each one, and then stack them together using software called Zerene which takes the in focus parts of each image and combines them. Live view on the camera is very helpful here, as I can see what is in focus with each image and make the movements accordingly to capture everything. After stacking, the image still need some cleaning up which I do in Photoshop – making the background smoother, and removing artifacts from dirt on the sensor coverglass. Microscopy will reveal dirt that you never knew was there before in normal photography – the shorter the wavelength of light used, and higher the objective NA, the smaller the features that will be revealed and will need editing out. I tend to capture my images in the camera as Jpeg files, and after stacking output the stack a 16 bit Tiff for subsequent work (outputting the stack as a Jpeg gave me more artifacts especially in the background of the image). Ideally I would do everything as Tiff files, but my computer is old and stacking Jpeg files is a tough enough job for it.
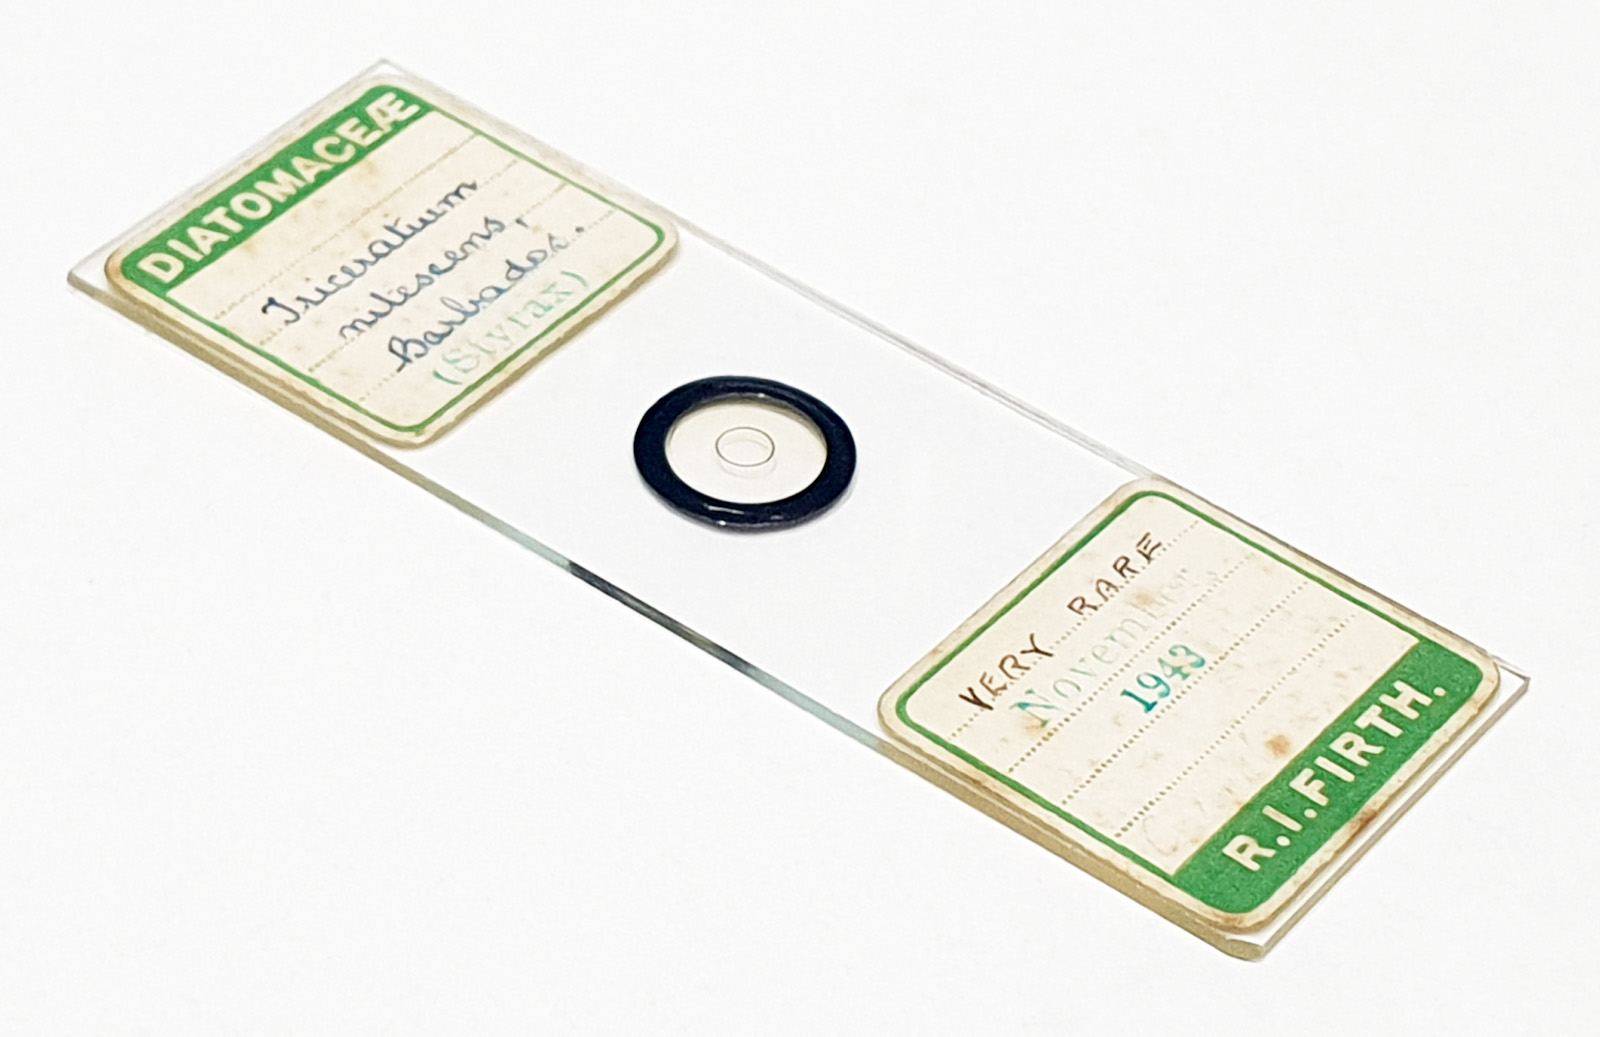
Before I go to cover some UV work I did with this slide, here is the slide itself.
R.I. Firth slide of Triceratium nitescens
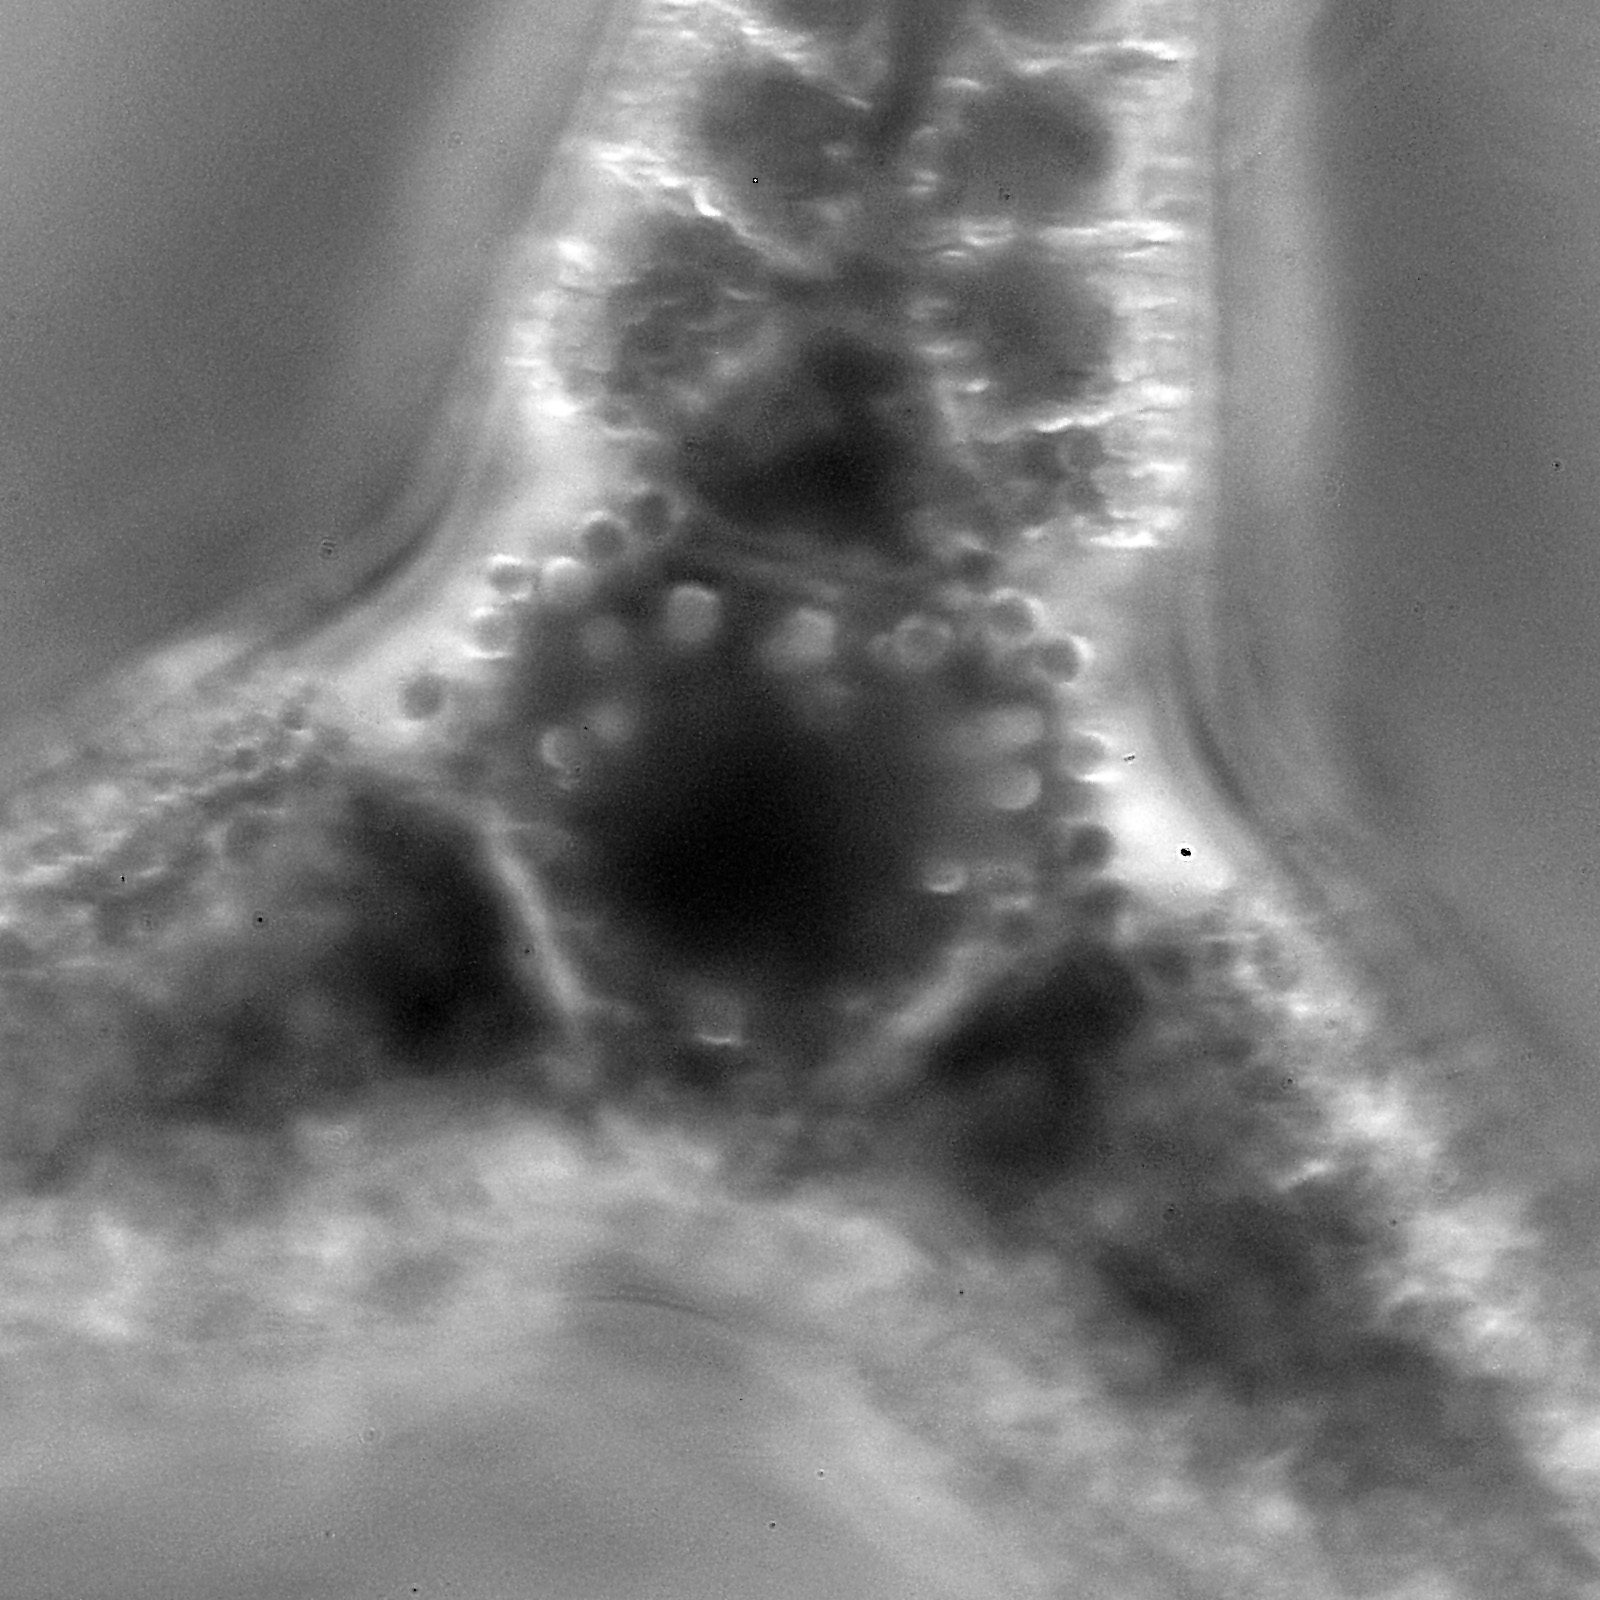
While the slide was on the microscope, I also did some experiments with 365nm UV (the camera is monochrome converted and sensitive to UV, visible and IR light). Keeping the same objective, the condenser was swapped for a Watson Quartz Cassegrain (which I just realised I’ve not written about before so must rectify that), the light source was a 365nm LED torch, and I filtered the light going to the camera by a stack of 2 Edmund Optics 365nm, 10nm bandpass filters. Here’s a photo of the diatom made up from a stack of 4 images with this setup.
Triceratium nitescens diatom, imaged using 365nm light with a Watson Quartz Cassegrain condenser
The effect wasn’t quite what I was after, but I think it still looks nice and shows the features in a different way. Given the high NA of the objective the effect is produce circular oblique lighting when using the Watson Quartz Cassegrain condenser.
Before I go, one last thing to mention, when dealing with what is effectively extreme macro imaging on the microscope, the settings under which the images are taken can have a huge impact on the quality of the final photograph. I use 3s exposure delay and electronic front curtain shutter, but found out something yesterday which is worth sharing. Initially I tried ‘S’ (Single shot) and the image was quite blurry. I changed to ‘Mup’ (Mirror up) and the image was much sharper. Comparison below using 365nm LED light, crops shown at original pixel resolution.
Dial in ‘S’ positionDial in ‘Mup’ position
I tried this a few times, and got the same result each time, so will be using Mup from now on with the d850. I seem to recall Nikon changed how they deal with Mup with the d850 so it can now be used with live view unlike earlier Nikon cameras, so perhaps it is a d850 specific consideration.
Slightly longer post than usual today, but I thought it would be useful to cover off some other things in addition to showing the main image. As always, thanks for reading, and if you’d like to know more about my work I can be reached here.
It’s too warm today to spend much time on the microscope, but I wanted to share the results of a little experiment. Having recently discovered that the Leitz 100x Pl Apo objective had pretty good UV transmission at 365nm, I thought I would give the 63x NA 1.40 a go as well, in combination with a Watson Quartz Cassegrain dark ground condenser, with the idea being to produce a circular oblique illumination setup (due to the high NA of the objective). Here are the results of the initial test. A little less formal than usual, but something to be returned to later.
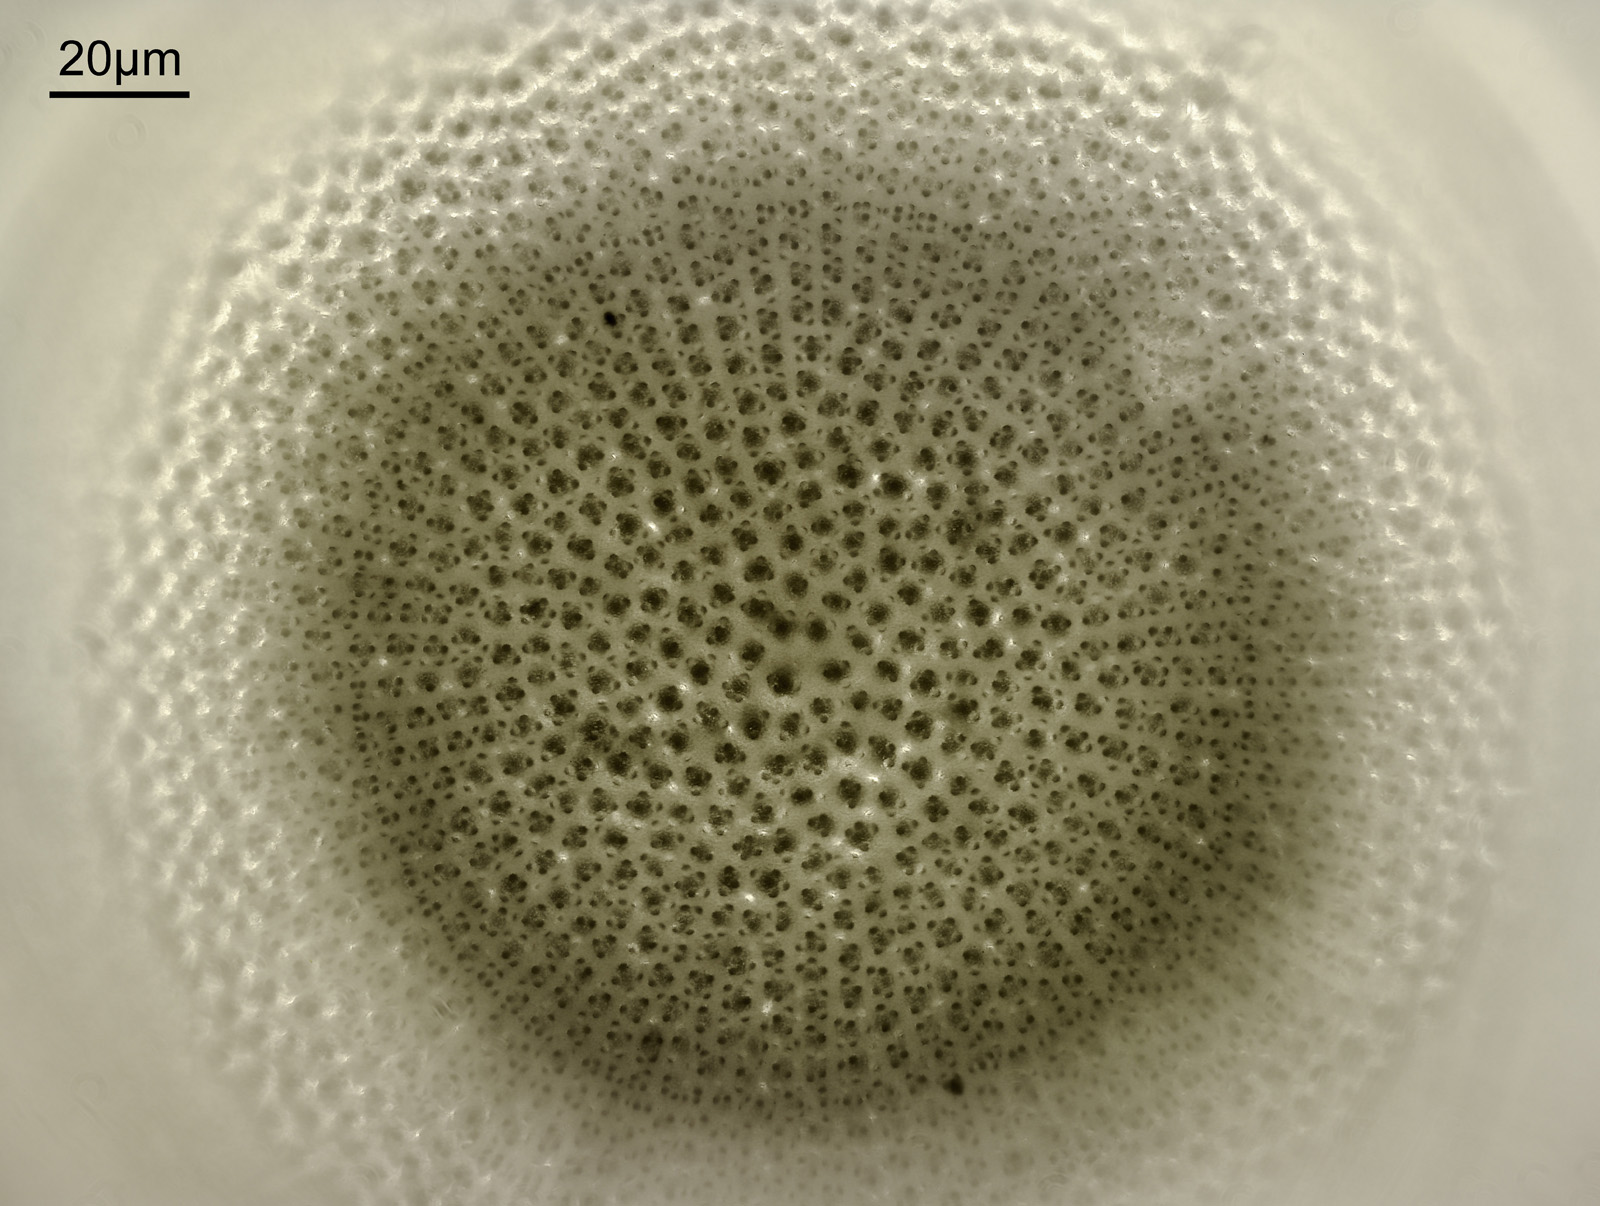
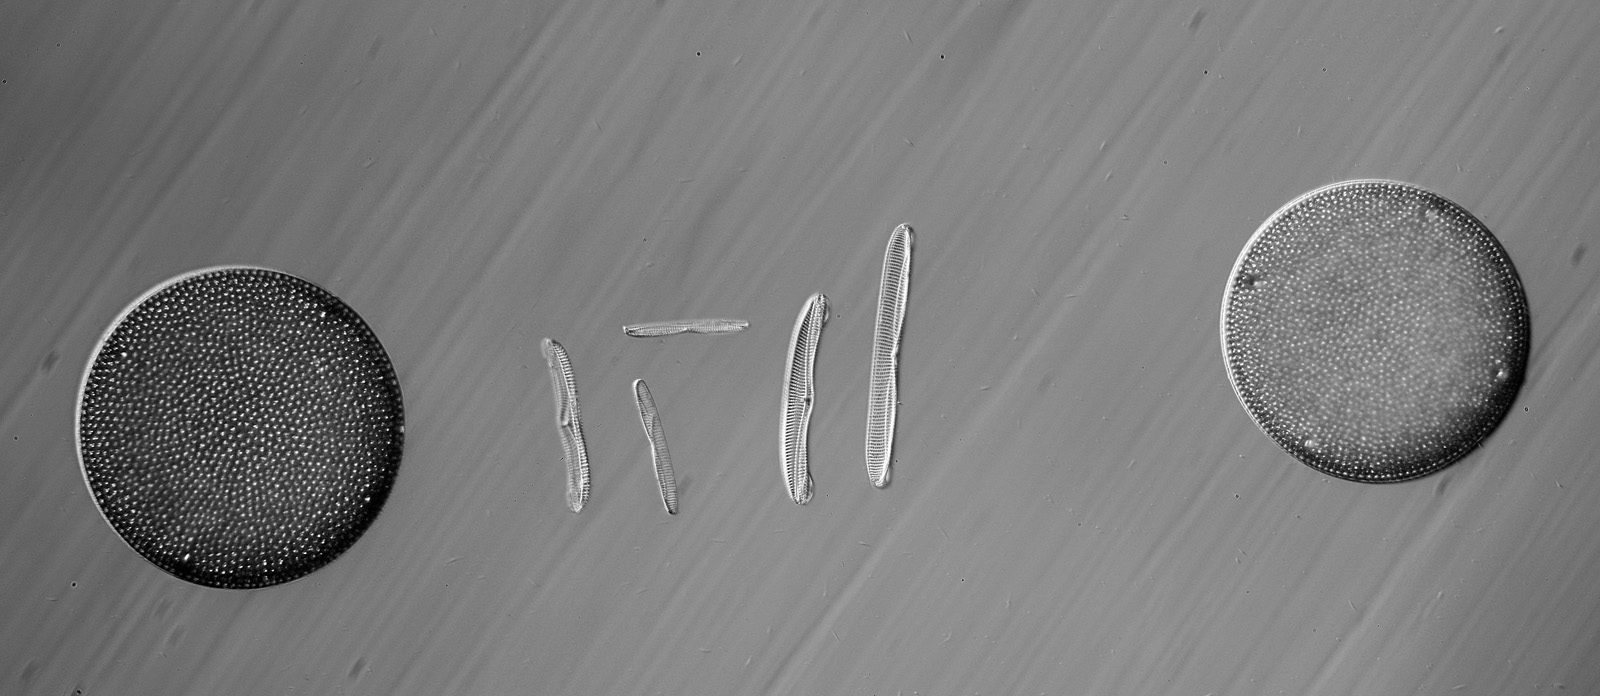
On the Thum slides, he used large disc shaped diatoms at either side of the main subject to help with locating for viewing. It is one of these disc shaped diatoms that is the subject today. Here’s a stack of 7x images taken using 365nm light on my Olympus BHB with the 63x Leitz Pl Apo NA 1.40 objective (resolution reduced for sharing here).
365nm light image of diatom from Thum slide
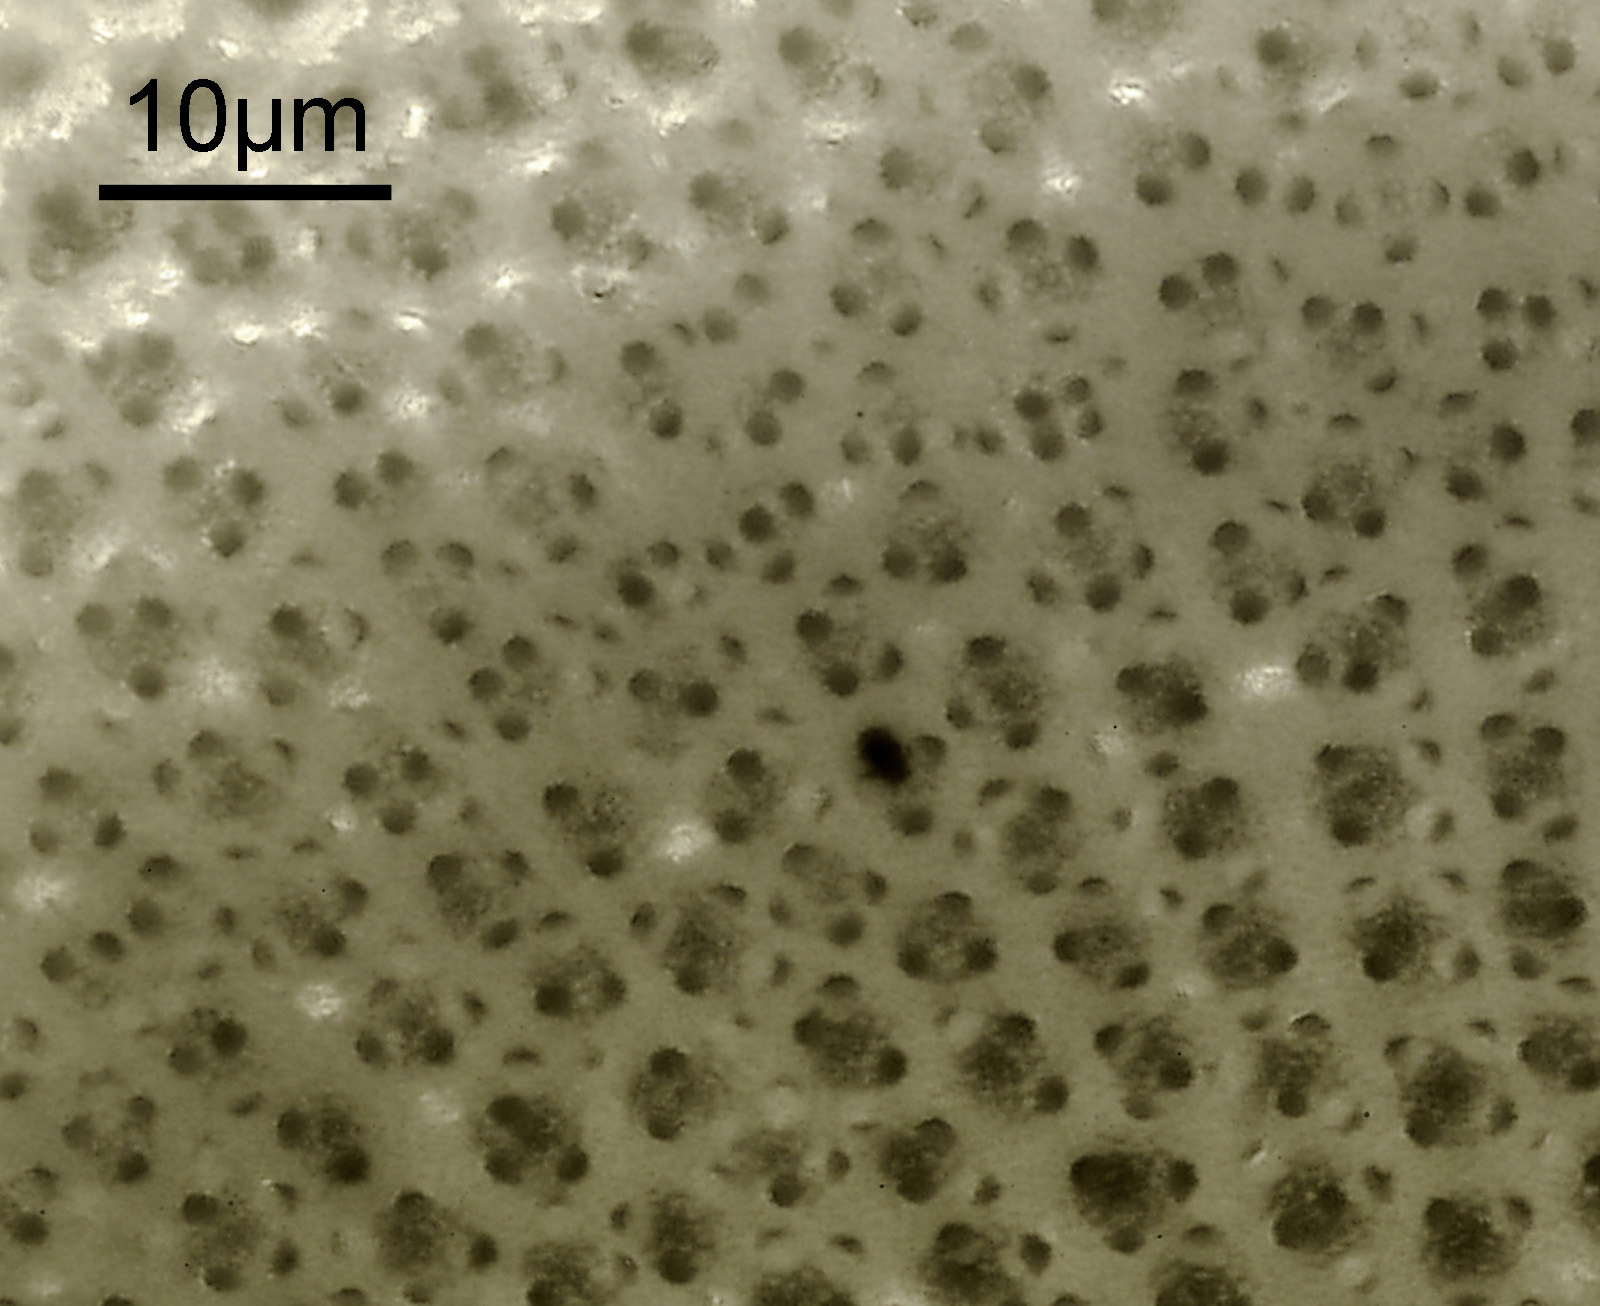
The lighting has produced a nice 3D effect (even though the condenser is a dark ground one, the high NA of the objective means the images isn’t dark ground). Here’s a crop at original pixel resolution.
Crop at original pixel resolution
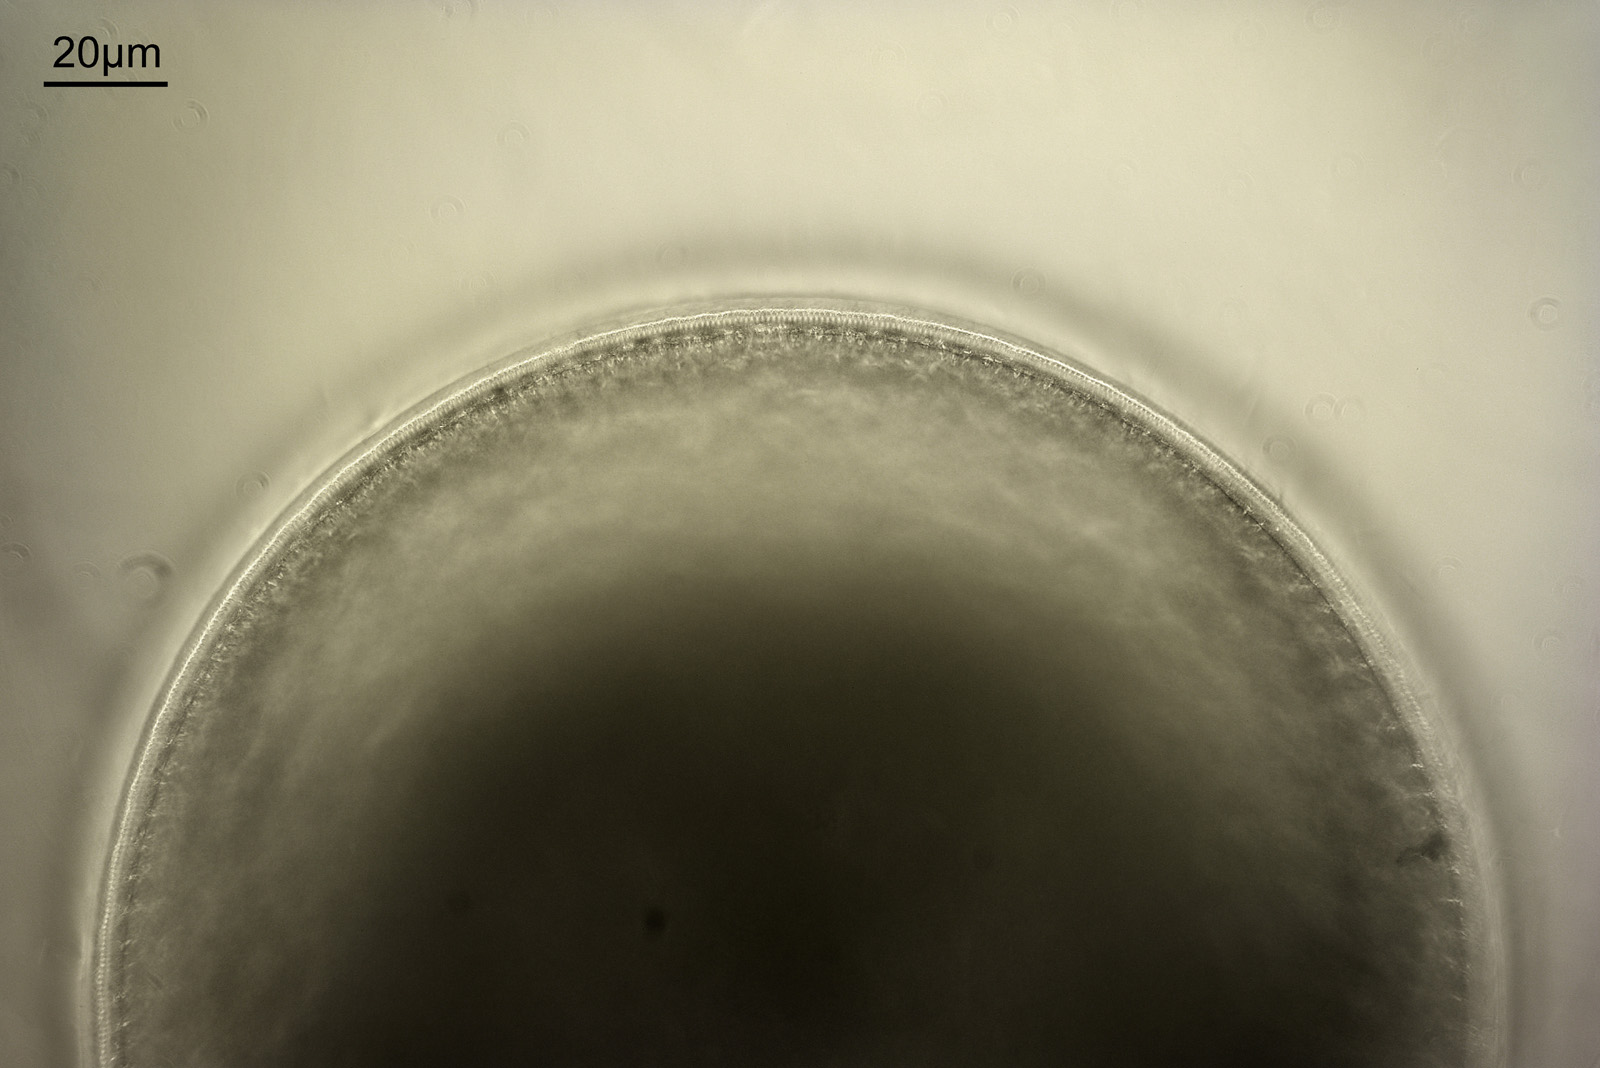
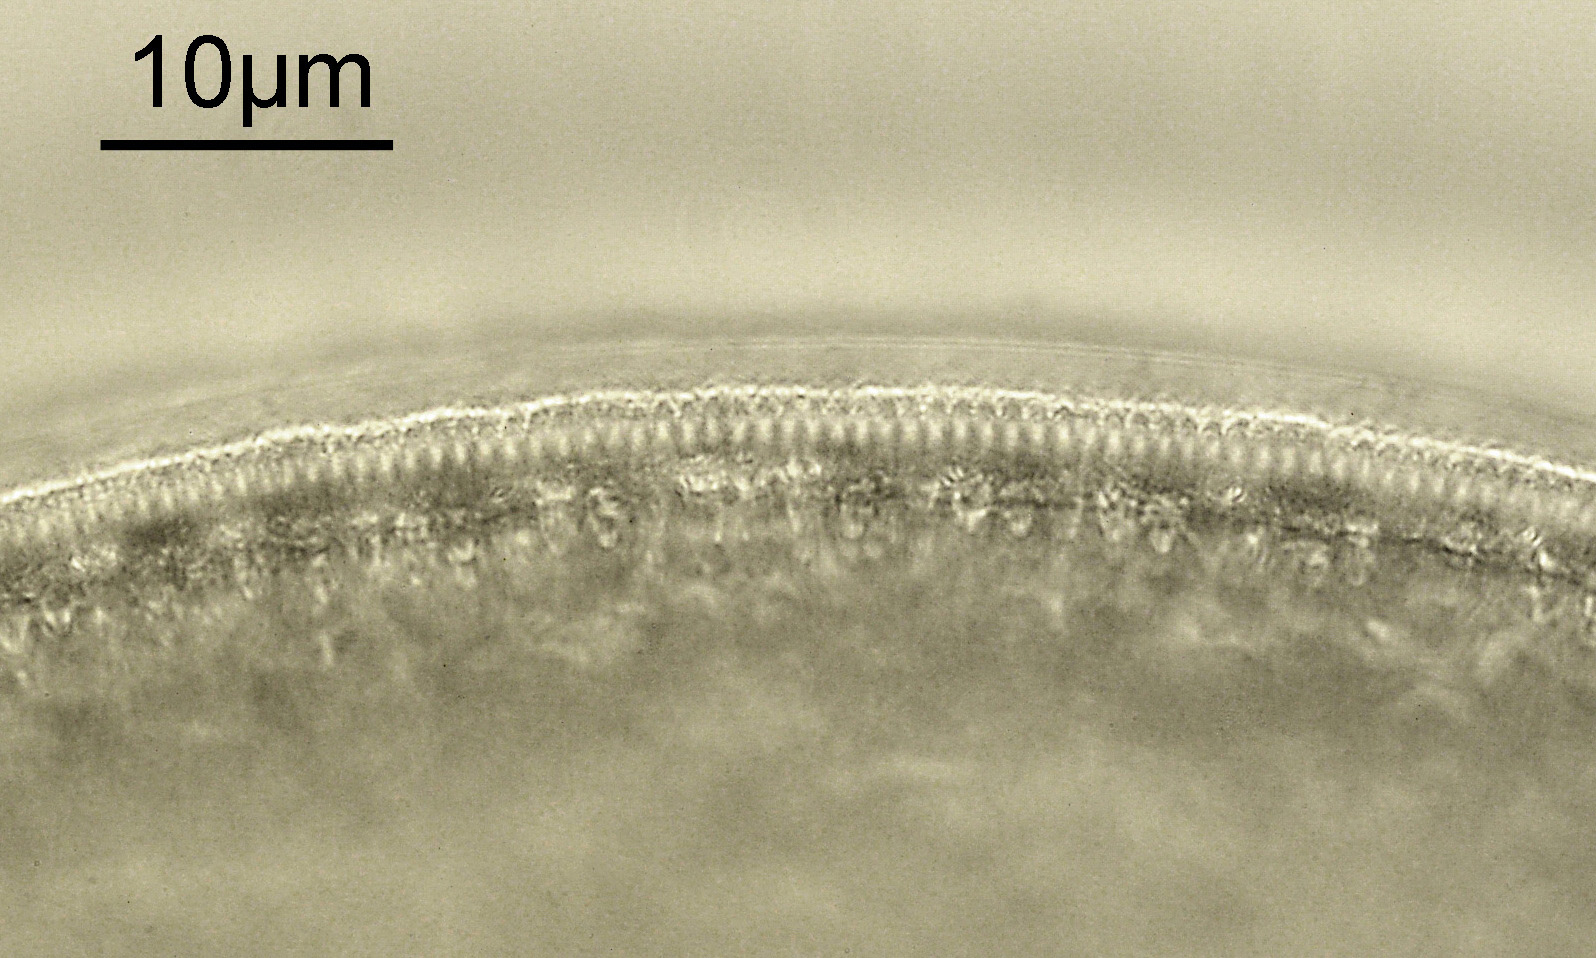
There is certainly lots of nice detail in the image. Refocusing on the edge of the diatom gave the following (single image, no stacking this time).
Edge of the diatom, full image
And again a crop of the image at original resolution.
Crop showing the edge of the diatom
I save my images as jpegs in the camera, and then if I am stacking use them to create a 16 bit TIFF file for further work. Interestingly the single image of the edge of the diatom shows a lot more artifacts (and was just processed as the jpeg) vs the stack even though everything was just saved a jpeg in the camera. I may try saving as BMP files in camera in future, especially when dealing with these UV images which show up all the small features and noise. The slide itself came from the Antiques Microscope ebay shop (see here), and here’s the full arrangement.
Full arrangement on the Thum slide
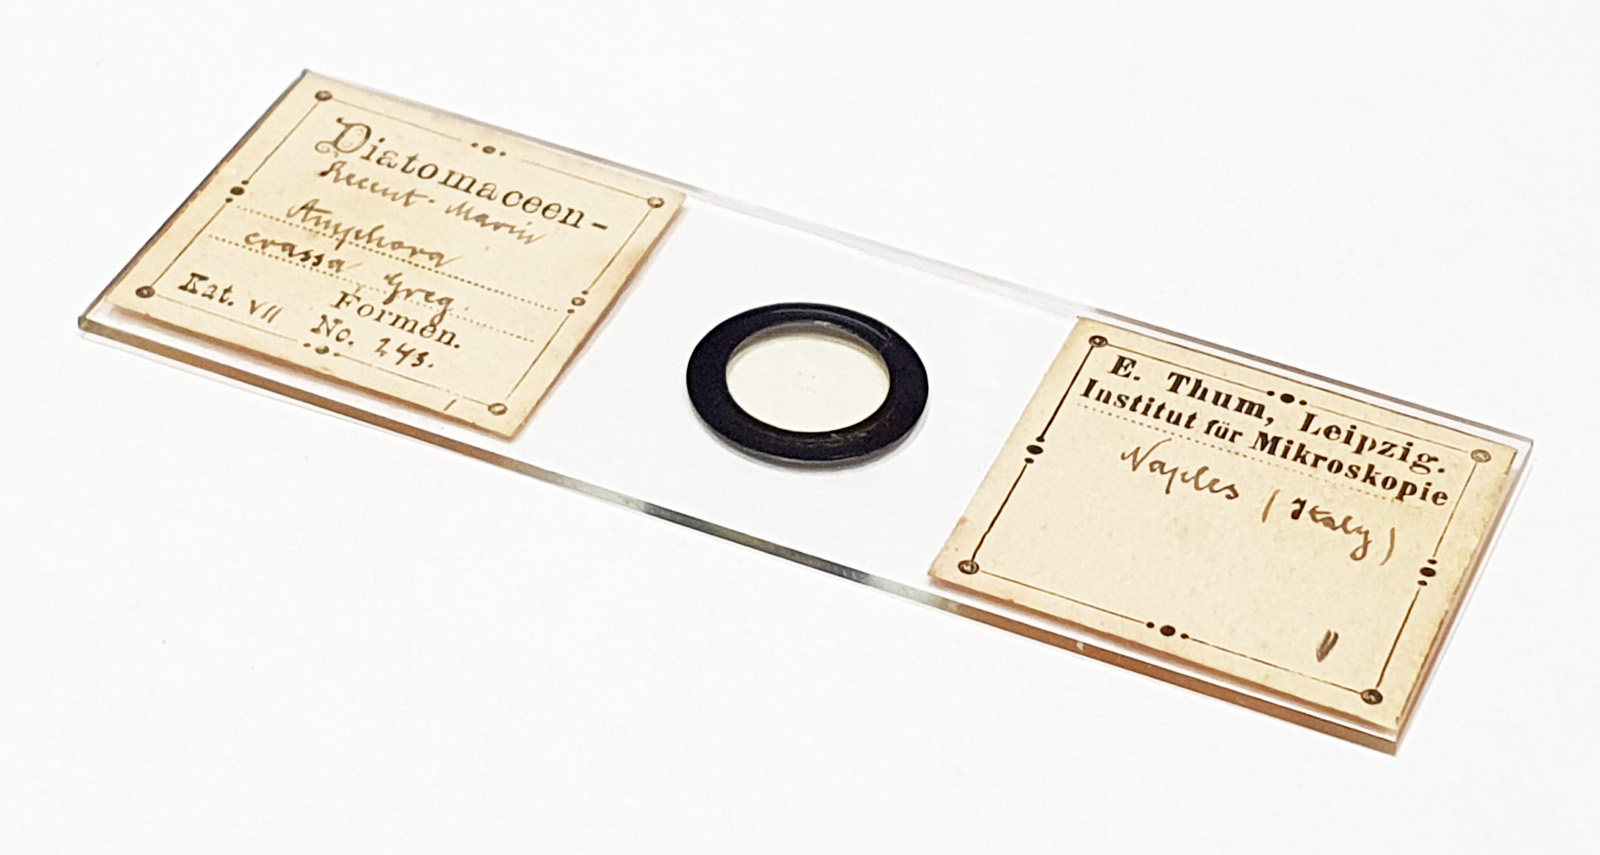
And the slide itself.
Thum slide of Amphora crassa
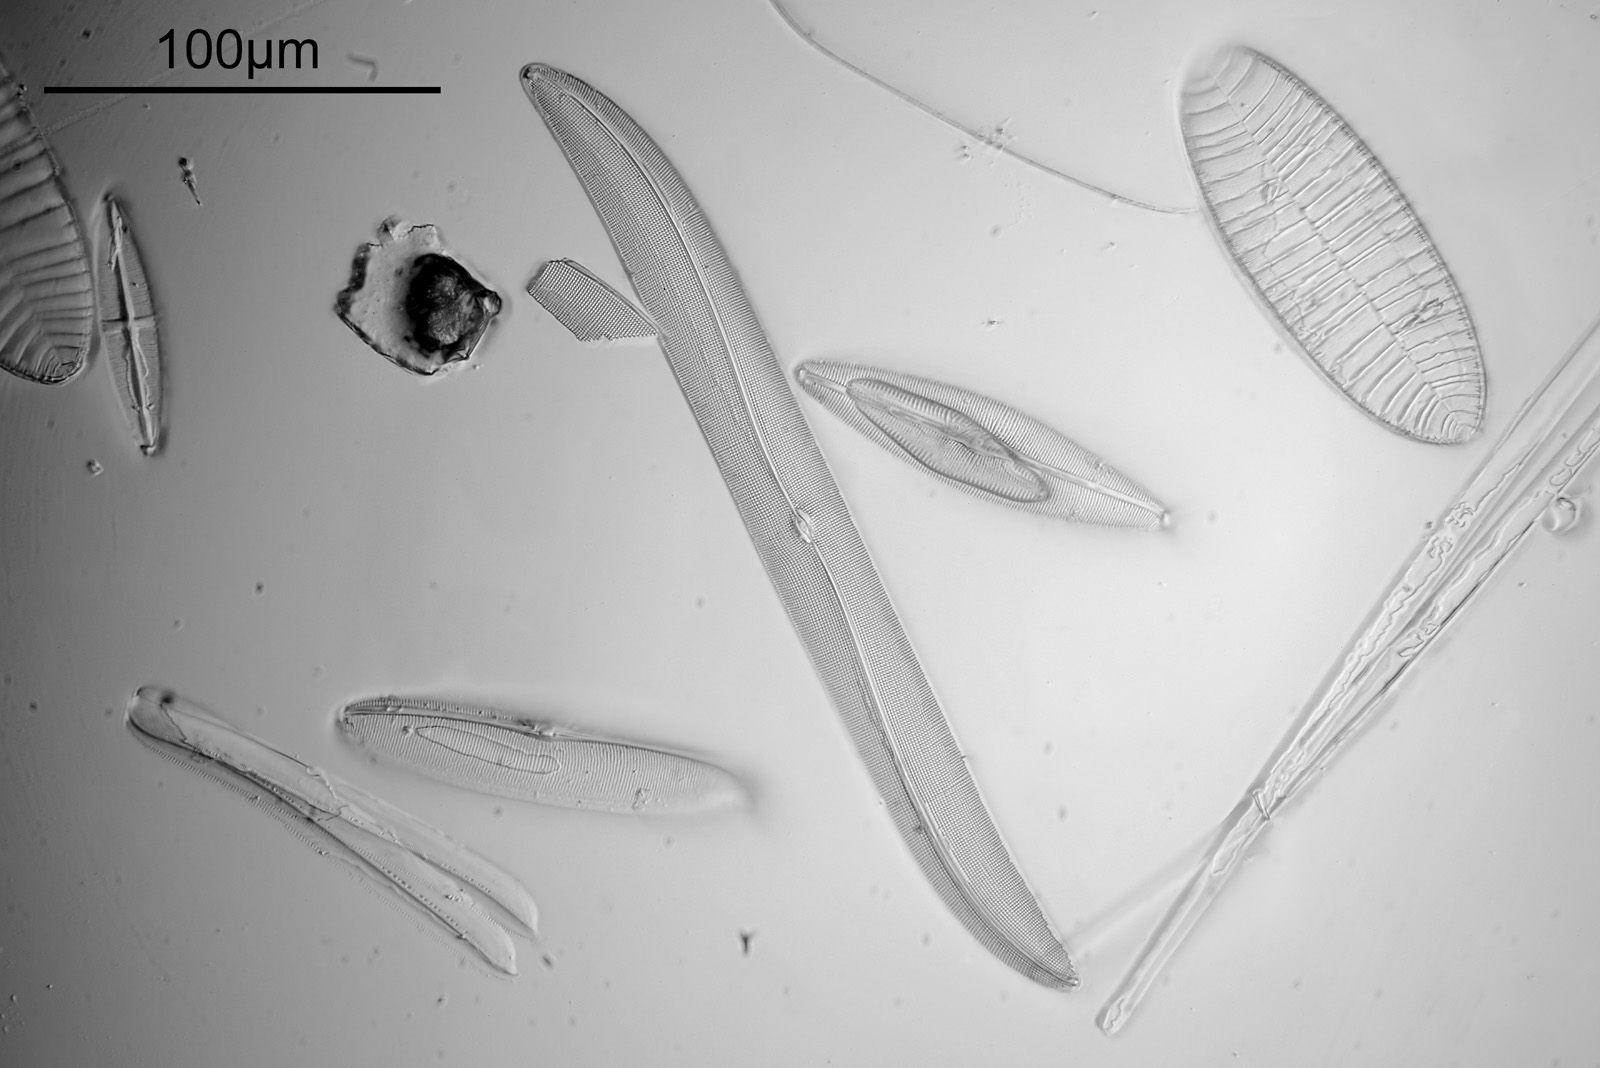
I shall return to the slide to look at the main subjects when it is a bit cooler here. In the mean time thanks as always for reading, and if you’d like to know more about my work I can be reached here.
Some of the microscope slides I get are quite expensive, either rare examples, unusual mounts, or sought after makers. Others however are not. Today’s post is one with slides of the latter. I got two slides by Smith, Beck and Beck, and for the pair they cost me the princely sum of £5 (plus £3.50 postage). As it turned out, one of them was pretty much useless – degradation over time – but the other still had some good diatoms on it.
The images as per usual were done on my modified Olympus BHB, this time using 450nm oblique illumination. The 40x images used a Nikon UV-F NA 1.3 objective with glycerine immersion. Photoeyepiece was a Nikon 5x CF. Camera was a monochrome converted Nikon d800. Image resolution reduced to 1600 pixels across for sharing here.
Here is a stack of 10 images from the slide described as ‘Pleurosigma balticum’.
40x image of the P. balticum slide
As well as there being plenty of P. balticum, there are various other diatoms on the slide including quite a few Surirella gemma. Quite a few of the examples have degraded somewhat, but there are still some usable ones on there. Most of the detail in the image above will be lost because of reducing the size for sharing, but the crop below is at original resolution.
Crop from 40x image at original resolution
As can be seen from the crop, there is plenty of detail in the P. balticum diatom.
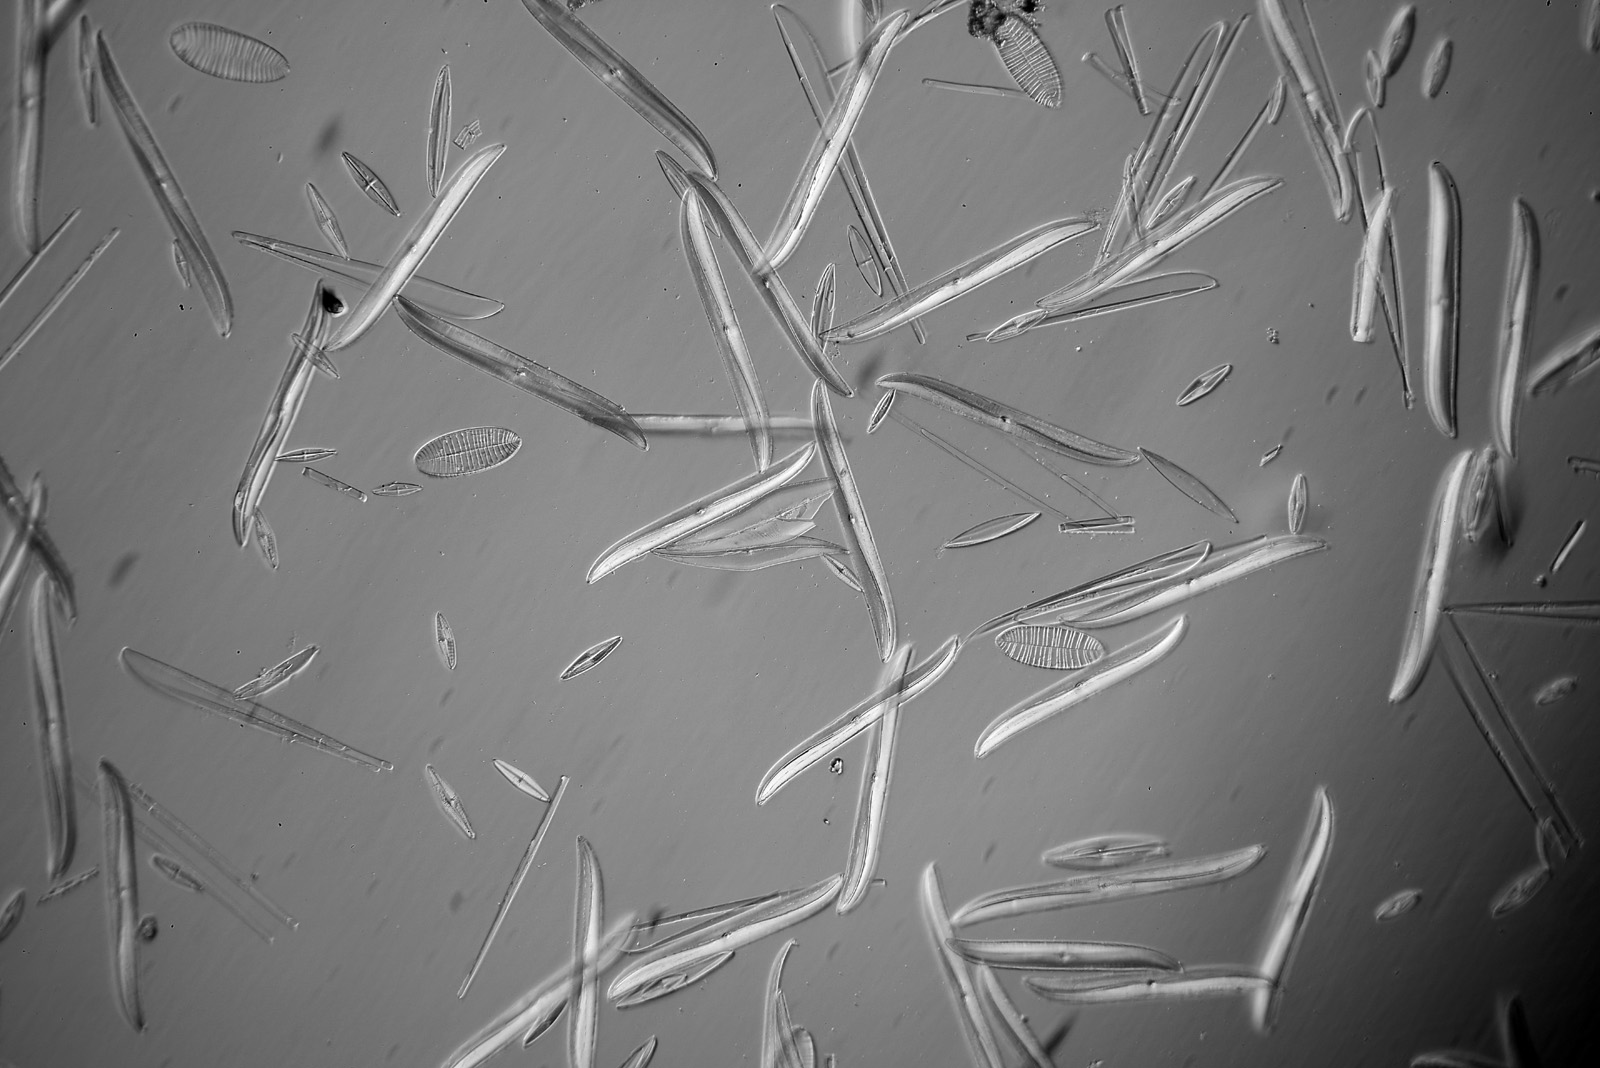
A wide field of view using a 10x objective shows how more of the slide looked showing the variation and density of the slide.
Wide field of view of the P. balticum slide with 10x objective
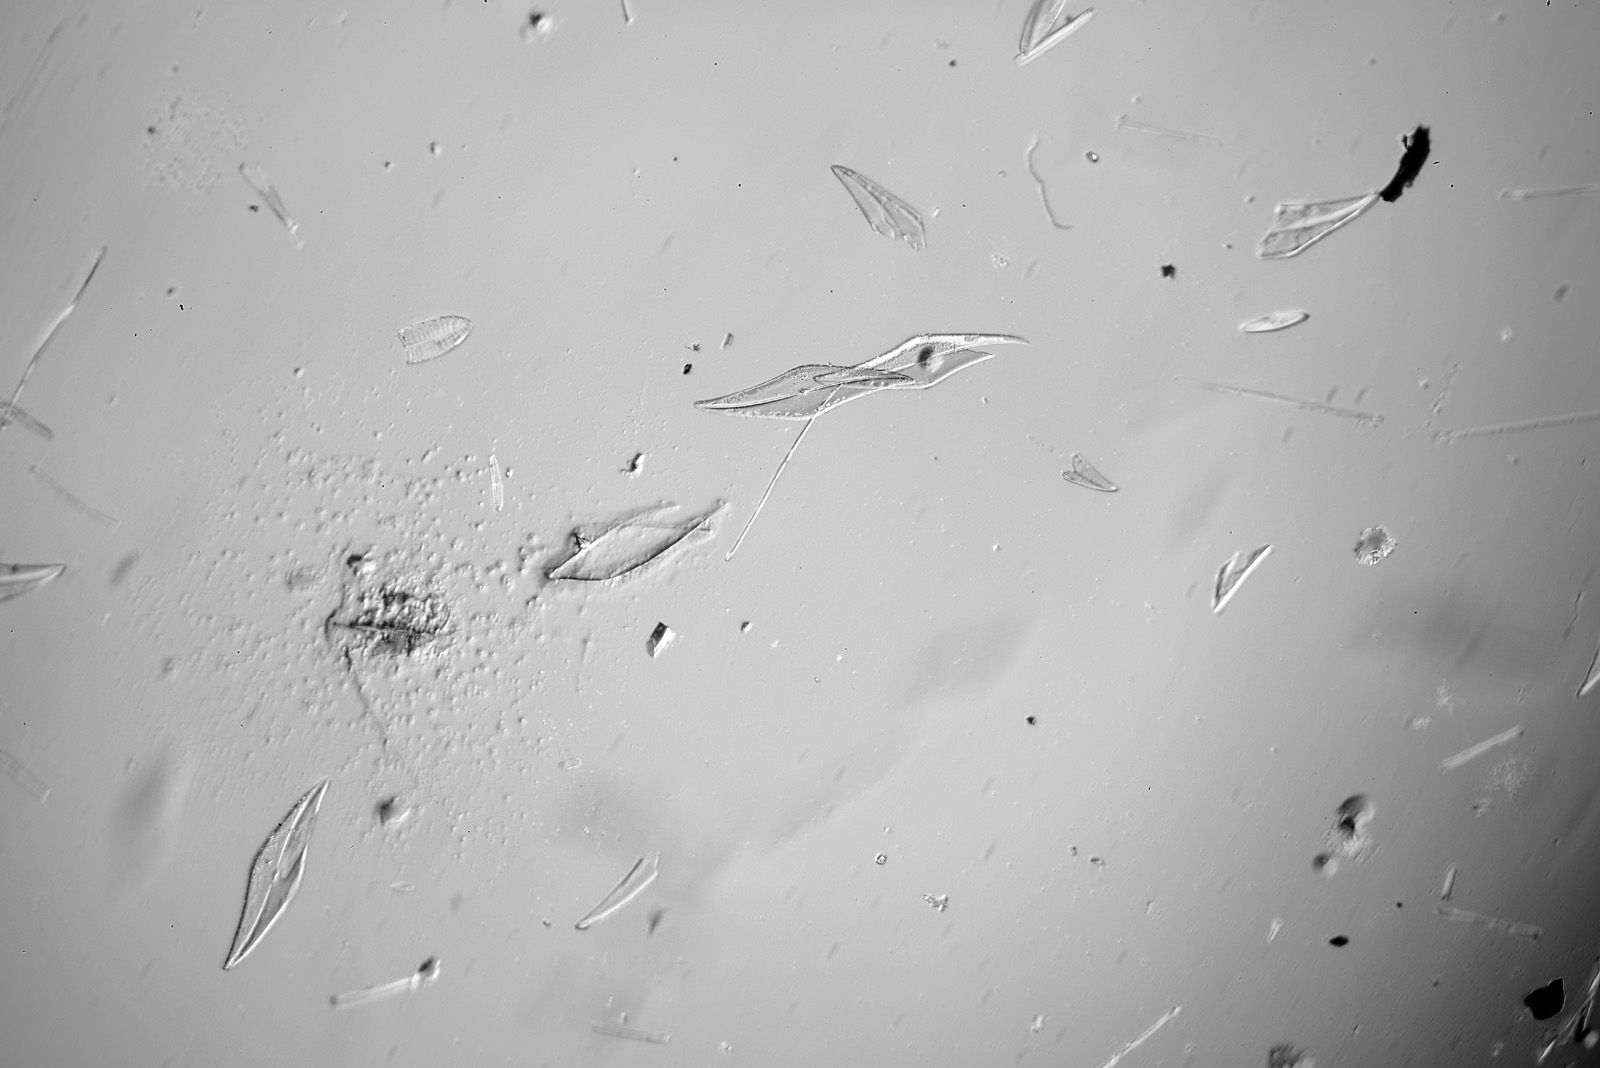
Unfortunately the other slide, marked P. quadratum, was pretty much unusable (10x objective image below).
Wide field of view of the P. quadratum slide with 10x objective
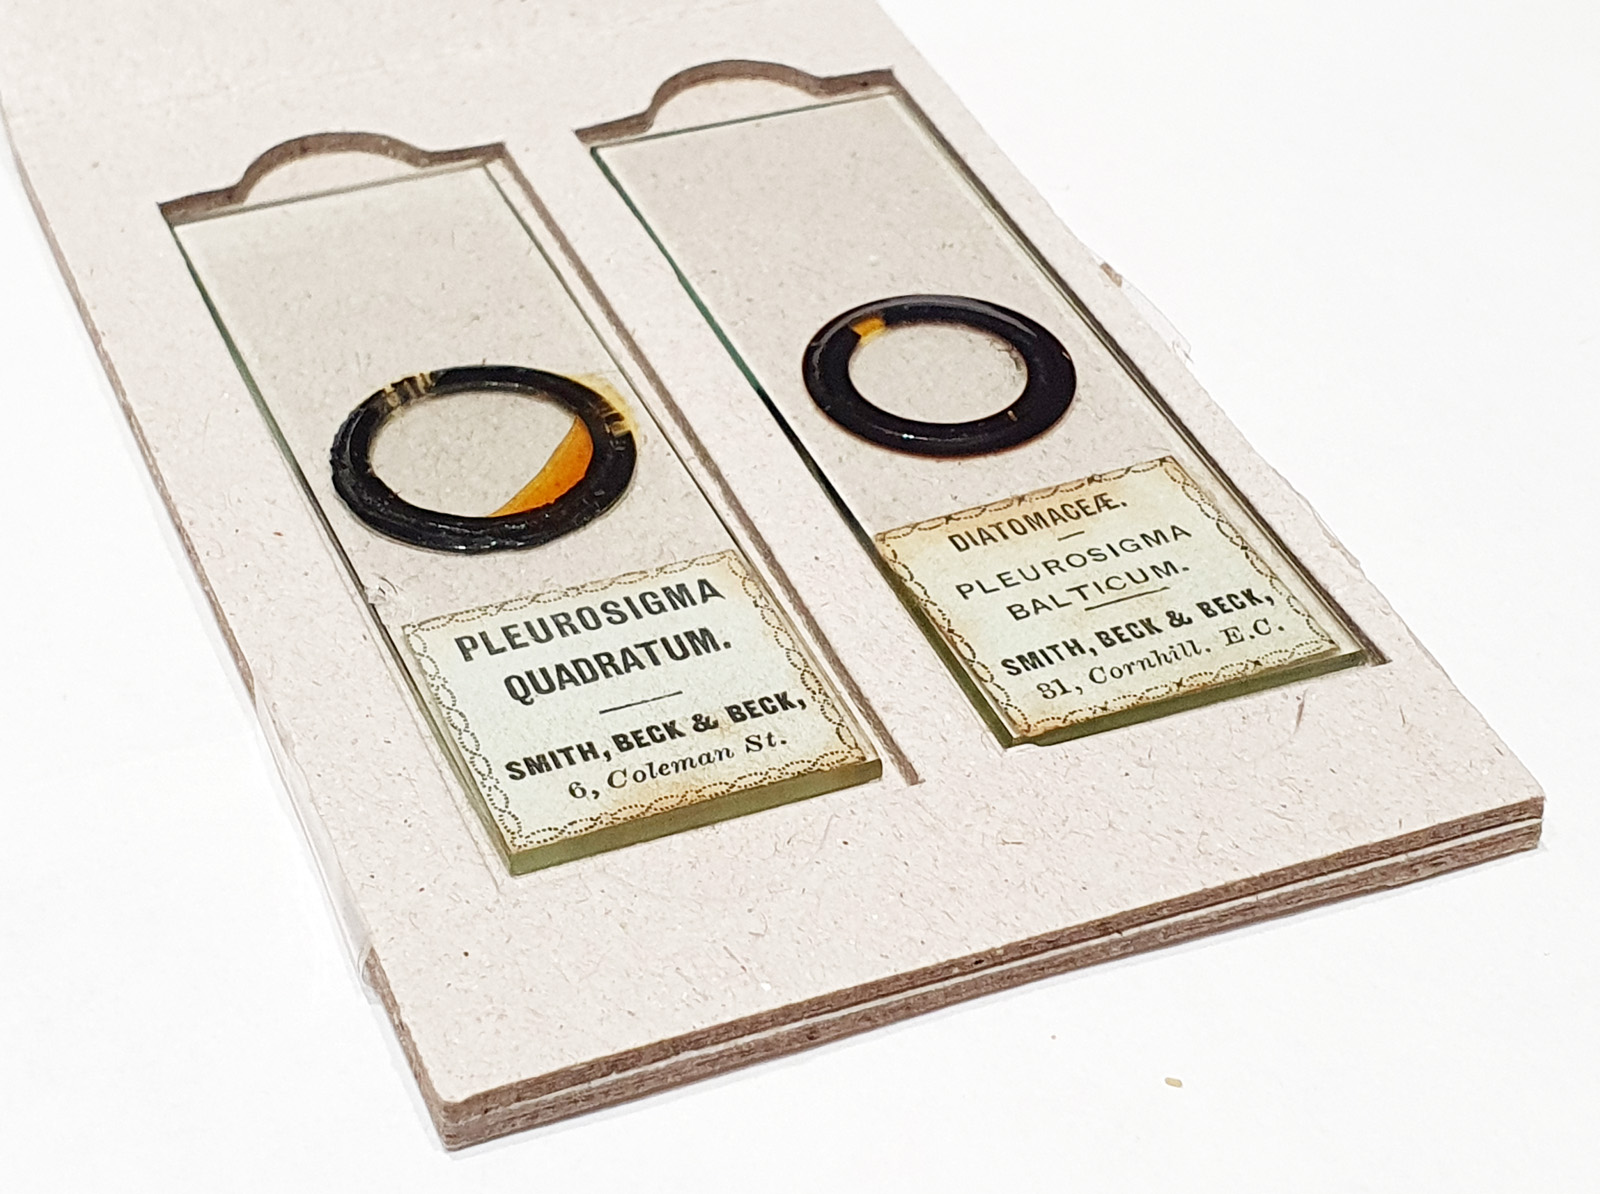
And of course, here are the slides themselves.
Two Smith, Beck and Beck slides
At first glance the slides look similar, but the printing and importantly the addresses are different. They were at 6 Coleman Street from 1847-1856, while at 31 Cornhill from 1865-1880 (according to Bracegirdle’s ‘Microscopical Mounts and Mounters’) which makes these some of the older slides that I have, especially the P. quadratum one. Last week I spent £5.40 at a service station for a sandwich while visiting the Archives of the Science Museum near Swindon to go through documents by Horace Dall (more on that soon after I have gone through my notes), so for less than my sandwich I got a nice slide to examine.
As always, thanks for reading, and if you’d like to know more about my work, i can be reached here.
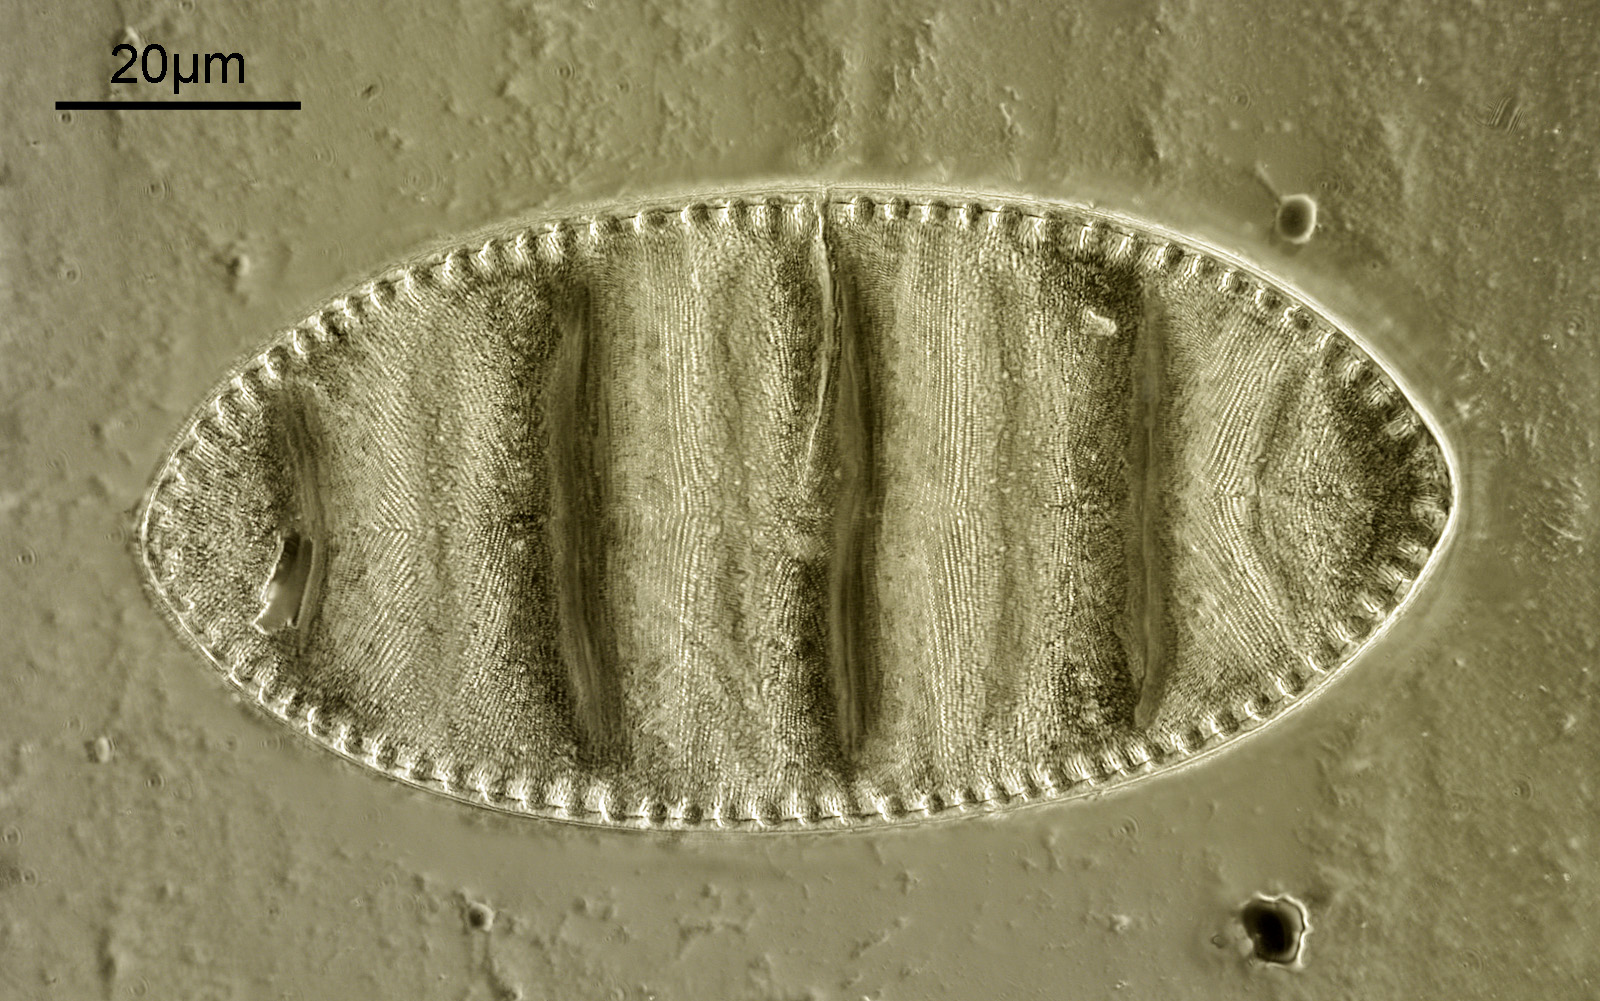
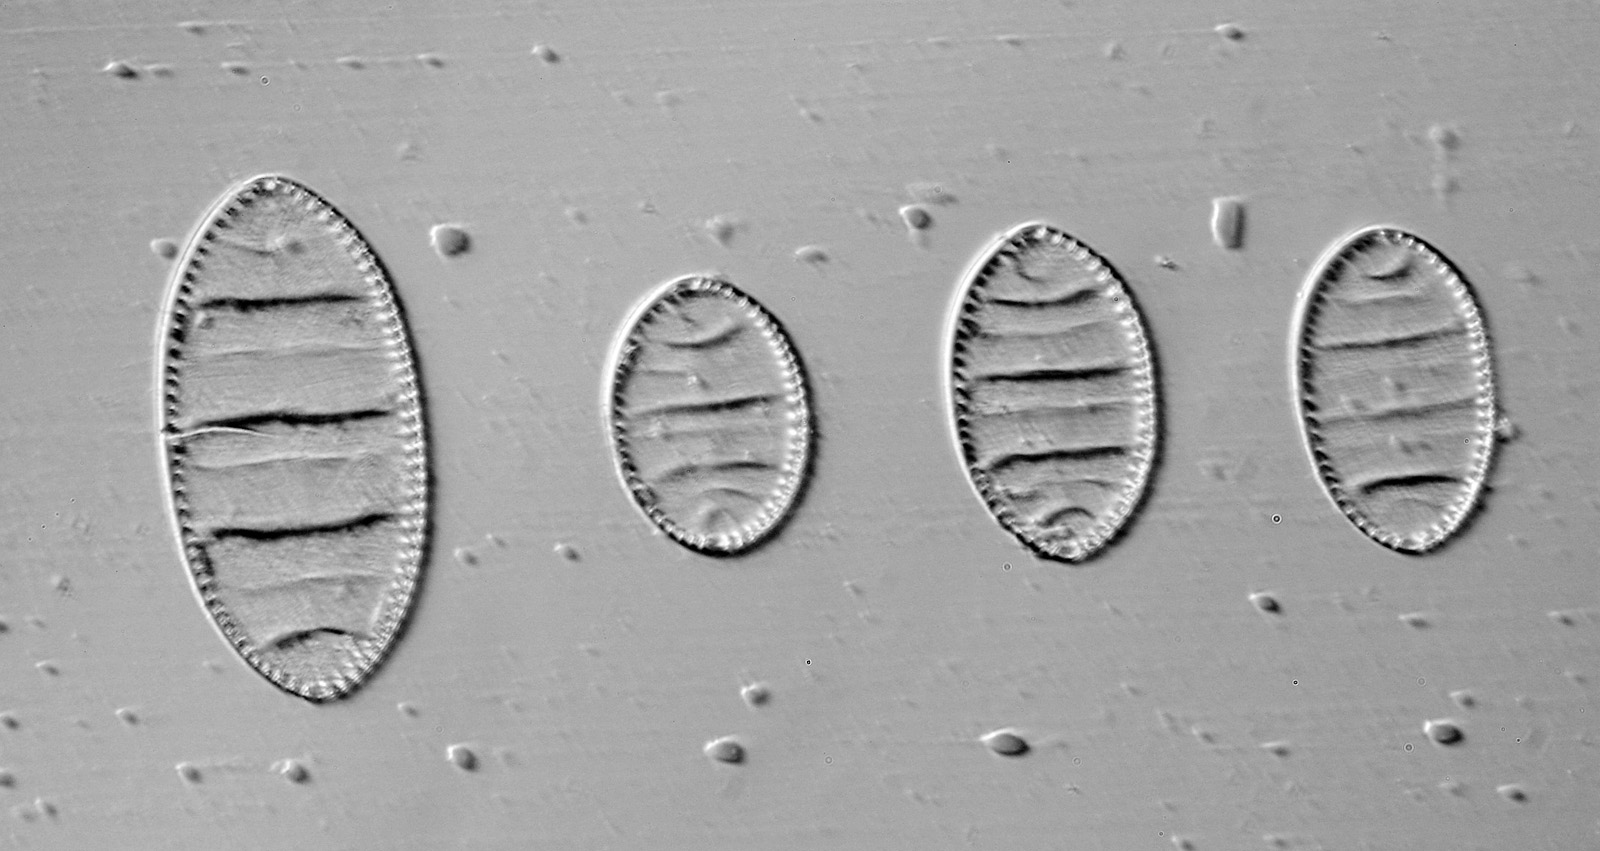
A few days ago I took a look at a Klaus Kemp slide of diatoms called Cymatopleura elliptica with 450nm light and a Leitz 63x Pl Apo NA 1.4 objective and, well, the image was not as good as I had hoped. Today I decided to revisit the slide with a different approach, and this post shows the results of that work. The image was done on my modified Olympus BHB microscope, light source was a Zeiss Mercury Xenon lamp. Objective was a Leitz 100x Pl Apo NA 1.32-0.60 (oil immersion). Condenser was a Watson Holoscopic one (again with oil). Objective iris was closed down slightly with the aim of trying to produce circular oblique lighting (COL). Photoeyepiece was a Nikon 5x CF. Filters – 365nm (10nm bandpass, Edmund Optics, 2 stacked together), 405nm (10nm bandpass) and 450nm (40nm bandpass) from Thorlabs. Camera – monochrome converted Nikon d800 from MaxMax. At 365nm, a stack of 18 images processed in Zerene stacker. Image cropped slightly and reduced in resolution for sharing. The camera produces slight colour casts and I have kept those here as I like the effect. And after all that, here it is.
Cymatopleura elliptica from Klaus Kemp slide, 365nm light, Leitz 100x Pl Apo objective
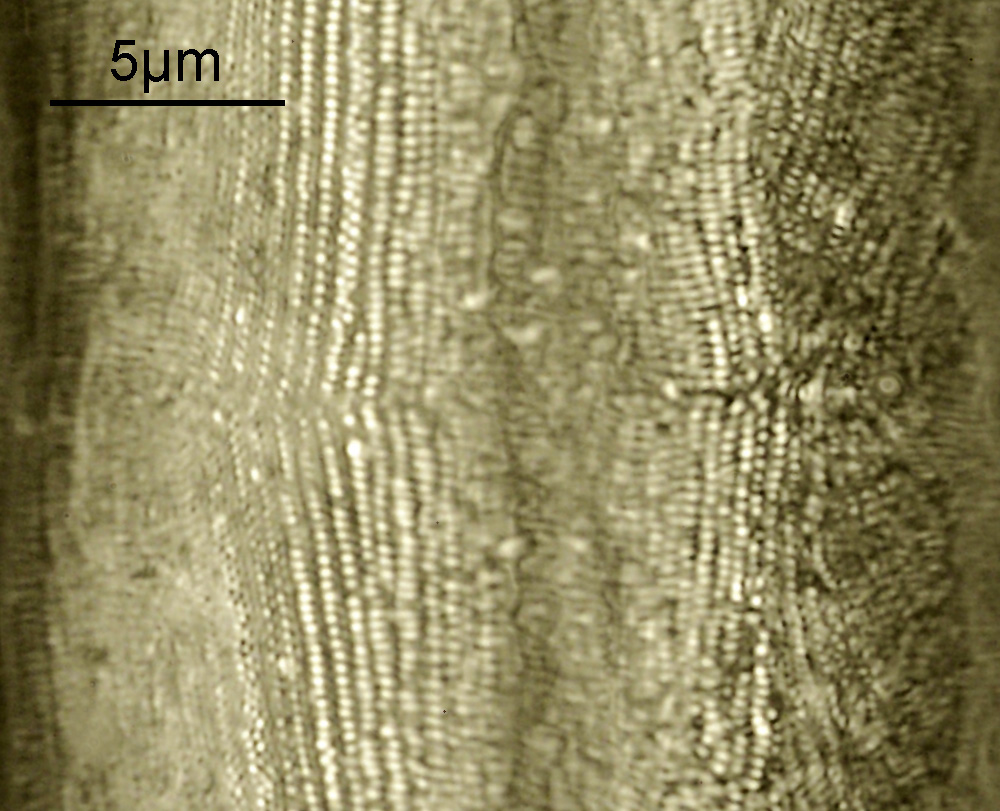
Moving to 365nm light produced a noticeable improvement in resolution, although that is probably lost a little on the image above which is 1600 pixels across compared with the original (5826 pixels across). As an example of the resolution of the original, the image below is a crop before it was reduced in size.
Cymatopleura elliptica from Klaus Kemp slide, 365nm light, Leitz 100x Pl Apo objective, cropped
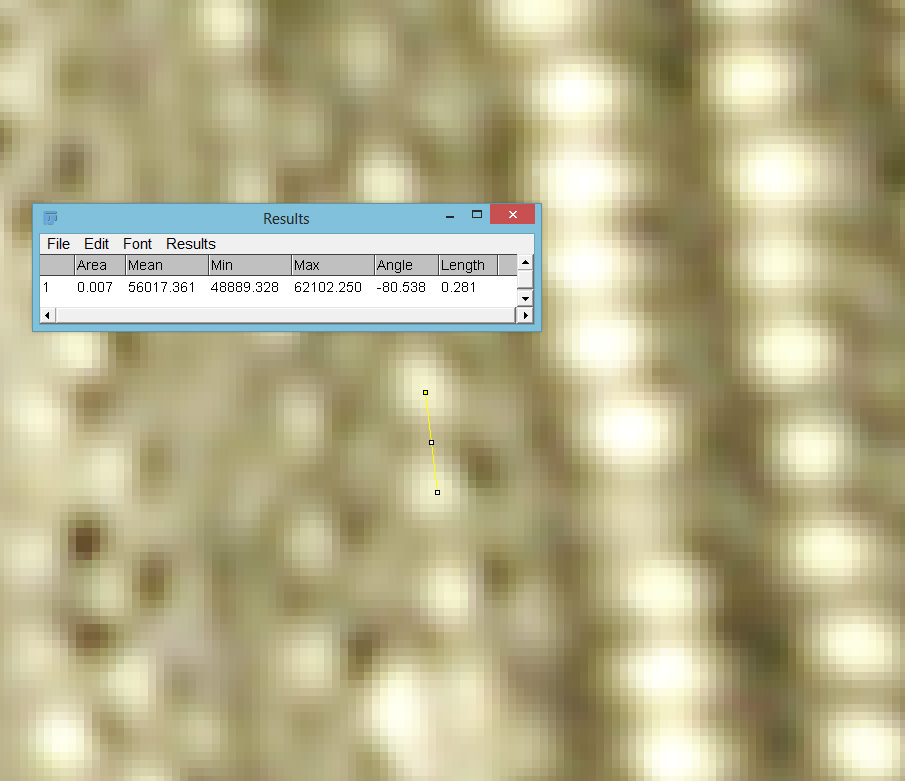
There is plenty of detail in the image, much more than my initial attempt with 450nm light. Going in closer and checking in ImageJ, some of those features are about 280nm apart.
ImageJ showing two features 281nm apart (0.281 microns)
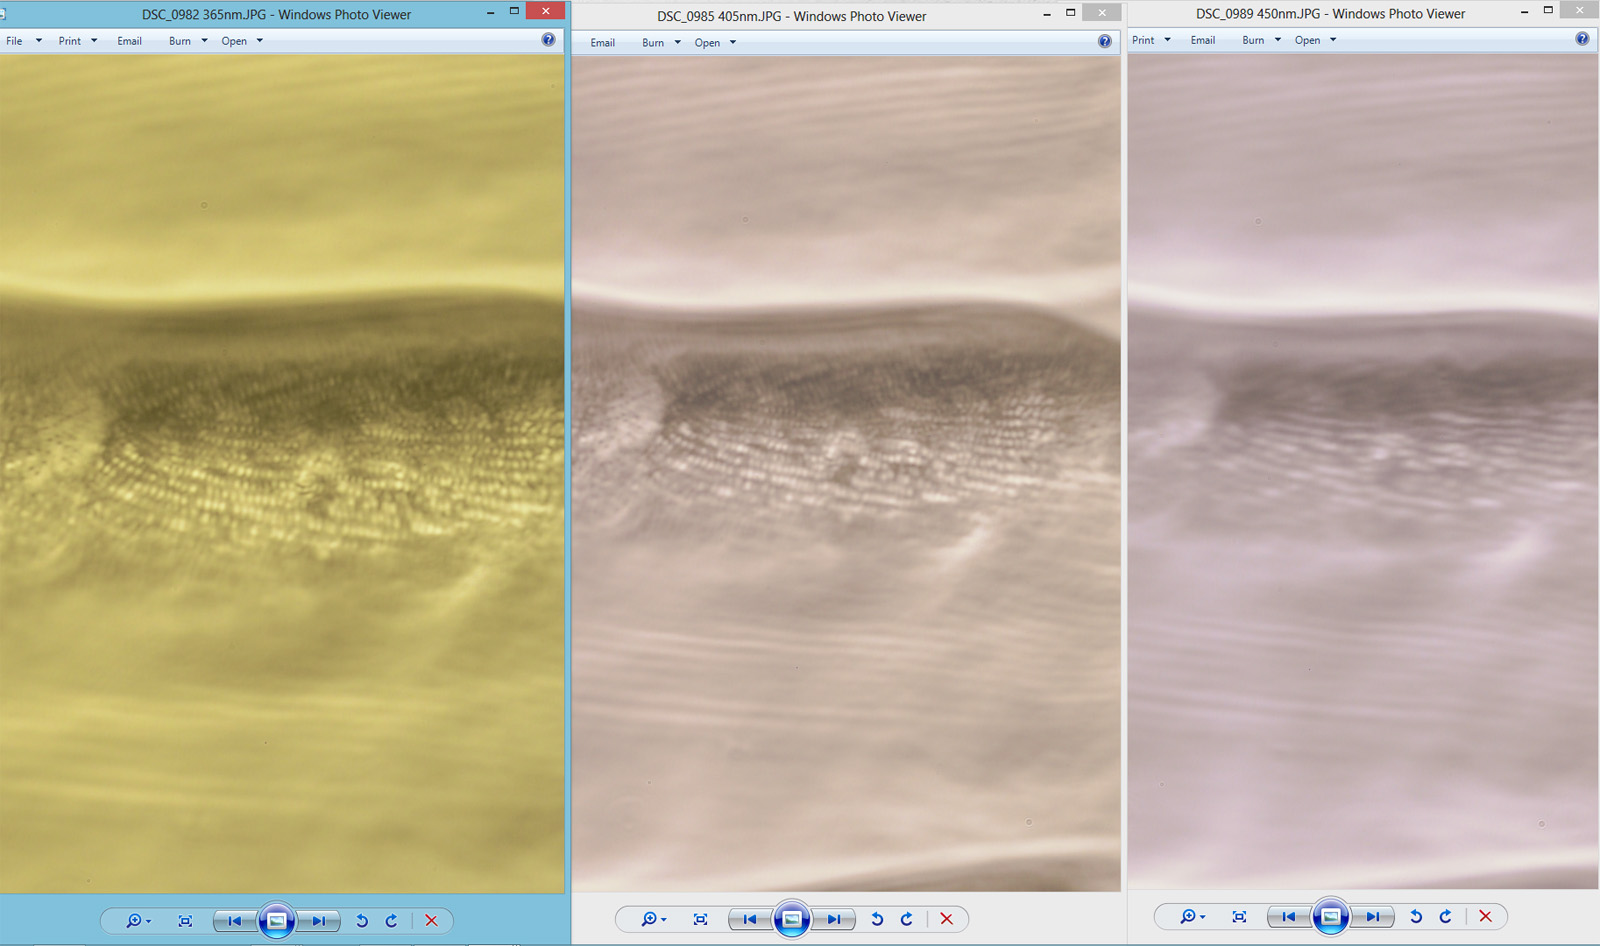
While the slide was on the microscope I took a series of 3 images of it at 3 different wavelengths (365nm, 405nm and 450nm). These are shown below.
Diatom features at 3 different illuminant wavelengths, 365nm (left), 405nm (middle) and 450nm (right)
The images above are unprocessed and not sharpened, but the microscope was refocused each time. It demonstrates nicely how the shorter wavelength light brings out the features in more detail (as expected by Abbe).
The slide actually has 4 examples of the diatom on it. The larger one was the one that was imaged.
4 diatoms on the slide
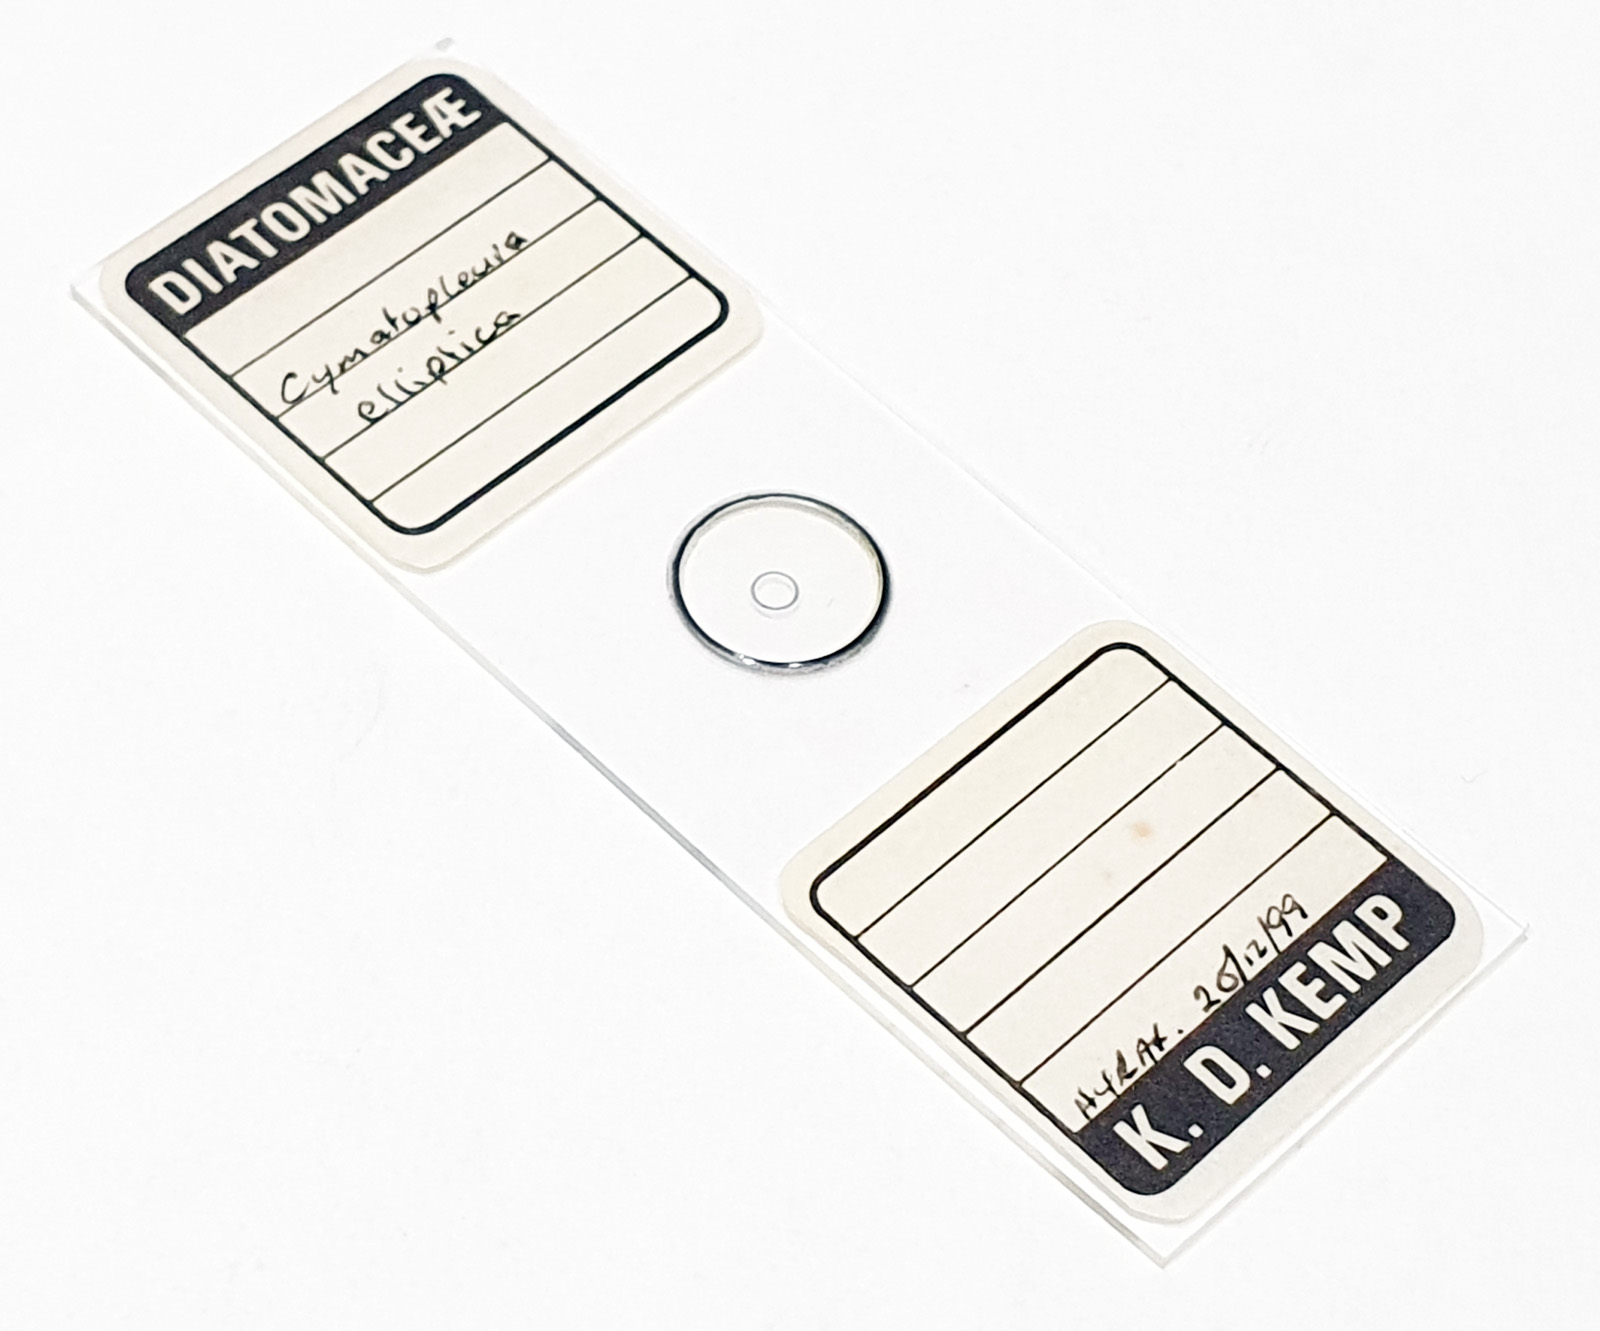
It looks as though there may something unusual with the fixative, as shown by the droplets in the image which were very visible on this slide. These were not on the outside of the slide or coverslip. Here’s the slide.
Cymatopleura elliptica slide by Klaus Kemp
The mountant is Hyrax which was one reason I decided to try 365nm light (it has pretty good UV transmission at 365nm). What was more surprising was the objective – I expected the Leitz 100x Pl Apo to block a lot of the UV and it actually performed really well. I must remember this for future work. Diatom naming is still well beyond me, but this one is also sometimes referred to as Surirella undulata (see here).
UV microscopy presents its fair share of challenges, but imaging at 365nm is the more straightforward end of the spectrum to try and provides some quite visible improvement in resolution compared with visible light. Be safe though if you plan on trying this – I use UV safety specs whenever dealing with UV light sources. As always, thanks for reading, and if you’d like to know more about my work I can be reached here.
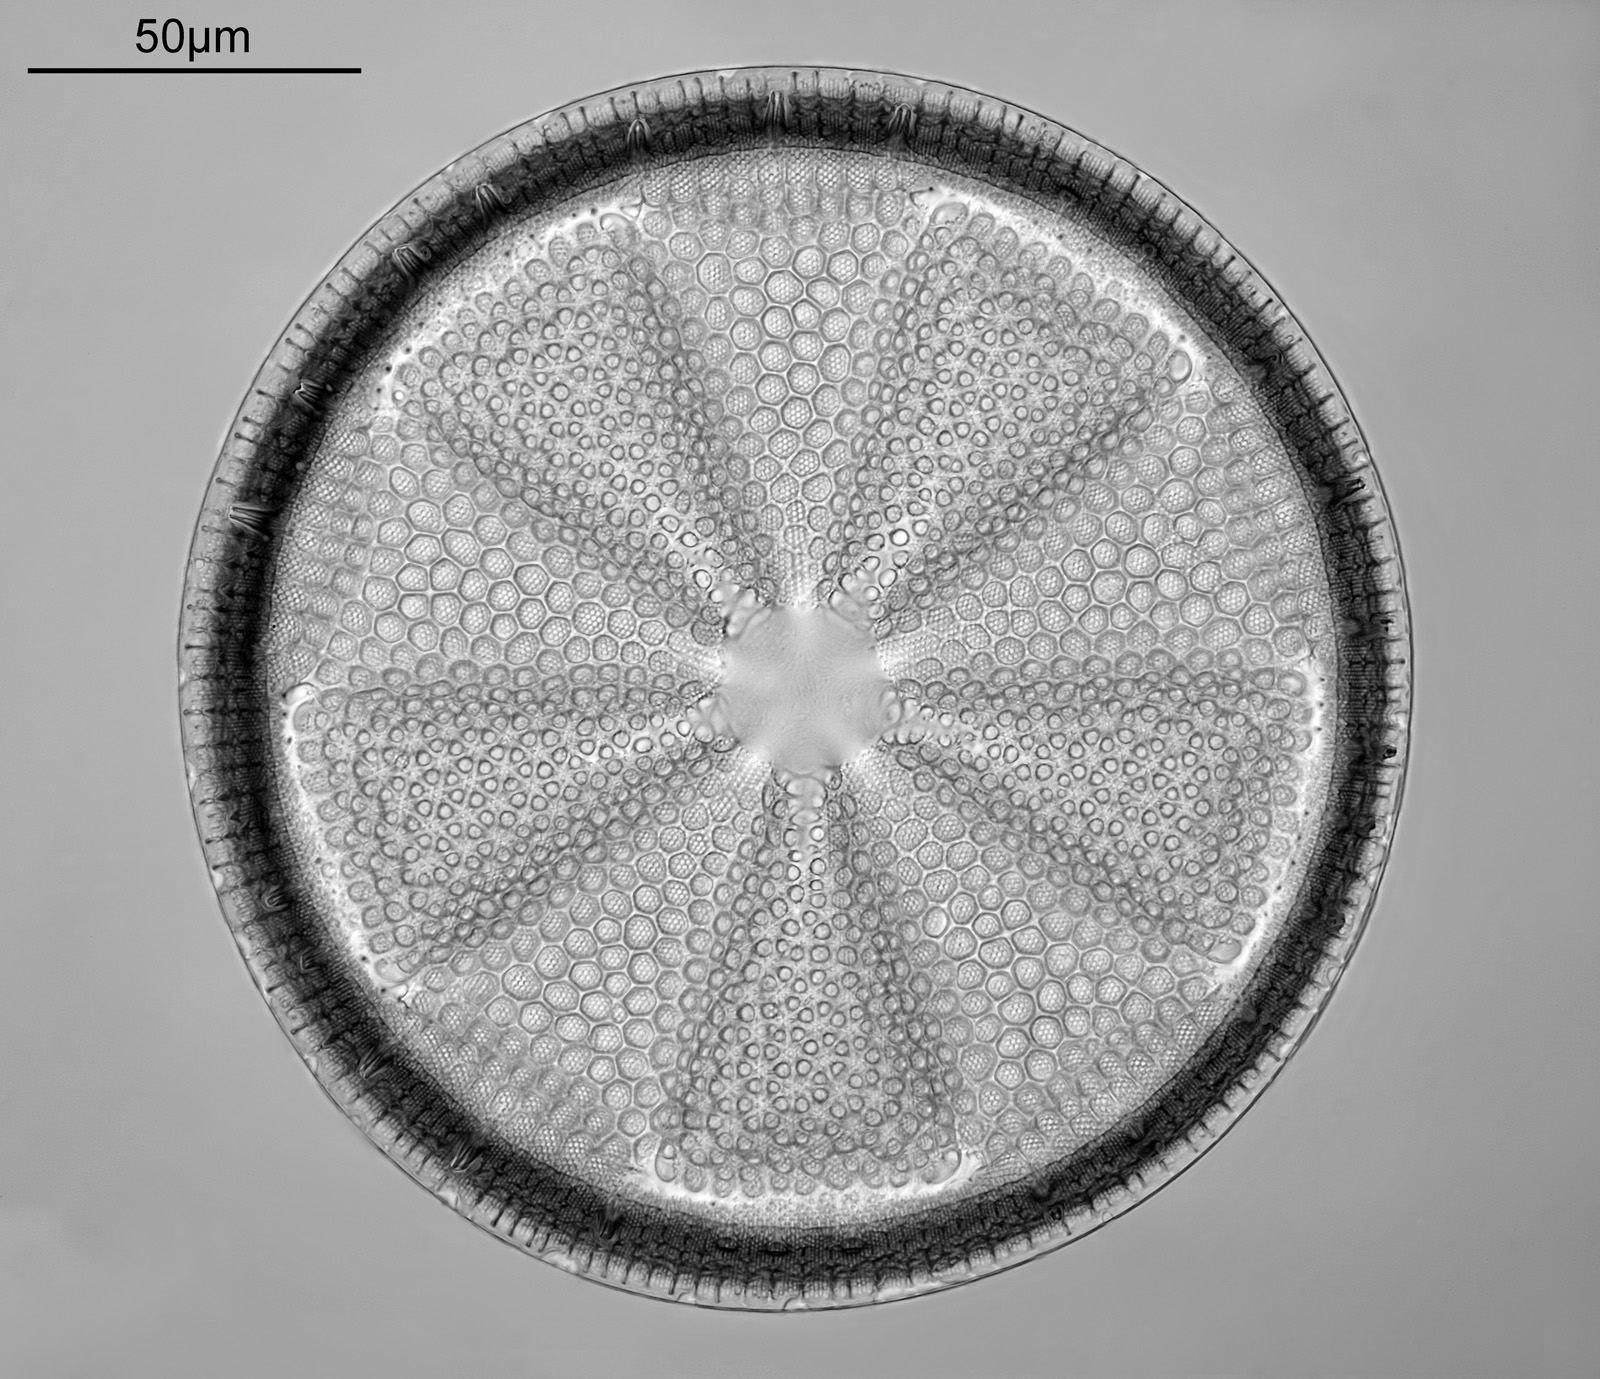
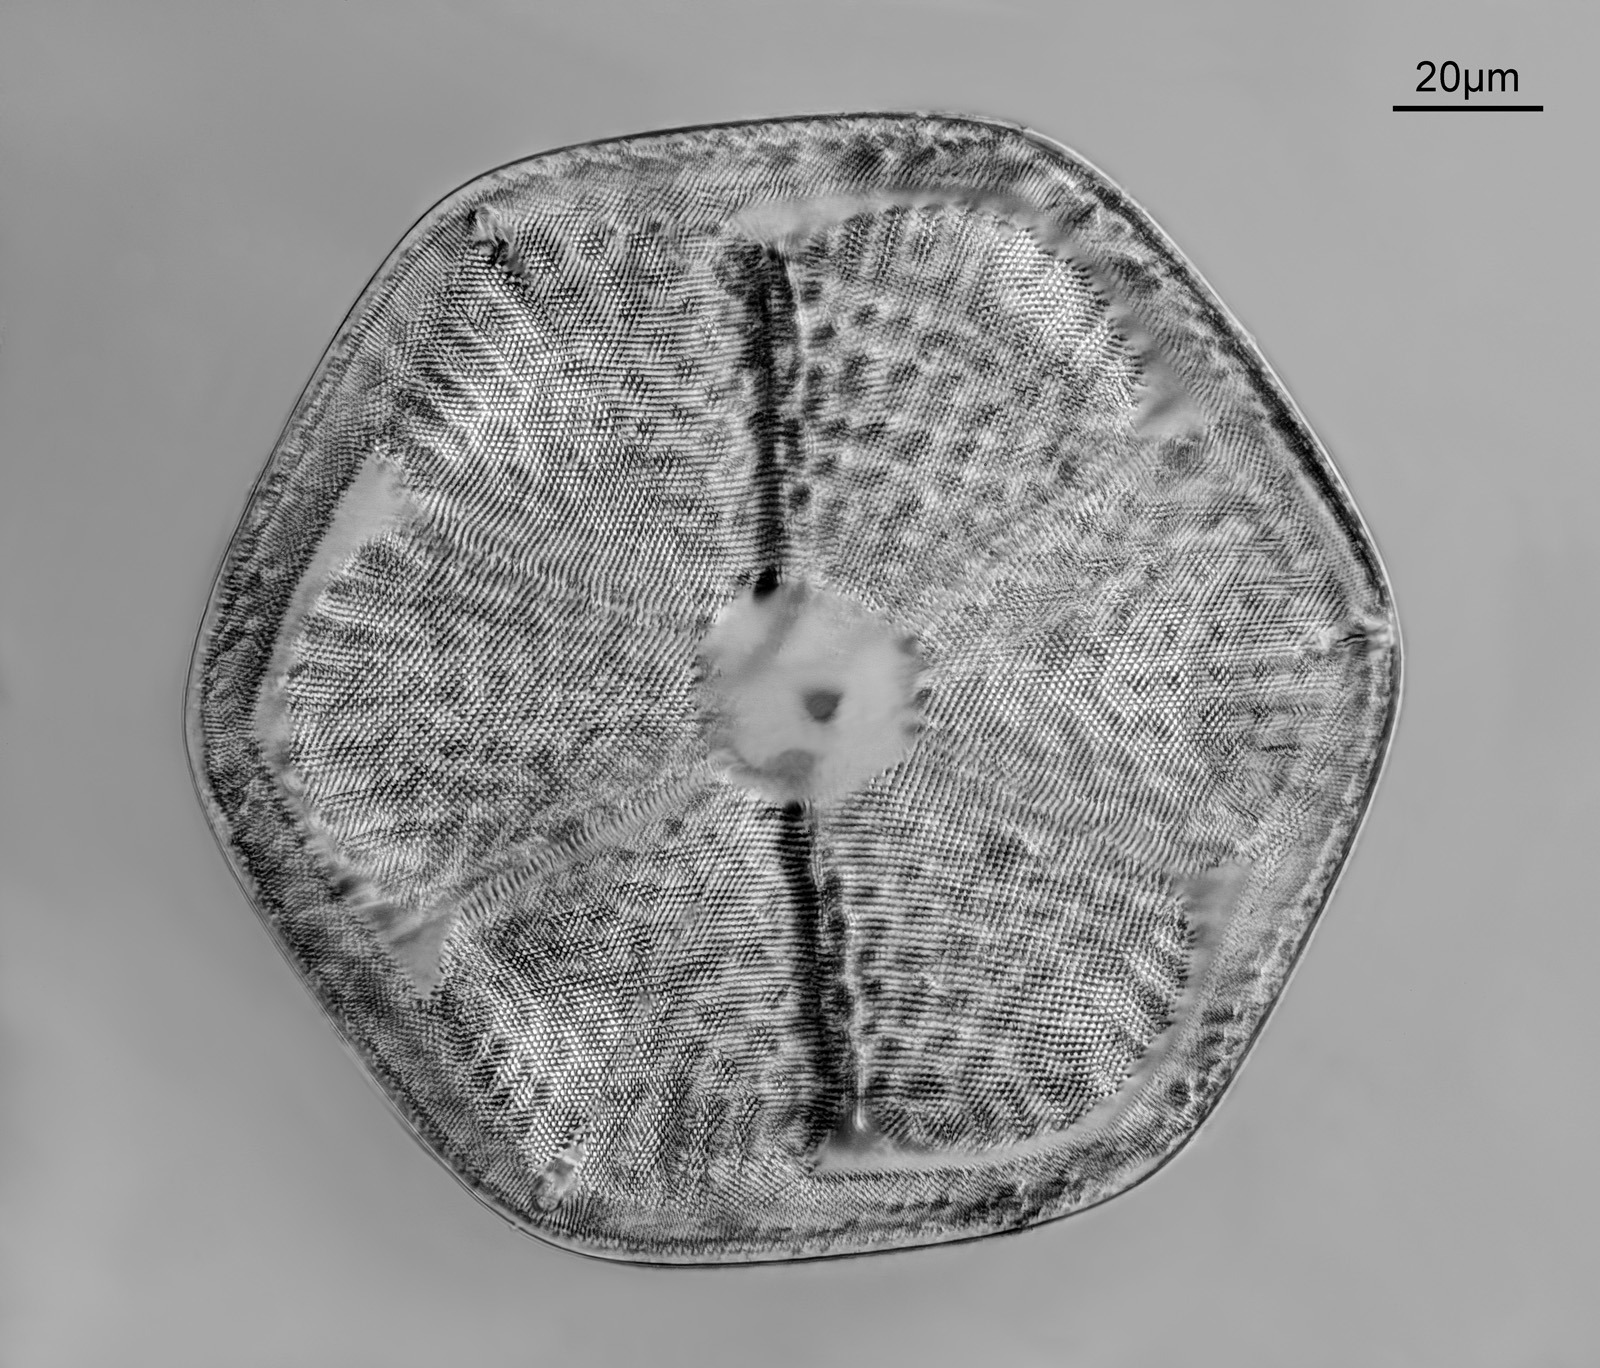
A couple of weeks ago I had a box of assorted slides come through which have turned out to have some real gems in it (I shared some initial images here). Today’s post looks at another slide from the box – an Actinoptychus heliopelta by Eric Impey from 1970. Images were done on my modified Olympus BHB microscope using 450nm light (slightly oblique). The objective for the main image was a Leitz 63x Pl Apo NA 1.4 which recently arrived from JB Microscopes. A Nikon CF 5x photoeyepiece was used. 27 images were stacked in Zerene. Images have been reduced in resolution for sharing.
Here’s the main image.
Actinoptychus heliopelta from a slide by Eric Impey. Leitz 63x Pl Apo NA 1.4 objective
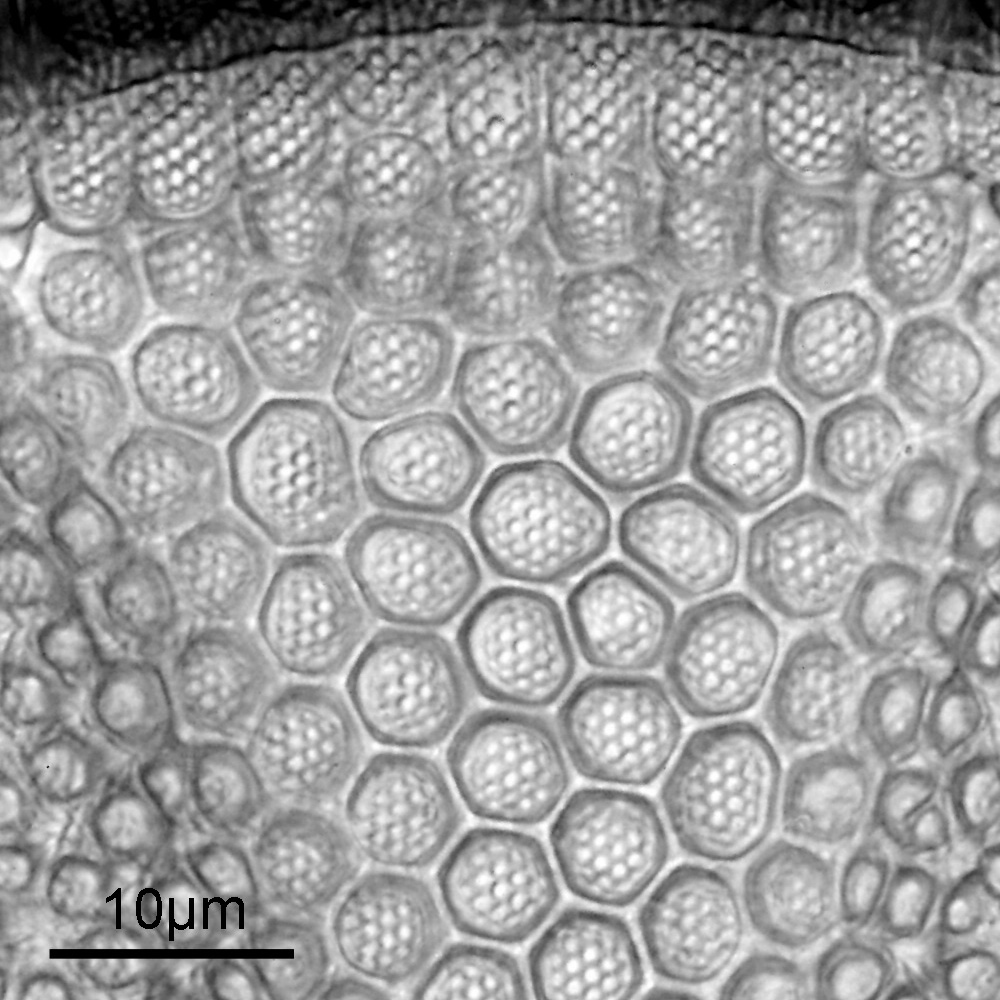
The sample is beautiful and there is plenty of detail on there, some of which is lost on here as I had to reduce the resolution for sharing. Below is part of the image shown at the original resolution.
Crop from the main image, shown at original resolution
The slide itself has 3 examples of the diatom on it, shown below (single image, not stacked, using a Nikon 20x Plan Apo objective). The one in the main image is actually the one on the right hand side of the image below.
3 diatoms from the Eric Impey slide
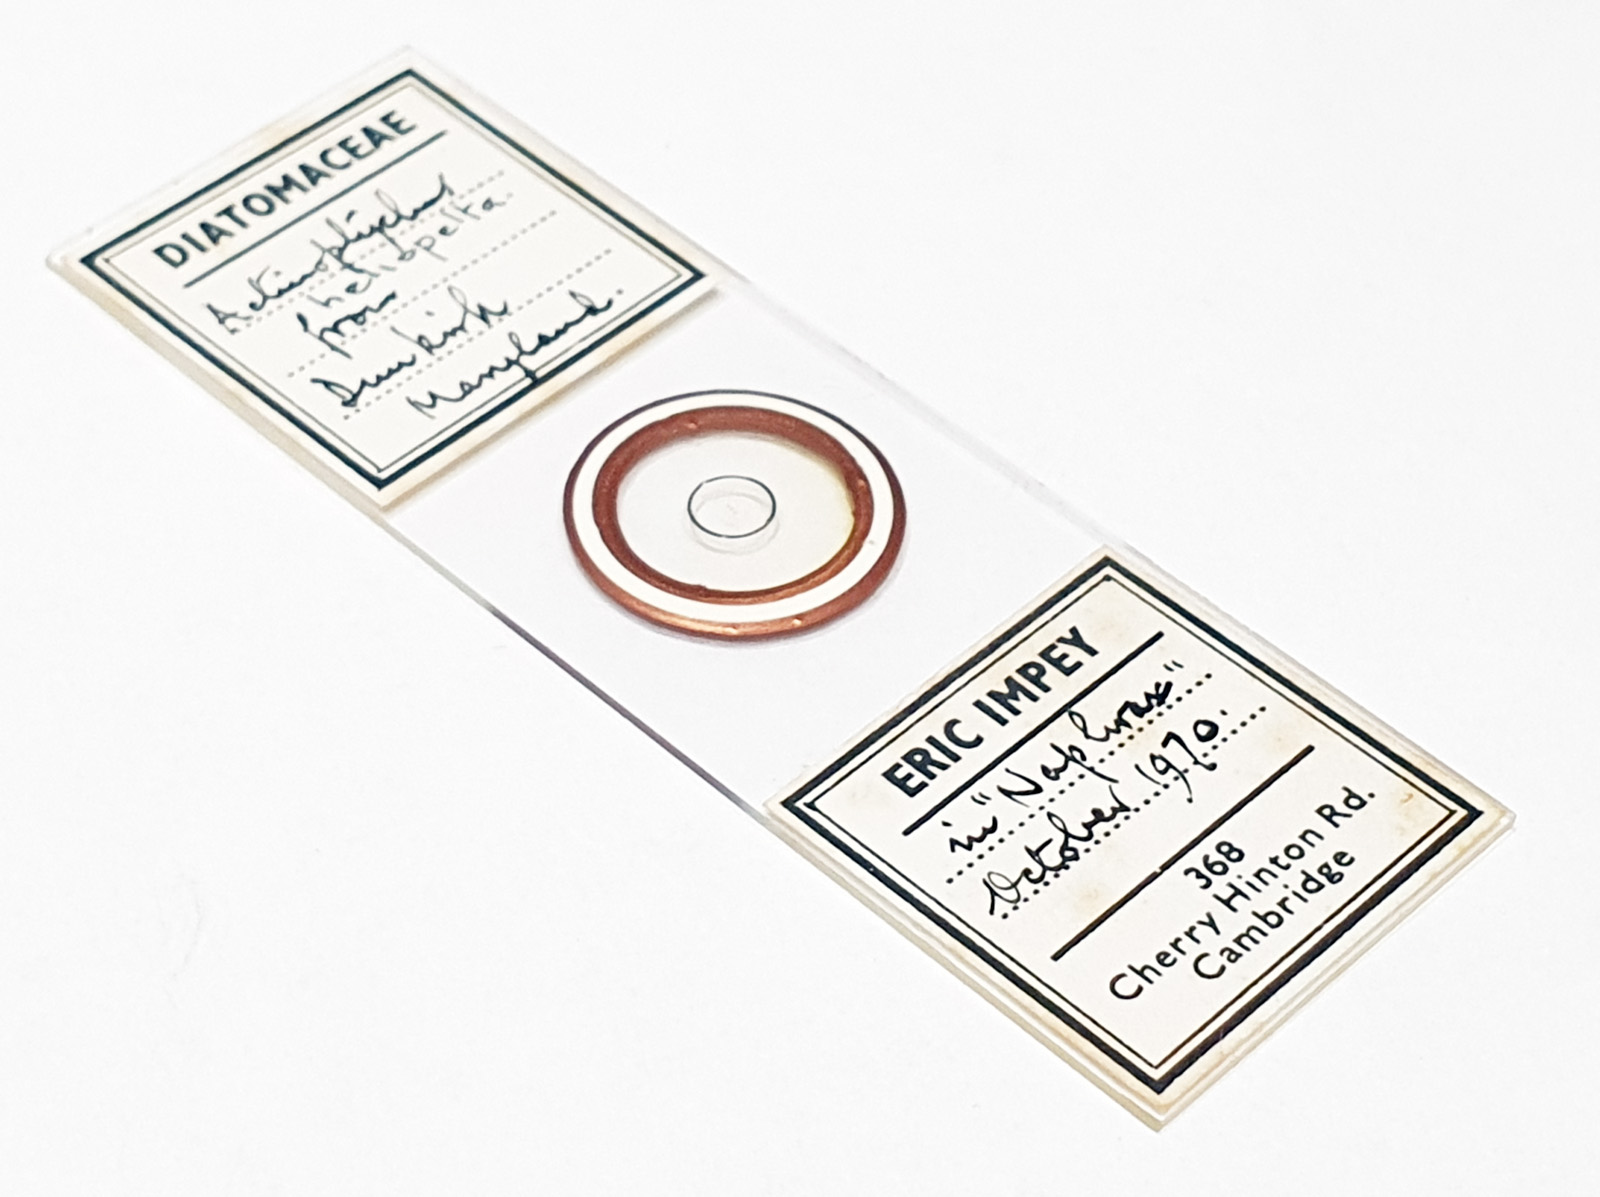
And the slide itself. The diatoms came from Dunkrik, Maryland. The mount is Naphrax, and it is a very well made slide, which even has a slightly decorative ringing around the coverslip.
Eric Impey slide of Actinoptychus heliopelta
As an aside, I think I have spent too much time looking at diatoms this weekend. This was what I saw when I looked down inside a plastic coke bottle…..
Coke bottle model of a diatom
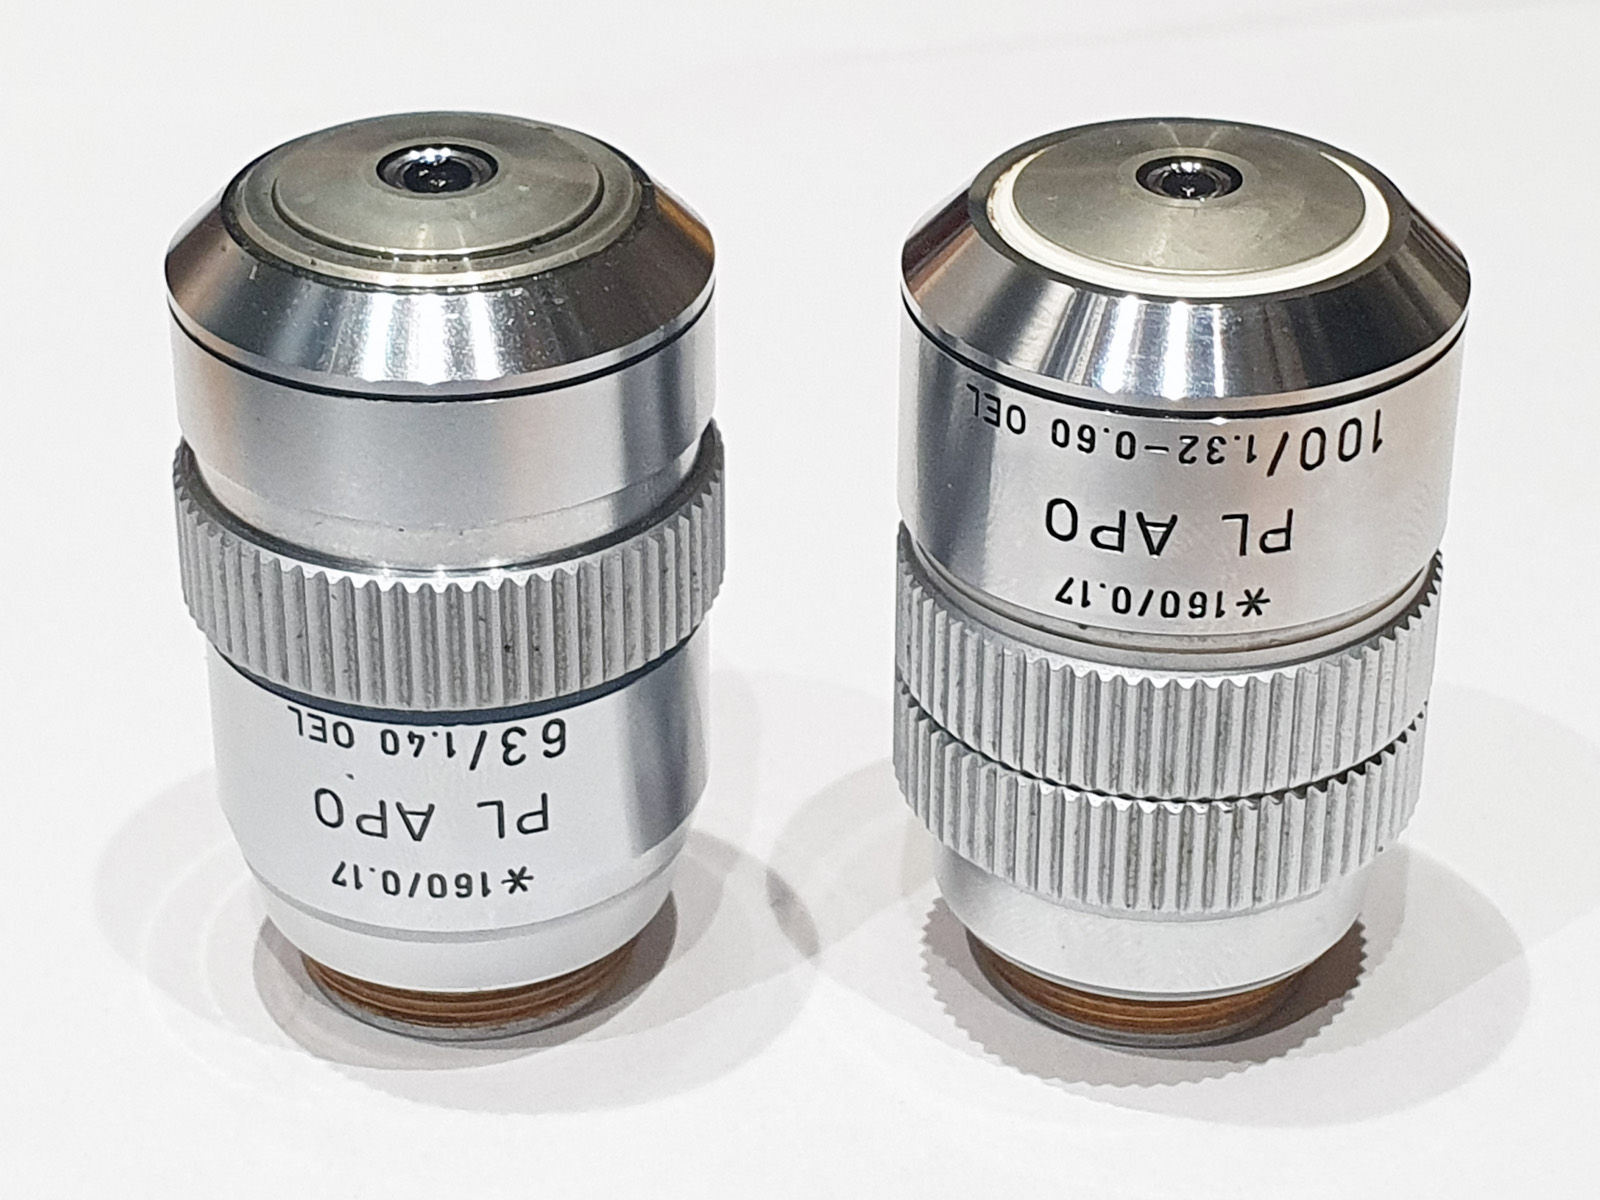
Before I go, being an equipment geek, I’ll also share the objective as I was very impressed by the quality of the image it produced. It’s a Leitz 63x Pl Apo NA 1.4, oil immersion. Here it is alongside it’s big(ger) brother, the 100x with an adjustable iris, which is also an excellent performer.
Leitz 63x and 100x Pl Apo objectives
At the risk of sounding like a broken record, I continue to be amazed by the quality of some of these older slides, and would well recommend them for anyone interested in looking for samples to image. This slide cost me all of £5.50 plus postage. If you don’t want to buy slides but relish new slides to look at, the Postal Microscopical Society offers members the chance to borrow slides from their collection and is well worth checking out. Thanks for reading and if you’d like to know more about this or other aspects of my work I can be reached here.
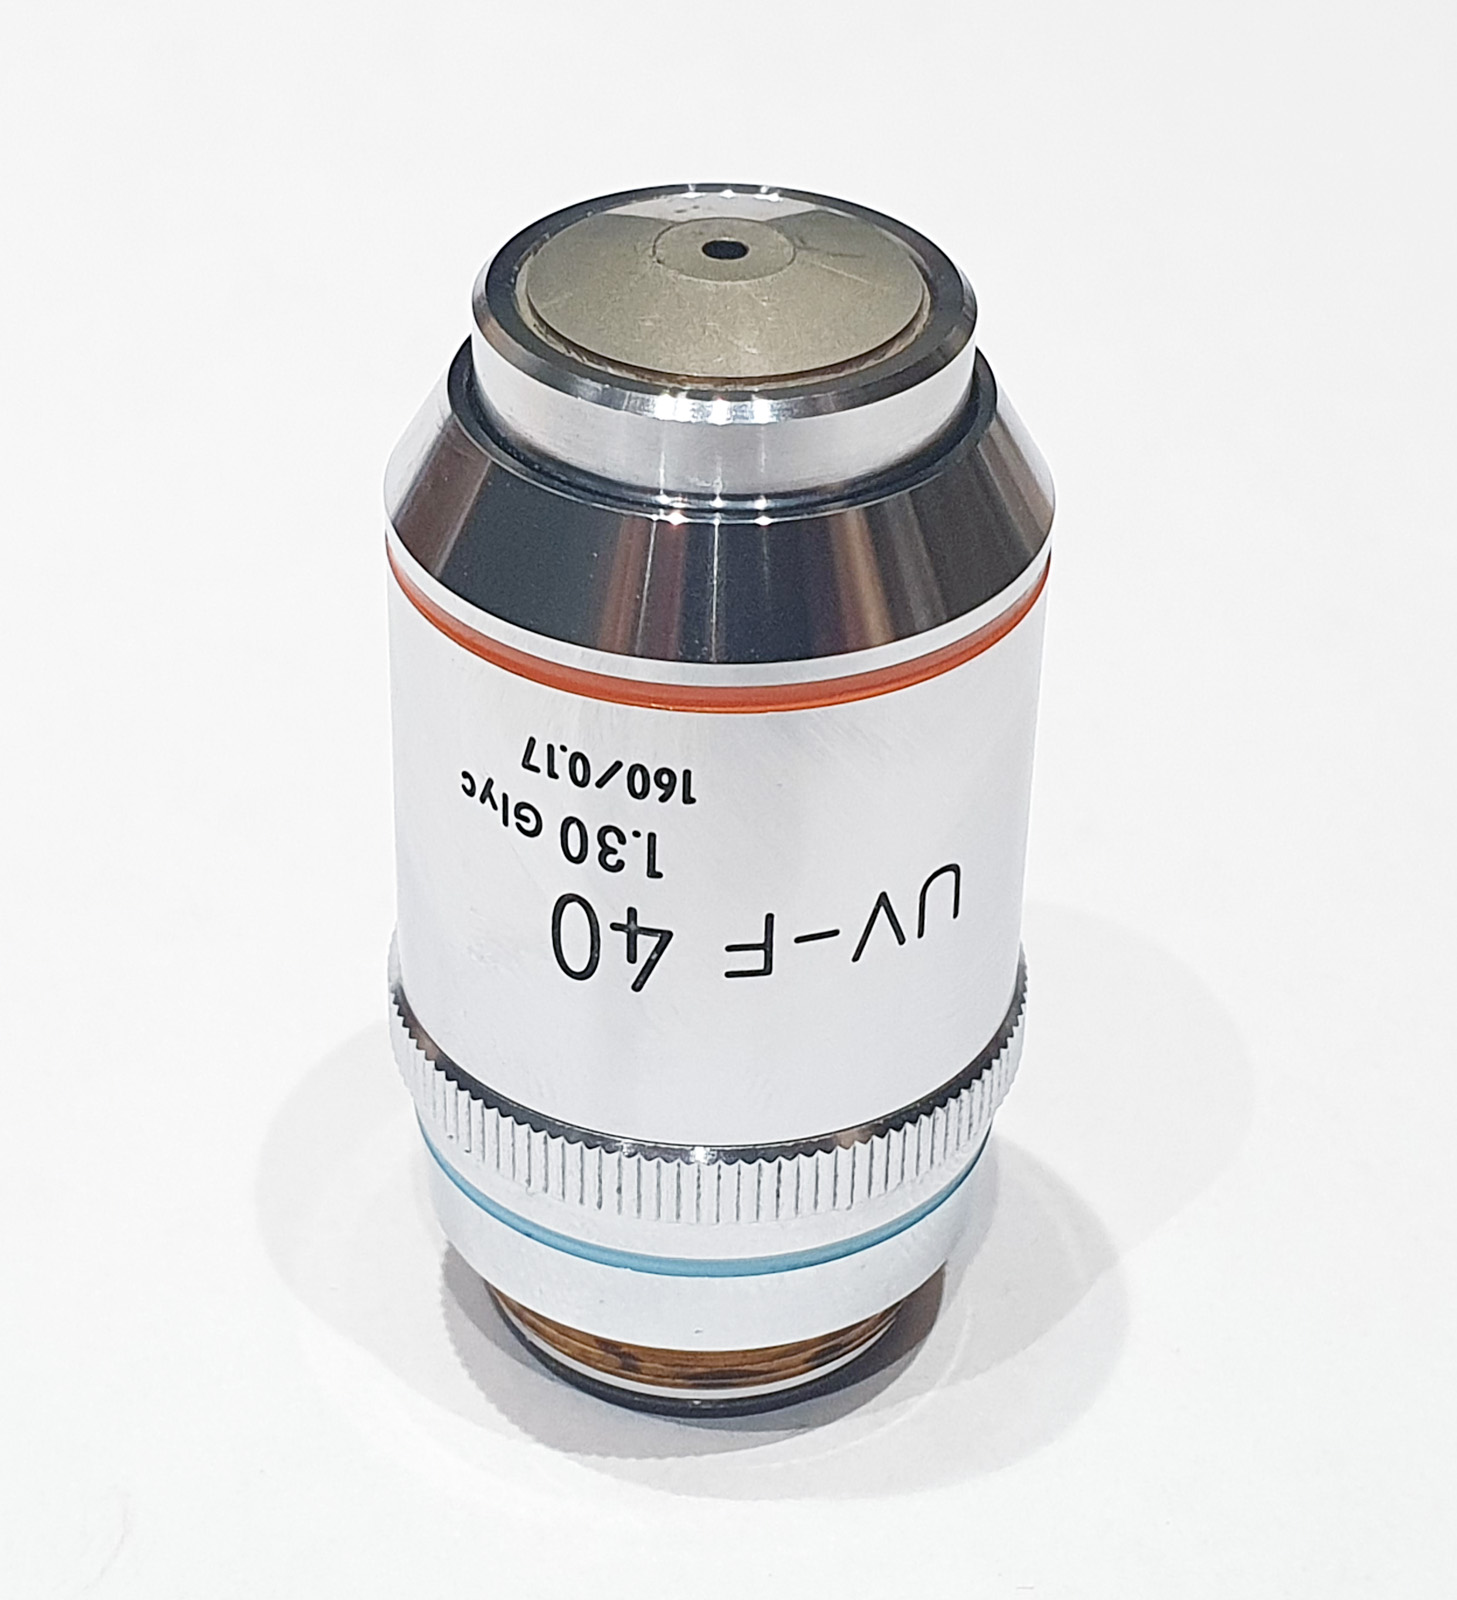
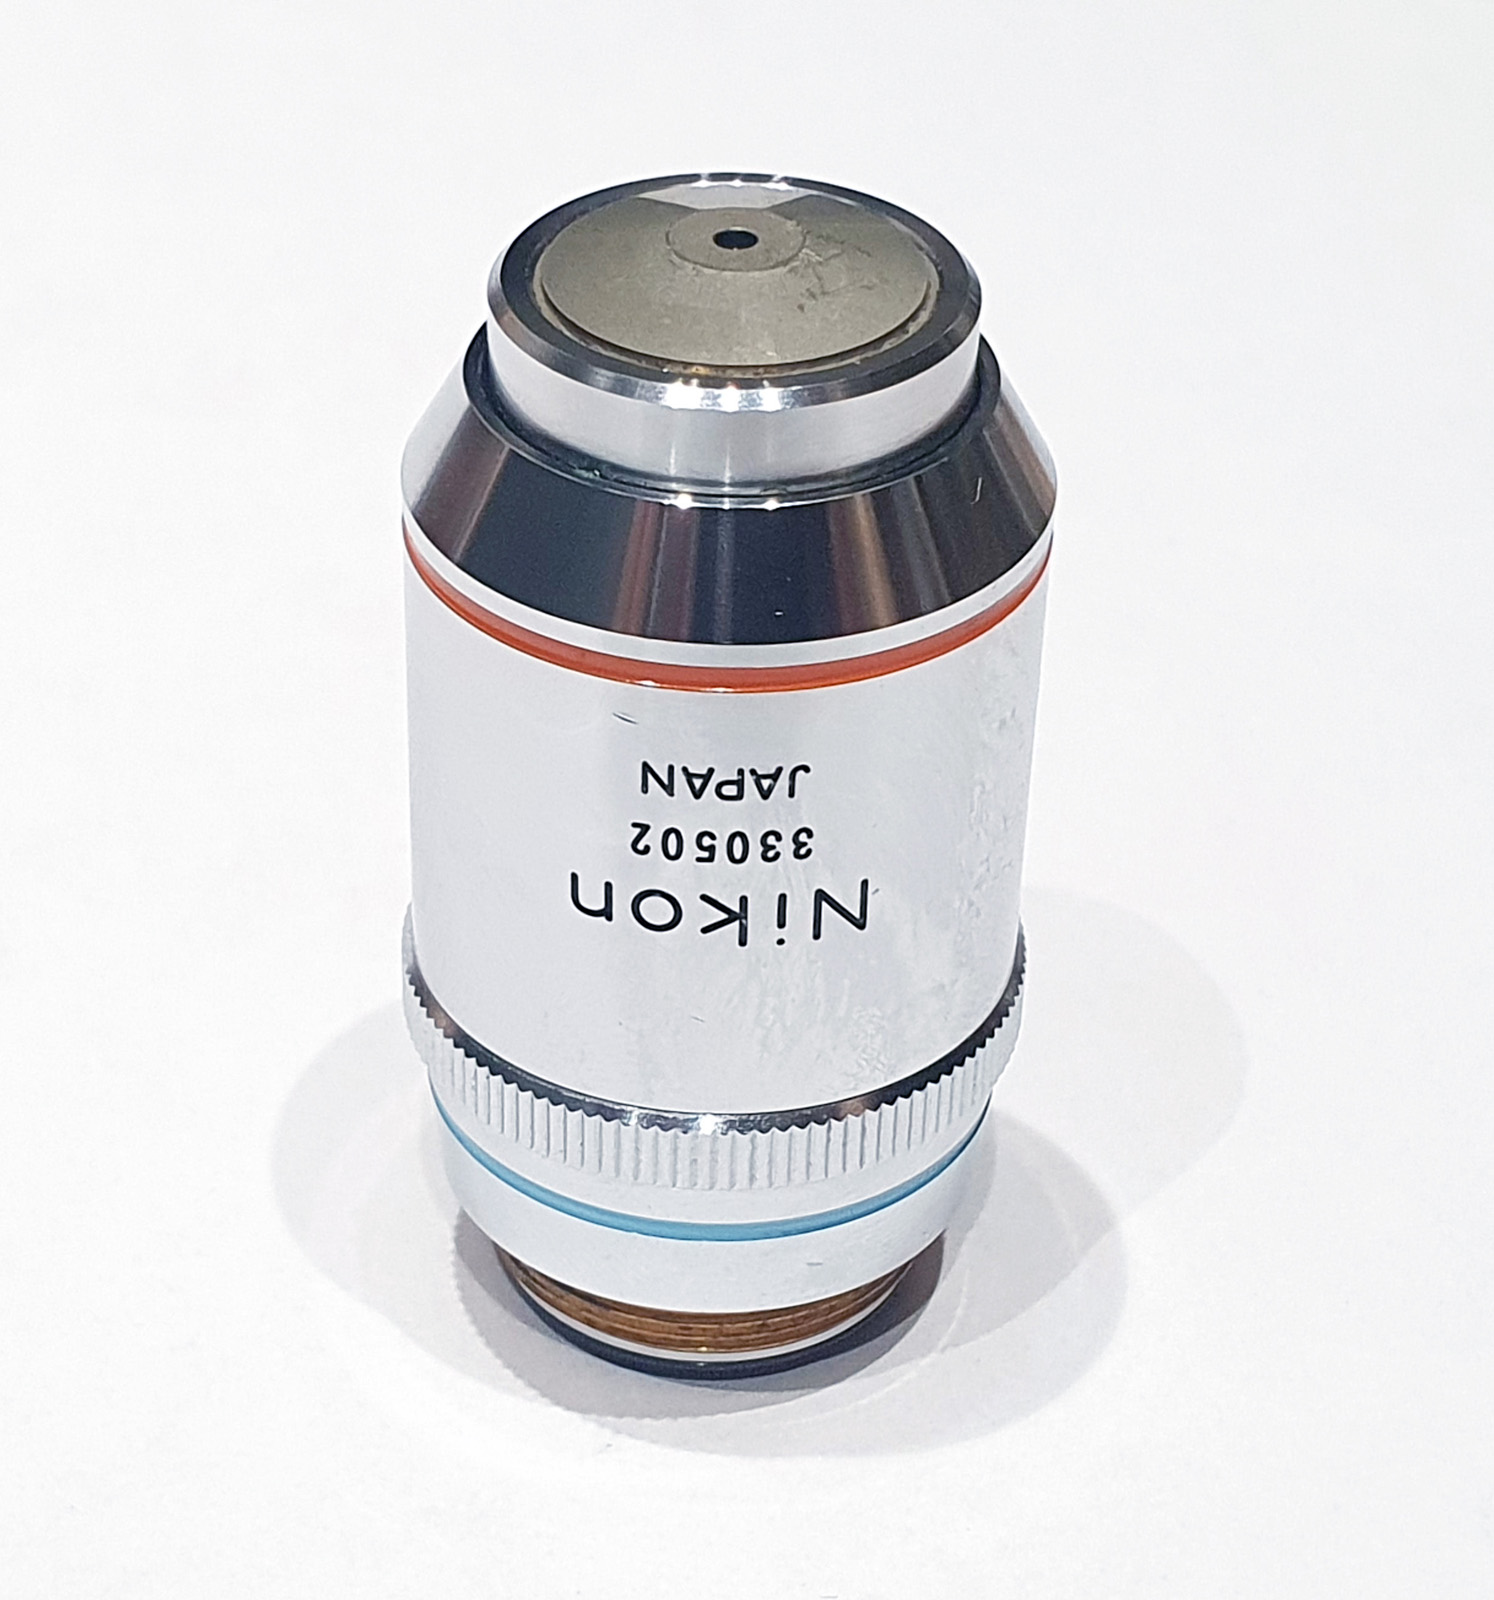
Today’s post has come about as the result of a chat with a microscope shop who I use to check over my objectives when they need fixing (JB Microscopes Ltd in Newcastle). A few weeks ago I bought an 20x Olympus Splan Apo that had some optical issues (the price was right and I had hoped it was worth the gamble). To see if it could be saved I sent it to JB Microscopes to be looked over and hopefully fixed. Unfortunately it could not, but while I was chatting with them I asked what objectives they had on their shelves. It turned out that they had a couple that I had been looking for for a while – a Nikon 40x UV-F glycerine immersion objective, and a Leitz 63x Pl Apo oil immersion objective. This post will cover some initial results with the Nikon 40x UV-F.
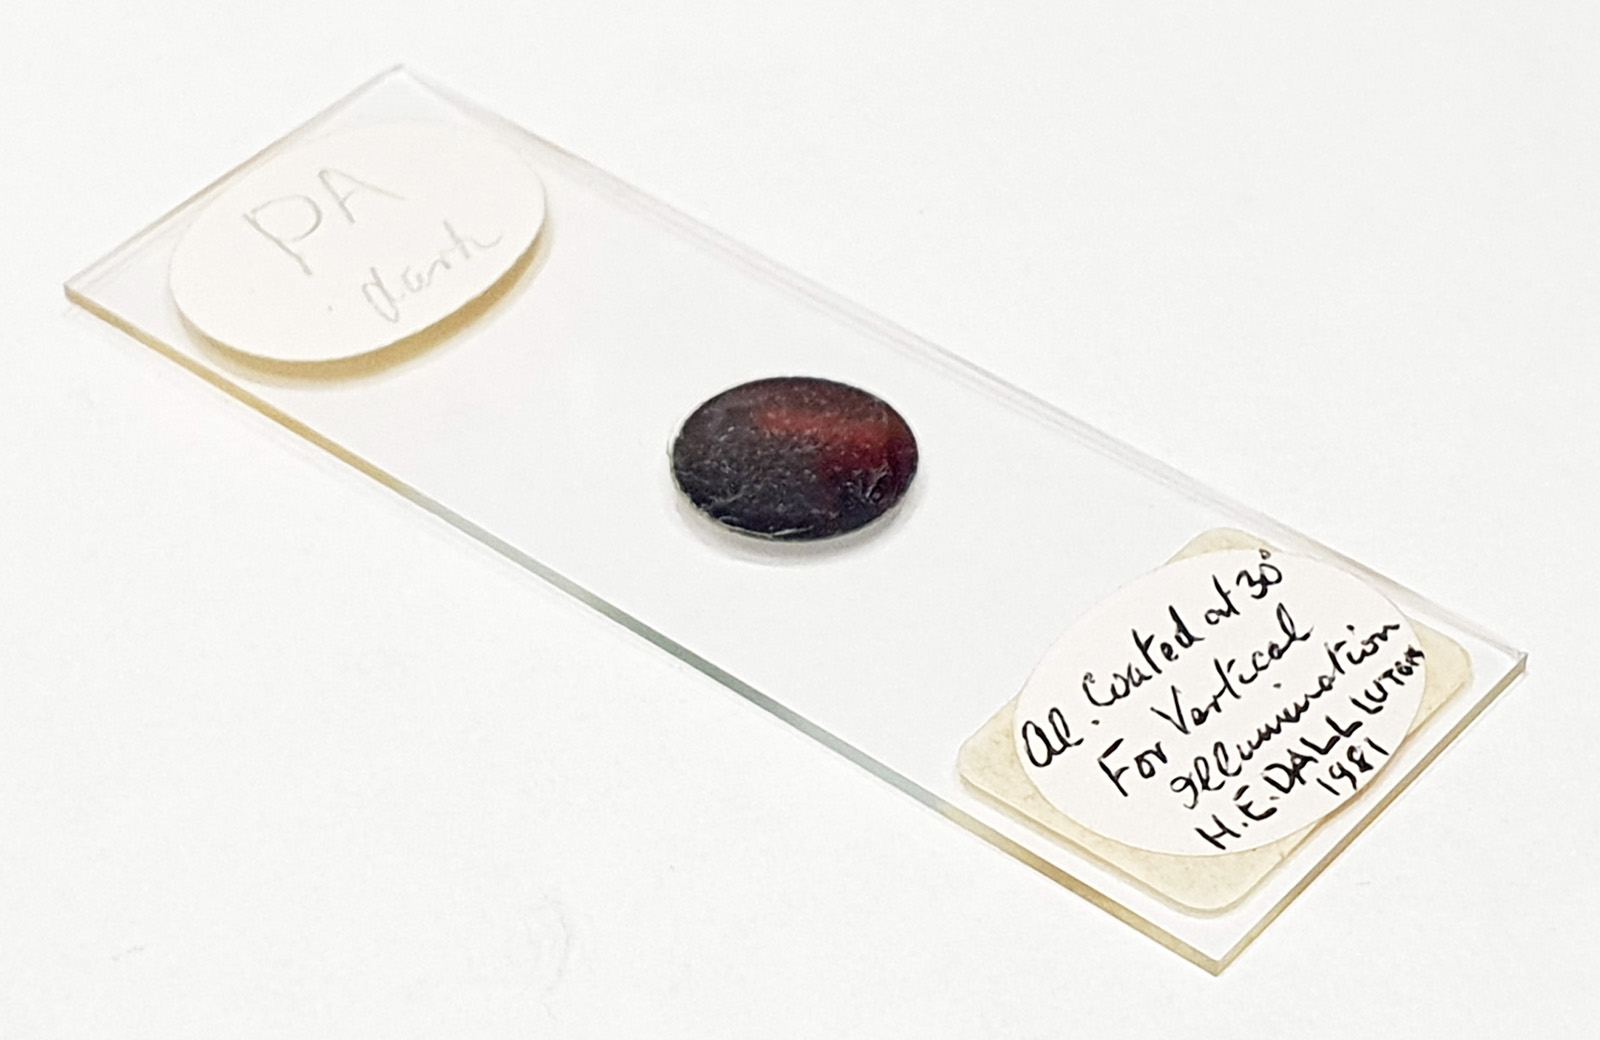
For the image I used an aluminium coated slide by Horace Dall. The slide is marked PA indicating it as Pleurosigma angulatum diatoms. Imaging was done on my modified Olympus BHB using 365nm light from an LED torch, an Olympus Abbe condenser (glycerine immersion), the Nikon 40x UV-F NA 1.30 objective with glycerine immersion, and a Nikon 5x CF photoeyepiece. Light was filtered with an Edmund Optics 365nm, 10nm bandpass filter. Camera was a monochrome converted Nikon d800 by MaxMax. 8 images were stacked in Zerene. The main image has been reduced in resolution for sharing.
Dall slide image using the Nikon 40x UV-F glycerine immersion objective
The final image was about 6200 pixels across and has been reduced to 1600 here. The stack produced plenty of detail, and to try and show this better, there are a couple of crops below which are shown at original pixel resolution.
Crop at original pixel resolutionCrop at original pixel resolution
And of course, here’s a photo of the amazing Horace Dall slide.
Aluminium coated Horace Dall slide
What about the objective? Here it is.
Nikon 40x UV-F NA 1.30 glycerine immersion objectiveNikon 40x UV-F NA 1.30 glycerine immersion objective
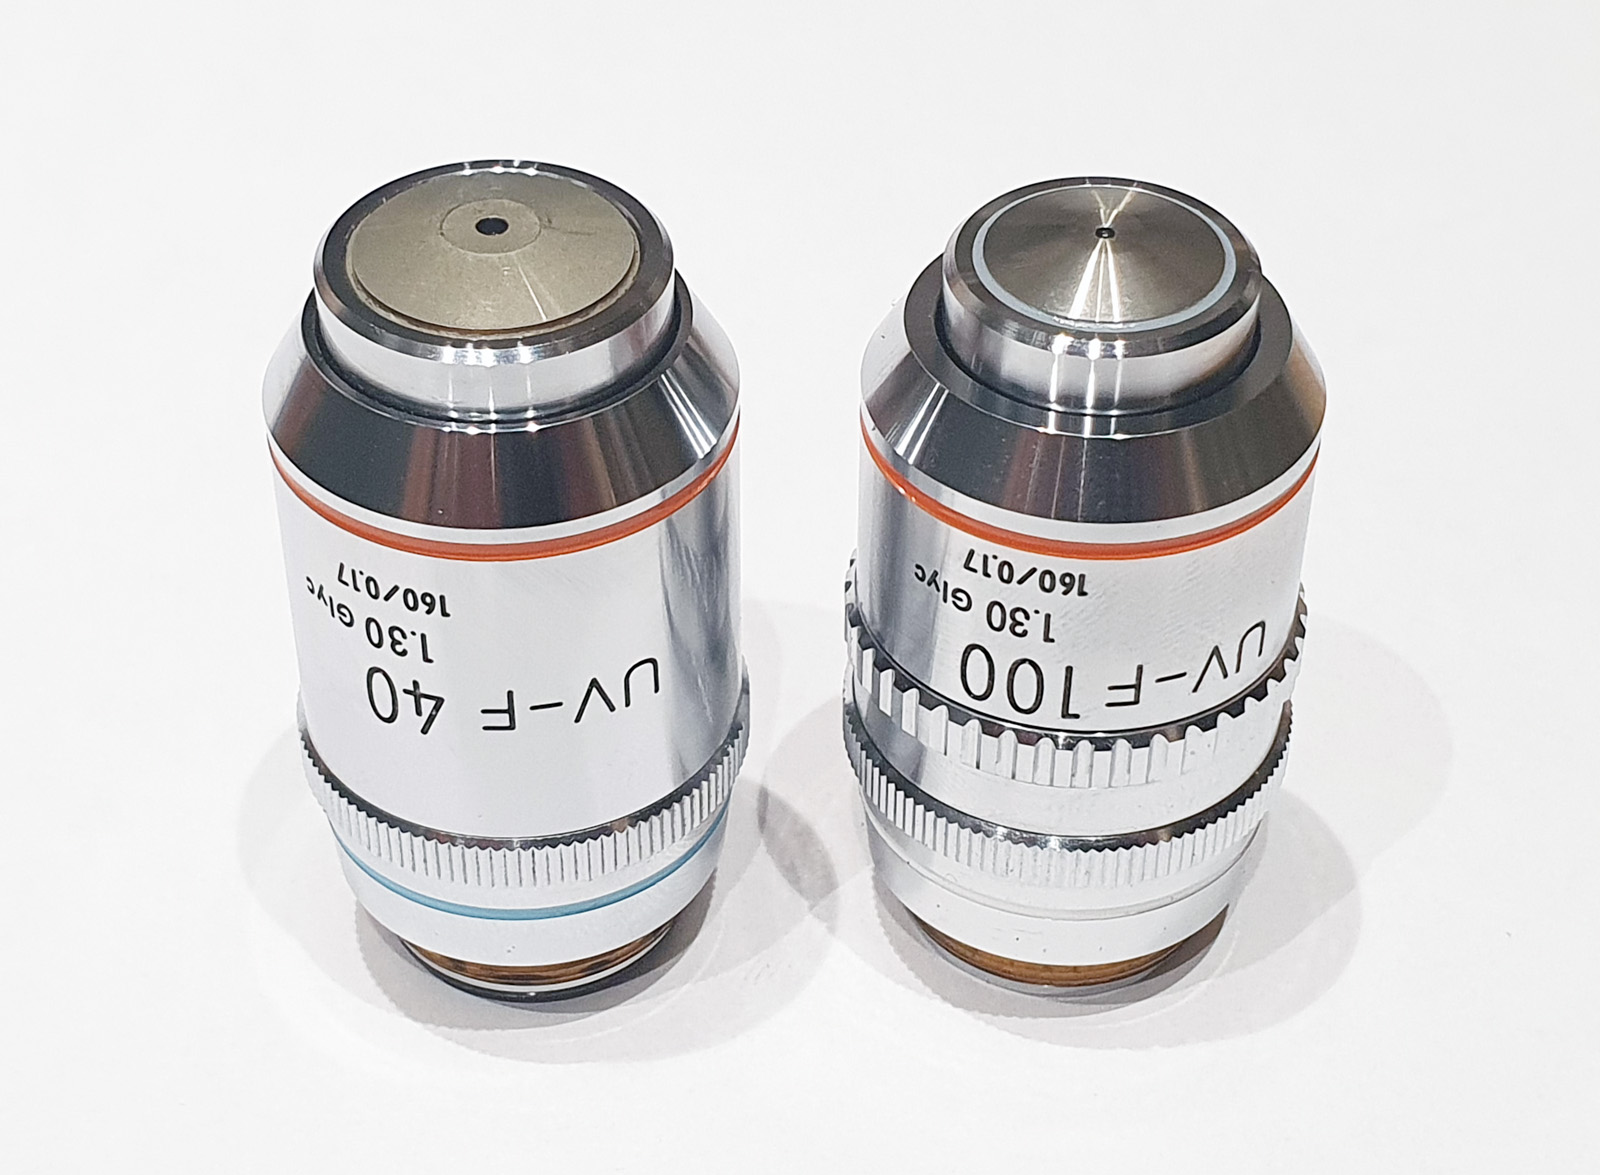
Why is this a special objective? Firstly, it’s a 40x objective with high NA. It is also quite rare, dating to around the mid to late 1980s. Originally developed for fluorescence imaging work, so it has good UV transmission (for longer wavelength 365nm UV anyway). There’s not much info about these objectives out there, but Charles Kreb’s site shows a Nikon CF brochure which has the 100x version of the objective, here. These aren’t Plan objectives nor are they Apo, so expect some field curvature and chromatic aberration if not using monochromatic light. What they are designed for is the let a lot of light through, and they certainly do that.
I have a 100x version of the objective, which has also been used for imaging at 365nm. The 100x is nice as it has an adjustable iris making it great for darkfield. Here are the 40x and 100x together.
Nikon 40x and 100x UV-F objectives
If anyone has the 10x and 20x from this series that you are looking to sell, please let me know as I am on the lookout for those two for my UV work.
We often do not thank our suppliers, but they make the work we do possible. As such, thanks again to JB Microscopes – great customer service and worth contacting if you are in need of something specific (they do not list their stock on their site). As always, thanks for reading, and if you’d like to know more about my work, I can be reached here.
Occasionally I’ll buy a little bit of a ‘lucky dip’ selection of slides to image on the microscope, especially if the same seller has a number of them for sale at the same time. At the weekend a box of 8 slides came through, and I wanted to share some of the images from a few of the slides. Images were done on my Olympus BHB microscope and have been reduced in resolution for sharing here.
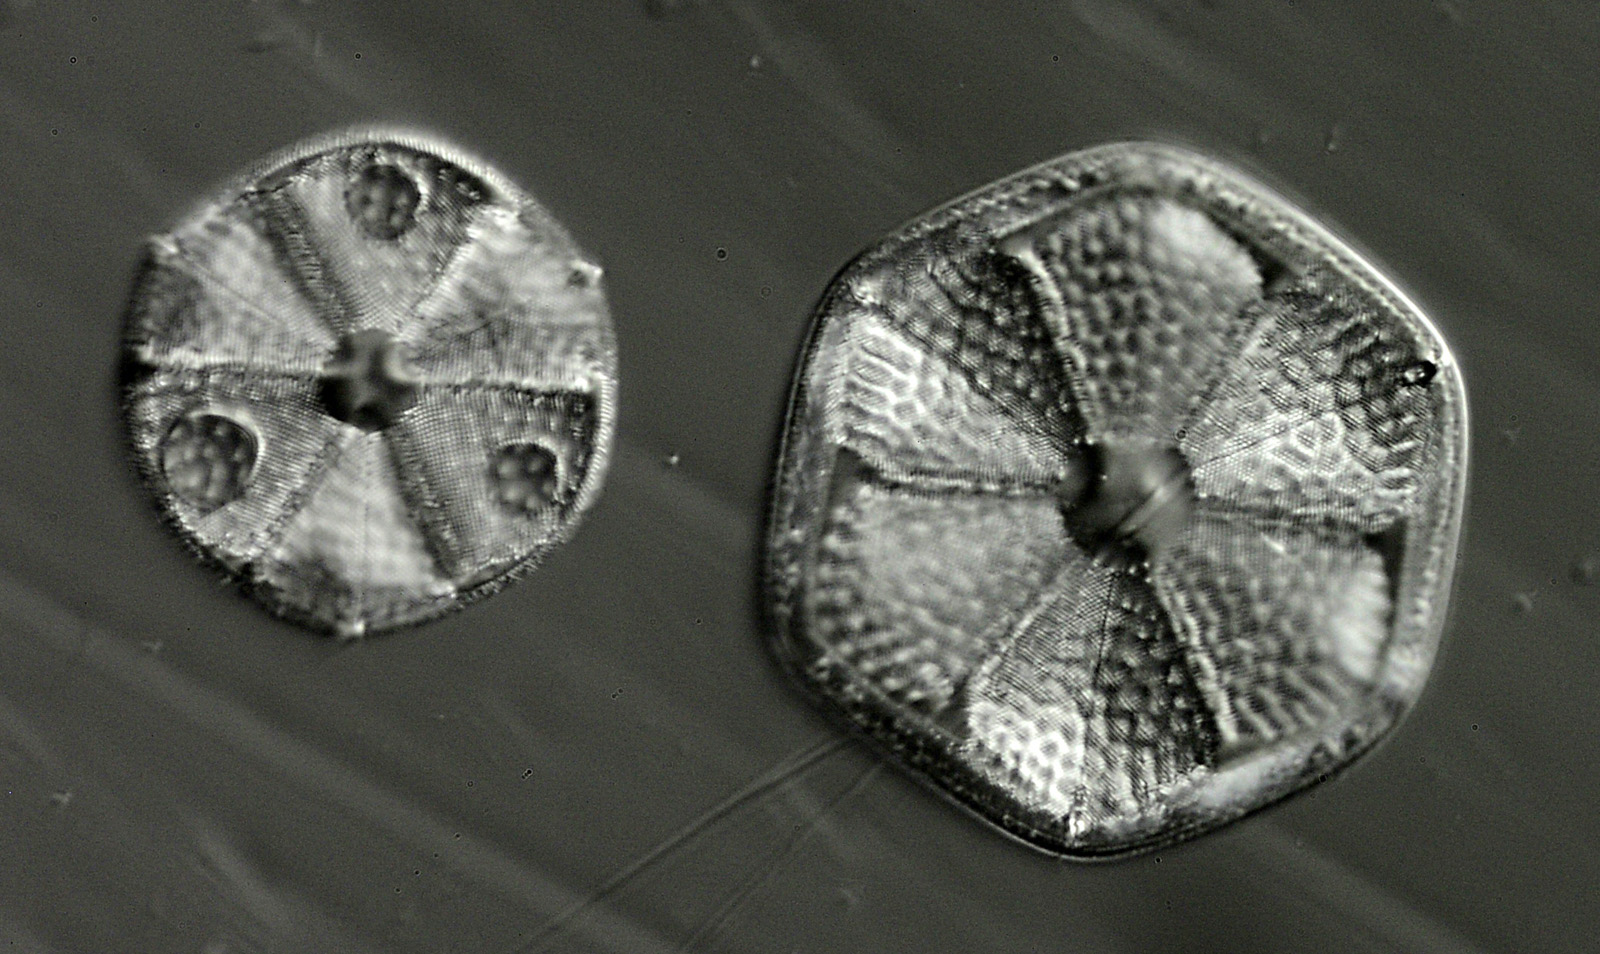
First is a diatom slide, an Actinoptychus hexagonus by W.A. Firth, imaged using a 60x Olympus Splan Apo NA 1.4 objective with oblique 450nm illumination.
Actinoptychus hexagonus using a 60x objective
Lots of lovely detail in the 60x image (this was a stack of 24 images). There are actually 2 diatoms on the slide, and here’s what they look like together, using a 10x objective and oblique light.
10x objective image
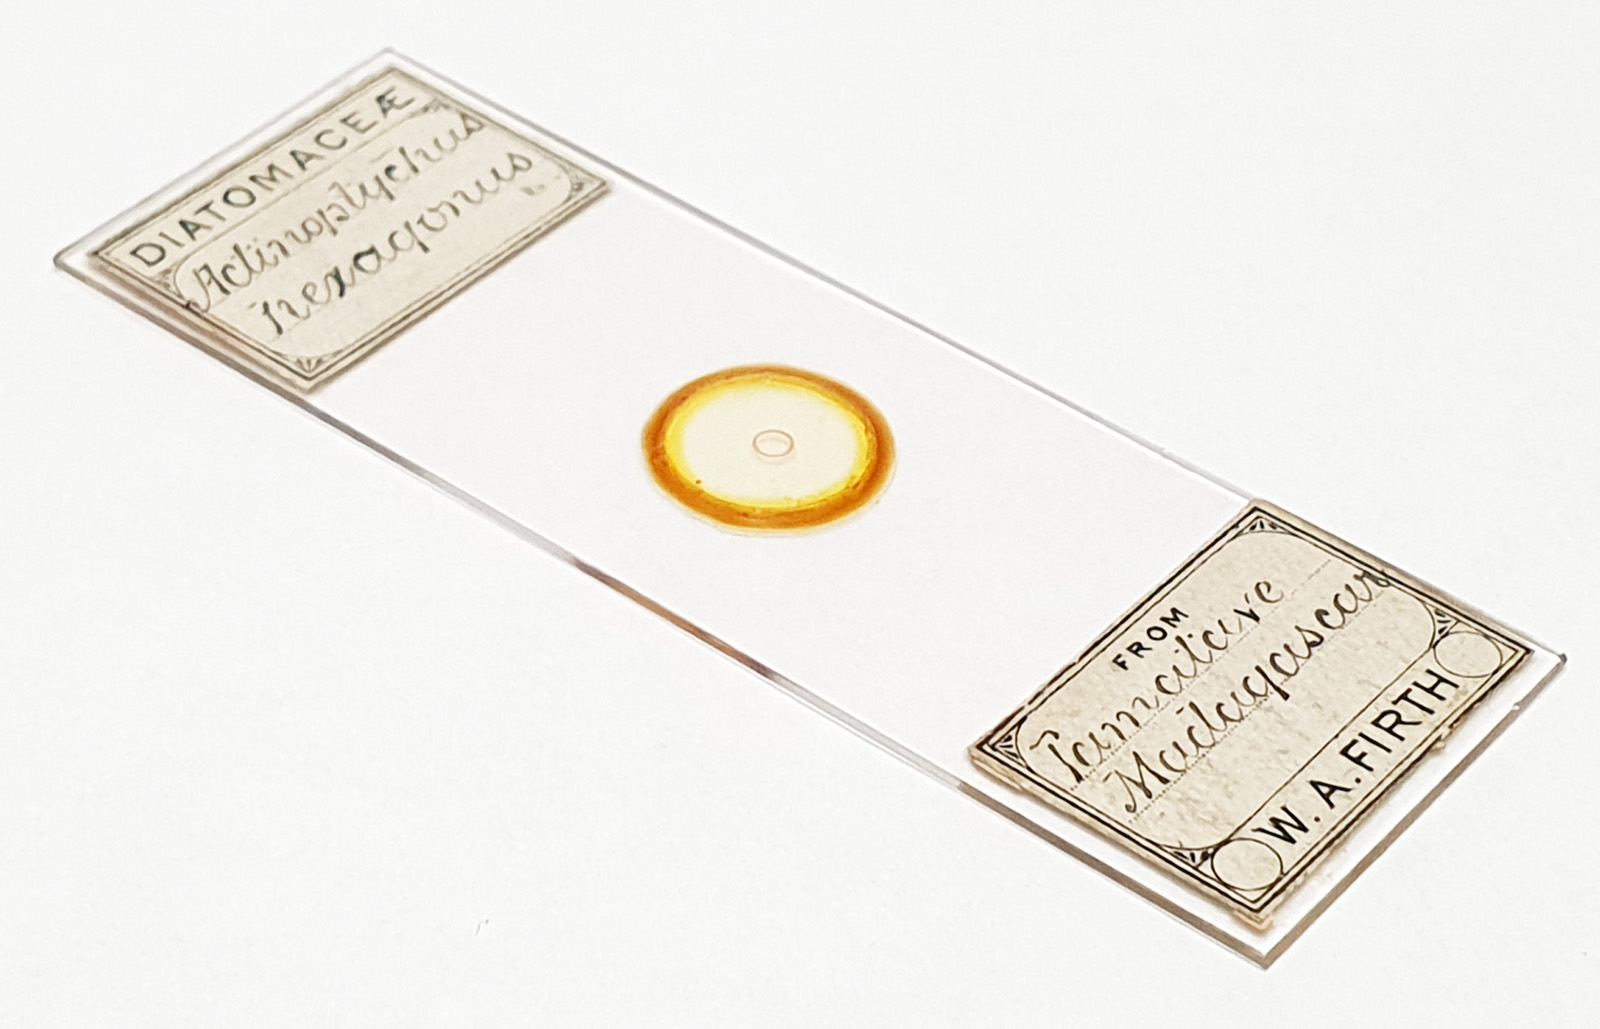
The main 60x image was of the one of the right. Here’s the slide itself.
W.A. Firth slide of Actinoptychus hexagonus
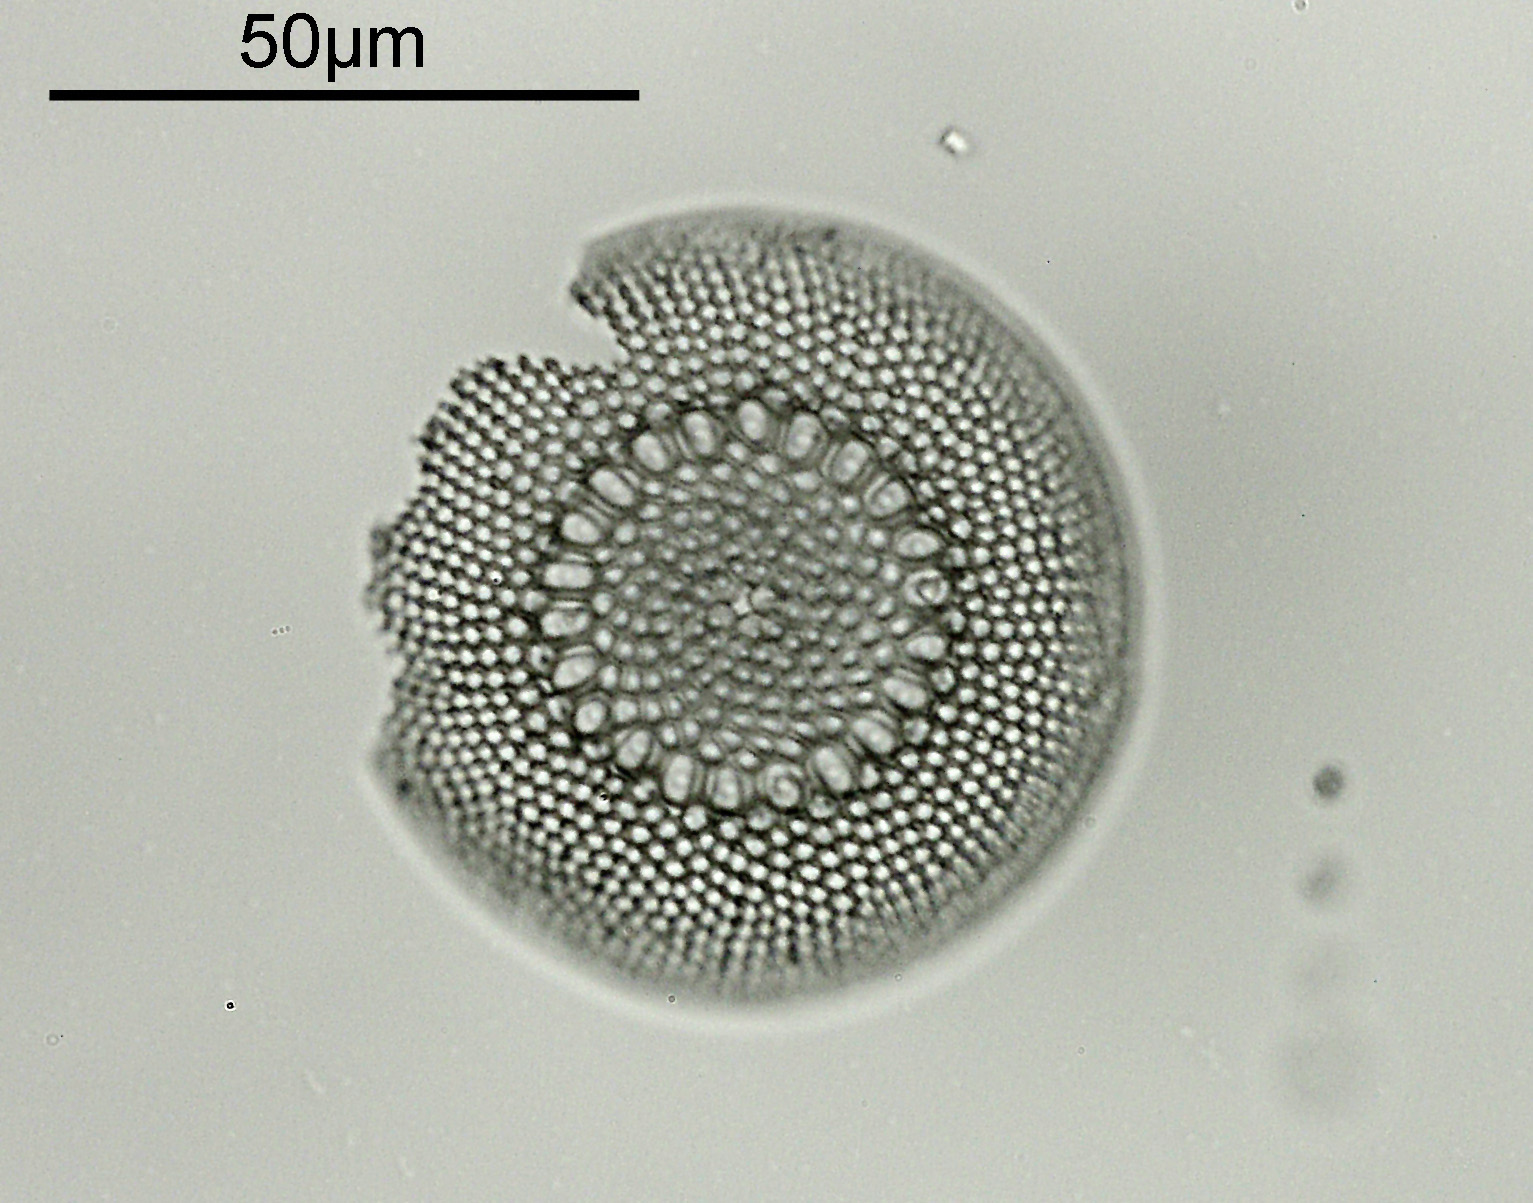
Next is another diatom slide, this time a strew from Oamaru. I only have a very preliminary image of one of the diatoms I found on this, as I then went on the Diatom Images facebook page to get an ID for it (I’d not seen one before). It is apparently Brightwellia coronata. Single image with a 20x objective.
Brightwellia coronata from an Oamaru strew slide
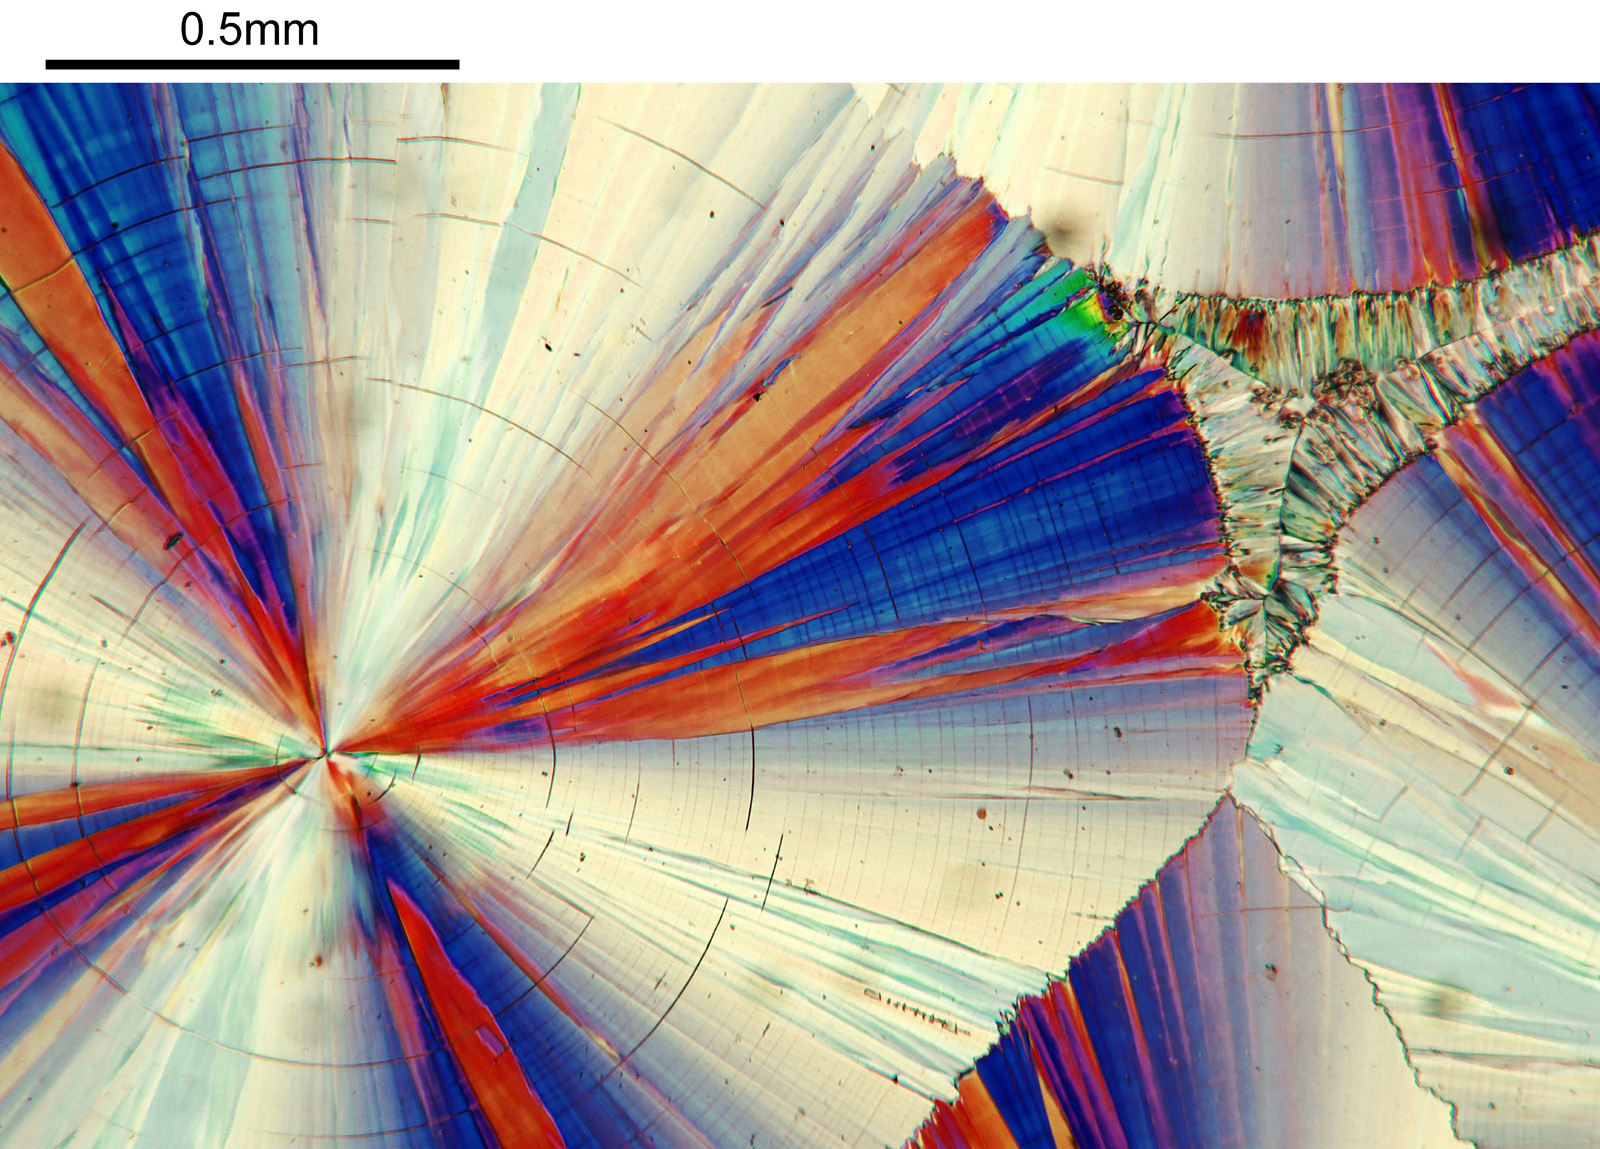
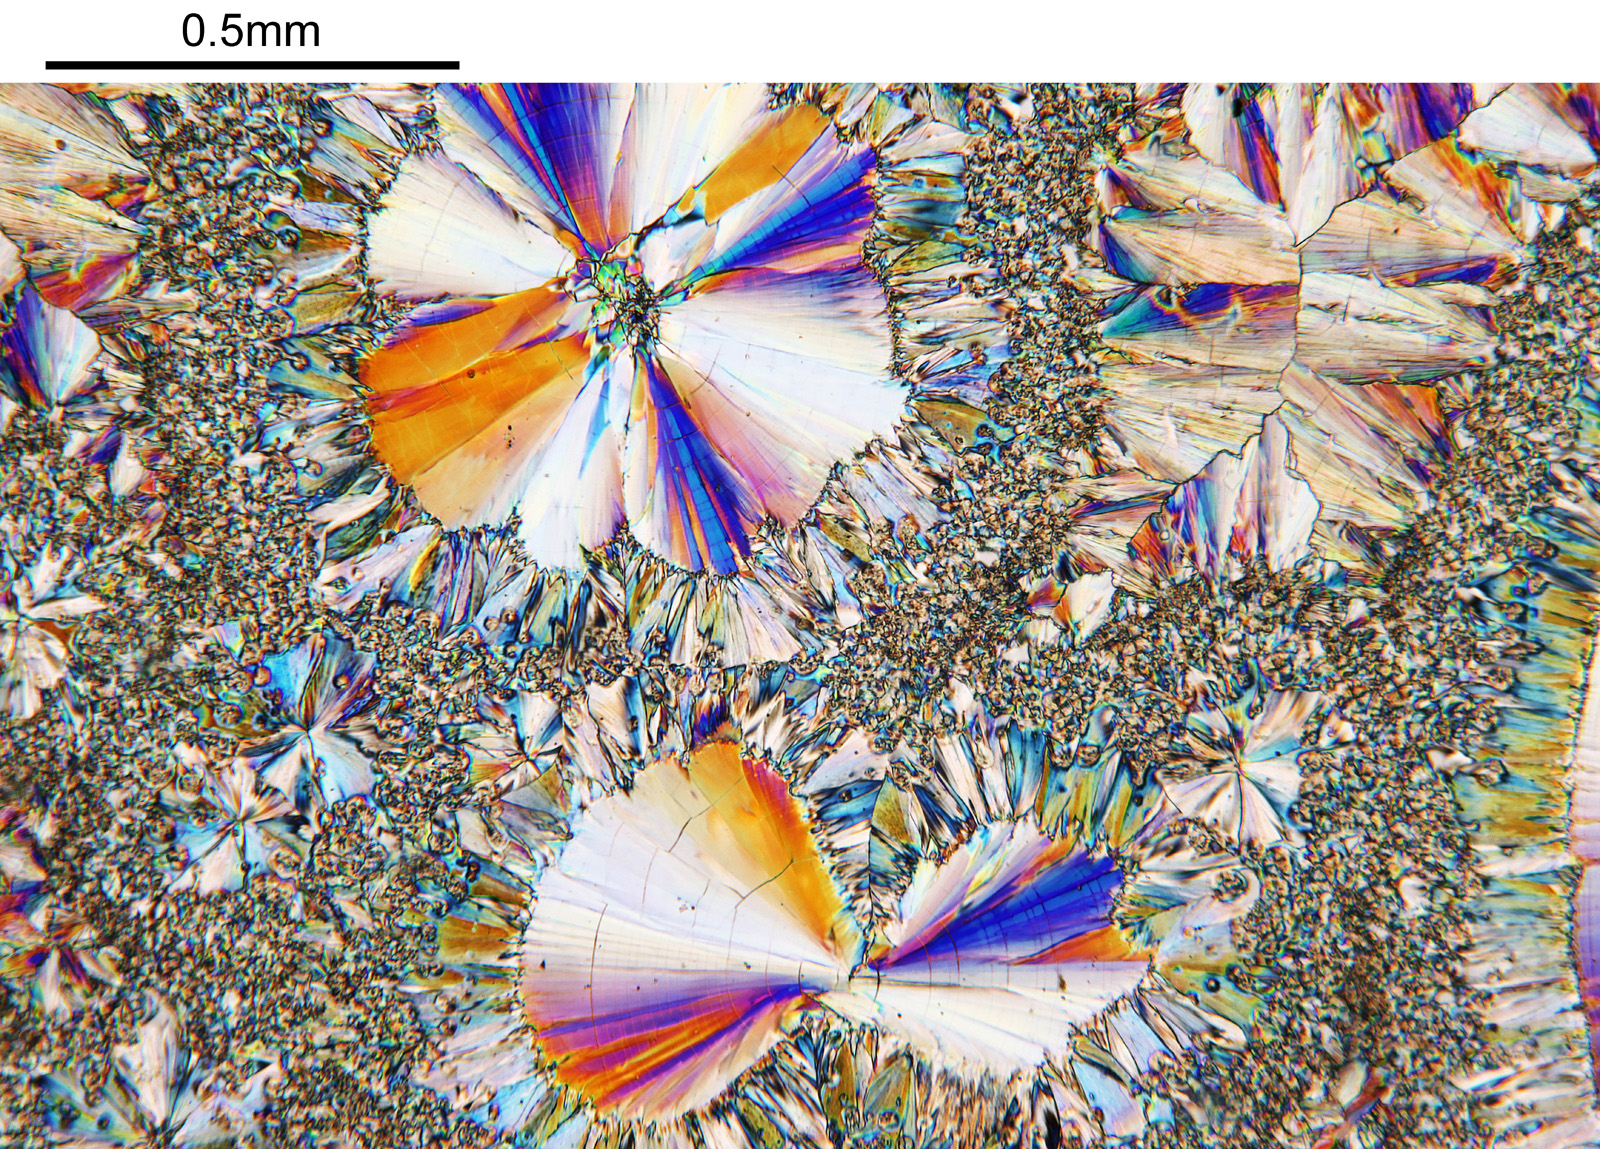
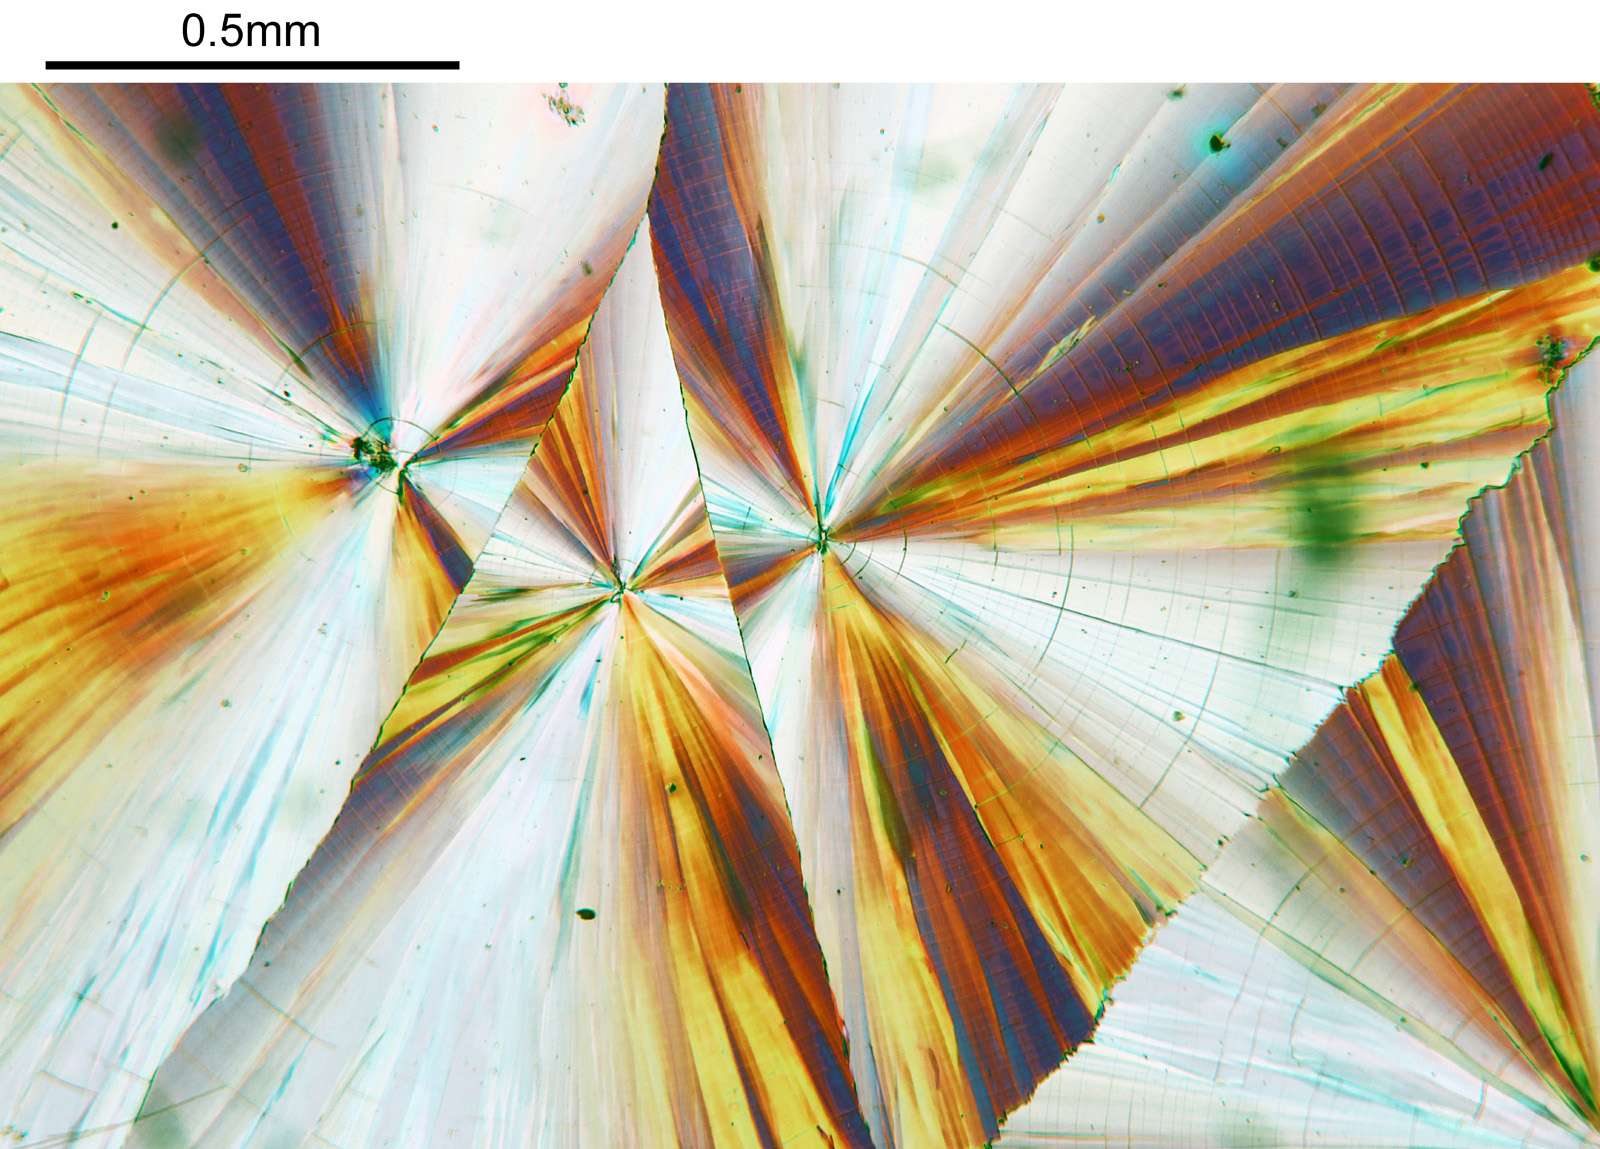
Finally for now, something a bit different – Salicine crystals imaged using cross polarized light and 4x Zeiss Planapo objective.
Salicine with a 4x objective and cross polarizedSalicine with a 4x objective and cross polarizedSalicine with a 4x objective and cross polarized
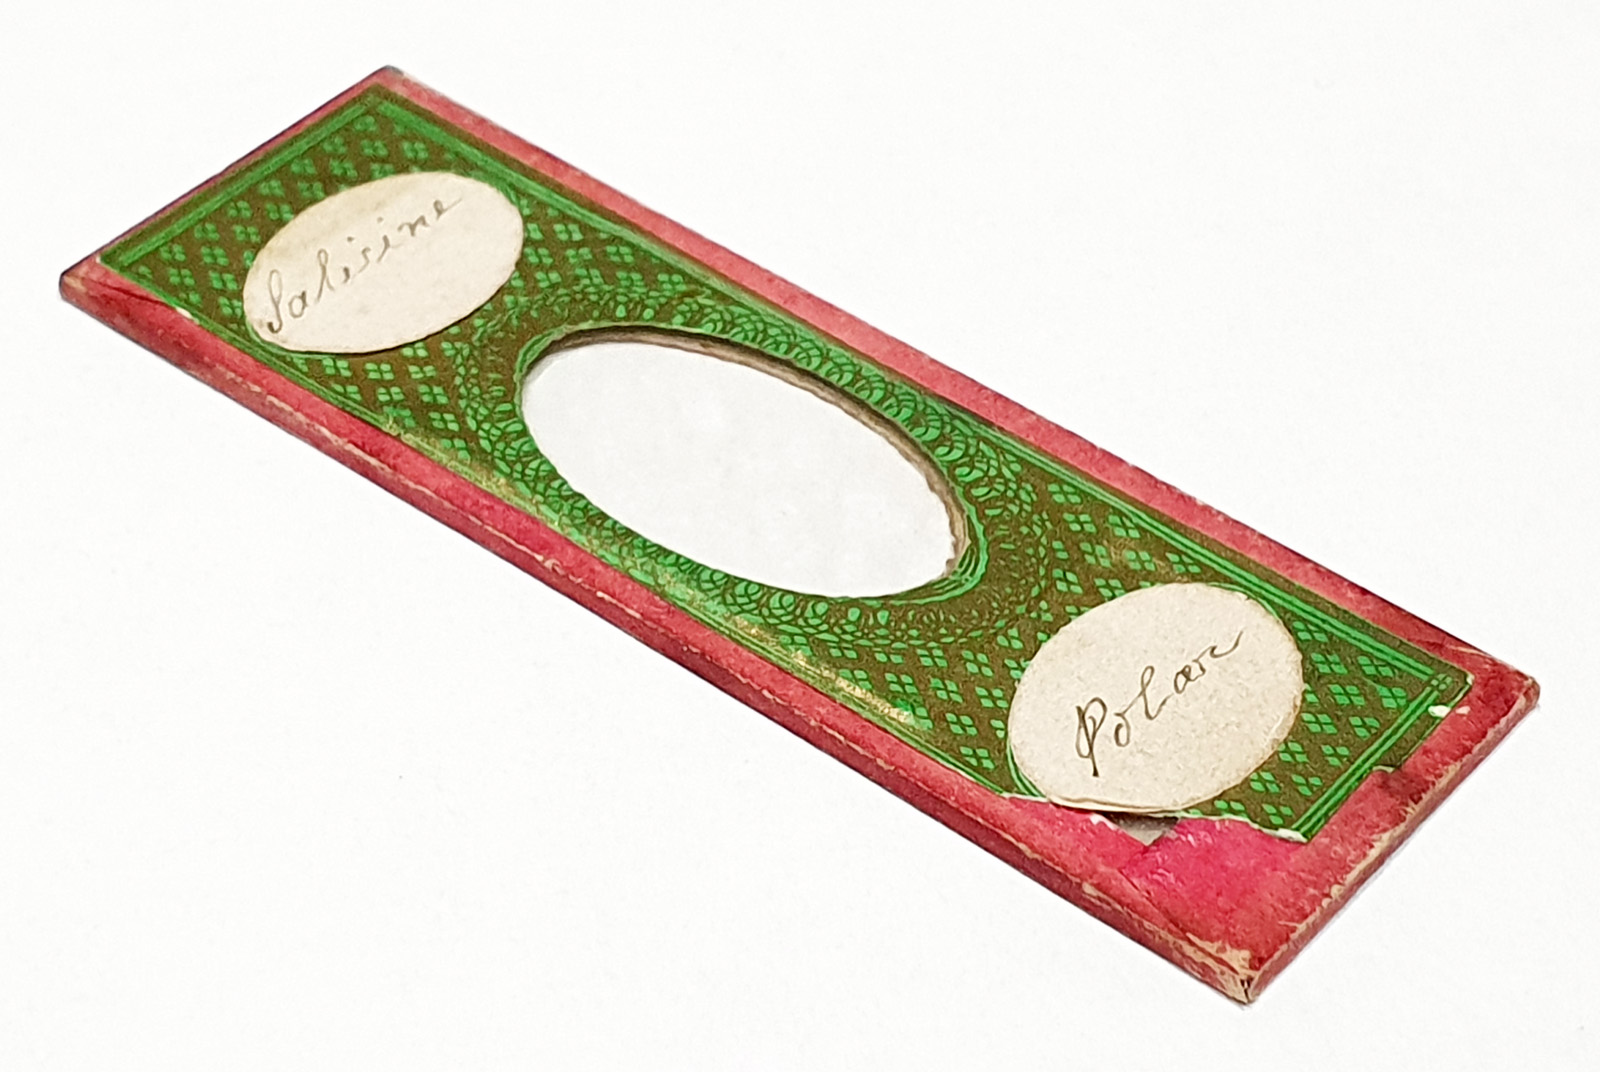
And the slide itself.
Salicine slide
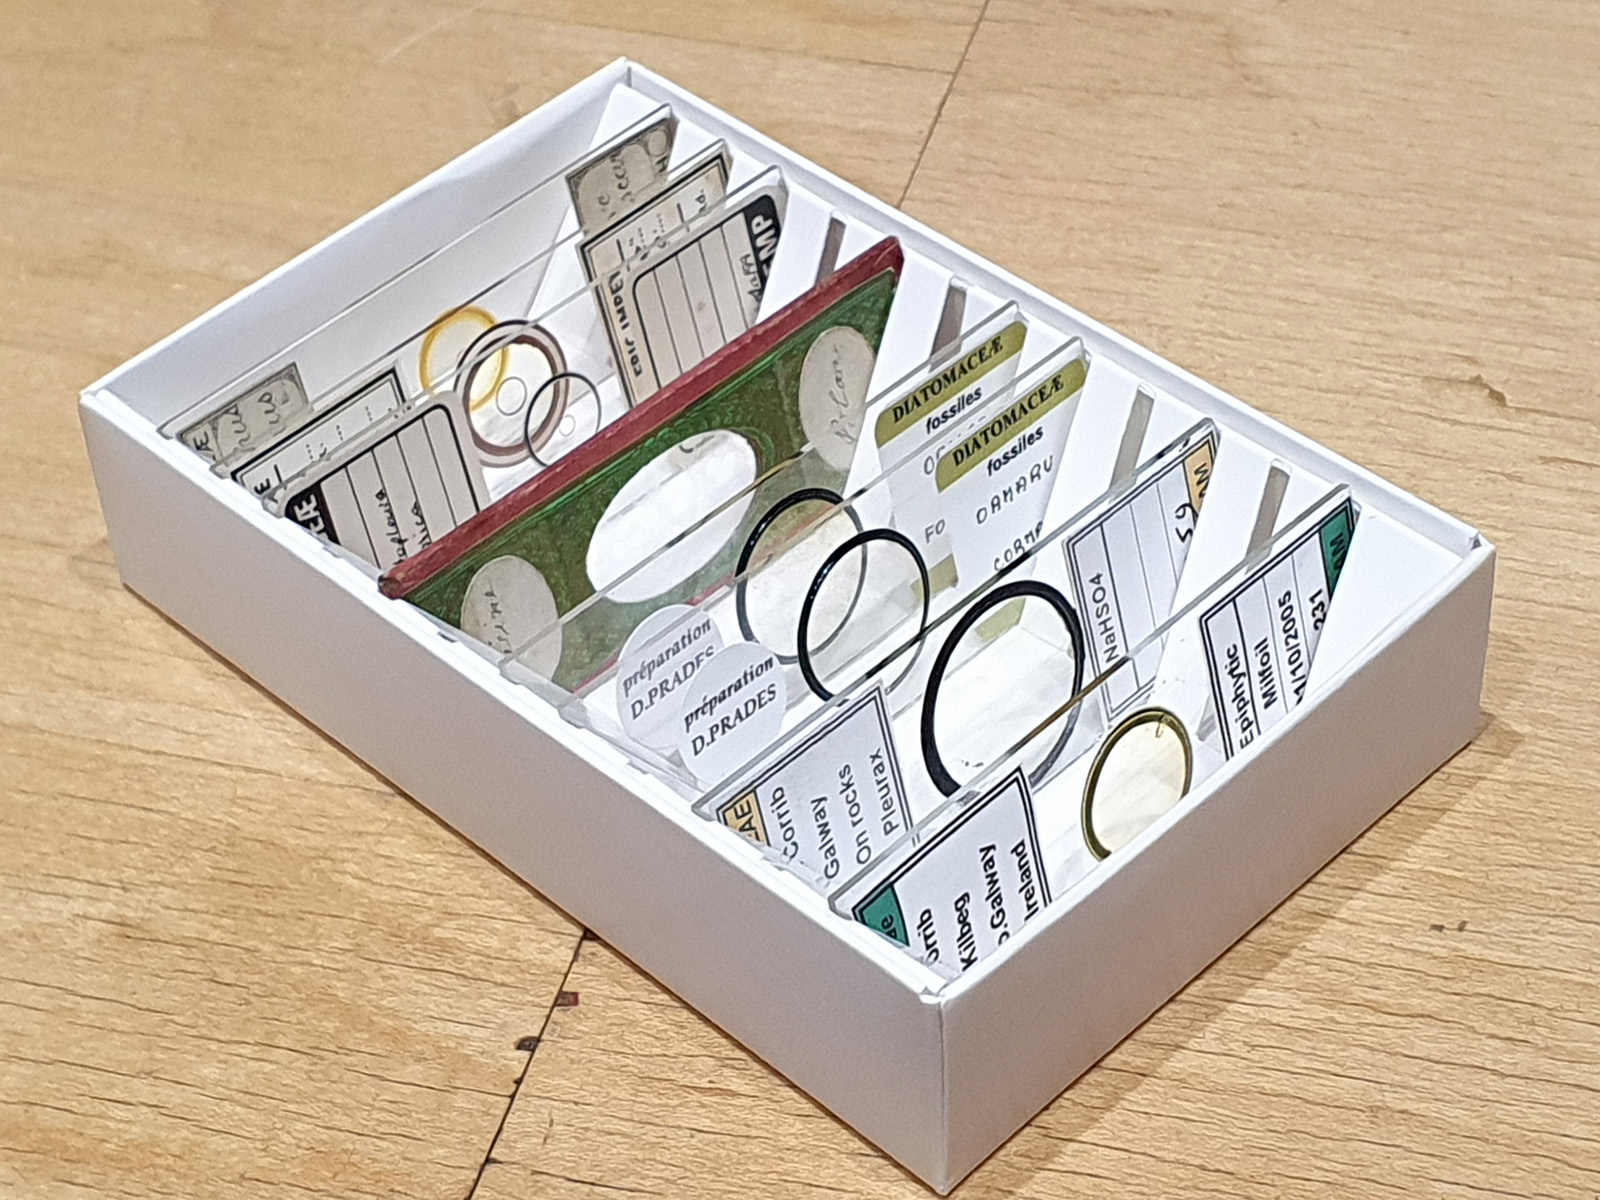
There’s a few more in the box to look at….
Slide box to check out
This box of slides cost me about £8 per slide including delivery, and will certainly give me plenty of enjoyment with trying to image them. I’m a huge advocate of second hand and older slides, and they are well worth checking out.
As always, thanks for reading, and if you’d like to know more about my work, i can be reached here.