
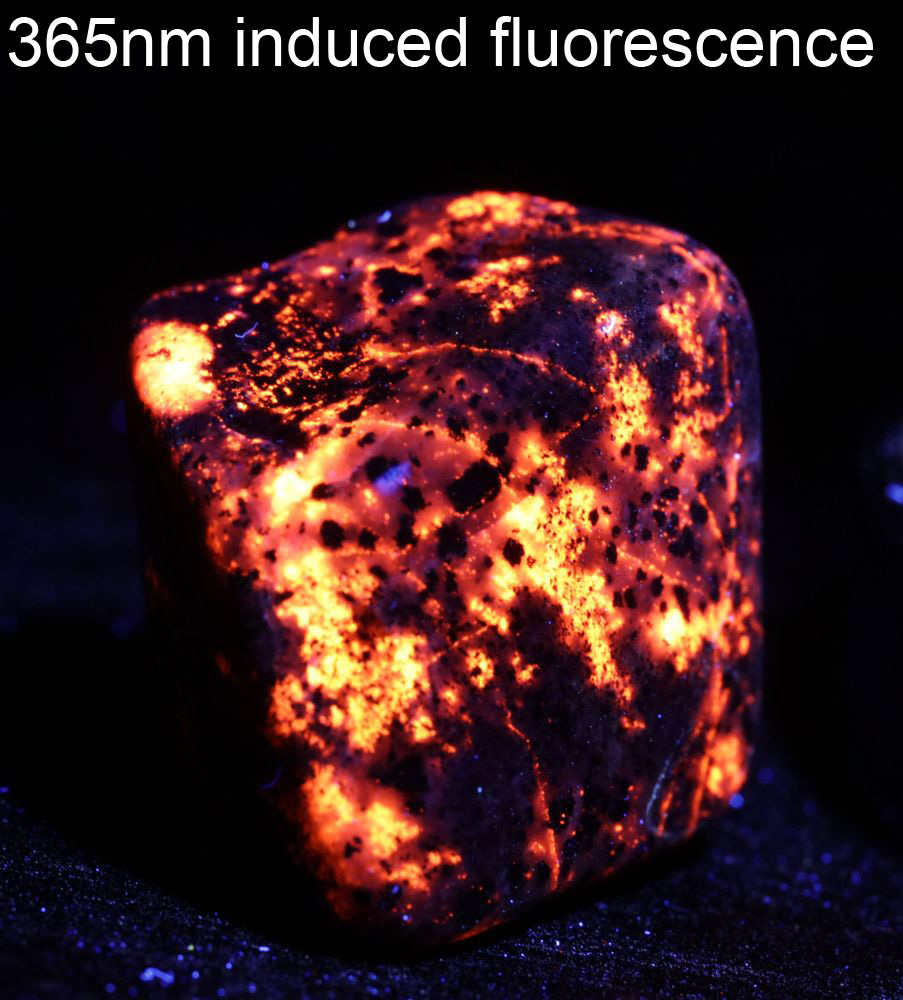
Come on, I bet you were not expecting to see a title saying ‘Yooperlite’. What even is Yooperlite? Well, Yooperlite is a very unassuming looking grey rock, in which is hidden a heart of burning fire. However in order to see its flaming heart requires a mystical light that you can’t see. Ok, enough of that and back to the science. Yooperlite is a a Syenite rock which is rich in fluorescent sodalite, and is found in Michigan. While it looks grey in visible light, when illuminated with long wavelength UV parts of it shines yellow and orange, as shown below.
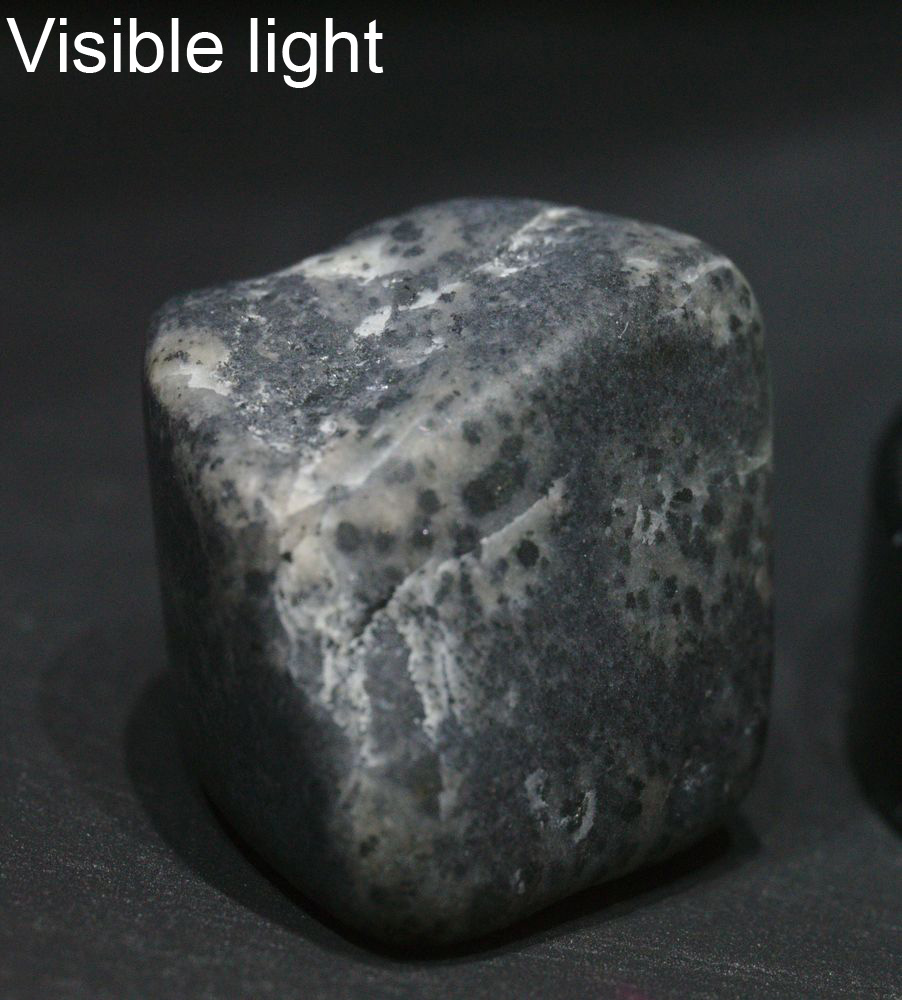
Just on case you were wondering, the rock doesn’t look quite as interesting when imaged using normal visible light.
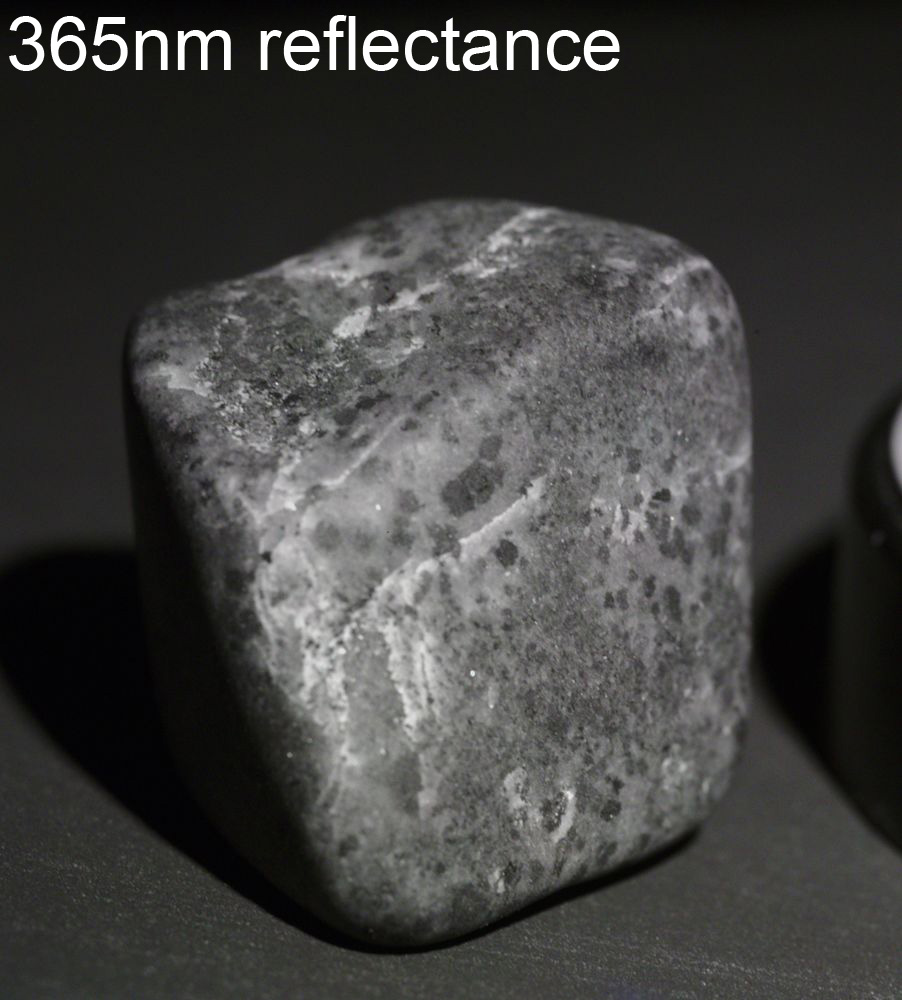
Indeed, it is equally uninspiring when viewed using UV reflectance imaging.
It really does shine with a fire when illuminated with a UV source. This type of UV induced visible light fluorescence is not uncommon in minerals, with many of them glowing with different visible wavelengths under UV light, however Yooperlite is extremely bright and pretty to look at.
The images above were taken with a macro lens on a normal camera. However, once you realise what needs to be done to carry out this type of imaging, it can also be applied to microscopy. The image below was taken using an Olympus BHM reflectance microscope using a 5x objective, as a stack of about 20 images.
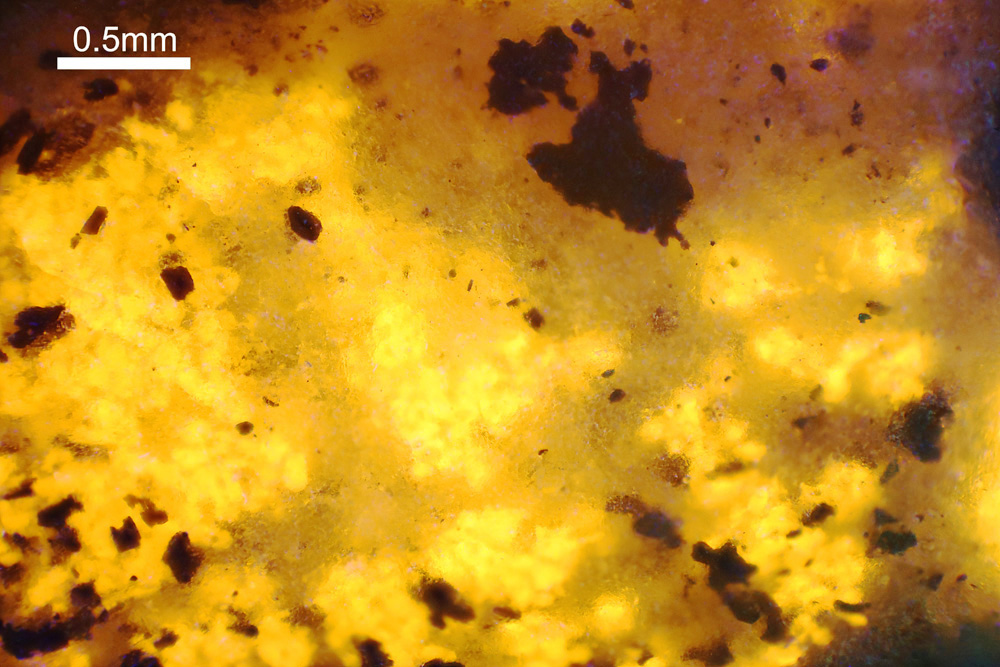
Under the microscope, the Yooperlite material looks truly 3d, looking as if there is a fire within underneath a layer of ice.
UV induced visible light fluorescence photography is an interesting and powerful photographic technique, used in a wide range of research fields, from dermatology and forensics, to art conservation, biology and microscopy. As it uses a standard visible light camera and lenses which transmit visible light, it does not need some of the specialist equipment required for UV reflectance photography. However there are still a few things which need to be done to make it work. The light source needs to be filtered to let only UV light through to the subject (I used a Baader U filter on a 365nm torch), and the camera lens needs a filter which blocks UV from reaching the sensor. ‘Ah’, I hear you say, ‘my camera has a filter on the sensor which blocks UV, so I don’t need an additional filter’. Well, yes and no. Normal visible light cameras do have a UV blocking filter, but not all of them block all the UV, so additional UV blocking filtration is also needed on the lens in that case. it is also good practise to use one to eliminate the chance of elements inside the lens fluorescing on UV exposure. I used a 420nm long pass filter which had low inherent fluorescence, so did not give an additional colour cast from UV exposure. Also, you need to image in the dark to get a true fluorescence photo. Really, really dark. All extraneous visible light needs removing for a true fluorescence image. The Yooperlite fluorescence is so strong though, that even in daylight, if you shine a 365nm UV torch on to it you can see the yellow.
The sample of Yooperlite I used was bought from the Caledonian Rock Shop and is about 2cm across. I used a 365nm torch, with additional filtration from a Baader U filter for filtering the light. The camera was a Canon EOS 5DSR and the lens a Rayfact 105mm f4.5 macro lens, with a 420nm long pass filter on the front. The Yooperlite was placed in a box painted with Semple Black 3.0 paint to effectively removed UV reflection and fluorescence around the rock.
Thanks for reading and if you want to more about this or any other aspect of my work, you can reach me here.