
My journey into the world of microscopy with my little Olympus BHB microscope (Project Beater) has been really fun, and has opened up the possibility of doing some UV microscopy. However, as is inevitable when working with 40 year old equipment there are some challenges. One of which is the in-built lighting system. On my system the electronics were fried, and big scorch marks next to a very complicated looking component made me think that an external power supply would be a good idea. Also the original tungsten bulbs are pretty thin on the ground now, and cost anywhere up to about 50GBP each. Couple that with a lifespan of about 200 hours if they are looked after properly, and it can get pricey, quickly….
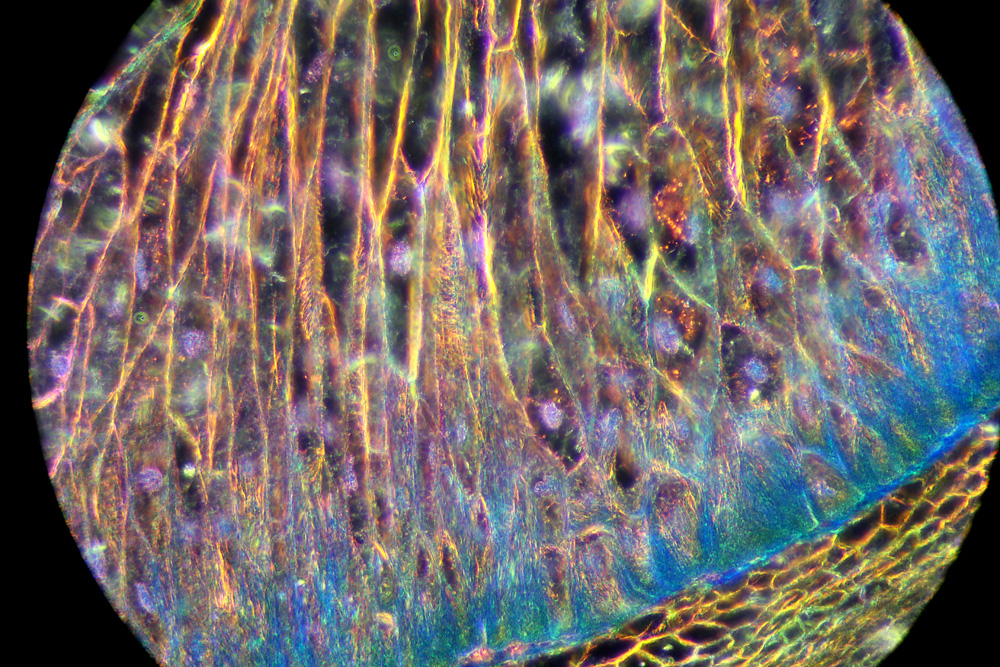
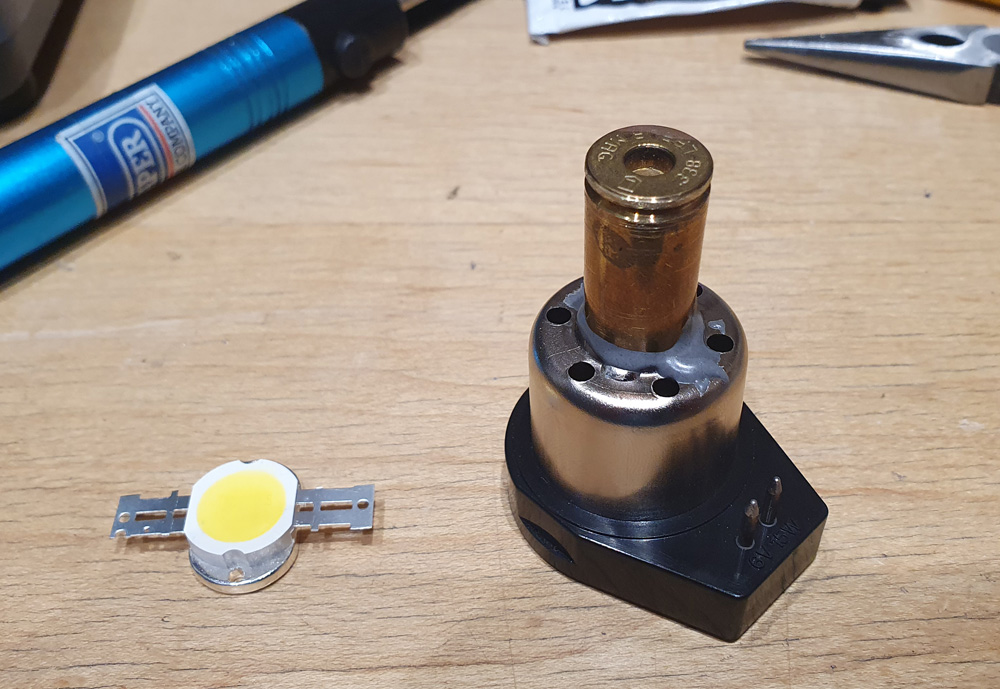
As a result of this, converting it to LED lighting looked like a nice option. I wanted to use the base of a broken bulb that came with the microscope as the mount for the LED, just so I could use the original lamp housing. The first attempt with a 3W white light LED was, and I can be brutally honest here, a bit rubbish. It produced a fair bit of light, but the LED was not in the same place as the filament from a bulb would have been, so I lost a lot due to the collimating optics not working that well. Also, 3W for the LED was a little low (or at least that is what I thought). For LED light MkII, I made a couple of changes. Firstly a more powerful LED – 10W white light with a colour temperature of 4000-4500K. This runs at about 10V and 1A, and cost about 2GBP delivered from eBay. Secondly, mount this LED where the filament of the original bulb would have been. This was a little more challenging….. Before we dive into the conversion, a jump to the end result and a pretty image. Here’s a dark-field image of a Maize seed taken on Project Beater using the LED light conversion I’ll discuss below.
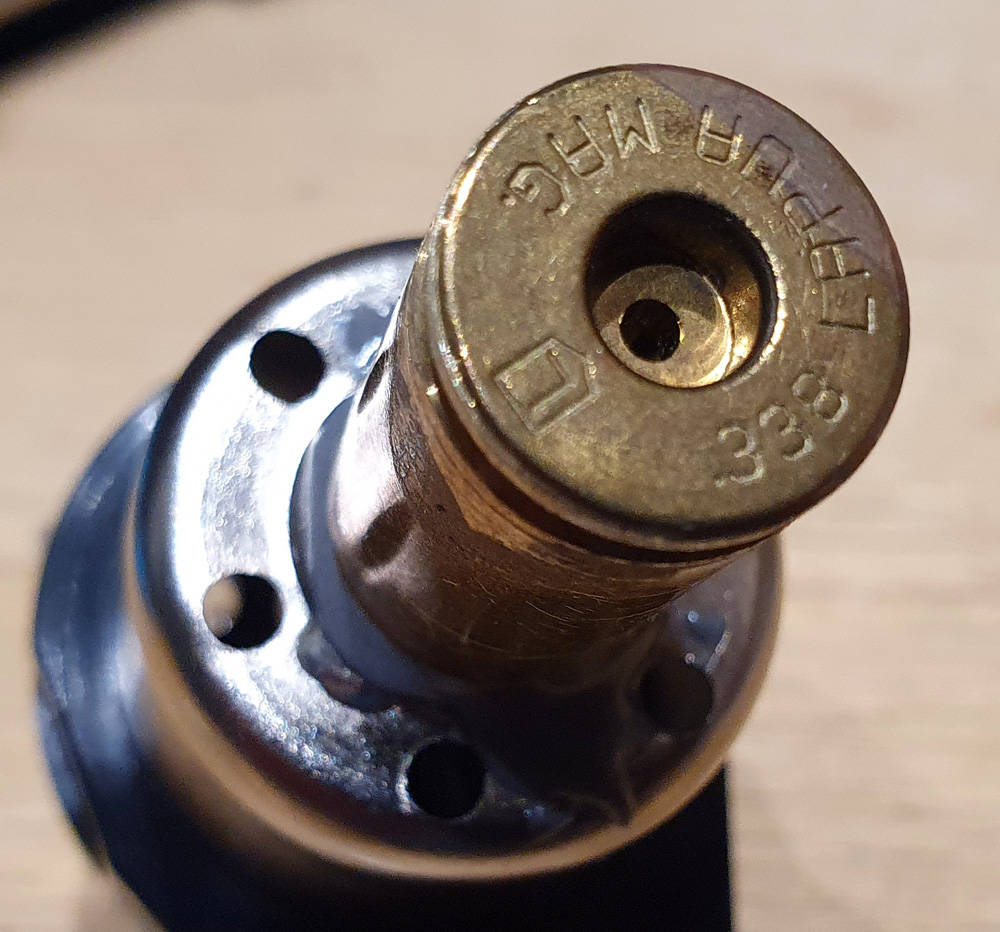
The old bulb was removed easily enough with the use of a mini blow torch to melt the solder holding it in place. The LED needed mounting about 3cm from the top of the existing mount, to enable the LED to be in the same place as the filament of the bulb. I needed a metal tube (to help act as a heat sink for the LED) about 3cm long, and with a nice flat top. This is where work overlaps with a hobby of mine. In my spare time I do some target shooting, and I had some empty brass cases on my workbench. One, from a 338 Lapua was about the right diameter to fit in the lamp housing. Plus it had a nice flat top for mounting the LED on and giving a good thermal contact. A few minutes with a hacksaw, and a bit of JB Weld, and the cut down brass case was mounted.
Once this had set fully, the LED could be added (again, thank you JB Weld) and wired in to the original connectors.
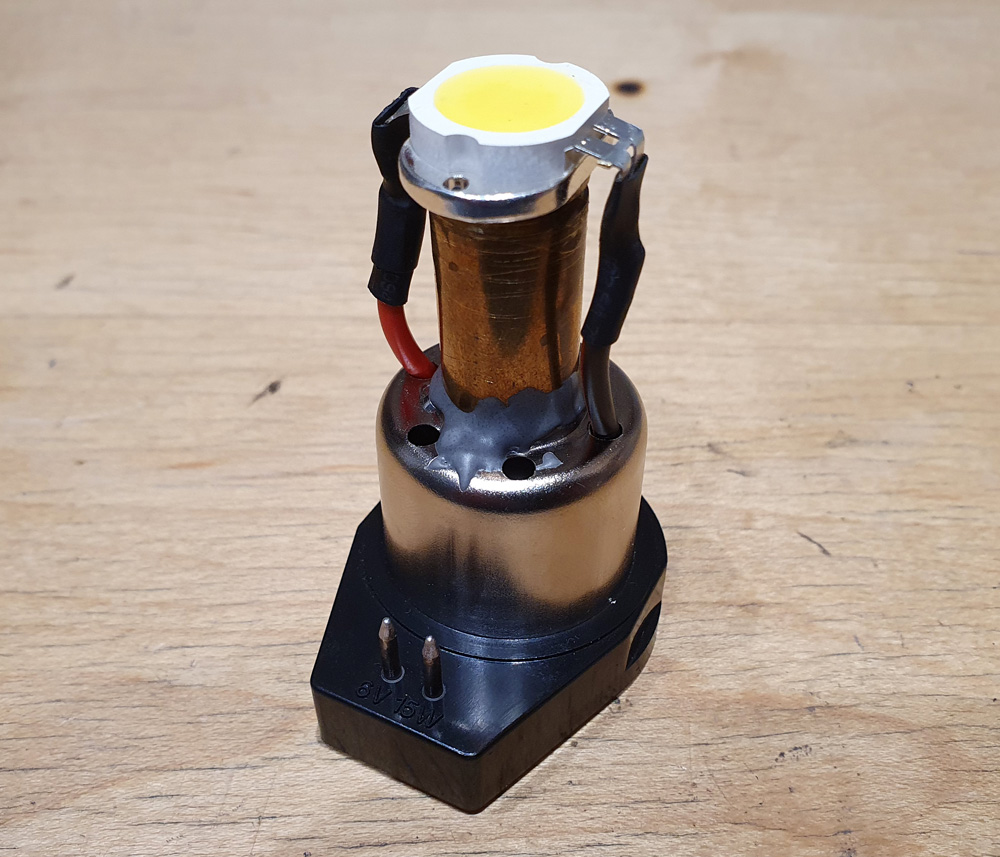
Putting this into the microscope produced a little bit of problem. It fit just fine, but was so bright that it was difficult to use in the normal bright-field setup. Even with the current turned down it was still my brighter than the original 30W tungsten bulb. Not good. Or is it? Unlike bright-field imaging, dark-field imaging modifies the light transmission to the sample with the end result of making the areas which are around the sample look dark, and allowing only light that has been scattered be imaged. In doing so it can be used to show features not visible in normal bright-field imaging. But dark-field imaging needs a lot of light. Aha, now we have an LED light source which is too bright for normal use, would it be suitable for dark-field imaging?
A quick test. The sample is Maize seed section, and the images below are taken with a 10x UVFL Olympus objective, and photographed through a 3.3x photoeyepiece. A quick comparison between the original 30W tungsten bulb and the 10W LED for dark-field imaging. Firstly, the 30W tungsten bulb, and a camera exposure time of 1.3s
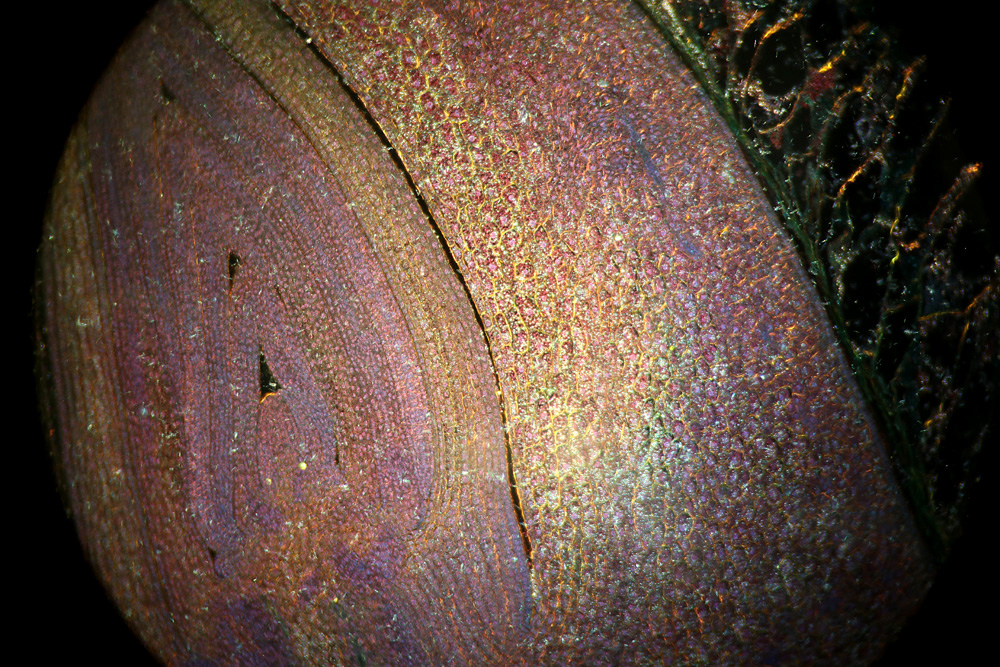
The 30W tungsten bulb produces a usable dark-field image, but there is a bit of a hot spot in the middle of the image. Secondly the 10W LED, same ISO setting on the camera, and the microscope was left the same. All that was changed was the light. 1.3s was too long for this light, and I had to reduce the time by about 15x to 1/13s to get an similarly exposed image.
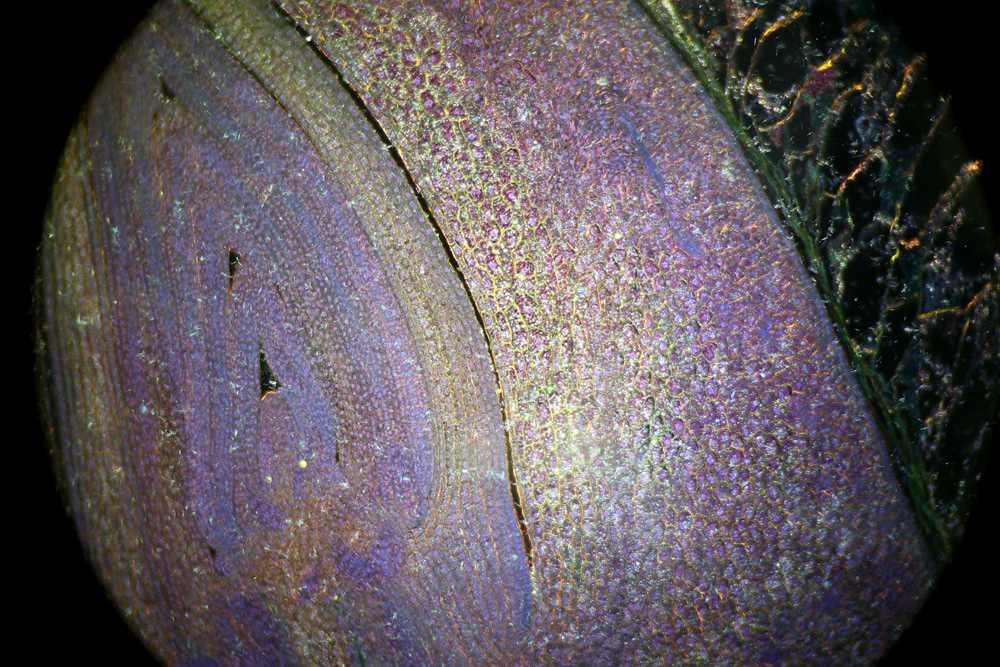
With the 10W LED the colour temperature of the image is much cooler than with the tungsten bulb (not surprising as the spectra is different), and the lighting intensity looked to be a bit more even across the sample. But the big difference is the exposure time – about 15x faster with the LED indicating much more light being present. So, yes it does look as though this LED light will be suitable for dark-field imaging, and will be a better option than the original 30W tungsten bulb. It is so bright in fact, that it would probably work well with narrow band pass optical filters, to do multispectral microscopy, but that is for another day.
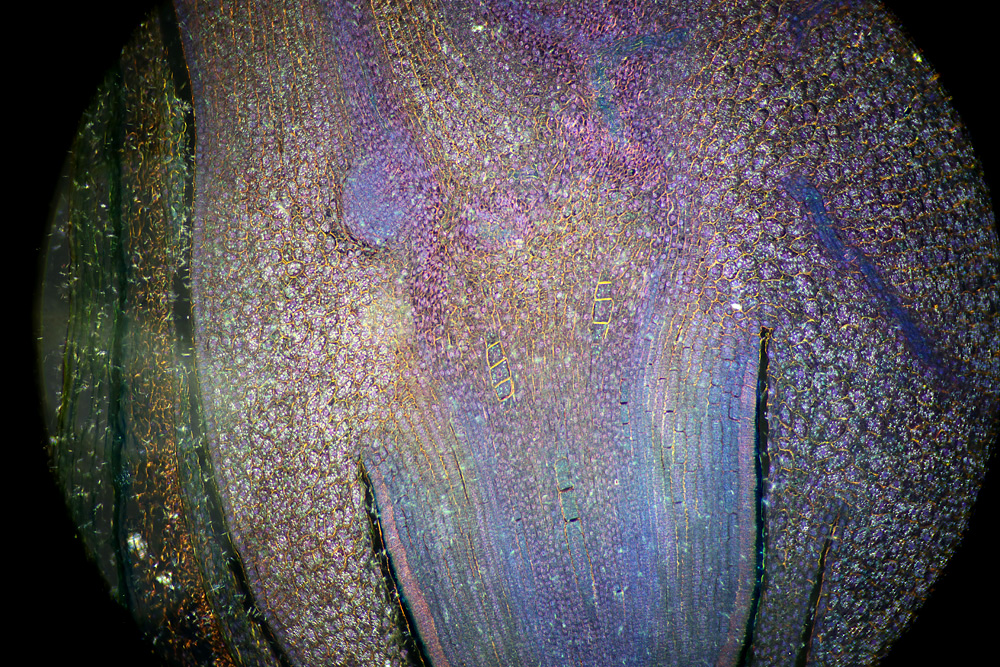
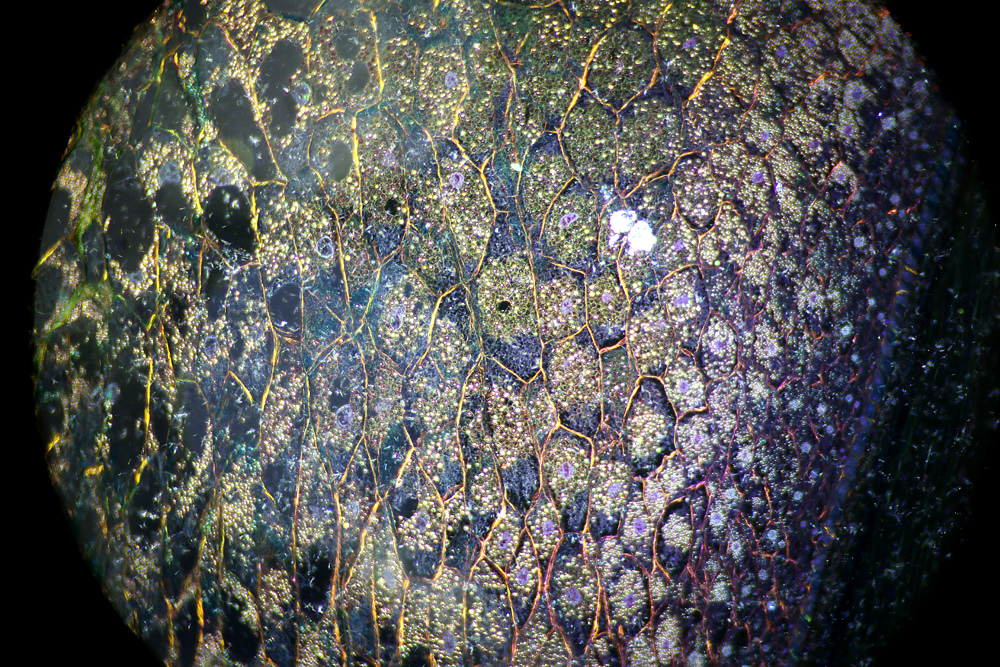
For now, here are a couple more dark-field images of the Maize see cross section, taken using the LED light (plus of course the one at the top of the post which was done at higher magnification).
Not all experiments work out as expected, and we should be really thankful of that – if they did, we wouldn’t really learn anything new. As scientists we shouldn’t be afraid to try new things, and test the limits of the equipment we use. Who knows, it might throw up some interesting new area that is useful for your work.
As for what’s next, well I’ve recently started seeing 10W 365nm LEDs for sale, so perhaps getting one and seeing whether it is useful for UV fluorescence microscopy would be a good idea. But first, time for a coffee. Thanks for reading, and if you are interested in this or any of my other work, you can reach me through my Contact page, here.