Category Archives: General

UV Microscopy – Photoeyepiece choice

Building a UV transmission microscope presents some unique challenges above and beyond those for visible light microscopy, especially around the availability of materials for lenses and mirrors in the UVB and C regions. Normal glass absorbs short wavelength UV, and the coatings and adhesives used in making visible light lenses often do too. As discussed in my post here, as I pull together parts for my UV microscope I’ll be sharing my findings on my site, in case others are thinking of trying this out.

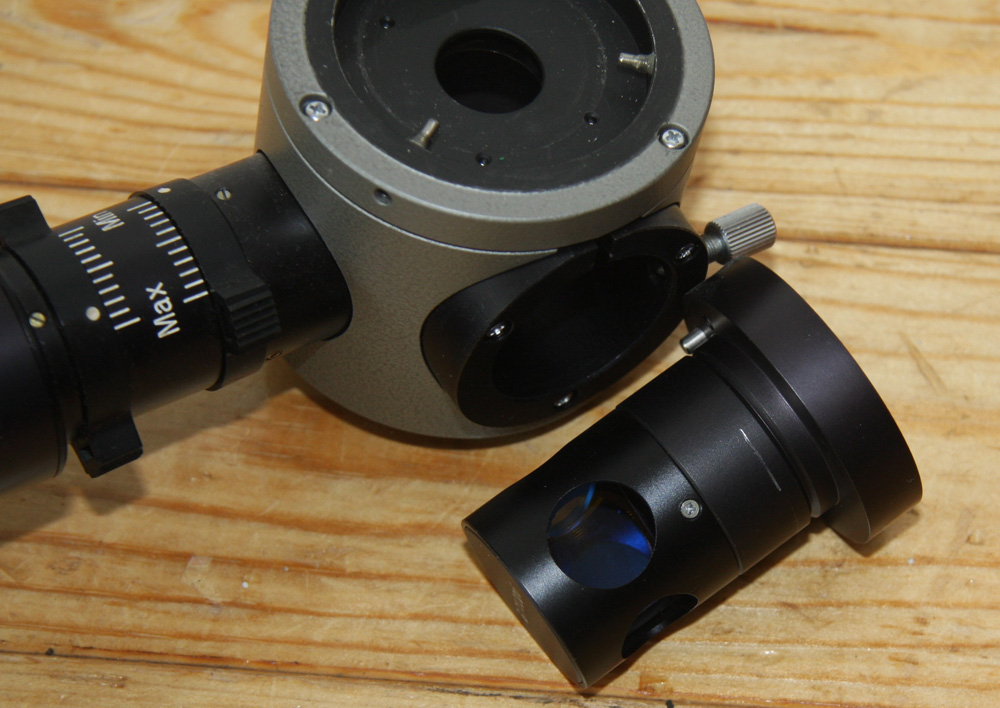
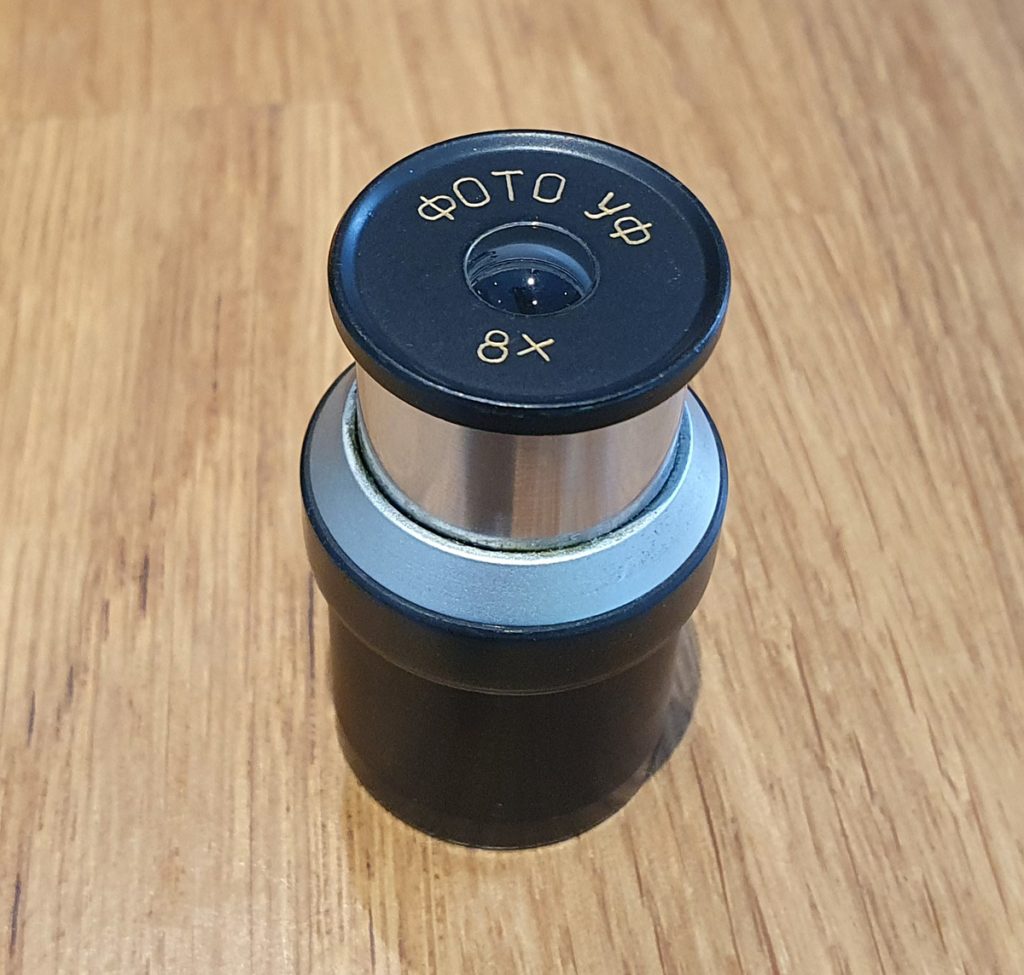
Today’s piece is about photoeyepieces. On my Olympus BHB it has a trinocular head to which I can attach a camera. To do this, it requires a photoeyepiece, which slides into the tube on the top of the head. The camera body can then be attached with an adapter tube and images taken without the need for any additional lenses. The Olympus photoeyepiece I have is great for visible light images, but I was concerned about its transmission in the UV, and in fact some early tests showed that to be correct. While looking around on eBay, I came across Lomo UV photoeyepieces from a few different vendors in Russia. Given the Lomo UV objectives show good transmission even at short wavelength UV, I wondered whether their UV photoeyepieces would also be good. I bought a selection of them for about 30USD each and after a 2-3 month wait they arrived. Some of them are corrected for specific objectives (to help correct the abberations in the objectives) and one was just marked as 8x. They are shown below.
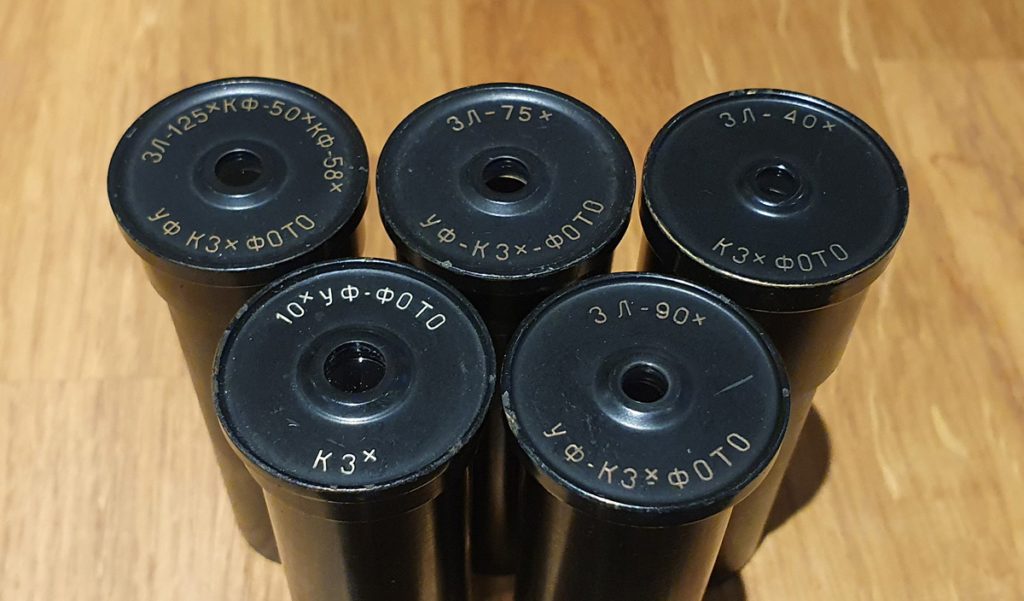
Lomo corrected UV photoeyepieces
Lomo 8x UV photoeyepiece

The first thing was to measure their transmission in the UV and compare it to the Olympus one that I have. I did this using the lens transmission system I’ve built (discussed here), and the results are shown below.
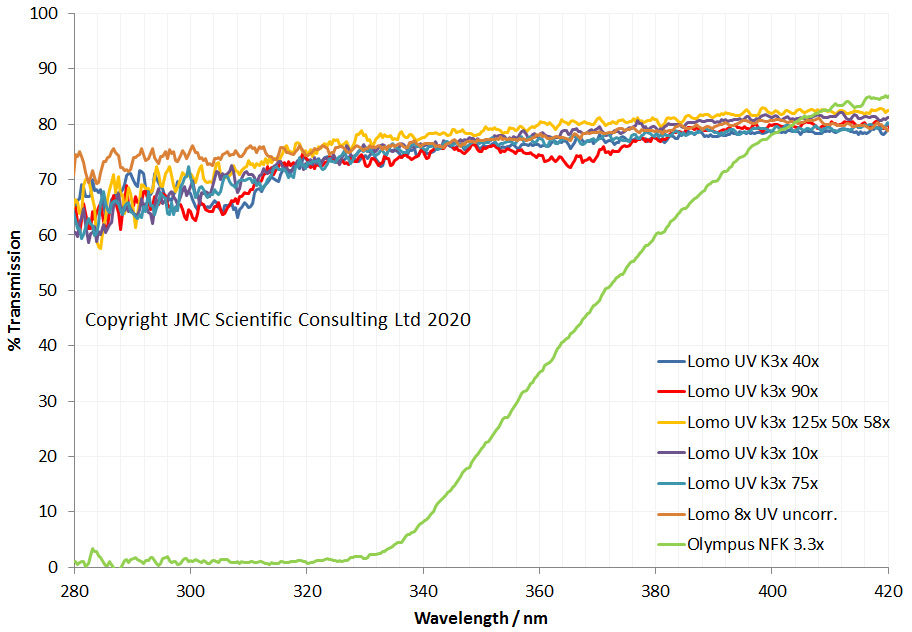
Photoeyepiece lens transmission in the UV

Well, the Olympus one really is not good for deep UV – transmission starts dropping at around 400nm, and by 330nm is basically zero – but would be usable at 365nm. The Lomo UV ones however are very different – transmission doesn’t really drop even down at 280nm. I suspect these are quartz and would therefore be good down to around 220nm. Note the Lomo spectra are a bit noiser than the Olympus one, as I used slightly less smoothing during the scans for them. Ok, so that’s the first hurdle crossed – they transmit UV. Next though, is will they make an image on my microscope that I can photograph?

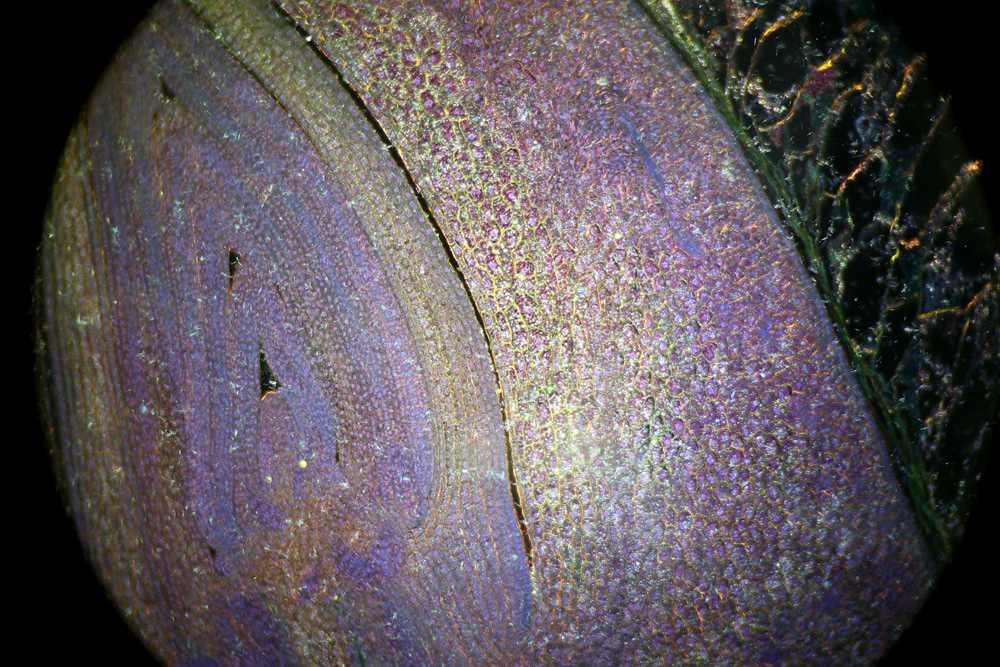
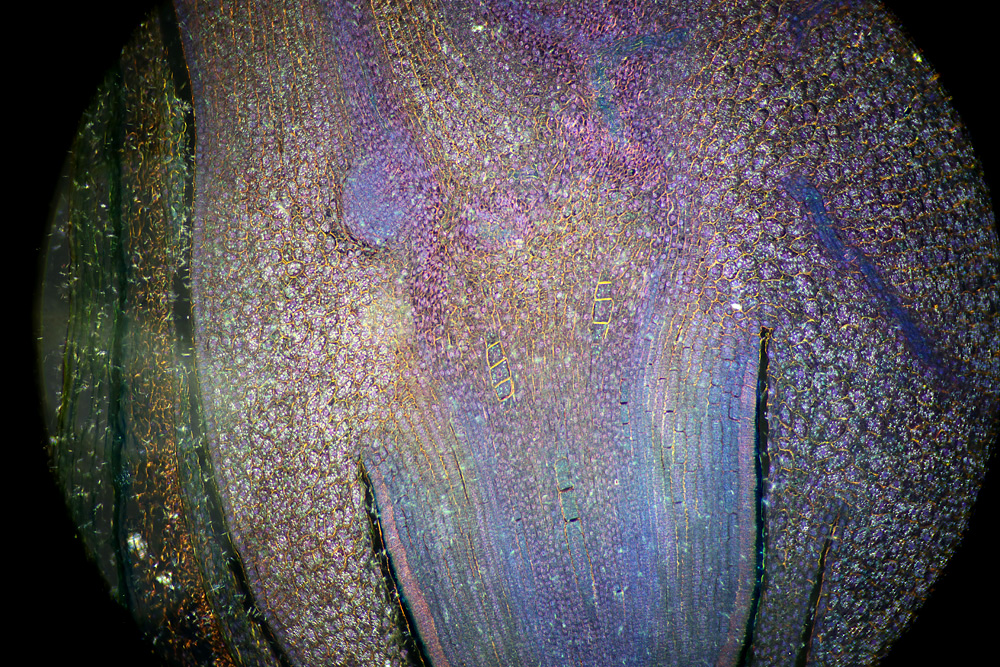
To answer this I used a slide of a section of scalp skin, and set up my monochrome converted Nikon d850 camera on the microscope, along with the Leitz 16x UV objective. I took images of the slide using a normal tungsten light source (this is not a test of UV imaging, just of whether they can create an image, if they work for this they should be fine for UV given the transmission results above) with the different eyepieces. Images are shown as full frame photos. Firstly, the Olympus one.
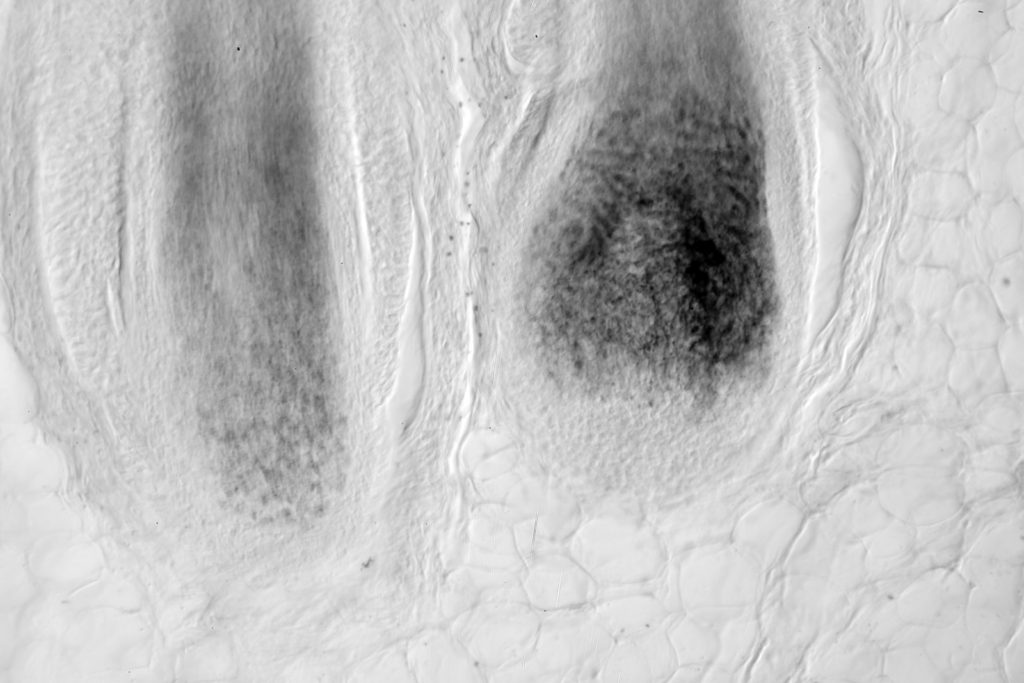
Scalp image with Olympus 3.3x NFK photoeyepiece

With the Olympus photoeyepiece I get a good image of the hair root bulbs in the scalp which covered the whole frame of the image. With the 3x Lomo UV ones, I got something very different though, and an example image is shown below.
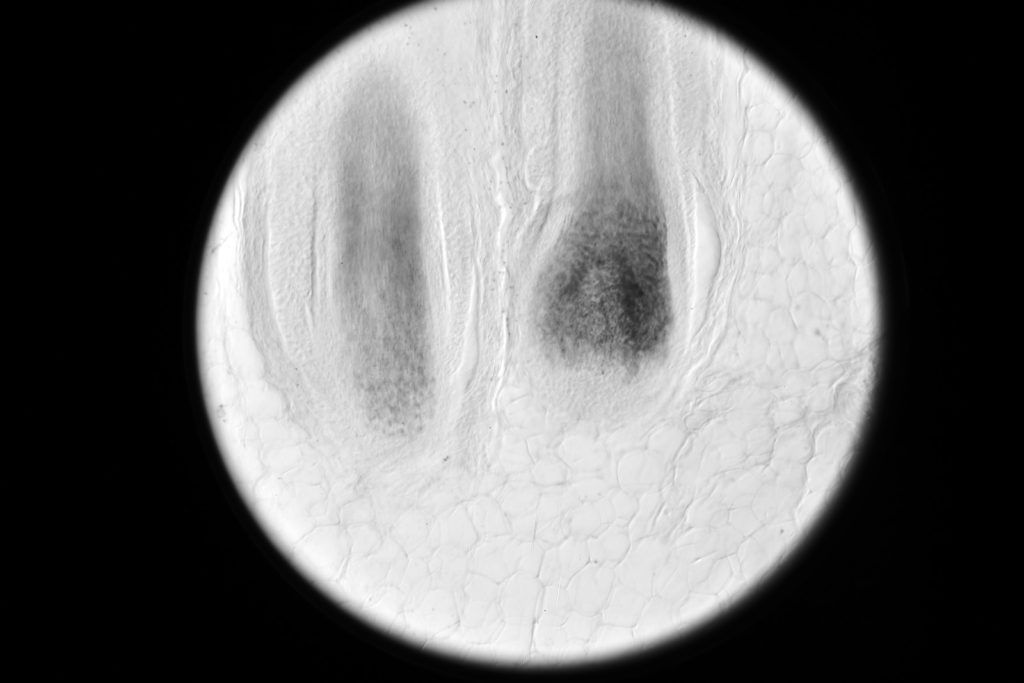
Lomo UV 3x photoeyepiece (corrected for 75x objective)

The Lomo 3x photoeyepieces which were corrected for specific objectives did not cover the whole frame of the camera sensor now, although the bit that I could see was a similar field of view to the Olympus. The different Lomo 3x photoeyepieces all behaved similarly but with slight variations in the size of the image circle. On the plus point they all gave usable images. Of course the images would need cropping, but with something like a Nikon d850 with high resolution, that would not be a problem and they would still give usable images.

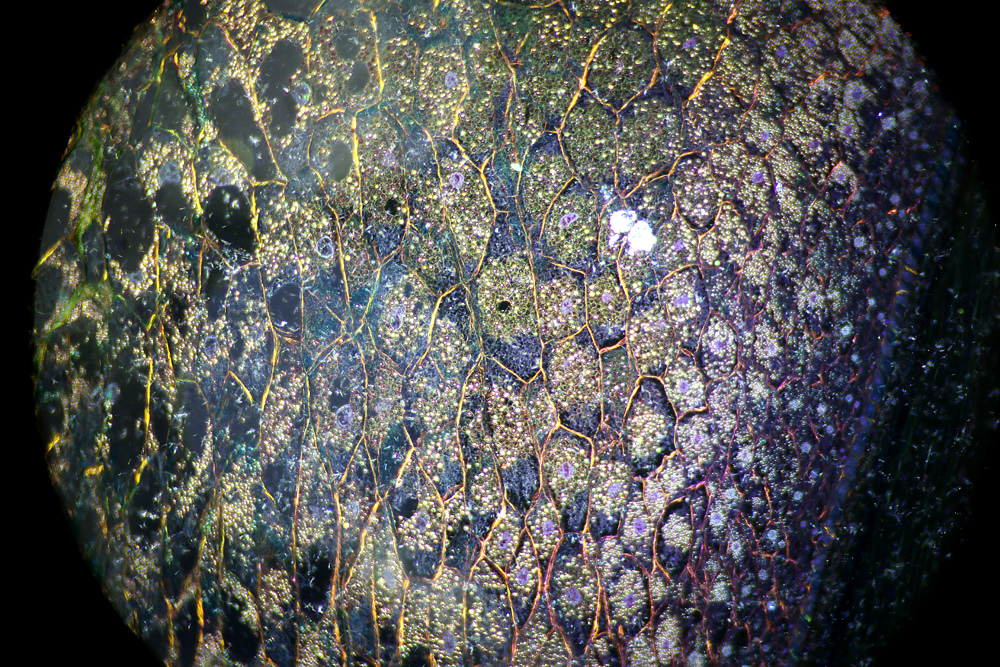
The Lomo 8x eyepiece was different to the others, as shown below.
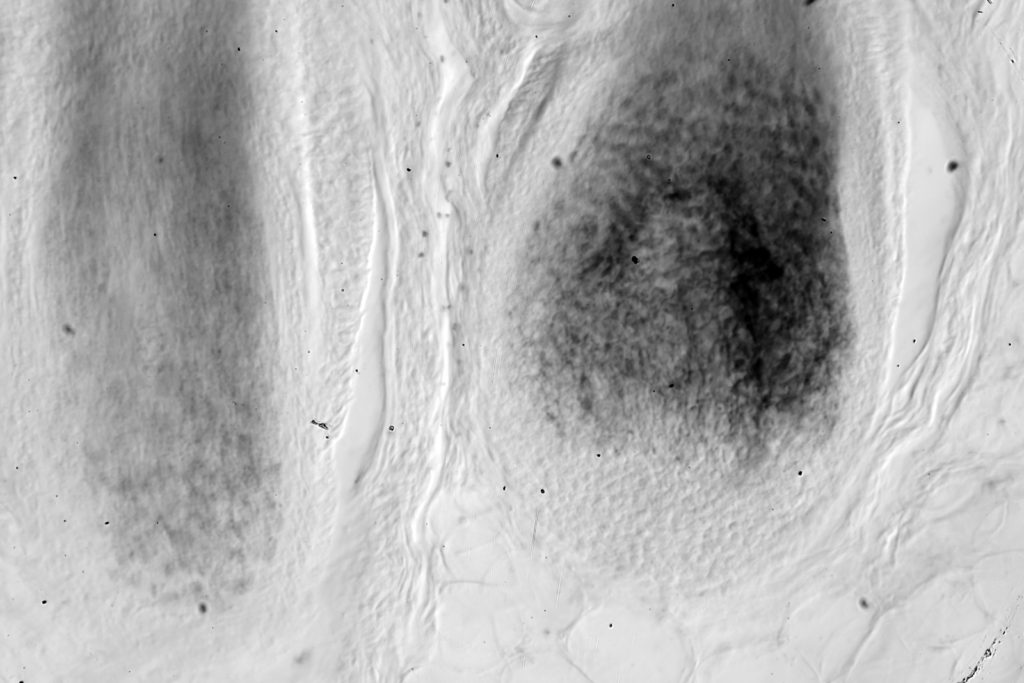
Lomo 8x UV photoeyepiece image

The Lomo 8x UV photoeyepiece produced an image which covered the sensor of the camera, and was actually only slightly more magnified than the Olympus 3.3x, and will be a good option for use. It is however filthy as can be seen from the dirt in the image, so will need a good clean before using again.

The Lomo UV photoeyepieces have passed their second test – can they produce usable images on my Olympus BHB. Yes, some of them have their issues such as the reduced image size, but given their transmission in the UV this is a small price to pay, and I look forward to trying UV imaging with them.

The development of a UV transmission microscope presents some significant challenges, especially for imaging in the UVB region and below. Knowing a bit about how other manufacturers have solved problems, and being willing to try to adapt other equipment to solve problems is a key part of the research process. Having now identified some UV suitable photoeyepieces for my microscope, I can tick off one of the aspects of the build.

Thanks for reading, and if you want to know more about this or any other aspect of my work, you can reach me on my Contact Me page here.

UV Microscopy – custom UV light source fittings

Using an old microscope for research has good and bad points. Good points include build quality and ease of working on them. Bad points include lack of spare parts and add ons. As I was tracking down UV lights for mine, I was struggling to get what I needed here in the UK, basically because it is now 40 years old. One thing in particular that I was after was a 100W mercury light source, for fluorescence and transmission imaging. I managed to find a couple of different Olympus lamps (with cables different fittings), but no power supply. However I did find a 50W Zeiss mercury lamp and power supply for not much money. Zeiss lamps though do not fit my old Olympus, so how to get it to work? This is where knowing a good machine shop becomes vital…..

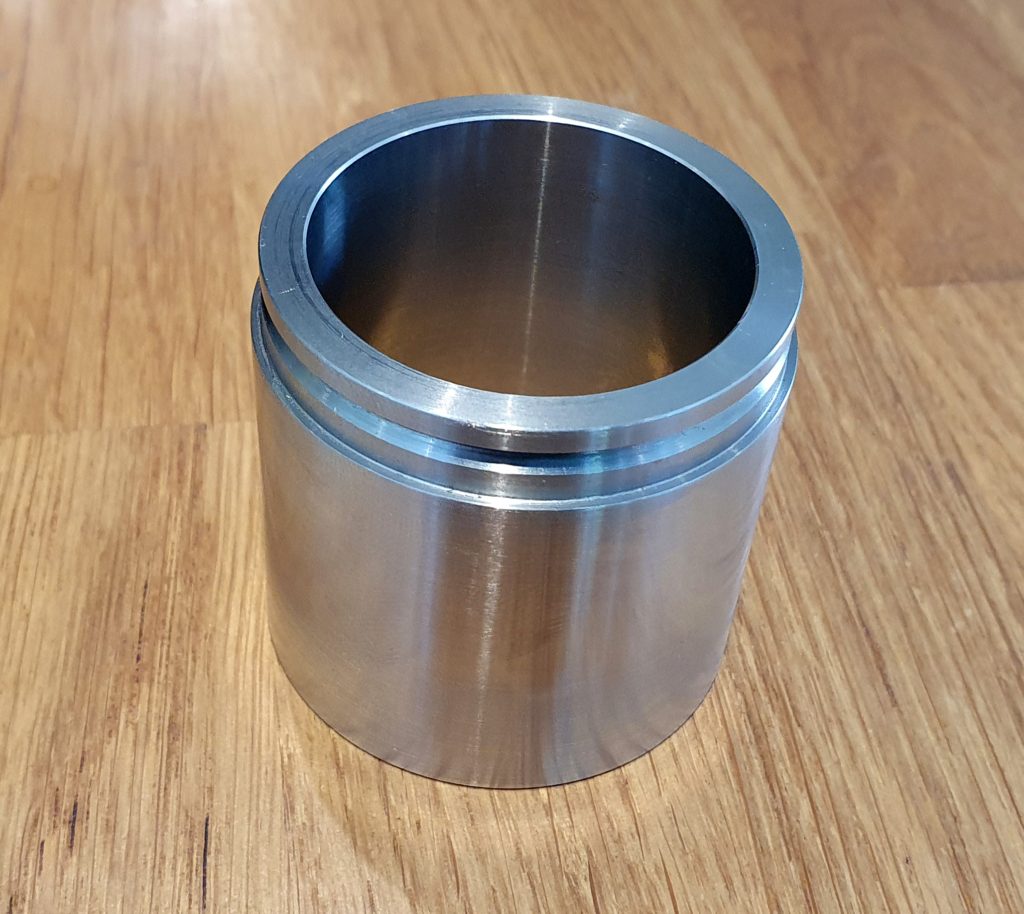
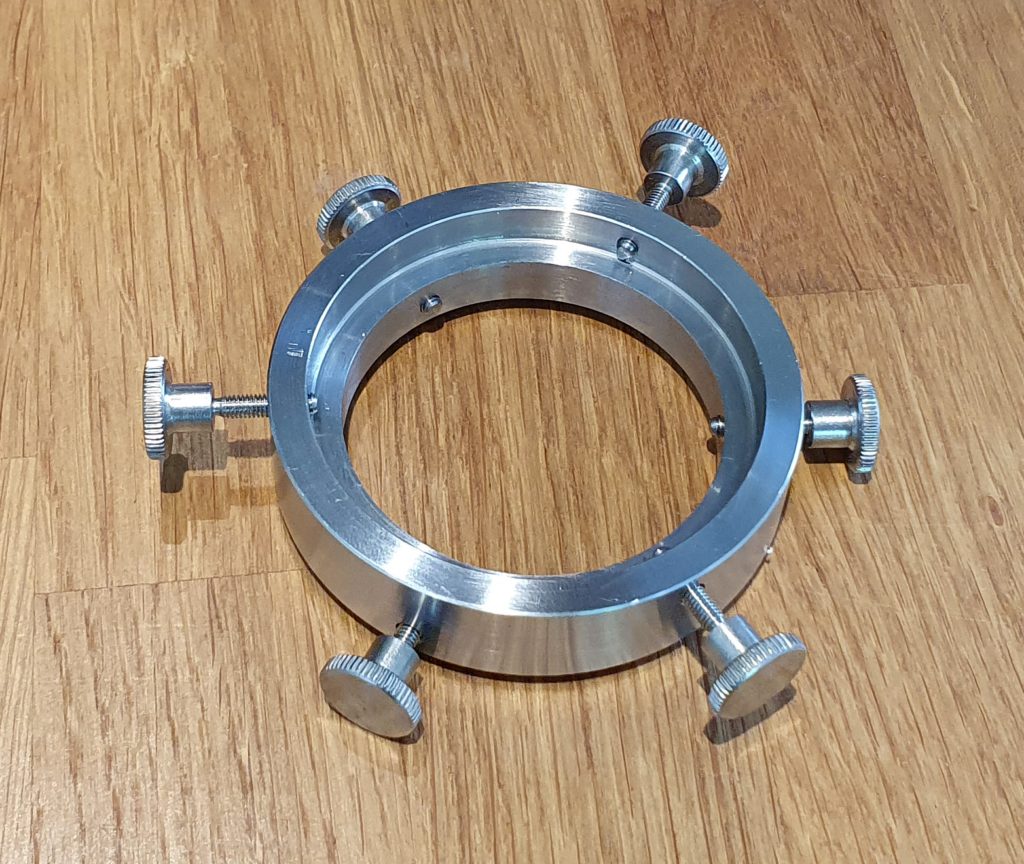
The Zeiss lamp I found had a larger fitting than the Olympus, and unlike the Olympus was male. So I needed a female to female adapter which reduced in diameter. I drew up some plans and approached Machined Precision Components Ltd in Watton, Norfolk to make them for me. 3 weeks later and two items arrived (below).

Adapter for Zeiss 50W mercury lamp
Adapter for mercury light for transmission measurement

The two adapters do different jobs. The first one allows me to attach the Zeiss lamp to the Olympus fluorescence imaging setup. The second one allows me to use the lamp for UV transmission microscopy as well, and as I got both of them done at once it saved on postage (once a Yorkshireman, always a Yorkshireman).

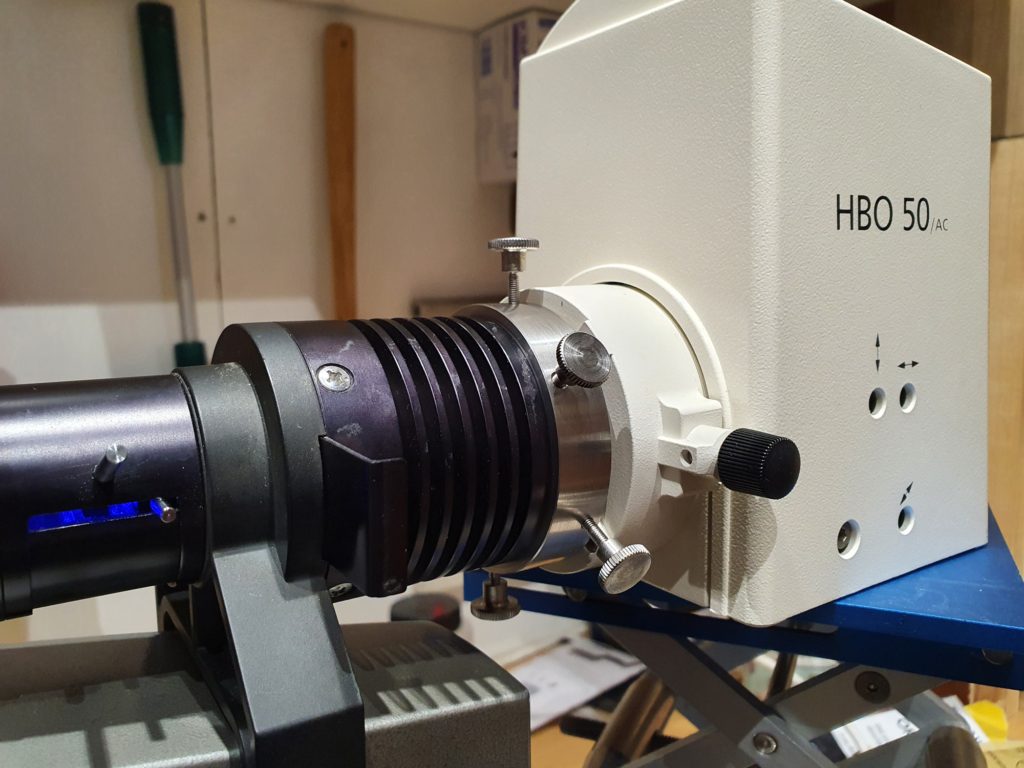
MPC’s work was top notch and everything fit really well. Here’s the adapter being used to fit the Zeiss lamp onto the microscope.

MPC adapter in use

The adapter allows me to use this 50W Zeiss lamp instead of the original Olympus 100W one, which is very handy as the replacement bulbs are cheaper for the Zeiss, and as each bulb costs more than the adapter did this is useful.

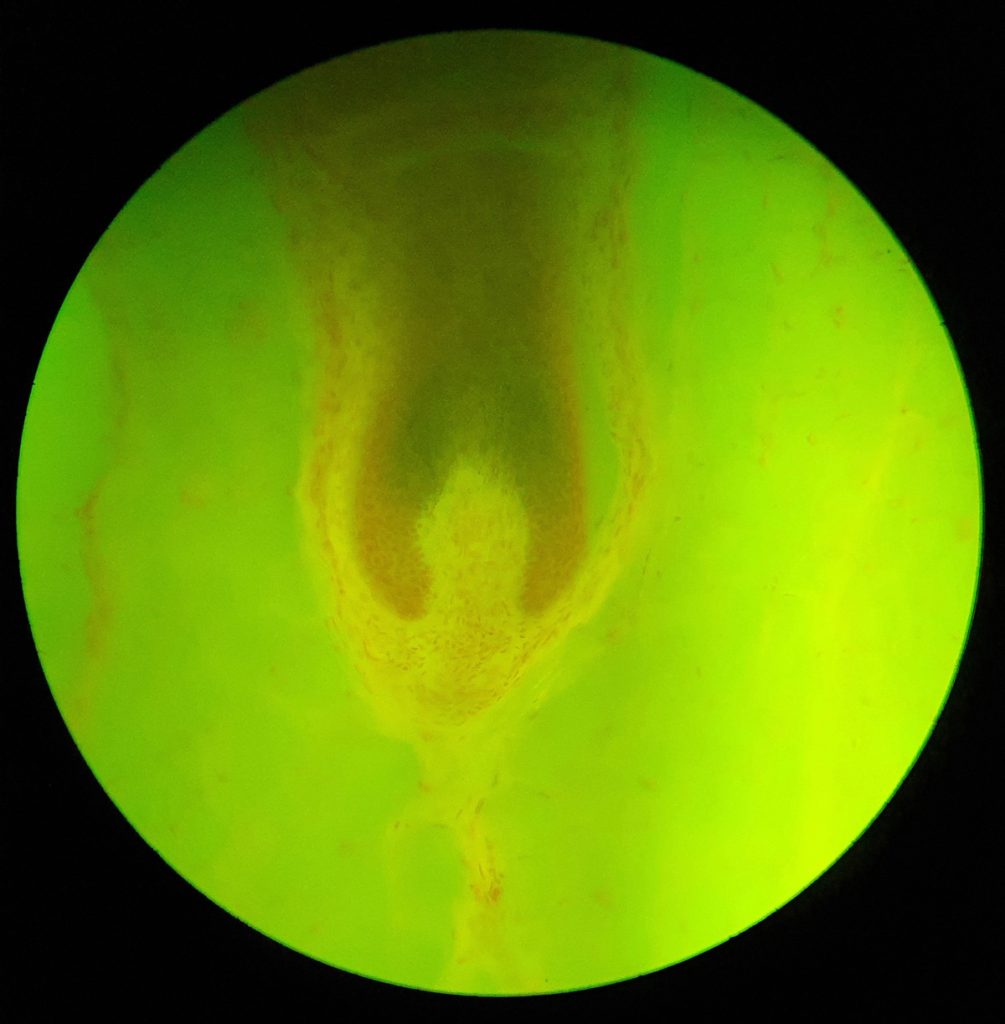
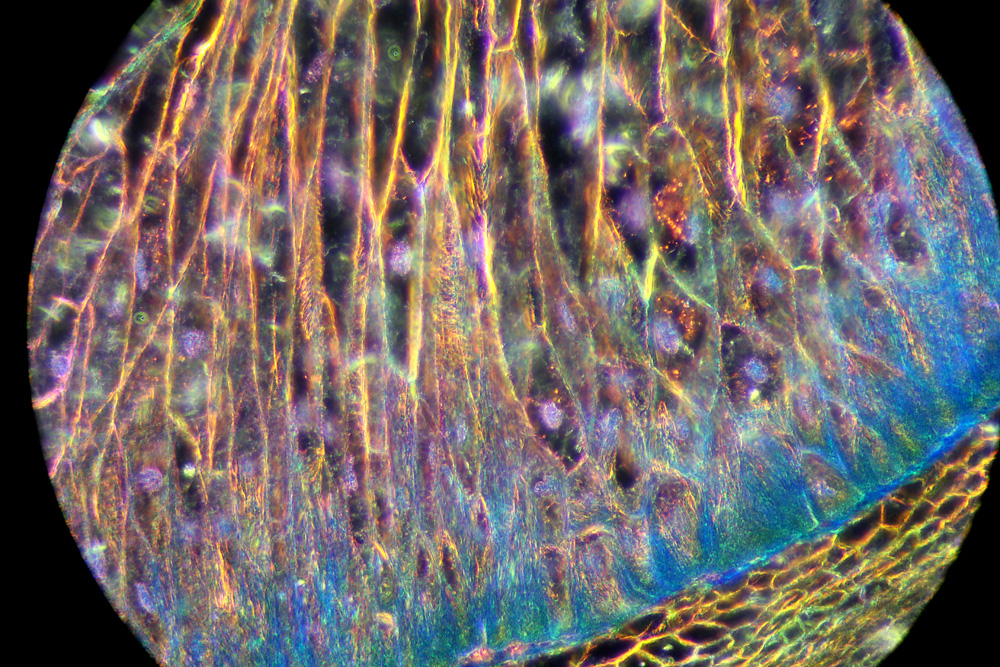
Does it work? Well yes it does. Here’s a fluorescence image of a skin sample showing a hair root under blue/UV induced fluorescence.

Fluorescence image of hair root

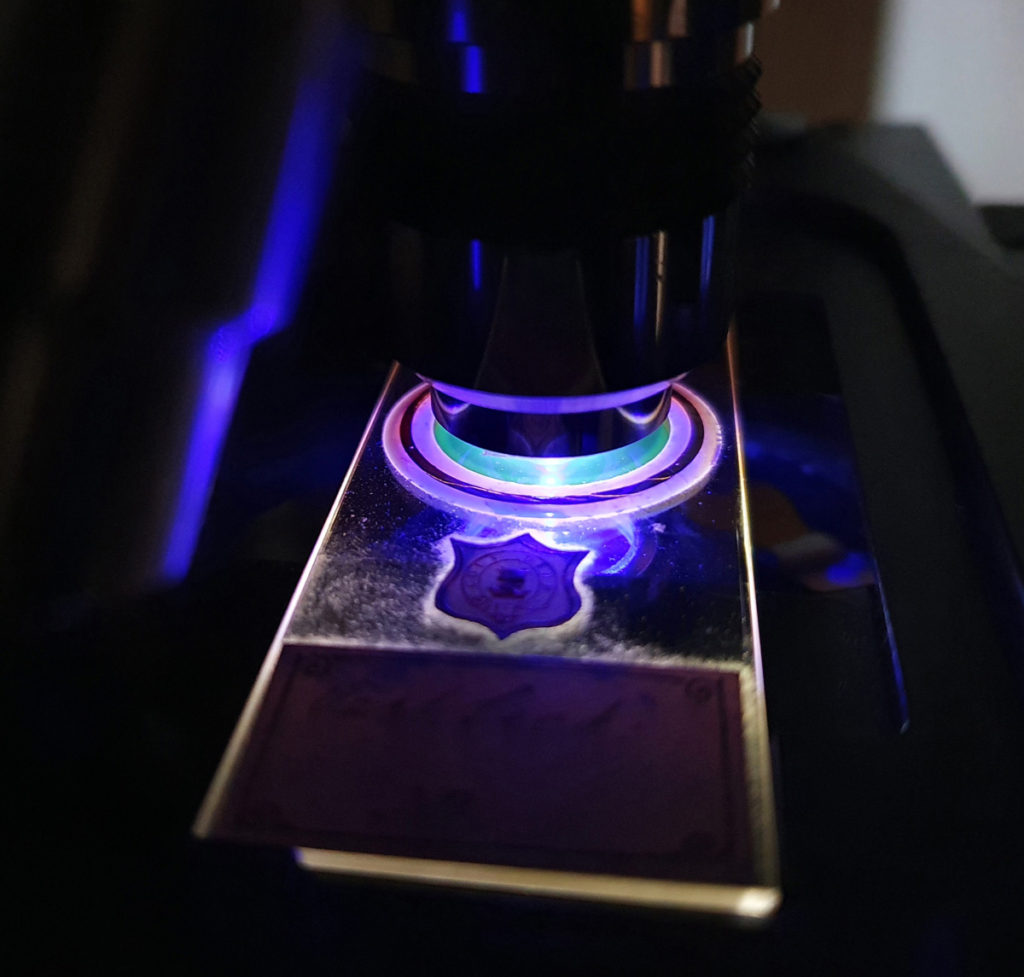
And also the incoming light being focused on to the microscope slide.

Light being focused onto the microscope slide

Repairing and renovating old equipment can be very cost effective for research, however sometimes parts will need to be made if you are combining equipment from different manufacturers. Knowing a good machinist is a key part of any researchers contacts when rebuilding old equipment. Thanks for reading, and if you want to know more about this or my other research areas, you can reach me here.
UV Microscopy – component considerations, and condenser choice

Since starting some microscopy as a bit of project to keep me occupied during the Covid-19 lock down, I got to thinking about building a UV transmission microscope. This would ideally be something I could use down to and even below 300nm and be able to select the wavelengths I could image with. This has obvious application for sunscreen formulation imaging – looking at the distribution of UVA and UVB actives in the product for instance – and also in the imaging of skin as well as forensics, botany, and even archaeology. I even started to have a go at it, here, when I did some rudimentary UV microscopy of a thin film of sunscreen on a slide. The issue with that though was that other than the objective it wasn’t using a system designed for UV imaging. Why is that a problem, why not just use a standard microscope? The biggest issue is that things which are transparent in the visible region aren’t necessarily transparent in the UV, especially at the shorter wavelength end of the spectrum. As you can imagine, if the lenses you are using are not letting any light through, then it’s going to be pretty hard to use them for imaging.

This leads me to the key question – what would it take to build a UV transmission microscope, something suitable for multispectral imaging down to 300nm and even below? I’ll share my thoughts as I go about the process, as it turns out there are quite a few considerations. Of course I could go ahead and buy a ready made UV transmission microscope, and I’ve come across a few companies that seem to offer them. I have not however even bothered checking the prices. Even if they were willing to provide a quote for me, the systems would cost tens if not hundreds of thousands of GBP. This sends me down the DIY route, and either sourcing or adapting components to do the job.

As I have already seen with my sunscreen imaging, doing UV transmission microscopy in the 365-400nm region is certainly doable with my normal microscope, however as mentioned above it is certainly not optimised for it. Also going to shorter wavelengths isn’t possible with the standard microscope due to the current optics absorbing the light. This means rethinking what to use for the condenser, the photoeyepiece, the internal focusing optics of the microscope itself, the filtration, the light source, even the choice of slide and coverslip, to try and maximise light throughput to the camera. If even one of these blocks the UV, then it won’t reach the camera, so all have to be assessed and changed. As you can imagine, this is not going to be an overnight fix, and I wont be covering everything in todays post.

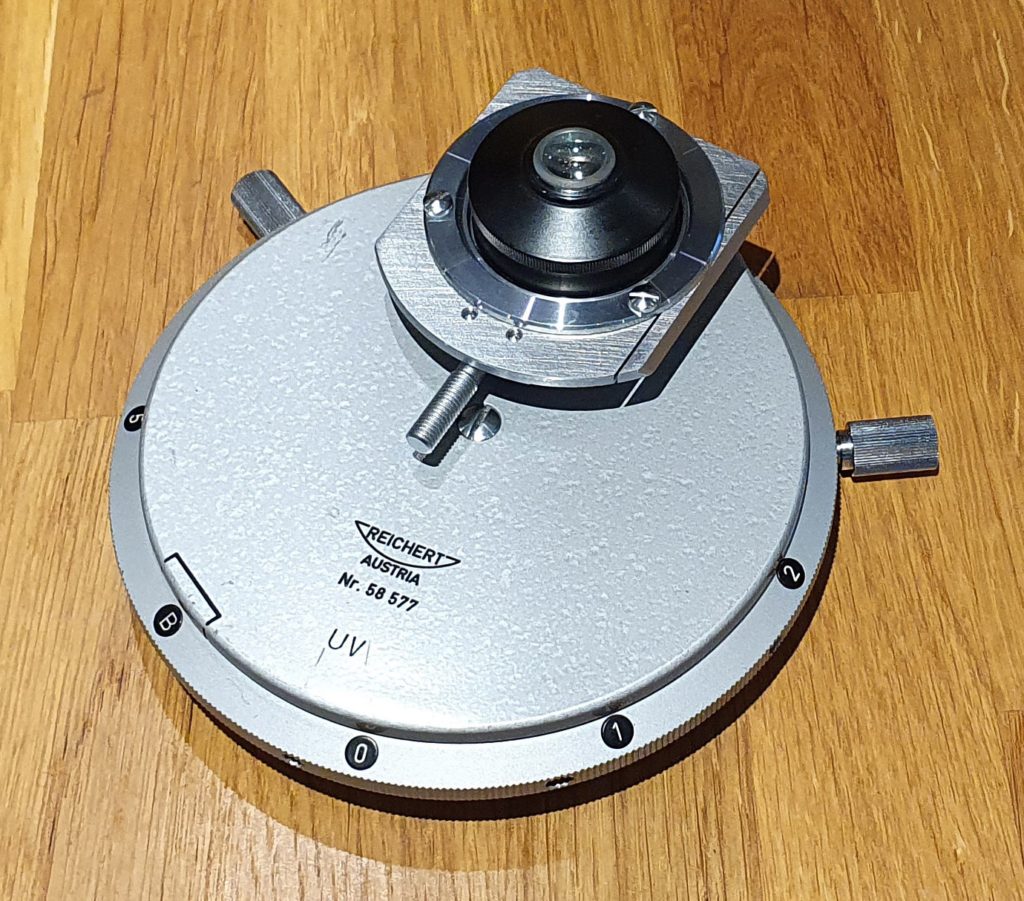
Let’s break this down into chunks, and start addressing the problem. The condenser does a vital job of focusing the light onto the subject. This, then obviously needs to be able to transmit the UV. In my sunscreen imaging work, I just used the standard Olympus Abbe condenser in the microscope. It’s a very basic design, but for UV transmission often simpler is better. I also have an Olympus BH-AAC Aplanat Achromat condenser which is much higher optical quality. While hunting around on eBay, I came across a Reichert UV condenser for sale in Russia. Reichert (based in Vienna) made some extremely high quality microscopes, and given this said ‘UV’ on it, and that the vendor didn’t want to much for it, made it an obvious candidate for testing. Here’s a picture of the Reichert UV condenser.

Reichert UV condenser

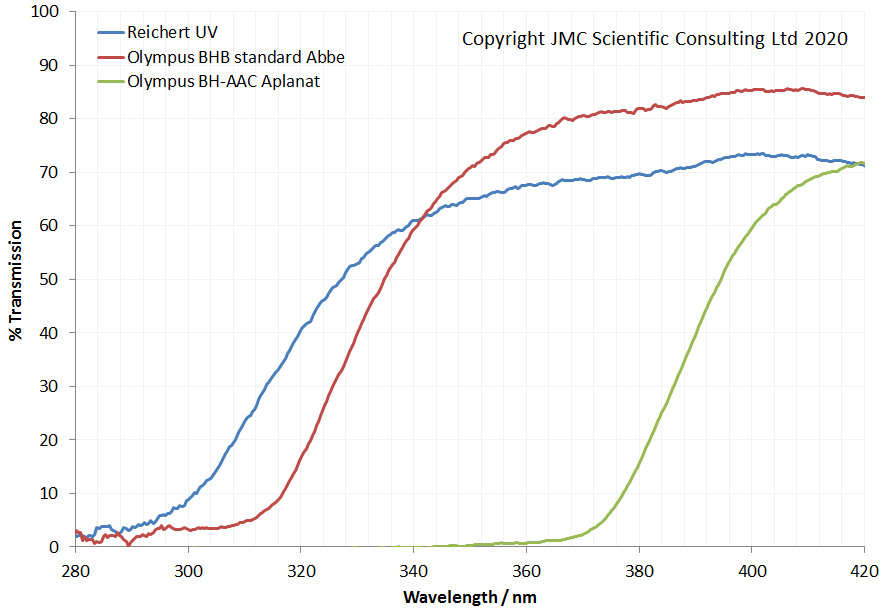
When it arrived I measured the transmission from 280nm to 420nm through all three condensers, and I got the following curves.

Transmission between 280nm and 420nm for the 3 condensers

So what is going on here? The BH-AAC Aplanat is letting very little UV through, so is obviously no good for UV imaging. Not a huge surprise, as it has multiple elements, and is likely coated to optimise visible light transmission. The standard Abbe condenser is actually pretty good for UV transmission down to about 350nm. Below that it tails off, and is pretty much blocking the UV below 320nm. This then was a lucky choice for my initial UV transmission microscopy work, but would obviously be no good for looking below 320nm. The Reichert UV condenser does let shorter wavelength light through than the Olympus Abbe condenser, but even this is blocking almost everything below 300nm. It’s a shame, as I thought with the name ‘UV’ this might have been better. Yes, it could potentially be used at 320nm, but not really much lower. In hind sight I should have realised that this was still a glass condenser, and was not going to be any use below 300nm, but c’est la vie…..

None of the tested condensers are really useful for the ‘low 300’s nm’ region of UV. So where does this leave me? I could get a custom made UV condenser, which is an option but not a cheap one. Another option was to look for a quartz condenser from an old microscope. Quartz condensers should have good transmission down to around 200nm. But they are not common, in fact they are very rare.

I actually found an antique Zeiss quartz condenser for sale in the US, and after putting in an offer on it managed to buy it. It is currently in the US waiting for a time when flying gets back to normal and I can collect it. I shall update on that when I finally get hold of it for testing.

In the mean time while I am waiting for the quartz condenser, there are plenty of other aspects of the UV microscope design to test and optimise. As mentioned above, this will not be a quick project, and I’ll update the progress on it as and when I can. A lot of the information I put in here which cover things like transmission through lenses and objectives, is not available elsewhere, and I am sharing this in case it of of use to anyone else venturing down this road. Ideally I’d like to find another Olympus BHB which I can use a donor for the project, rather than risk damaging mine while I convert the internal optics. If you want to know more about this (and you have an Olympus BHB you’d like to donate, hint, hint), or any other aspect of my research, you can reach me here. Thanks for reading, and happy sciencing…..
Project Beater – Microscopy of antique skin slide

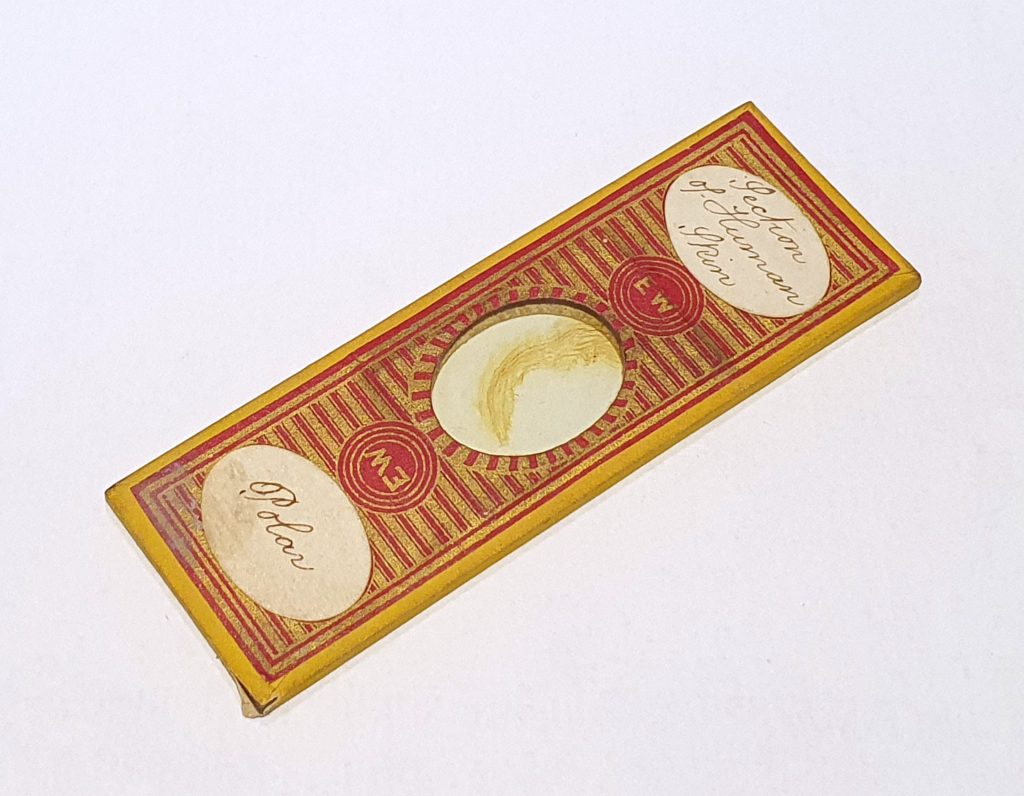
With my research interests in skin it was only a matter of time before I tried microscopy on a sample of it. Normally with skin sections they are stained to help bring out different parts of them. I wanted to try and see what an unstained sample looked like (the plan eventually is to look at it with UV, but that is a story for another day). Rather than using a new slide, I thought an antique one might be better and be unstained. I found an Edmund Wheeler slide of skin on ebay, and after a brief wait for the postal service to do its thing it arrived for imaging. Here’s the slide.

Edmund Wheeler slide of human skin

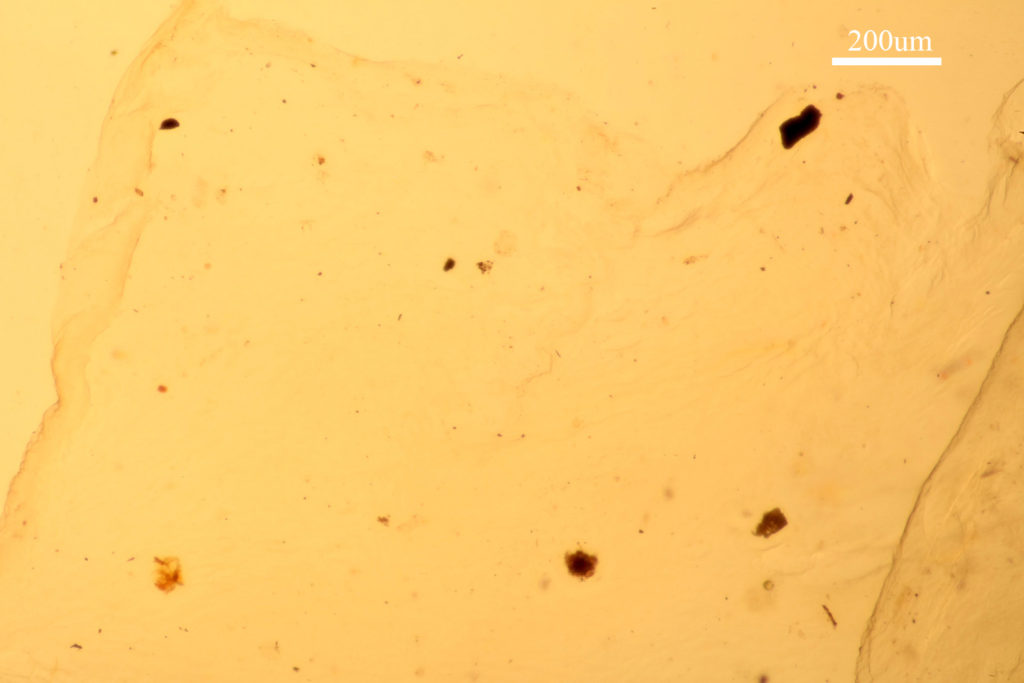
Edmund Wheeler (1808-1884) is a well known preparer of microscope slides. Indeed his work is often counterfeited, although I am reasonably confident that this one is not a fake and is probably around 150 years old. As you can see in the middle of the slide is a large section of skin which looks slightly dark against the white background. How does it look under the microscope? Firstly with normal bright field imaging. This was with a 10x Olympus UVFL objective and a tungsten light source and a scale bar is included.

Section of skin, bright field with 10x objective

It’s pretty obvious with bright field imaging and an unstained skin sample, it is difficult to see anything. You can just about make out the edge of the skin, and that is about it for structures.

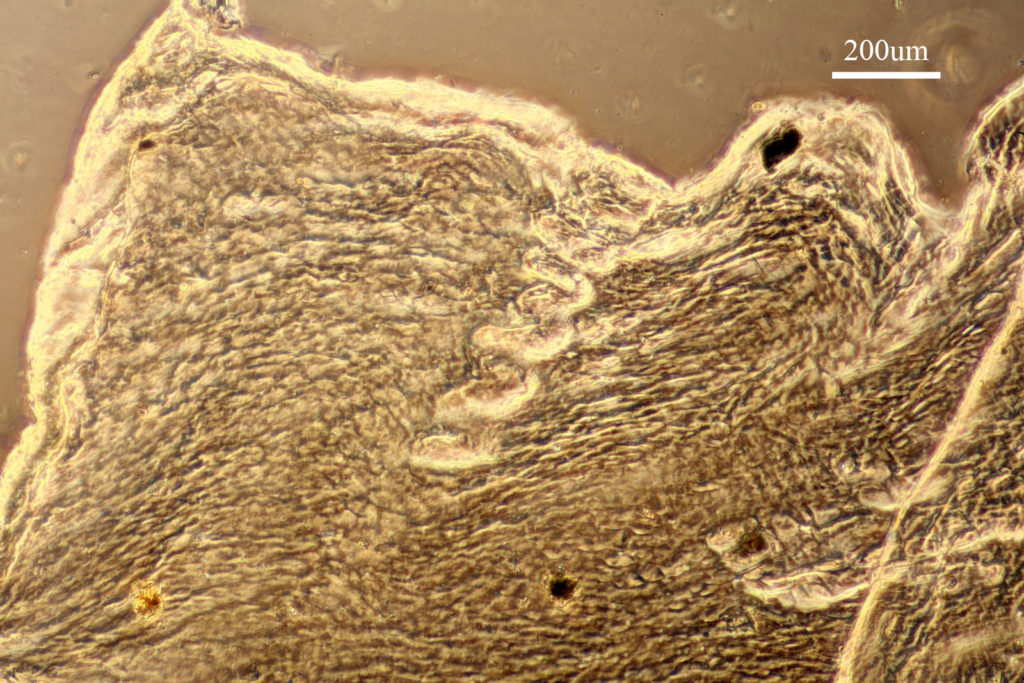
Switch to phase contrast and everything becomes clearer. This is the same region, but now with a 10x phase contrast objective and lighting.

Section of skin, phase contrast with 10x objective

Using phase contrast a structure appears in the middle of the image, with the corkscrew cross section of a sweat gland. In fact looking around the sample there were a few of these features moving down into the skin from the surface. There are also different layers of the skin which are clearly defined, so I’ll be exploring that more in the future.

Microscopy is an amazing tool for exploring the natural world, but as with all imaging techniques, choosing the right setup is key to actually being able to see what you are interested in. Here, phase contrast imaging has revealed features of an unstained skin sample not possible to view using standard bright field imaging. If you’d like to know more about this or my other research you can contact me here. Thanks for reading.
Project Beater – Imaging diatoms from a vintage microscope slide

One of the really fascinating aspects of my microscope refurbishment project has been the ability to look at things which are impossible to see with the naked eye. This is of course because of the magnification it can offer, but also the ability to play with the lighting to emphasize different aspects of the subject. The ability to look the natural world with a microscope has fascinated scientists and artists since microscopy began. The Victorians had a particular fascination with something called Diatoms (the silica shells formed by microscopic algae), making amazingly beautiful patterned slides comprising tens or hundreds of them, and there’s a great article on that here. These old slides are extremely sought after, and command huge prices, however less ornate vintage slides with diatoms on them regularly appear on ebay and other auctions sites, and I thought it would be great to get one and see what it looked like using my microscope build – Project Beater.
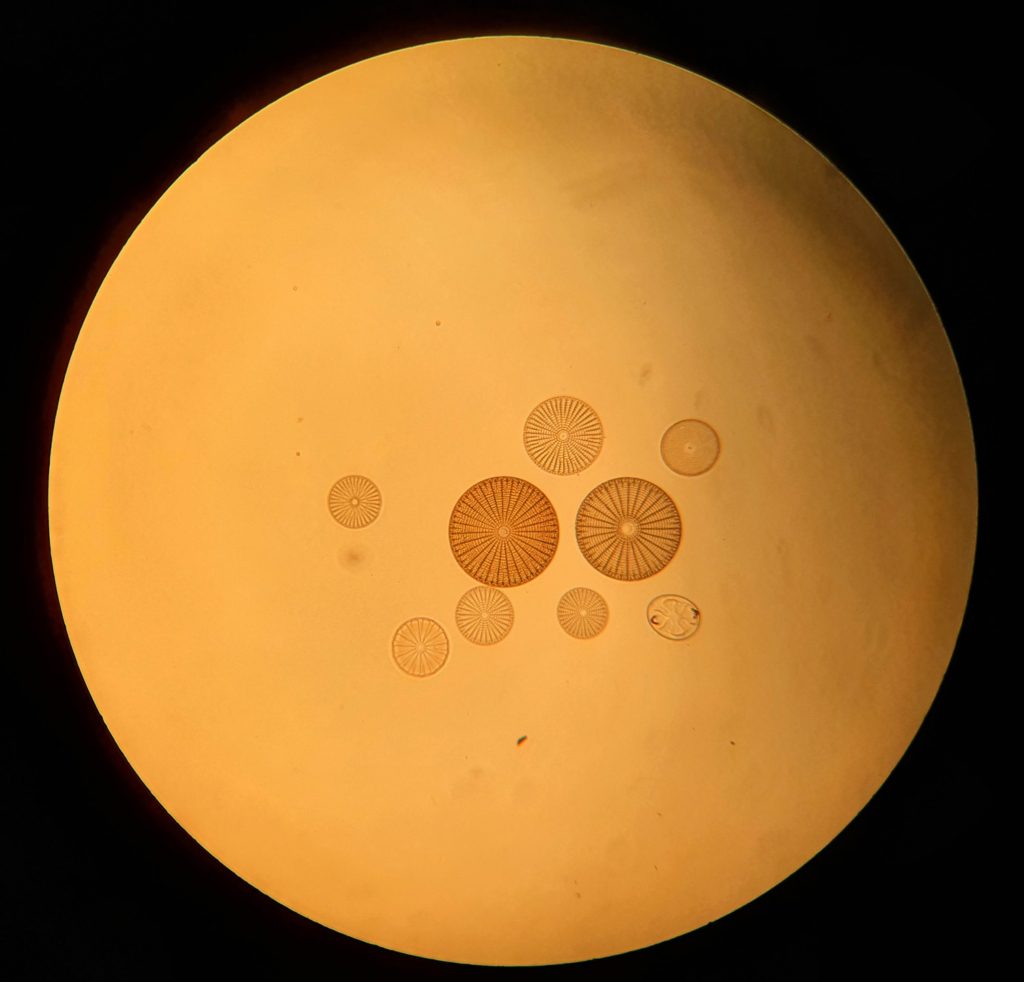
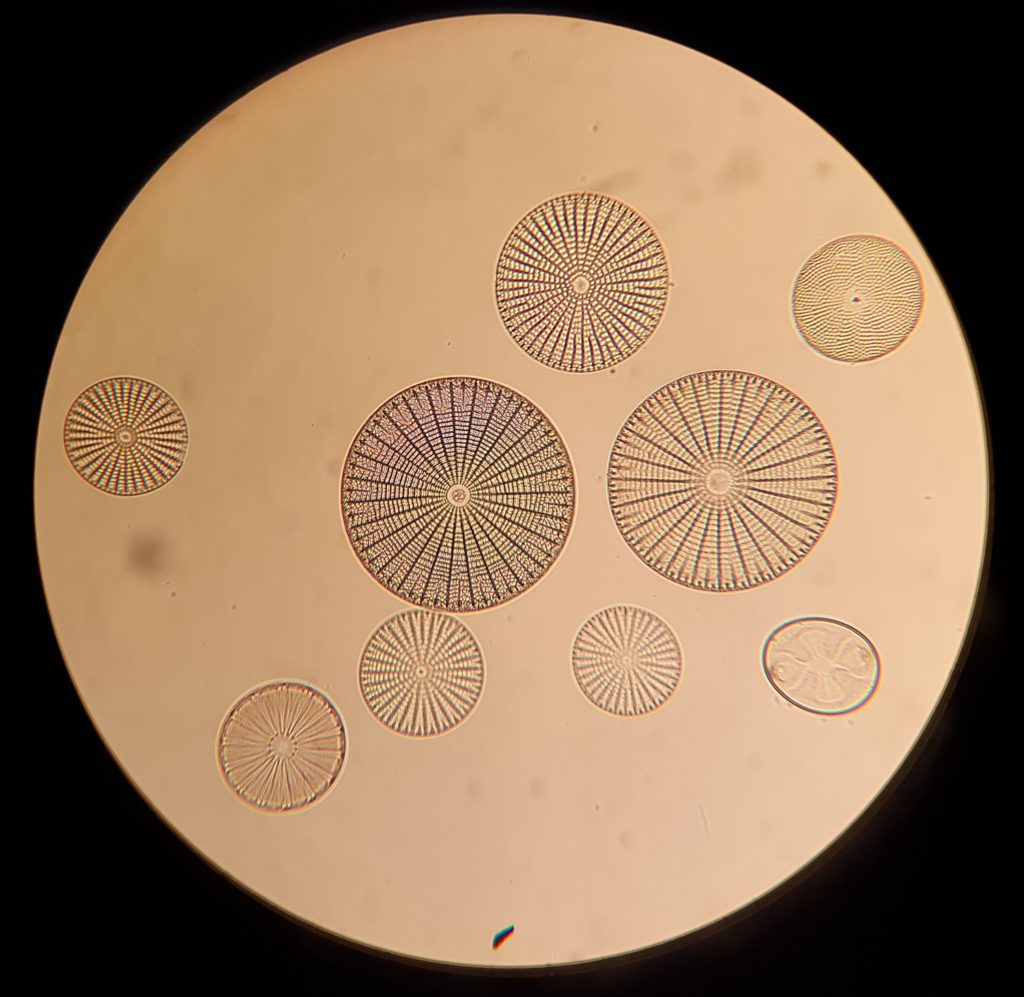
The slide I got was made by Clarke and Page, who worked in London between 1904-1923 (there’s a bit on history on them here), and it only had a few diatoms on it. On the plus side it cost me less than 10GBP. So, the important stuff, what does it look like? All images below were taken using a camera phone through the eyepiece, and have not been focus stacked. Firstly imaged using 10x objective, and 10x eyepieces for 100x overall magnification with standard brightfield imaging.

Diatoms at 100x with normal brightfield imaging

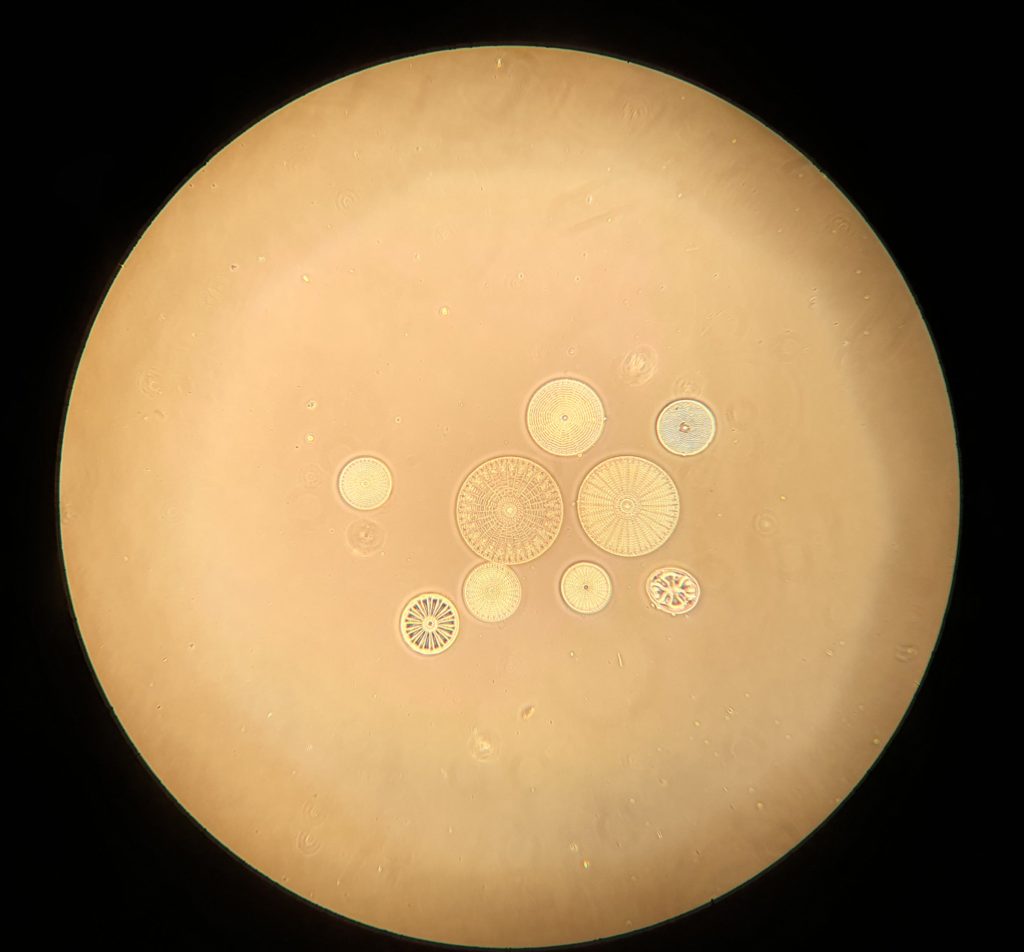
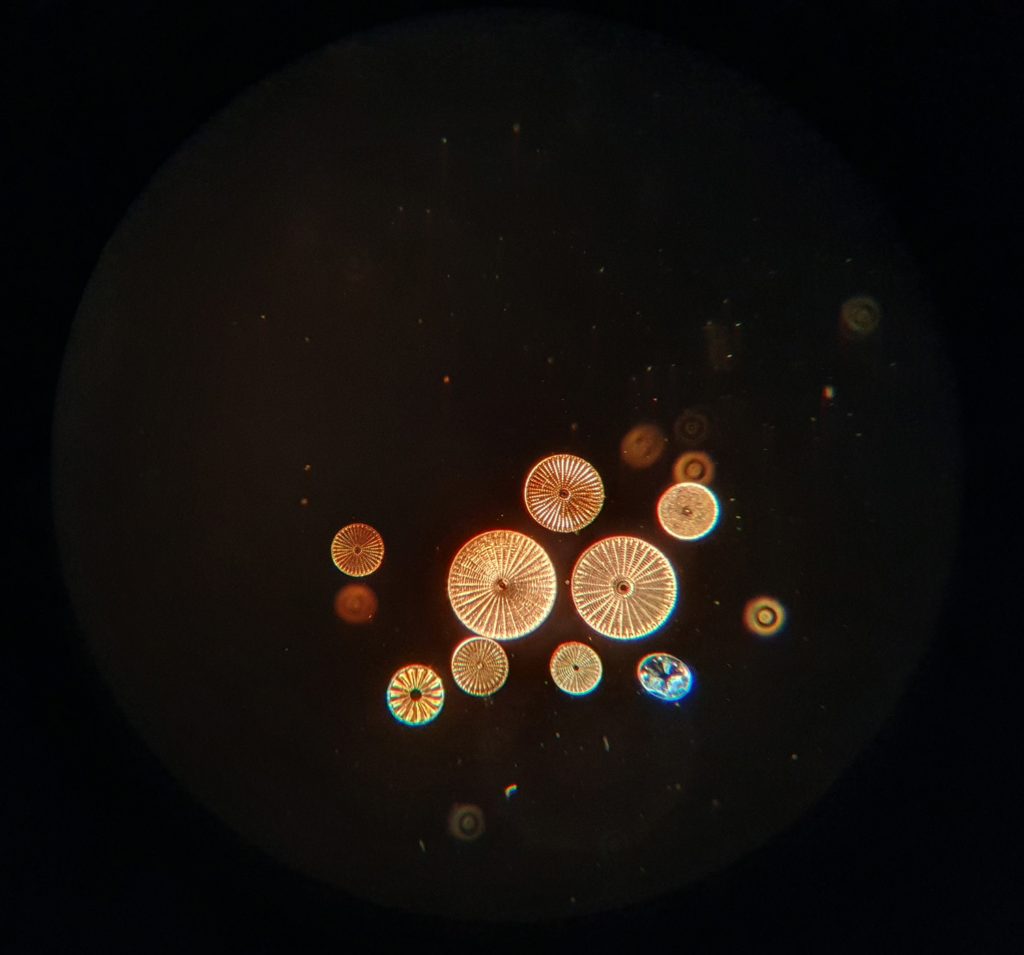
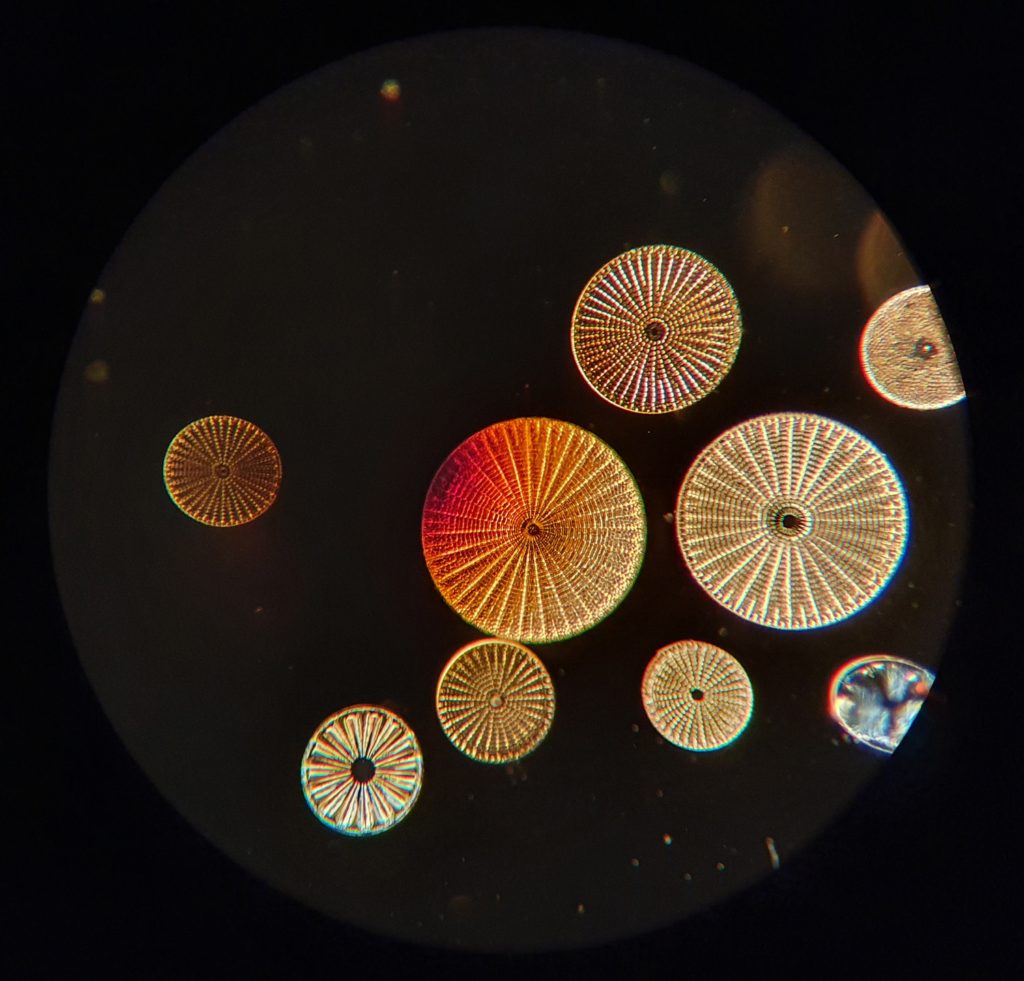
Even with brightfield imaging at this magnification the structures present inside the diatoms is starting to become apparent. Where diatoms come ‘alive’ though, is when you do phase contrast and darkfield imaging. Here they are under phase contrast and darkfield imaging at the same magnification.

Diatoms at 100x with phase contrast imaging
Diatoms at 100x with darkfield imaging

As you can see, they looks much more interesting when the lighting is changed. I also took a couple of images with a 20x objective, for 200x overall magnification – brightfield and darkfield.

Diatoms at 200x with brightfield imaging
Diatoms at 200x with darkfield imaging

These images were just taken with a camera phone through the eyepiece, so the quality is obviously poor compared to focus stacked images, and as I learn more about getting good quality focus stacked photos, this slide will be a great subject to have a play with.

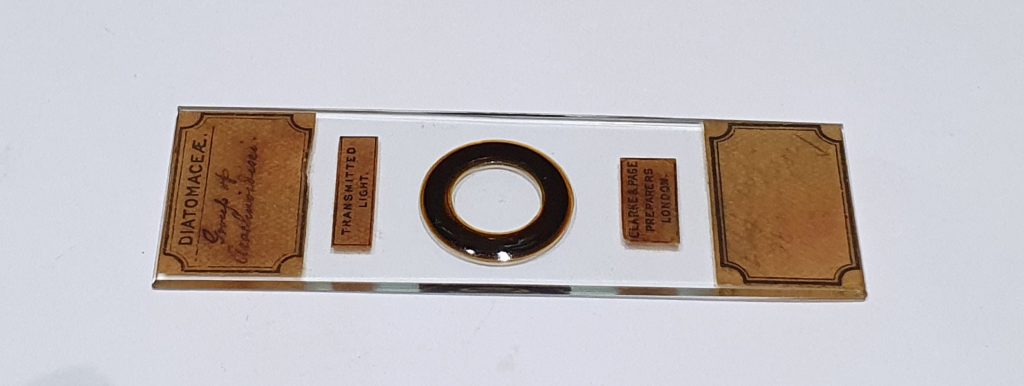
Here’s the slide itself.

Clarke and Page microscope slide with diatoms

The diatoms themselves are just off the center of the black ring in the middle of the slide. Depending on how good you monitor and lighting are, you may just be able to make out a tiny dot just off center within the ring – that is the cluster of diatoms.

Using a microscope can literally open up a new world to anyone interested in science and nature, and for not much money you can walk in the footsteps of the early pioneers, seeing what they saw. Rebuilding a microscope has offered me fascinating insight into this world, and is something I will continue to research both for work and pleasure in the future. If you want to know more about this or any other areas of my work, you can reach me here.
Project Beater – The perils of cleaning & UV fluorescence

As some of you may know, I bought an old and tatty microscope during the recent Covid related lock down, with the aim of restoring it and learning a new skill at the same time. I’ve affectionately called it Project Beater given the state it was in when I bought it, and so far it has been fun to work on. Parts of it were filthy, with grease that was meant to keep everything moving set like glue, so a good cleaning was the order of the day. However when it comes to old equipment, is there such as thing as too much cleaning? Well, as it turns out yes there is……
To expand the capabilities of the microscope I’ve been on the look out for some of the add-ons that were originally advertised for it. One supplier I’d bought something from offered me a reflected light fluorescence setup which would be suitable for the microscope. These are reasonably complex optical components, but the idea is the supply a light to the sample which has been filtered to give a specific range of wavelengths. This then bounces off a dichroic mirror down on to the sample where it causes the sample to fluoresce at a different wavelength. This fluorescence then passes back through the objective and (this is where it is important) back through the dichroic mirror, before reaching the eyepiece. As you can imagine the dichroic mirror is a very important part here, and does the job of reflecting some wavelengths while letting others pass through it.

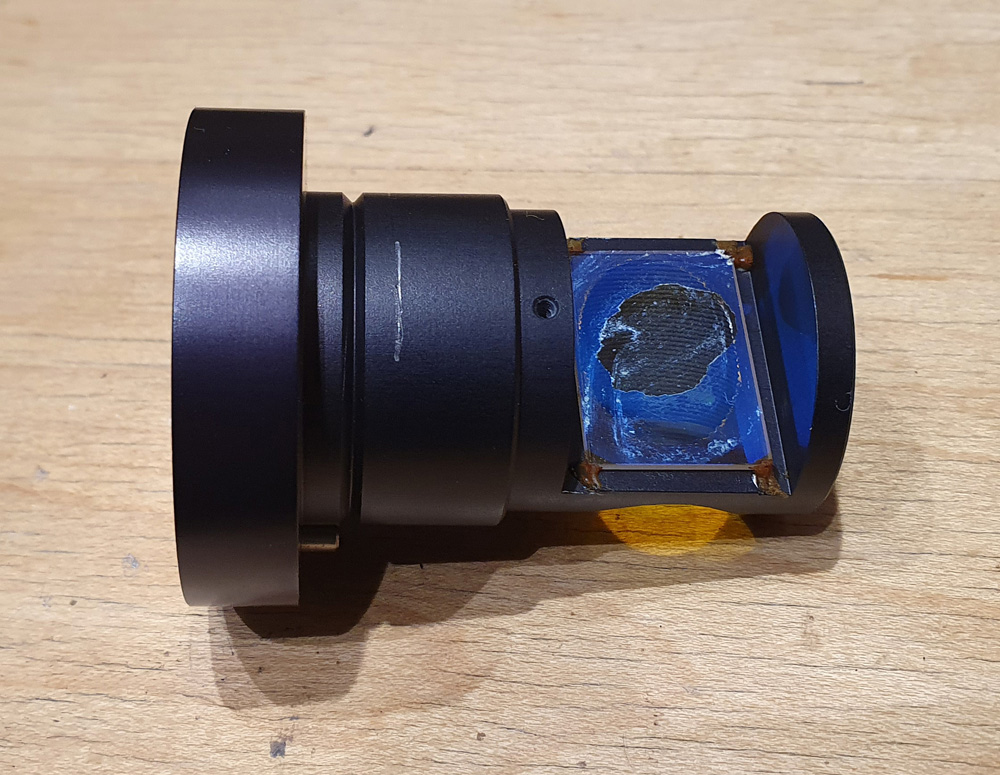
The reflected light fluorescence device comes with removable blocks containing the required filters for fluorescence with certain wavelengths. Mine came a ‘Blue’ dichroic mirror setup, meaning that blue light would hit the sample, and wavelengths longer than about 500nm would pass back through the mirror before going through the orange emission filter and being detected. Here’s a close up of the dichroic mirror block removed from the setup, with the dichroic mirror just visible inside it.

Blue dichroic mirror block

This device is about 40 years years old, and like all optical filters looked like it could do with a bit of clean. However when I started with even the most gentle touch, the coating on dichroic mirror just disintegrated, leaving behind a bare piece of glass, and shower of dichroic coating flakes. This is what it looked like, post ‘cleaning’….

Dichroic mirror post cleaning.

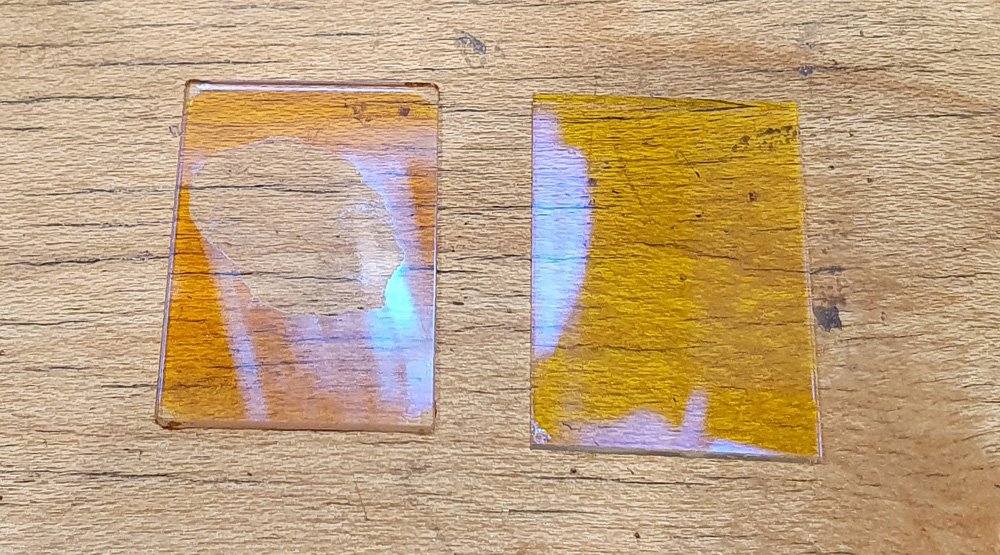
My heart sank. Without this the whole device is useless, and finding another 40 year old mirror block would be, well, ‘challenging’ is one way to put it. So it left me ‘in a bit of a pickle’ (many other choice phrases were used at the time). After I stopped kicking myself for making such a stupid mistake it was time to make a plan and try and salvage the situation. Firstly I checked out Alan Wood’s excellent website on Olympus microscopes (here) and looked through the manual for the reflected light fluorescence device, in which were plots of the transmission curves for the different filter blocks. On my blue filter block, it looked like I needed something which reflected blue light and shorter wavelengths, and let through longer wavelength light. This made sense, as the remainder of the coating on the old filter reflected blue as can be seen in the picture above. To try and find a suitable filter my first port of call was UQG Optics, who I’ve bought a few parts from before. They had a few different dichroic filters, and their Dichroic Yellow looked like a pretty close match. After providing them with the size for the filter based on the one in the block, they were able to cut a 50mm square one down for me. Visual comparison of the 2 filters showed they both reflected blue light, and were a similar (but not identical) colour for transmitted light.

Old filter (left) and UQG filter (right)

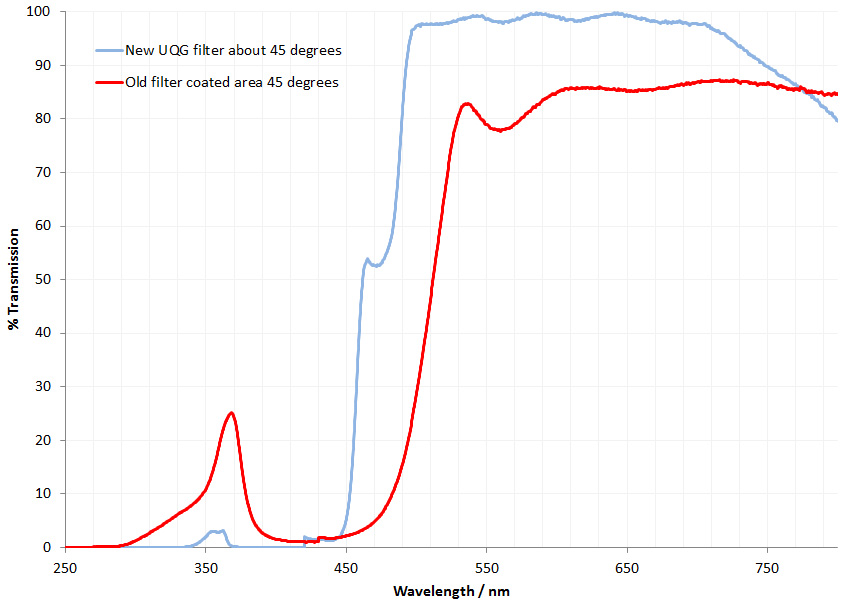
A more scientific test was to measure transmission of the filters when held at 45 degrees (this is important as dichroic filters change their optical properties as the angle the light hits them varies, and it’ll be hitting at 45 degrees when mounted in the block). This gave the following;

Old and new filter transmission at 45 degrees

As expected the new replacement filter was similar, but not identical to the old filter, with a lower cutoff for transmission and blocking more of the UV. Reflection from the surfaces at 45 degrees was also measured, but that was just a relative measure as I don’t have a specular reflection standard. This again showed they were similar but not identical, with the new filter starting to reflect below 500nm, while the old one reflected below about 530nm. These values correlated well with the measured transmission curves, which is as expected.

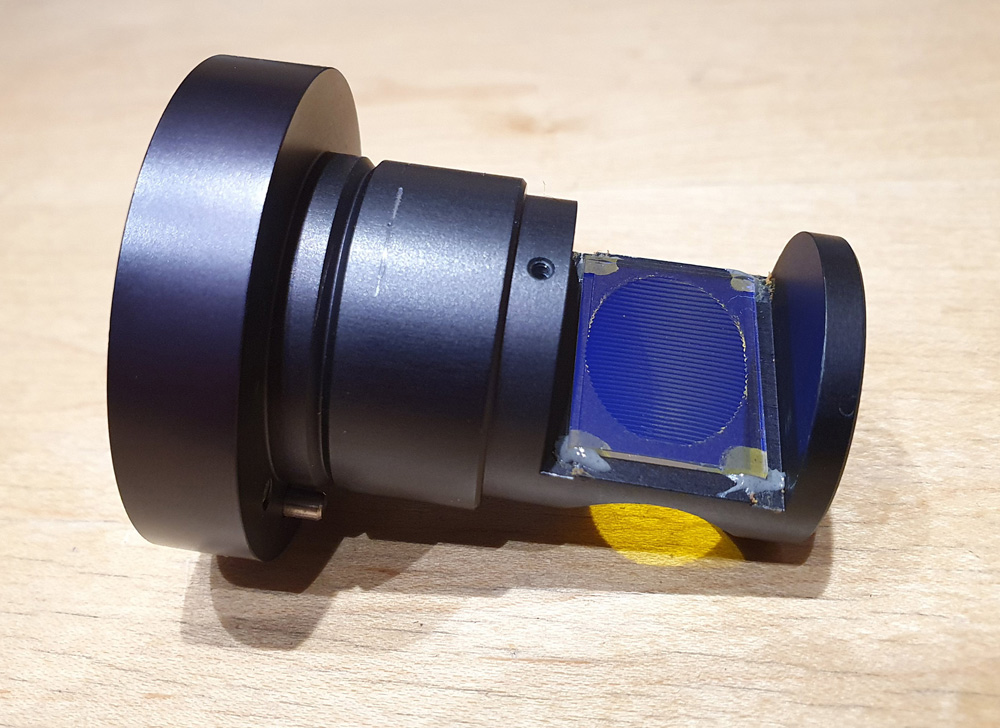
What does this difference between them mean? The new filter lets through slightly shorter wavelength light than the old one. Therefore I’ll need to slightly adjust the wavelength of the excitation filter, or risk just losing some of the excitation light rather than having it reflected to the target. Not the end of the world, and at least gives me something to have a play with. The old filter also bled quite a lot of UV, although this could have been due to degradation of the filter because of its age. The new filter didn’t leak UV as much, meaning more could be reflected on to the sample depending on which excitation filter is used. To mount the new filter a small blob a glue was applied to each corner as with the old one.

New filter in place

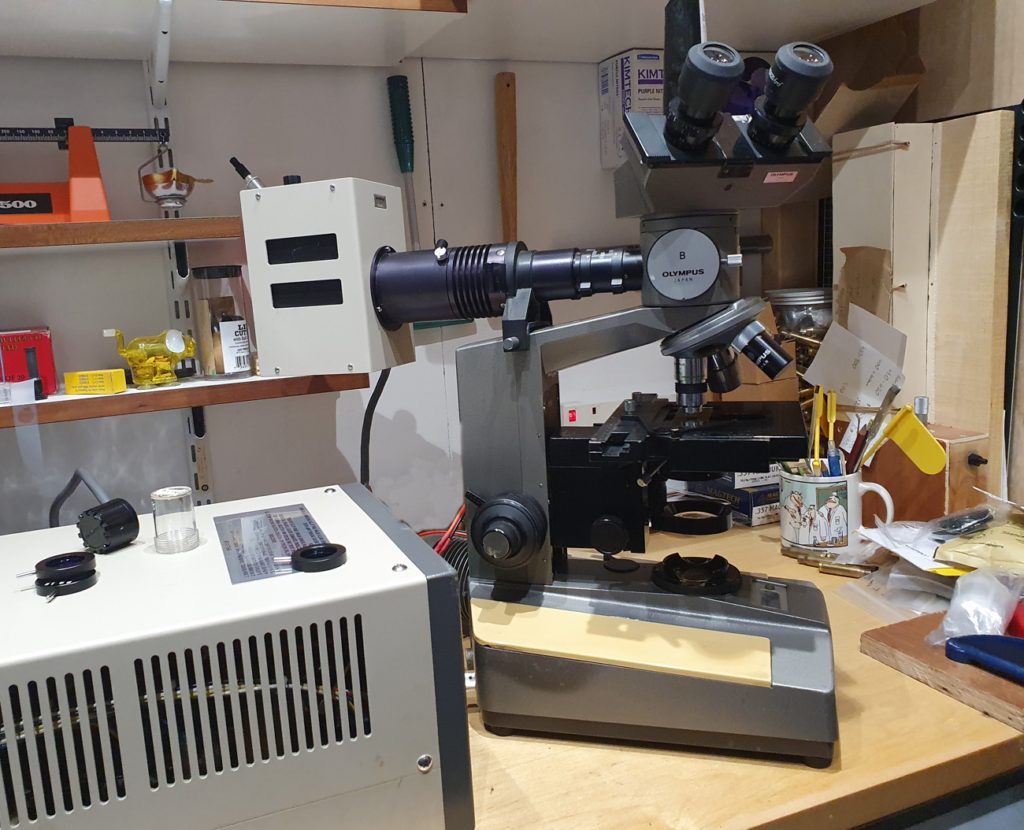
The next step was to get the 100W mercury xenon lamp going, so I could start to do some fluorescence microscopy (this lamp will be the subject of another post in the future). Here it is all setup on top of the microscope.

Mercury lamp and reflected fluorescence setup

I chose a UG5 excitation filter as I was mainly interested in looking at UV induced fluorescence. The subject was a petal from a Ragwort flower as it should show some nice fluorescence.

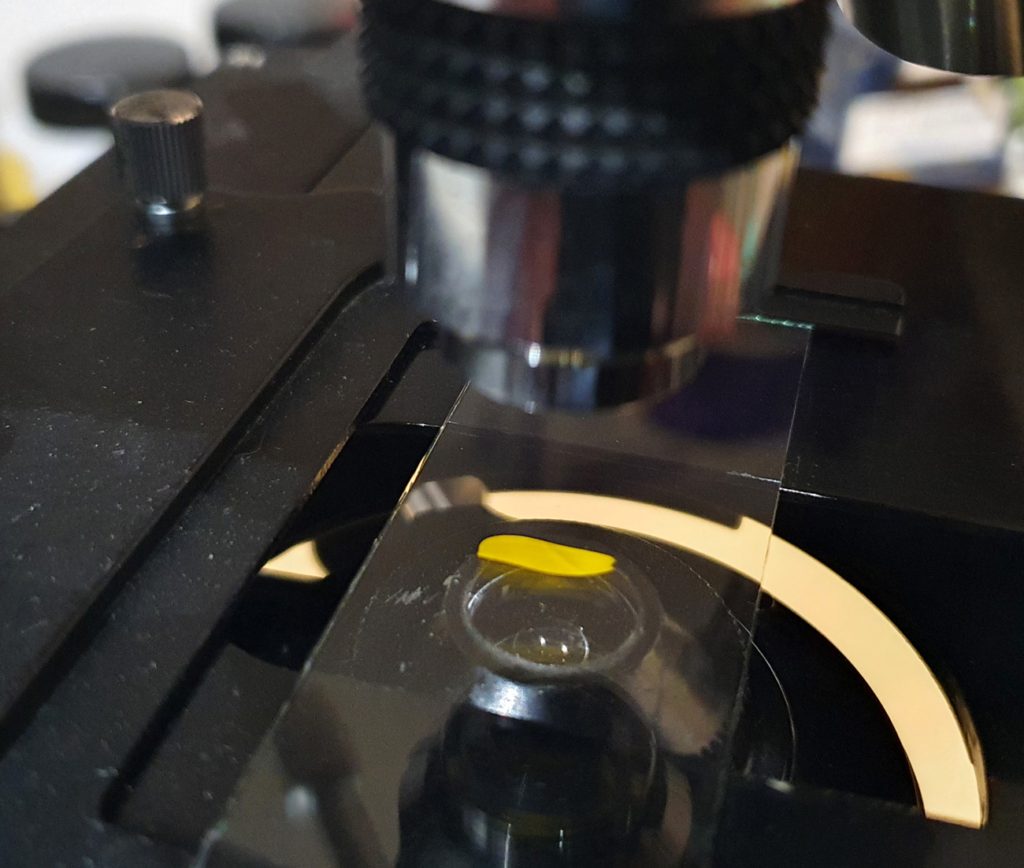
Ragwort petal ready for assessment

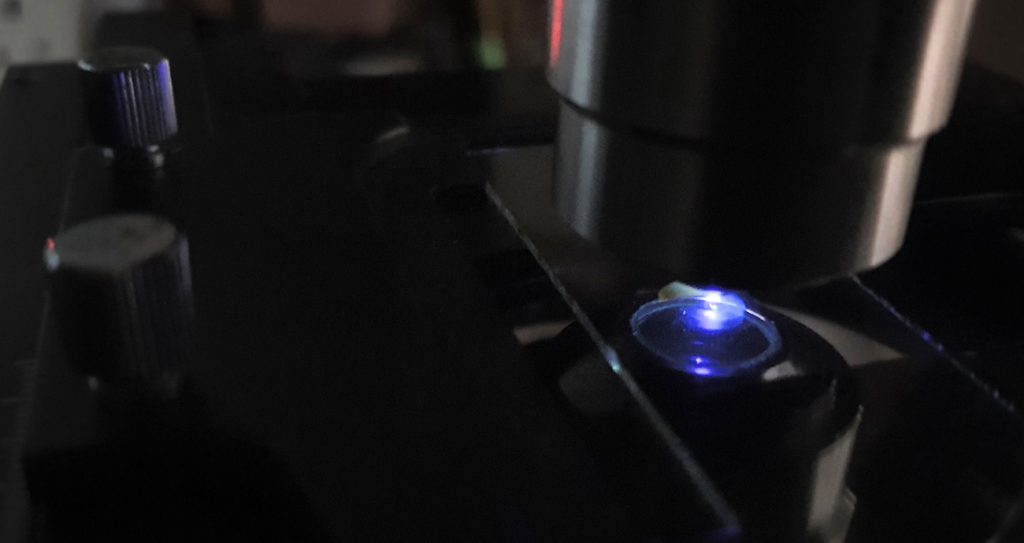
With the lights out and the mercury xenon lamp on, you can see the light hitting the sample.

UG5 excitation filter fluorescence

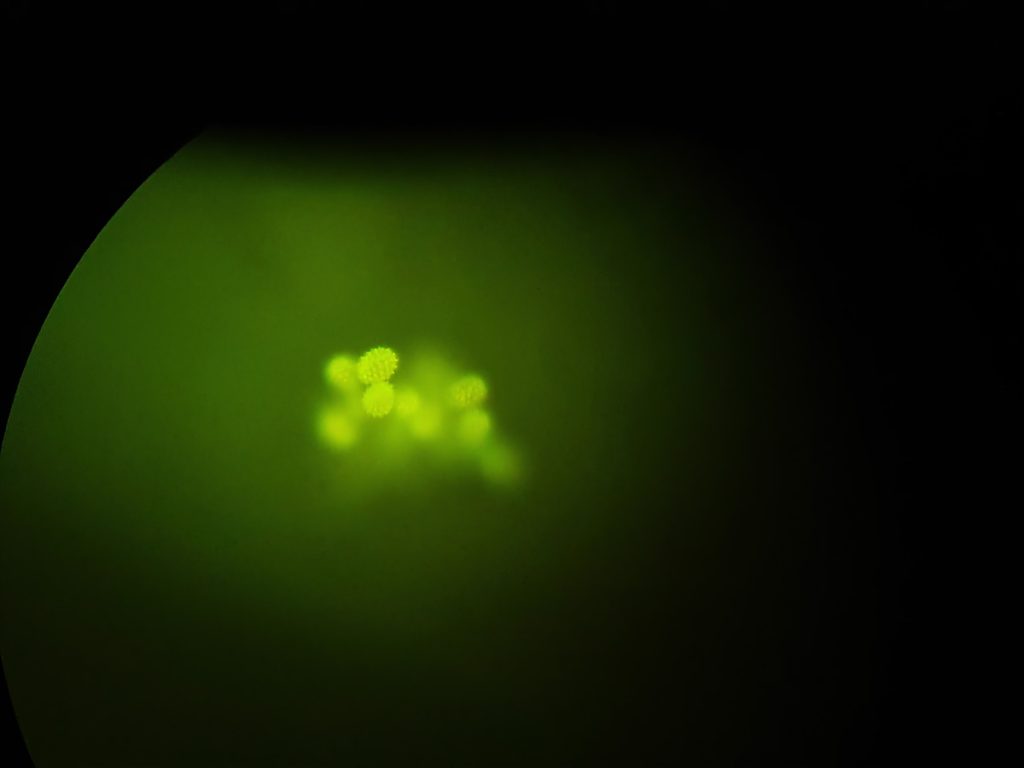
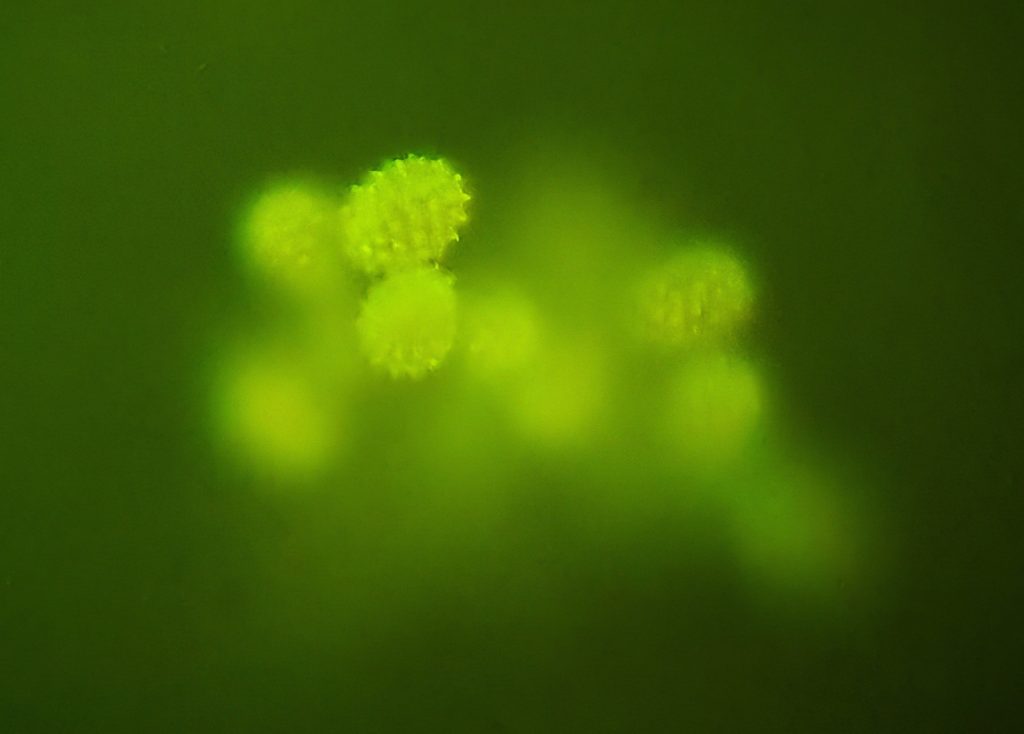
Looking through the 20x Olympus SPlan objective I could see the following (captured using a camera phone through the eyepiece).

Ragwort pollen about 200x magnification

And cropping the original image, the spiky ‘pineapple’ shaped pollen grains can be seen fluorescing.

Cropped image of fluorescing pollen grains

Remember that this is a single image with no focus stacking, so not all the pollen grains are in focus. However it shows the setup is working.

What have I learnt here? If something looks a little dirty, stop and think before cleaning it, especially when it is a bit older. If I find any other filter blocks for this, the dichroic mirror will be left well alone. The replacement filter was close in properties to but not the same as the original one. This will have a little bit of an effect on the usability, but hopefully not huge amount. After a bit more of a hunt I’ve tracked down what would be a closer match to the original dichroic mirror, so I’ll keep a note of that if this one doesn’t work out. Overall though, as scientists we shouldn’t be afraid to experiment. Yes, some things we do wont work out as expected and if that happens, step back, take a deep breath, assess the situation and plan the next step. Most importantly, don’t be afraid to keep experimenting.

Thanks for reading, and if you want to know more about this or my other work, you can reach me through my Contact Me page.

Project Beater – microscope LED light conversion

My journey into the world of microscopy with my little Olympus BHB microscope (Project Beater) has been really fun, and has opened up the possibility of doing some UV microscopy. However, as is inevitable when working with 40 year old equipment there are some challenges. One of which is the in-built lighting system. On my system the electronics were fried, and big scorch marks next to a very complicated looking component made me think that an external power supply would be a good idea. Also the original tungsten bulbs are pretty thin on the ground now, and cost anywhere up to about 50GBP each. Couple that with a lifespan of about 200 hours if they are looked after properly, and it can get pricey, quickly….

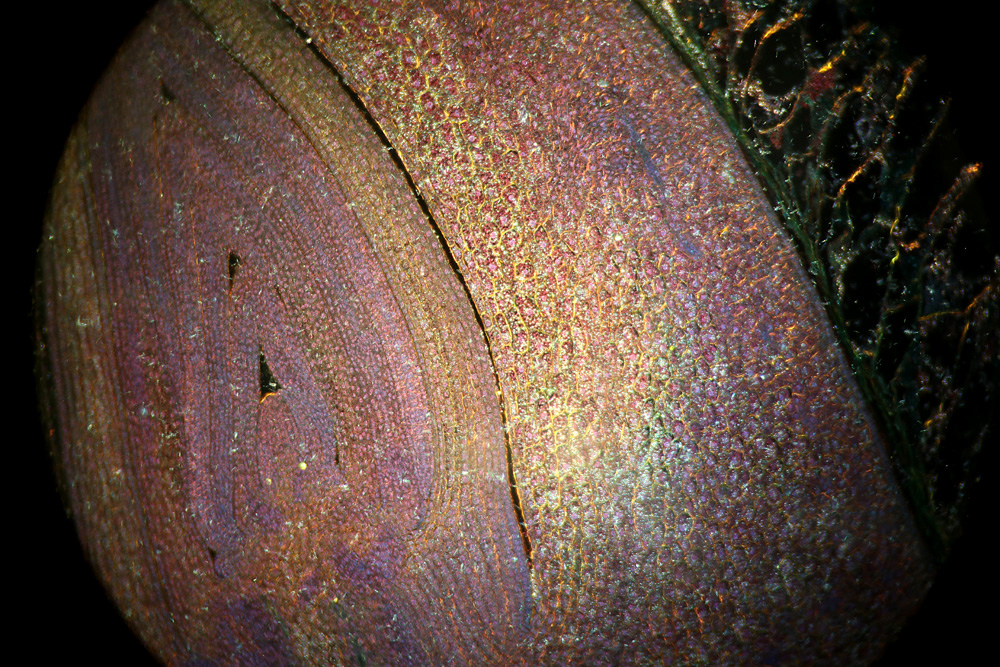
As a result of this, converting it to LED lighting looked like a nice option. I wanted to use the base of a broken bulb that came with the microscope as the mount for the LED, just so I could use the original lamp housing. The first attempt with a 3W white light LED was, and I can be brutally honest here, a bit rubbish. It produced a fair bit of light, but the LED was not in the same place as the filament from a bulb would have been, so I lost a lot due to the collimating optics not working that well. Also, 3W for the LED was a little low (or at least that is what I thought). For LED light MkII, I made a couple of changes. Firstly a more powerful LED – 10W white light with a colour temperature of 4000-4500K. This runs at about 10V and 1A, and cost about 2GBP delivered from eBay. Secondly, mount this LED where the filament of the original bulb would have been. This was a little more challenging….. Before we dive into the conversion, a jump to the end result and a pretty image. Here’s a dark-field image of a Maize seed taken on Project Beater using the LED light conversion I’ll discuss below.

Dark-field image taken with 40x Olympus lens

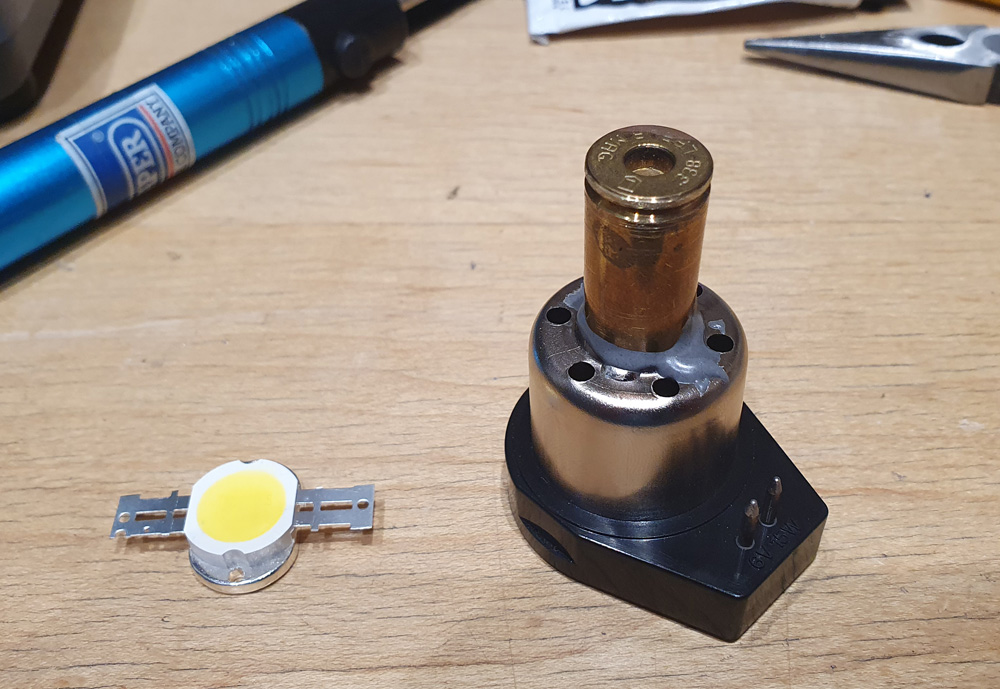
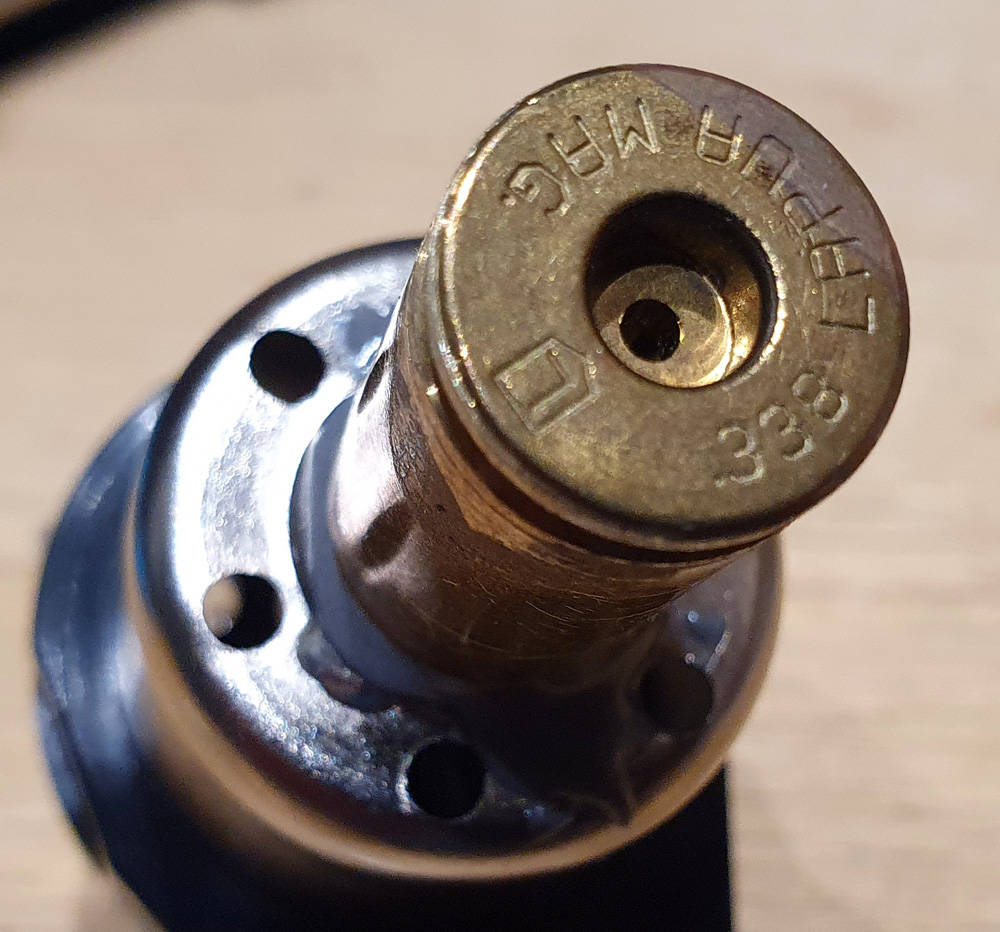
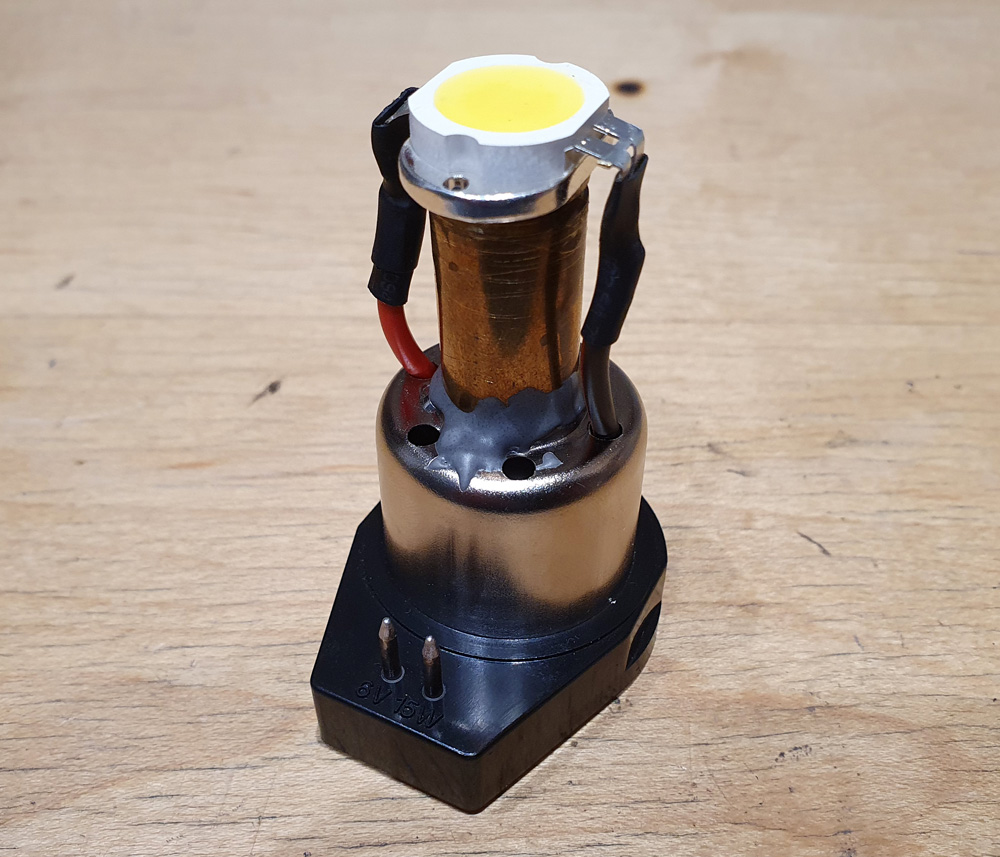
The old bulb was removed easily enough with the use of a mini blow torch to melt the solder holding it in place. The LED needed mounting about 3cm from the top of the existing mount, to enable the LED to be in the same place as the filament of the bulb. I needed a metal tube (to help act as a heat sink for the LED) about 3cm long, and with a nice flat top. This is where work overlaps with a hobby of mine. In my spare time I do some target shooting, and I had some empty brass cases on my workbench. One, from a 338 Lapua was about the right diameter to fit in the lamp housing. Plus it had a nice flat top for mounting the LED on and giving a good thermal contact. A few minutes with a hacksaw, and a bit of JB Weld, and the cut down brass case was mounted.

Original bulb holder modified for the the LED
Re-purposing a spent case

Once this had set fully, the LED could be added (again, thank you JB Weld) and wired in to the original connectors.

10W LED all wired up

Putting this into the microscope produced a little bit of problem. It fit just fine, but was so bright that it was difficult to use in the normal bright-field setup. Even with the current turned down it was still my brighter than the original 30W tungsten bulb. Not good. Or is it? Unlike bright-field imaging, dark-field imaging modifies the light transmission to the sample with the end result of making the areas which are around the sample look dark, and allowing only light that has been scattered be imaged. In doing so it can be used to show features not visible in normal bright-field imaging. But dark-field imaging needs a lot of light. Aha, now we have an LED light source which is too bright for normal use, would it be suitable for dark-field imaging?

A quick test. The sample is Maize seed section, and the images below are taken with a 10x UVFL Olympus objective, and photographed through a 3.3x photoeyepiece. A quick comparison between the original 30W tungsten bulb and the 10W LED for dark-field imaging. Firstly, the 30W tungsten bulb, and a camera exposure time of 1.3s

Original 30W tungsten bulb, 1.3s exposure time

The 30W tungsten bulb produces a usable dark-field image, but there is a bit of a hot spot in the middle of the image. Secondly the 10W LED, same ISO setting on the camera, and the microscope was left the same. All that was changed was the light. 1.3s was too long for this light, and I had to reduce the time by about 15x to 1/13s to get an similarly exposed image.

10W white LED, 1/13s exposure time

With the 10W LED the colour temperature of the image is much cooler than with the tungsten bulb (not surprising as the spectra is different), and the lighting intensity looked to be a bit more even across the sample. But the big difference is the exposure time – about 15x faster with the LED indicating much more light being present. So, yes it does look as though this LED light will be suitable for dark-field imaging, and will be a better option than the original 30W tungsten bulb. It is so bright in fact, that it would probably work well with narrow band pass optical filters, to do multispectral microscopy, but that is for another day.

For now, here are a couple more dark-field images of the Maize see cross section, taken using the LED light (plus of course the one at the top of the post which was done at higher magnification).

Dark-field Maize seed image taken with 10x UVFL Olympus objective

Not all experiments work out as expected, and we should be really thankful of that – if they did, we wouldn’t really learn anything new. As scientists we shouldn’t be afraid to try new things, and test the limits of the equipment we use. Who knows, it might throw up some interesting new area that is useful for your work.

As for what’s next, well I’ve recently started seeing 10W 365nm LEDs for sale, so perhaps getting one and seeing whether it is useful for UV fluorescence microscopy would be a good idea. But first, time for a coffee. Thanks for reading, and if you are interested in this or any of my other work, you can reach me through my Contact page, here.

UV microscopy of sunscreen formulations

Light microscopy is a powerful tool to help you understand how your product or formulation is structured. As with all imaging techniques though, depending on what you want to image, it is not without its challenges. When the Covid lockdown started, I bought myself a beaten up old Olympus microscope, with the aims of learning how it worked getting it up and running again, and with a long term goal of using what I’d learned to build a UV transmission microscope. Of course, things progressed pretty quickly as we shall see….

First though some of the results of my first attempt at UV microscopy. Taking the standard Olympus BHB microscope, and replacing the halogen light source with a 200W Xe lamp which is filtered to produce light mainly in the UV region from 250nm to 400nm, I took some images of a sunscreen formulation on a glass slide. This product is an oil in water emulsion (oil droplets suspended in a water based continuous phase), and with the UV absorbing component in the oil phase. This would be a nice simple one to try, as the two phases should look very different under UV.

For an objective lens, I used a Leitz 40x UV objective (which is discussed further here), to give me a good chance of getting as much UV to go through it as possible, and this is what a thin film of the sunscreen looked like imaged using a UV modified Nikon d810 camera (overall magnification about 400x).

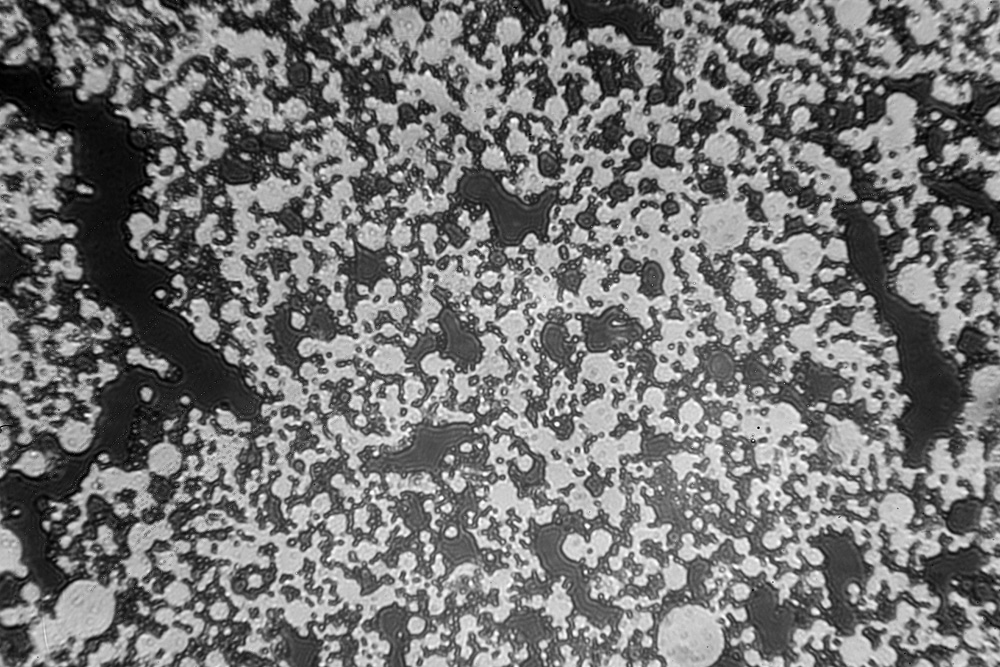
UV microscope image of sunscreen formulation (approx 400x mag)

So, what are we looking at in the image above? The black areas are the oil phase, where the sunscreen is present (hence they look darker as the UV is being absorbed). In between the dark areas, is the water phase. You can see individual oil droplets, but also some areas where the oil droplets are starting to merge together as the emulsion structure begins to collapse.

While doing the images, I noticed that if the microscope cover slip was touched, the water and oil phases would ‘flow’ as a result. To capture this behavior I took a video clip using the UV modified camera (watch it with the sound off unless you like to noise of cooling fans from the light source).

UV video clip of sunscreen movement under the microscope cover slip

What are we seeing in the image above? Firstly, at the start of the clip, the lighter grey water phase flows from left to right, taking some of the individual oil droplets with it. This is then followed by the oil phase as it collapses and the darker sunscreen containing oil droplets fuse together. The video is darker than the photograph, as there is so little UV getting through to the camera – in order to get anything at all on the video the ISO setting on the camera had to be turned up to 10,000!!!

Overall, a success for a first experiment. The sunscreen containing oil droplets look like they should under UV, and it was even possible to get some video footage of the behavior.

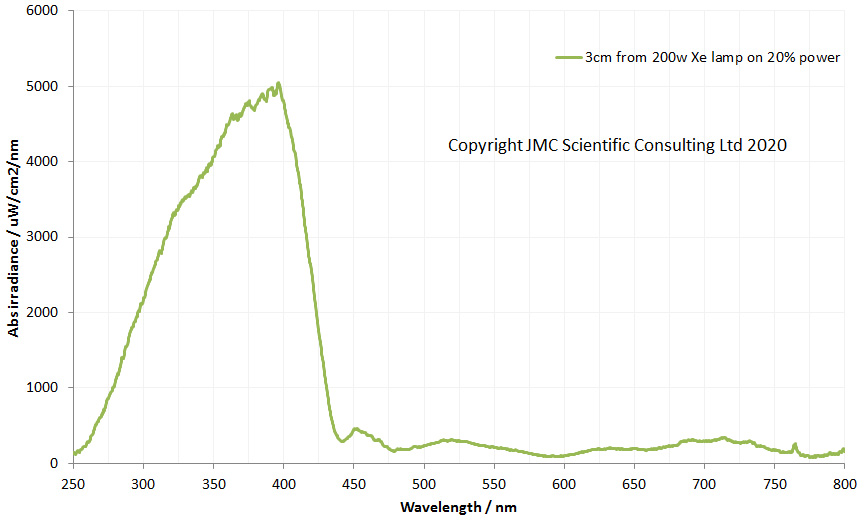
What is going on here though, why is everything so dark in the video clip? The light source was a 200W Xe lamp, focused using a collimator into the back the microscope – there should have been loads of light. This is where the issues with dealing with optical systems comes in to play. This microscope was not designed for UV imaging, and so every lens, every mirror, every beam splitter will be be absorbing some UV. Imaging is done through a photoeyepiece in the top of the microscope which projects a image into the camera. This in itself is a relatively complex piece of optics designed for use in visible light rather than UV. Also the 200W Xe light source was just ‘shone’ into the back of the microscope with the hope that the alignment would be good enough. Add all these together and a lot of the light will be lost before it even reaches the camera. Using a spectrometer it was possible to estimate how much was being lost. Firstly an irradiance scan taken with the cosine corrector of the collection fiber about 3cm in from the collimator on the light source.

Irradiance scan of the light source

This light is producing a lot (and I mean a lot) of UV. I wear gloves, and UV safety goggles while using this light, as the risk of burning and eye damage is high. There is a good range of UV wavelengths though, from about 250nm up to 400nm.

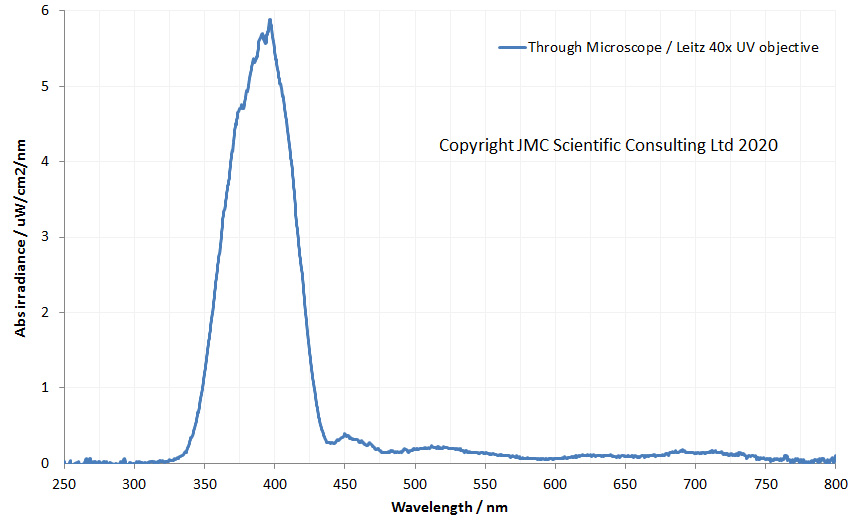
Now a second scan with the spectrometer, with the cosine corrector up against the exit of the photoeyepiece at the top of the microscope (after the light has gone through the microscope, the condenser, the glass slide itself, the Leitz UV objective lens, and the photoeyepiece).

Irradiance after passing through the microscope

The light getting through the photoeyepiece is about 0.1% the intensity coming from the lamp itself. Also the wavelength range of UV has been reduced. Now there is nothing really below 350nm. This is because the microscope is not designed for UV imaging – the glass lens elements present absorb the UV, both in the glass itself and any coatings on them. This is why UV microscopy is so difficult – all the components in the optical train must be optimised for UV rather than visible light, especially if you want to get below 350nm.

There is another issue to consider as well – the filtration of the light before it gets into the camera. On my UV modified Nikon d810 camera, there is an internal filter which lets through light mainly between 320nm and 380nm, while blocking unwanted wavelengths. So as you can see, with the light getting through the microscope, I am only really seeing what is going on between 350nm and 380nm at the moment.

Future direction for this work is for me to build a UV microscope, rather than trying to adapt one to do the job – something capable of being used between about 250nm and 400nm. This will be a bit of along term goal though, as the challenges are many. Still, should be fun though…..

In the mean time if you’d like to know more about this or any of my other work, get in touch – you can reach me through my Contact page.

Leitz UV microscope objectives – historical optics

When I look back at my school days, thinking about some classes still fills me with dread. One of those was History. Memorising endless British Kings and Queens and the dates they reigned. Dull, dull, dull, dull, dull. It’s strange though as I loved archaeology, but History classes just didn’t do it for me. It could also have something to do with the teacher, who had a habit of prowling around the class while barking facts at us, but that is another story. As I have ‘matured’ I’ve gained a bit more of an appreciation for history – without knowing where we’ve come from, how can we make sure we are heading in the right direction, or perhaps more pertinently these days “those who do not learn history are doomed to repeat it”. Anyway, I digress, and back to the science.

As part of my research into imaging science, UV photography has really captured my imagination. Recently I have started looking more at microscopy, and so the idea of doing some UV microscopy seemed like an obvious area to explore. However most objective lenses aren’t ideal for UV transmission, as they block some or all of it. Some of the standard microscope objective lenses, such as the Olympus UV fluorescence (UVFL) lenses have pretty good UV transmission around 360nm, but then it drops off to essentially nothing at 320nm and below. If you want to look at short wavelength UV, say at 320nm and below, then you start needing rather specialised objectives which are no longer based no glass lenses.

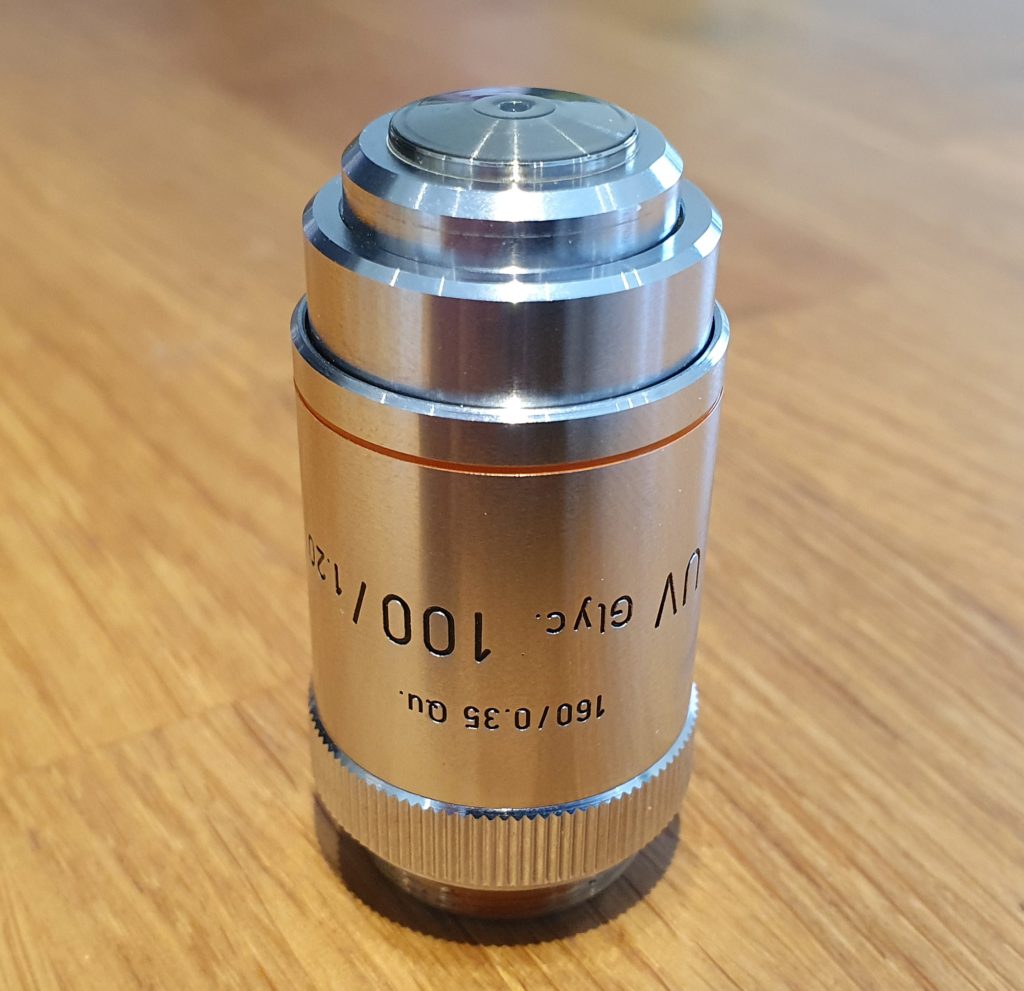
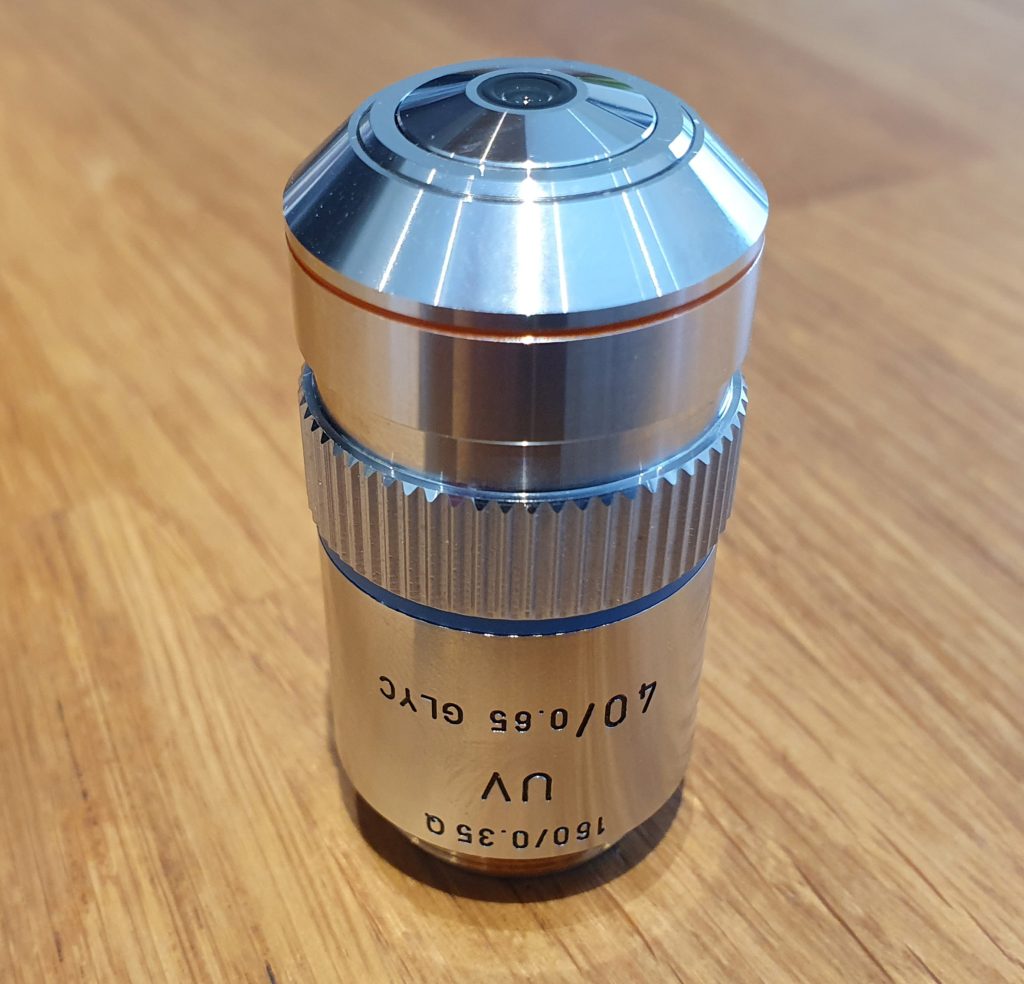
These UV lenses tend to be very expensive, especially when bought new, however they do occasionally appear on the second hand market. When they do become available, prices can vary wildly, often depending on whether the seller knows what they are, and whether collectors are getting into a bidding war. One manufacturer of these types of lenses was Leitz, and recently I was fortunate enough to find one of their 16x UV objectives on eBay from a seller in the US, which I quickly snapped up. When it arrived I started trying to track down any information about it, but couldn’t find anything definitive. Even asking a couple of experts on Leitz failed to reveal anything other than ‘they were made in very small numbers’. A few weeks after the 16x arrived, I was given the details of a dealer in Germany – Optik Online, here – who had another couple of the Leitz UV lenses available. Now, for those of you who haven’t looked here, this is an amazing shop, and somewhere an optics geek can spend hours. It turned out that he had two more of the Leitz UV lenses, a 40x one and 100x one (both glycerin immersion lenses), and I quickly put in an order for these as I hadn’t seen them anywhere else. Here they are;

Leitz 40x UV objective
Leitz 100x UV objective

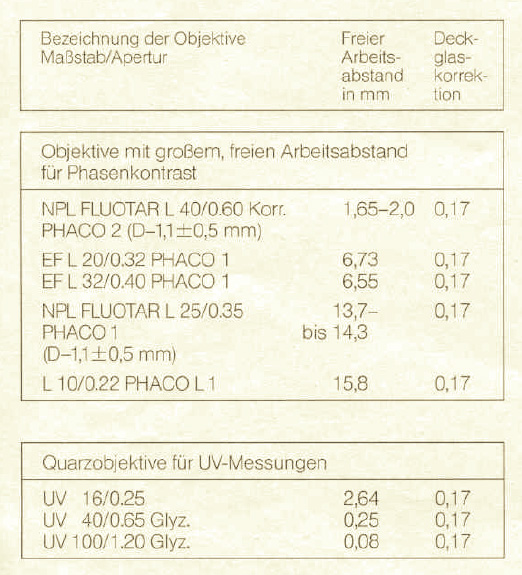
These 2 seemed to be a similar style to my 16x one, but unfortunately the dealer didn’t know anything else about them. I did manage to find a Leitz brochure from 1985 which mentioned three UV objectives, with the same magnifications as mine, and an excerpt from this is shown below;

Excerpt from 1985 Leitz catalogue

In the catalogue to UV lenses are called ‘Quarzobjektive’ but while they magnifications and NA values matched my lenses, the cover slip thickness is different (mine say 0,35mm quartz, while these say 0,17mm). It does seem strange though, and I’m actually wondering whether the catalogue has an error in it regarding the cover slip thickness. More research to be done there, to hopefully get to the bottom of that…..

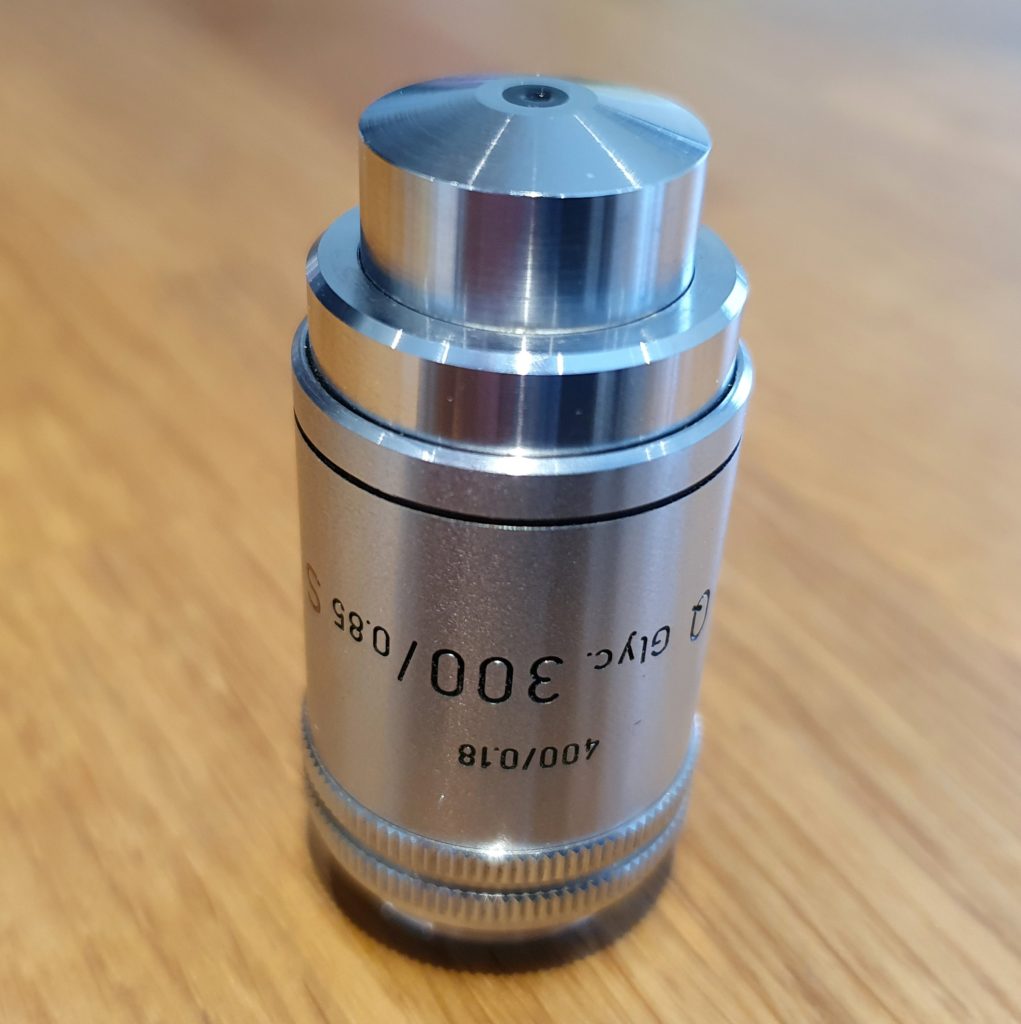
While looking through the Optik Online site, I also found a Leitz Quartz 300x objective, which looked very interesting, so included that in my order. Here is the lens;

Leitz 300x Quartz objective

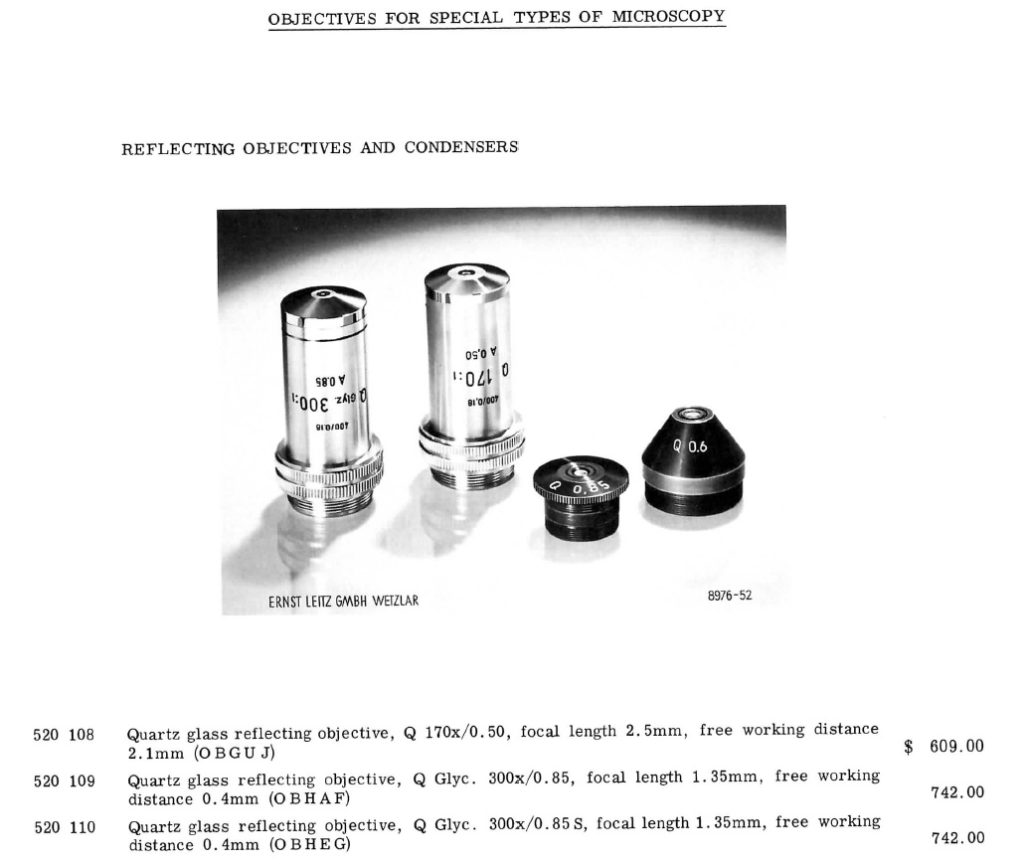
Now this one is a bit different in appearance to the other ones, and it is also meant for a different design of microscope (the tube length on this one is 400mm rather than 160mm on the others). After a bit more detective work, I found some information on something similar from the 1960s, and that it is likely to be a reflecting objective rather than a reflex design (although I wont be dismantling it to check that). Here’s a copy of the brochure detail from 1967;

Catalogue excerpt for the 300x objective from 1967

The objective seems to be similar to part number 520 110 in the catalogue, although the actual design looks a little different.

Optik Online also had a 32x Zeiss Ultrafluar lens which is also designed for UV imaging down to 220nm, so that is coming over for testing too and I’ll share more about that once it arrives.

Looking to older scientific equipment for inspiration is fascinating, and this is an area of history that certainly gets my attention (if only we did this at school). The designs that these guys were making 30+ years ago are amazing, and still perfectly usable today for research. If you can find them, and that can be a quest in itself given they were never made in huge numbers, they are often available at a fraction of the cost of new lenses. Digging into their history can also be a challenge – I’ve been able to find some information on these lenses, or at least similar versions to them, but even so I’m not completely sure that what I’ve found is exactly right. If you know any more about these, such as when they were from and what they were designed for, I’d love to hear from you.

Thanks for reading, and enjoy your research.

Zeiss 60mm f4 UV-Objektiv lens and Buttercups in UV

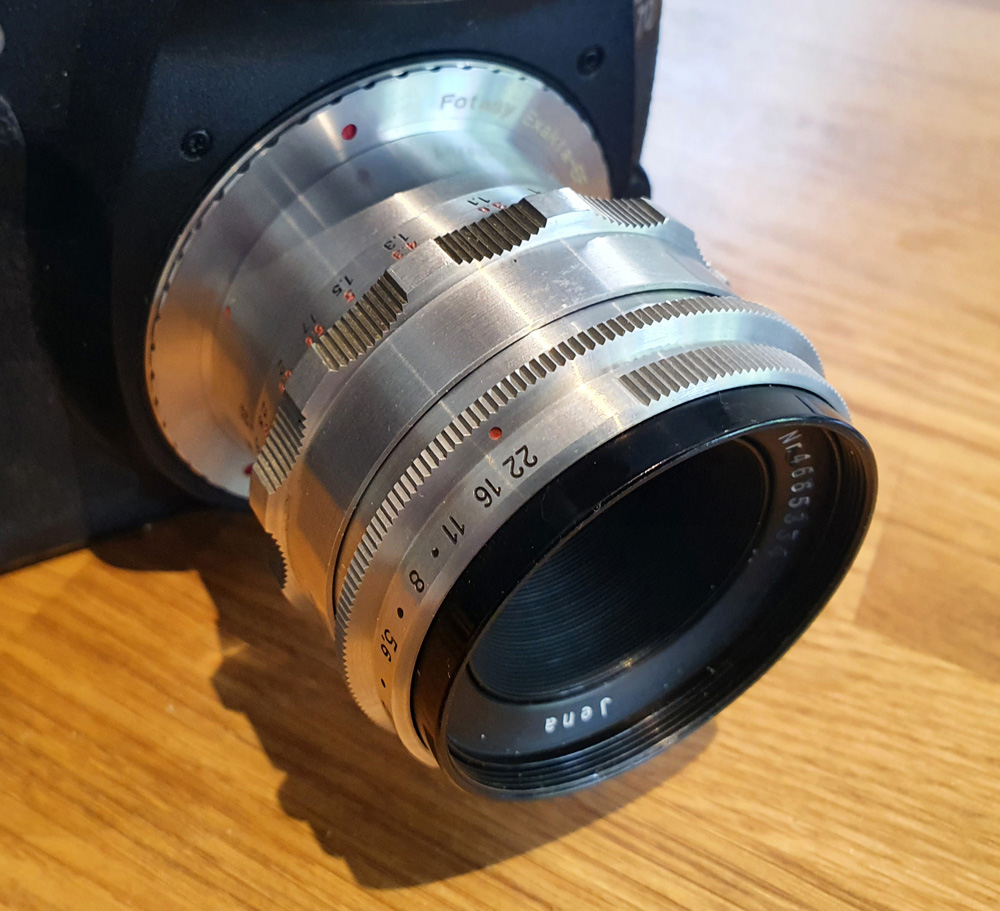
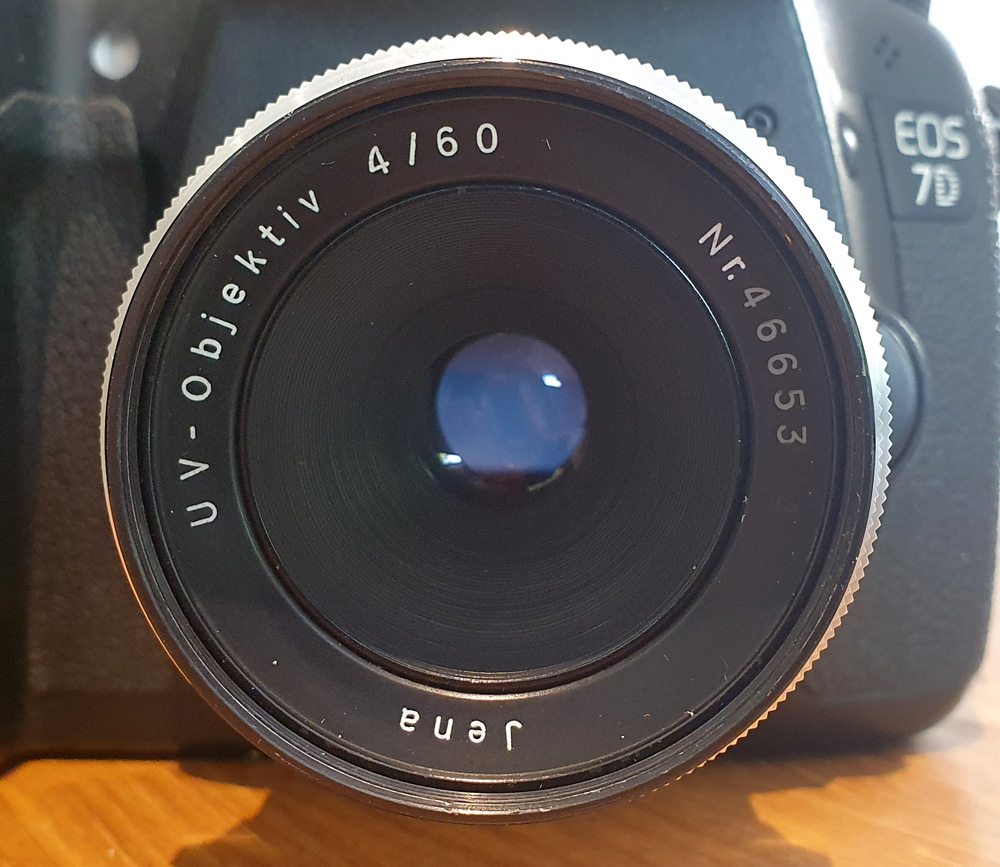
Choice of lens has a huge impact on the nature of your final image. Some lenses are so clinically sharp you can cut yourself on the details in your shot. Others have more ‘character’. Here’s a fun and unusual lens, which falls into the second category, although I suspect under certain circumstances can yield some very usable images. It’s the 60mm f4 Zeiss UV-Objektiv in Exakta mount. Pictures of the lens below, mounted on to my UV converted Canon Eos 7D camera.

60mm f4 Zeiss UV-Objektiv

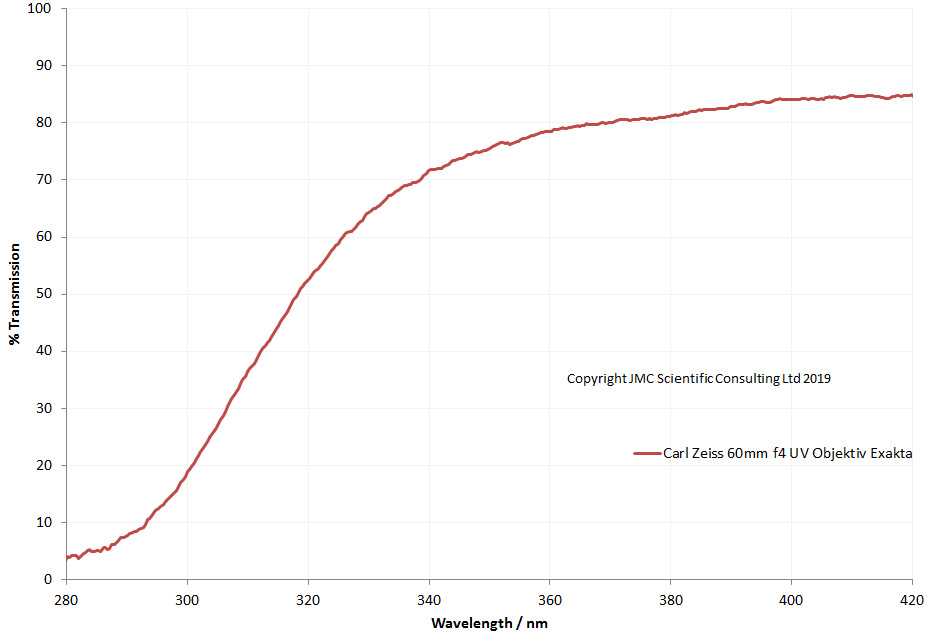
The lens is a simple triplet construction, and while it has pretty good UV transmission, it does not go as deep into the UV as the 105mm UV Nikkor Or 85mm Asahi Ultra Achromatic Takumar. I measured the transmission spectrum between 280nm and 420nm and got the following curve.

Transmission through the Zeiss 60mm f4 UV-Objektiv

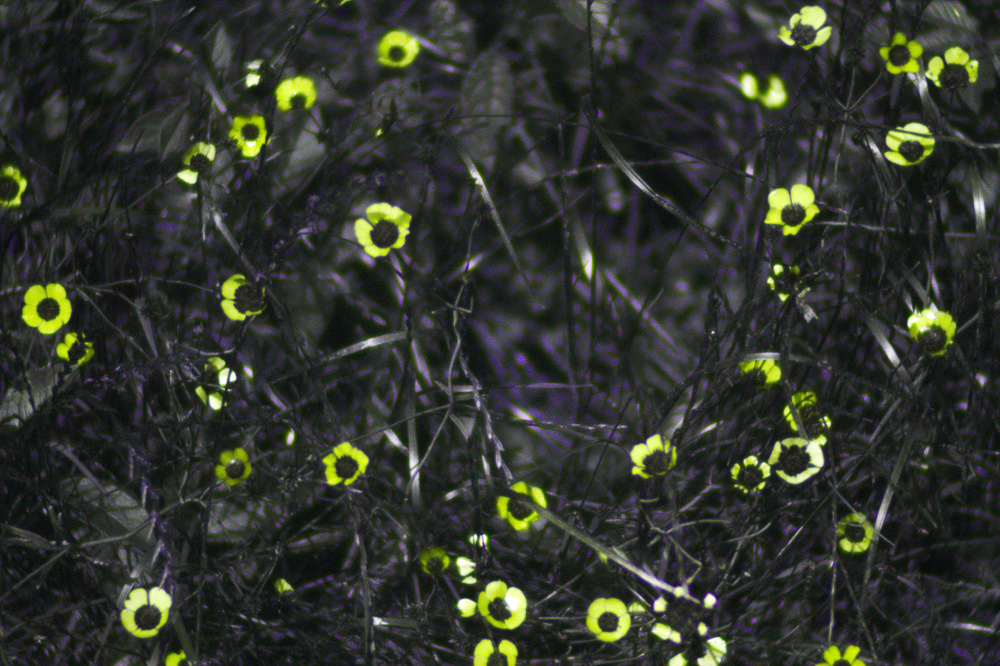
This lens is a simple construction – 3 element, 3 groups – and suffers quite horrendously from focus shift as the wavelength changes. To test it out, I got an Eos to Exakta adapter so I could mount it on my UV converted Eos 7D, and took a picture of some Buttercups in the garden, which is shown below.

UV Buttercups with the Zeiss 60mm f4 UV-Objektiv (wide open)

Once white balanced correctly, the Buttercups show strong UV characteristic of the black centers and yellow petals, but the image is definitely a little soft. The UV filter in my modified Eos 7D lets through quite a broad range of UV wavelengths, so I get the feeling using a narrower band pass filter, and on a camera which has live view focusing, would improve the image.

There are some truly fascinating historical lenses, either quirky designs, or amazing engineering (or more often, both) which can be adapted to digital imaging. If you want to know more about this or any of my other work, I can be reached through my Contact page. Thanks for reading.