
Bit of a short update today, but there will be more to come on this after I have done some more work on it. Last year I reported being able to photograph in the UVC at 254nm with some of my modified cameras (for example see here). When I was building my UV microscope I wanted to make sure that it would be usable that far into the UV, even though the logistics of actually making it happen would be challenging. Recently I got hold of a small UVC light source which could make this more feasible, and I wanted to share some initial results from it.
Firstly though, a word of warning. UVC at 254nm can be extremely damaging to the eyes and skin. Do not attempt any work like this without the proper safety equipment and knowledge of how to use it. You have been warned……
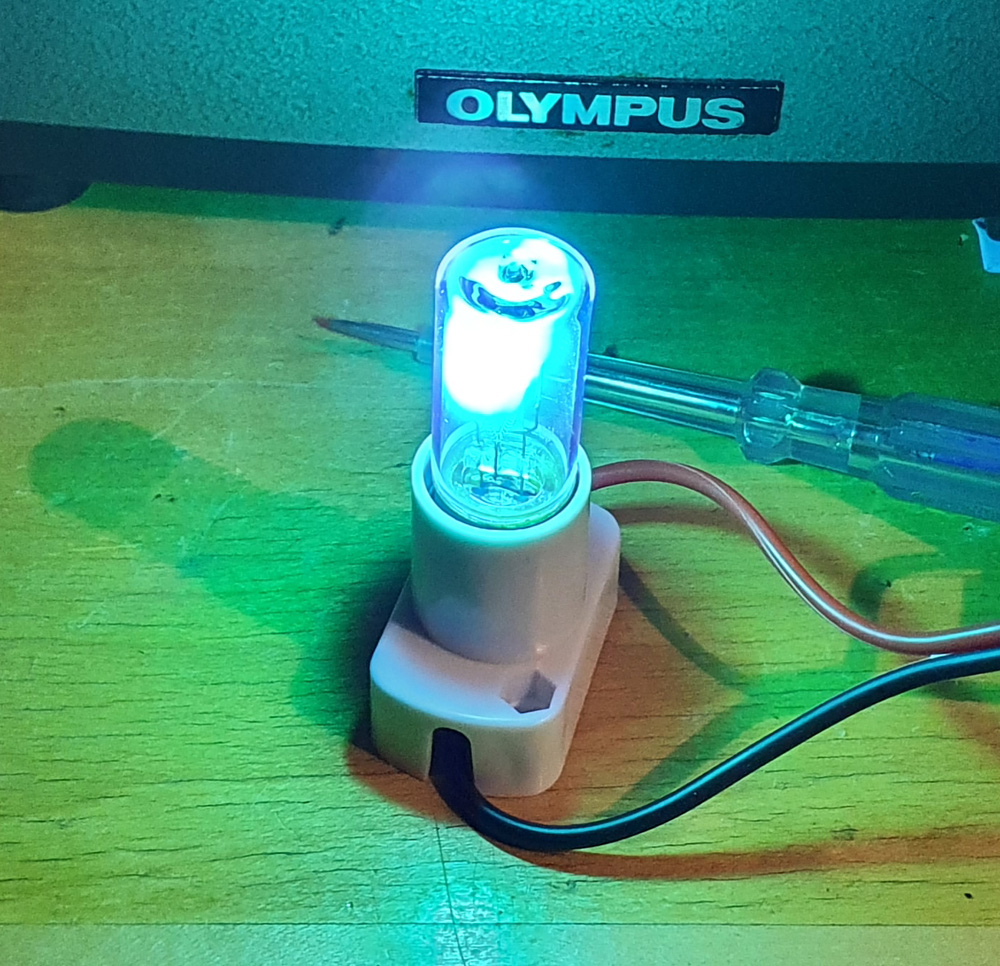
The camera I used was my MaxMax converted monochrome Nikon d850 which is one I’ve used previously for UVC imaging. The light source was a 3W UVC lamp (a bit more on that later) mounted in a spare Olympus lamp housing. The slide was the diatom slide that I had made using fused silica/quartz instead of glass, and the one I’ve been using for my imaging work at 313nm and 365nm. I used a 10x Zeiss Ultrafluar objective. The light was basically just put in the empty lamp housing and moved around until I could get an image with it. And this is a first image at 254nm….
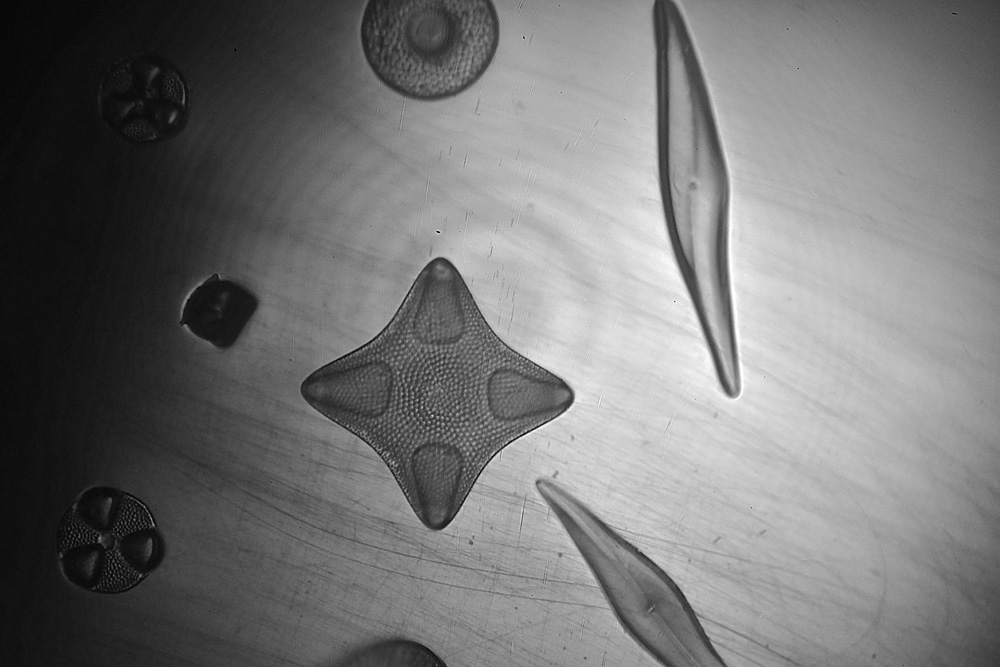
As images go this perhaps is not as impressive as some others. But the key thing to remember here is that this was done using 254nm and captured on a (modified) high street camera. There are some issues, and these will need to be overcome with future work. The image isn’t pure UVC – the camera has so little sensitivity down there that there is some contamination from other wavelengths. Based on some tests done at the same time, about 90% of this image is UVC related and the rest isn’t. I have another filter on order which will probably be stacked with the one currently being used. Better blocking of unwanted wavelengths is needed. The light source was not focused at all, and a lot was lost. I’ll be building a UVC focusing system for the lamp over the next couple of months. Image acquisition times are long, very long. Part of this is due to lack of focusing on the lamp, but part is just down to lack of camera sensitivity. It’s a pain, as I cannot use live view to optimise the focus, and everything has to be done slowly. This image above was not the best focus, but was a proof of concept one. No simple answer to this, other than hopefully the focusing system that needs to be built.
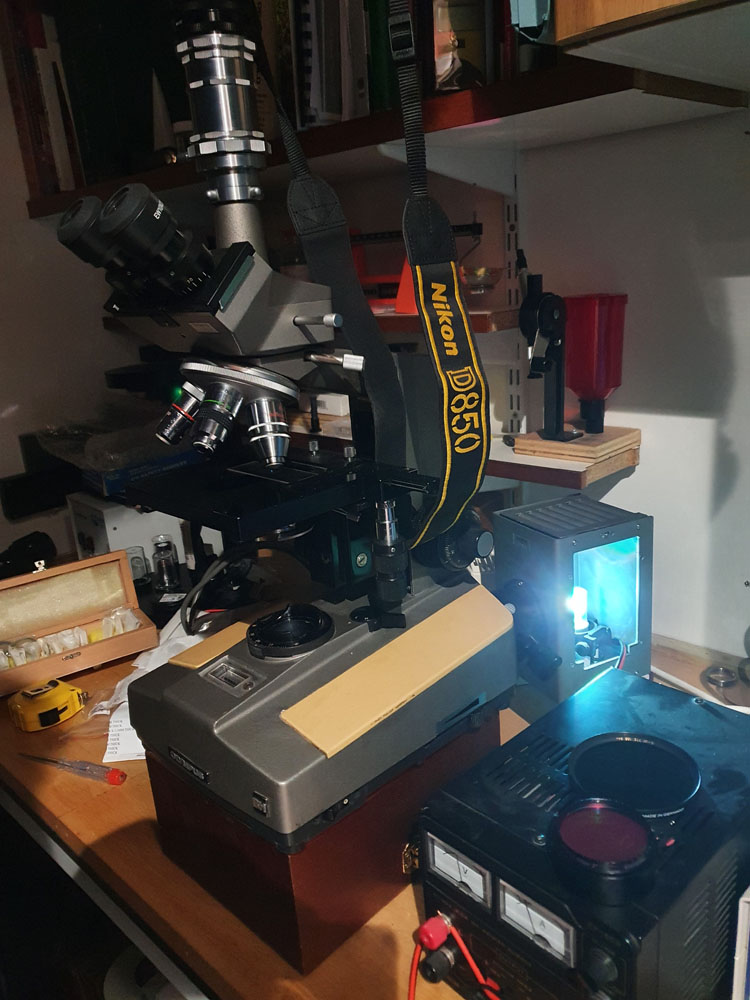
What about the light and setup? The lamp is a 3W low pressure mercury one, and was driven by a DC powersupply (manufacturer claimed 10VDC, but mine worked between at about 11V). Here’s a couple of pictures which shows the lamp and how it was setup on the microscope.
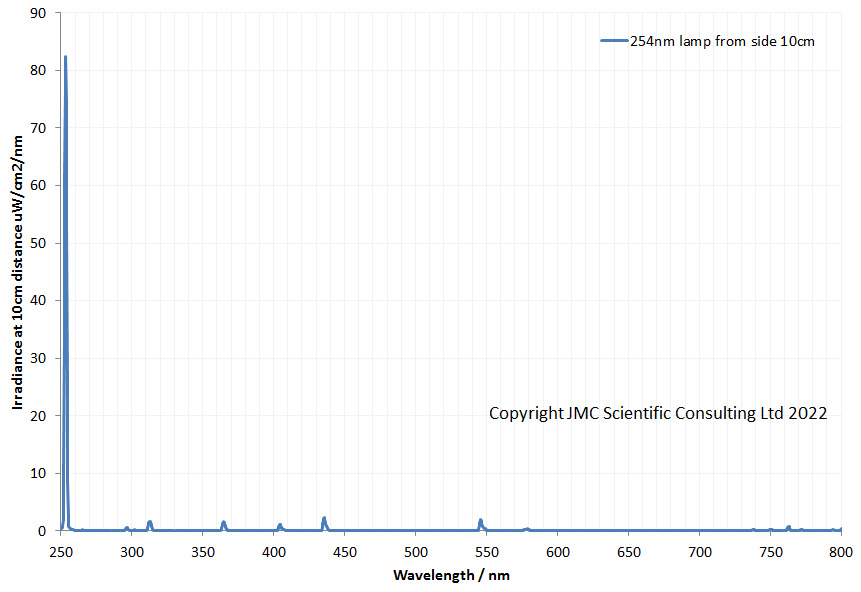
Also, here’s the emission spectrum from the lamp, showing the strong mercury emission line at just under 254nm (measured using an Ocean Insight FX spectrometer at a distance of 10cm from the side of the lamp).
It’s early days for this experiment and hopefully there will be more news on it later in the year. For now though thanks for reading and if you’d like to know more about my work you can reach me here.