
Over the past couple of years I have been building a UV transmission microscope, with the main idea being to use this in my sunscreen research (a brief summary of the key points of the build are given here). I’m now using the microscope to look at sunscreen emulsions in the visible, UVA and UVB regions, and I’m now starting to publish the work as well.
However going back over a 100 years, UV transmission microscopy was done in the quest for resolution – as the wavelength is reduced then for a given numerical aperture (NA) the resolution increases. Therefore moving to the UV offered the chance for more resolution.
I thought about using diatoms as a way of testing the resolution of my system. But the issue I had was the normal slides are made from glass and have mountants, both of which block the short wavelength UVB. After a look around I found someone who was willing to make a diatom slide for me, but using a quartz slide and coverslip (so that it wont block the UV) and the diatoms were mounted with gelatin. As it turned out the chap making it thought it could be better (as the mount is too visible) but I still wanted to try it out.
After a lot of experimenting on his behalf (for which I will be forever grateful) the first test side arrived recently, and I wanted to share some very preliminary images. This was of one of the diatoms on the slide.
These were done with with my UV transmission microscope, and with a 32x NA0.4 Zeiss Ultrafluar objective. Images captured at 546nm (visible), 365nm and 313nm using a monochrome converted Nikon d800 camera. Images processed similarly, and collected as stacks in Zerene. They have been reduced in resolution for sharing here.
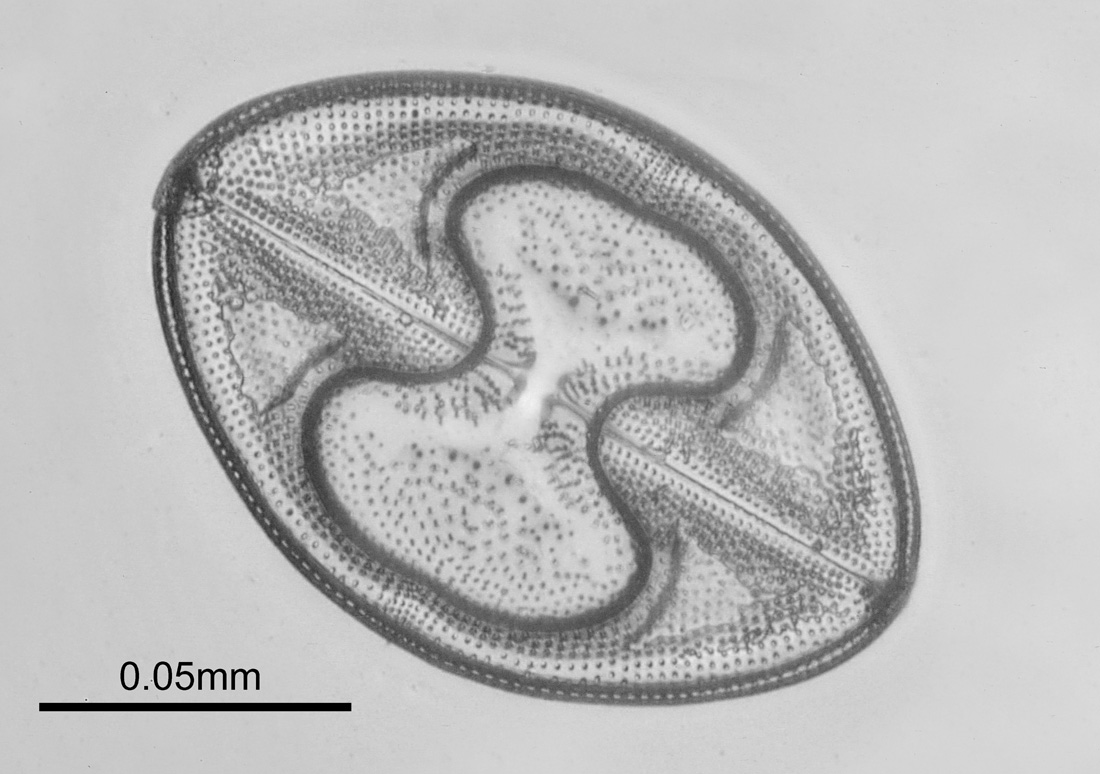
First, at 313nm in the UVB region.
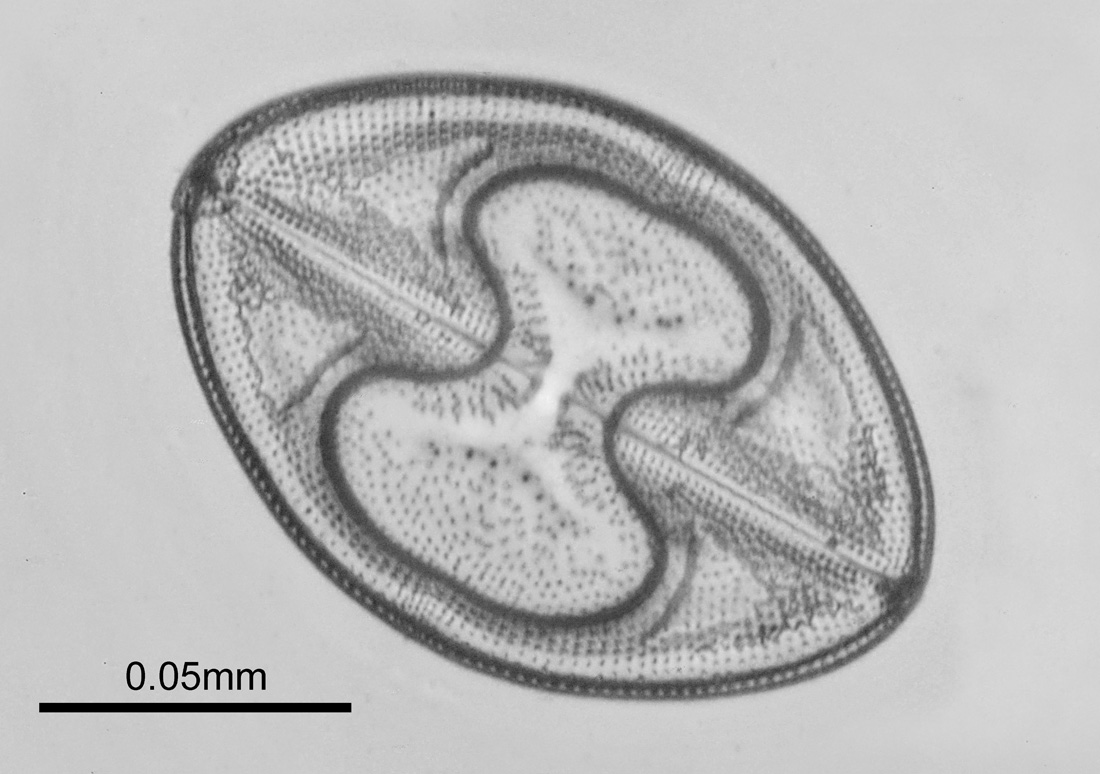
Next at 365nm in the UVA region.
The finally in normal visible light at 546nm.
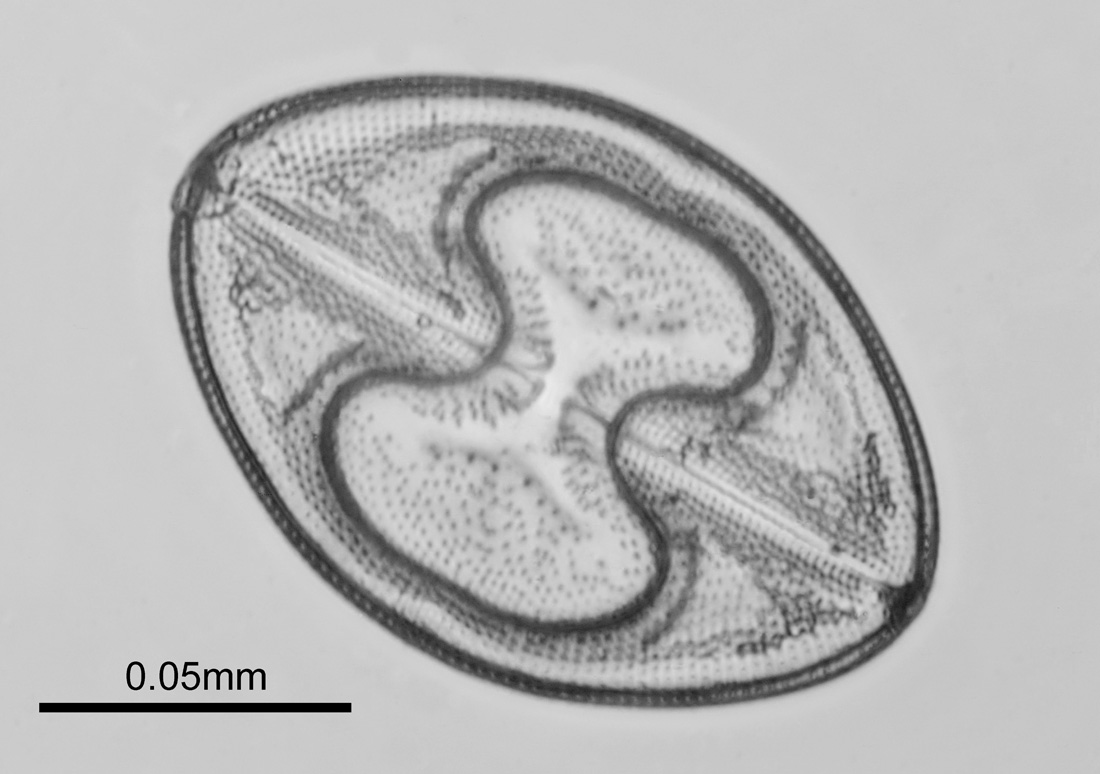
The increased resolution which comes from using 313nm is quite dramatic. Remember, the same objective (a 32x NA0.4 Zeiss Ultrafluar) was used for all these images. It would be interesting to replicate some of the early work using 276nm and 256nm, but that would require different light sources and filters to the ones I have now. However as they are even shorter wavelengths, there should be more resolution to be had.
The objective used for the images above (a 32x Zeiss Ultrafluar) had a relatively low NA 0.4. In theory, there would be more resolution to be had with a larger NA objective. I do have a 100x NA 0.85 Zeiss Ultrafluar, so took some images of a different diatom on the slide. Firstly at 313nm using the 32x objective (single shot, no stacking, hence not everything is in focus).
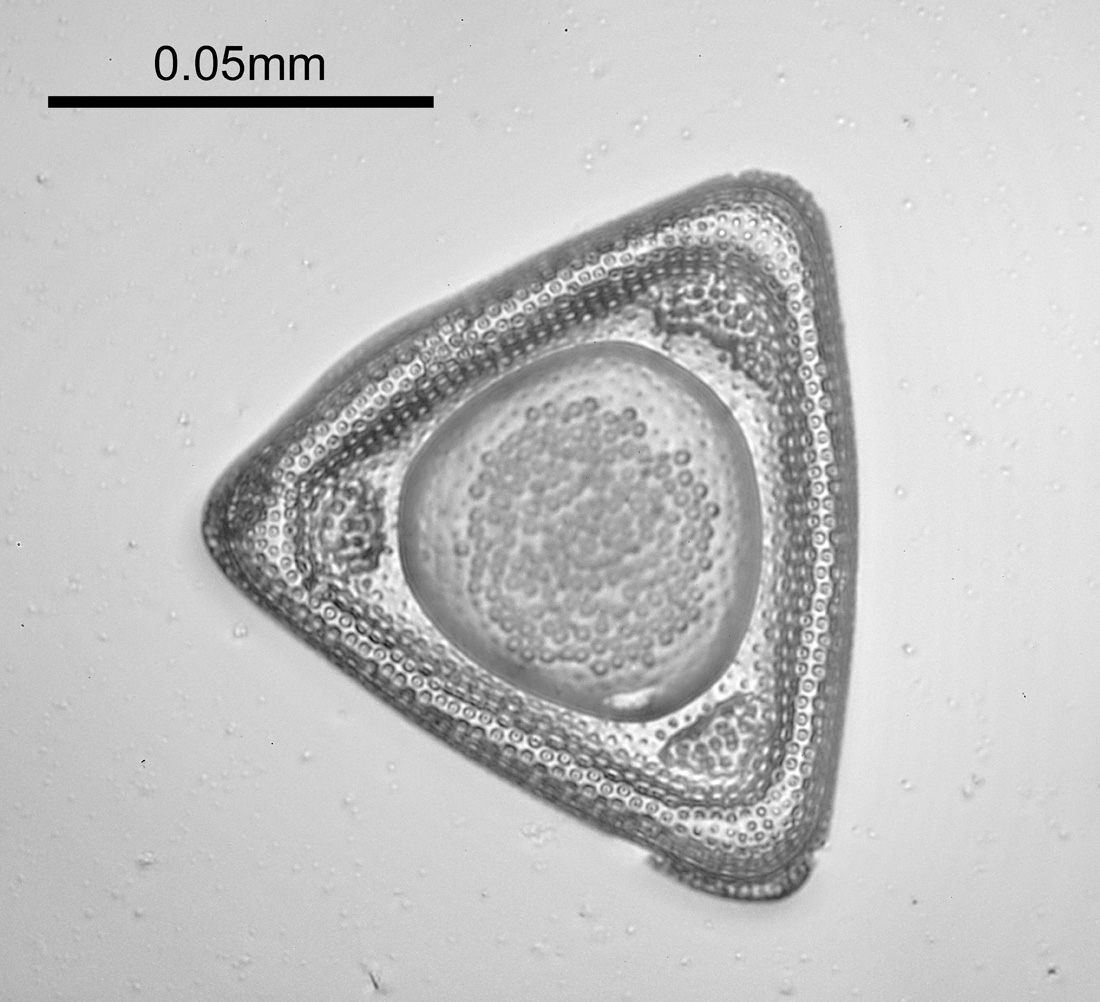
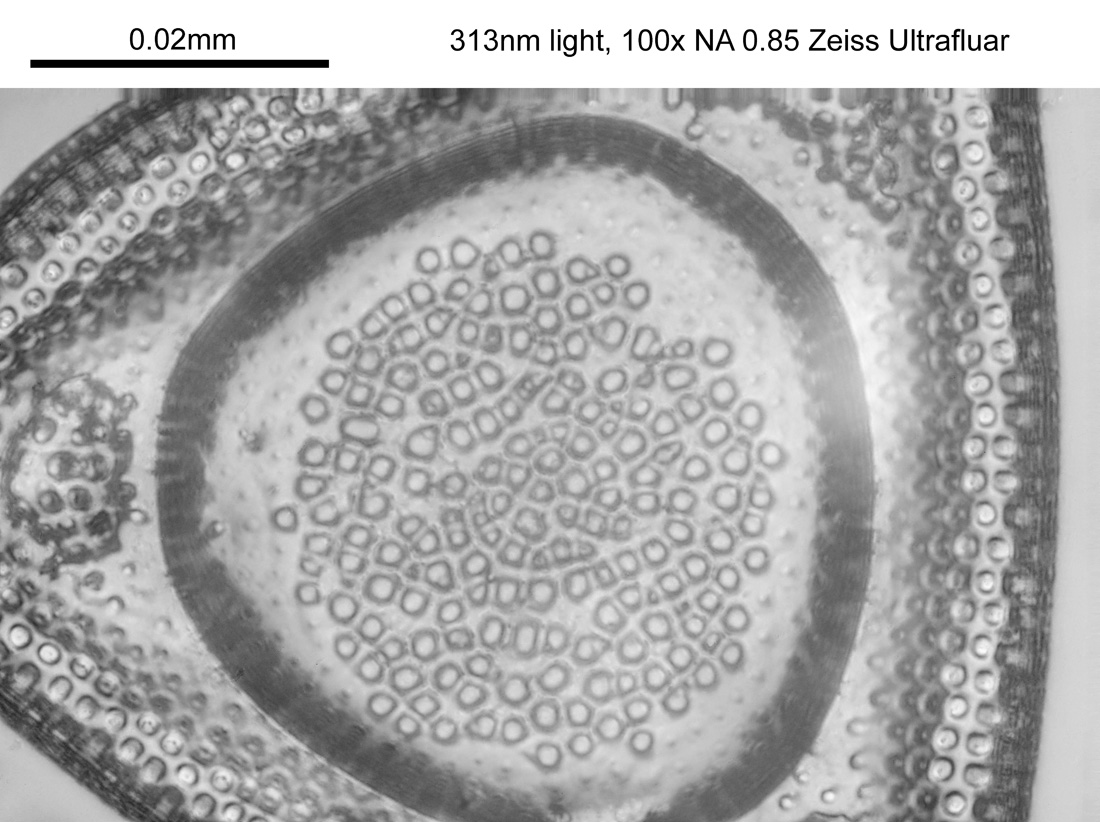
Then at 313nm with the 100x NA 0.85 Zeiss Ultrafluar.
And then finally at 546nm with the 100x NA 0.85 Zeiss Ultrafluar.
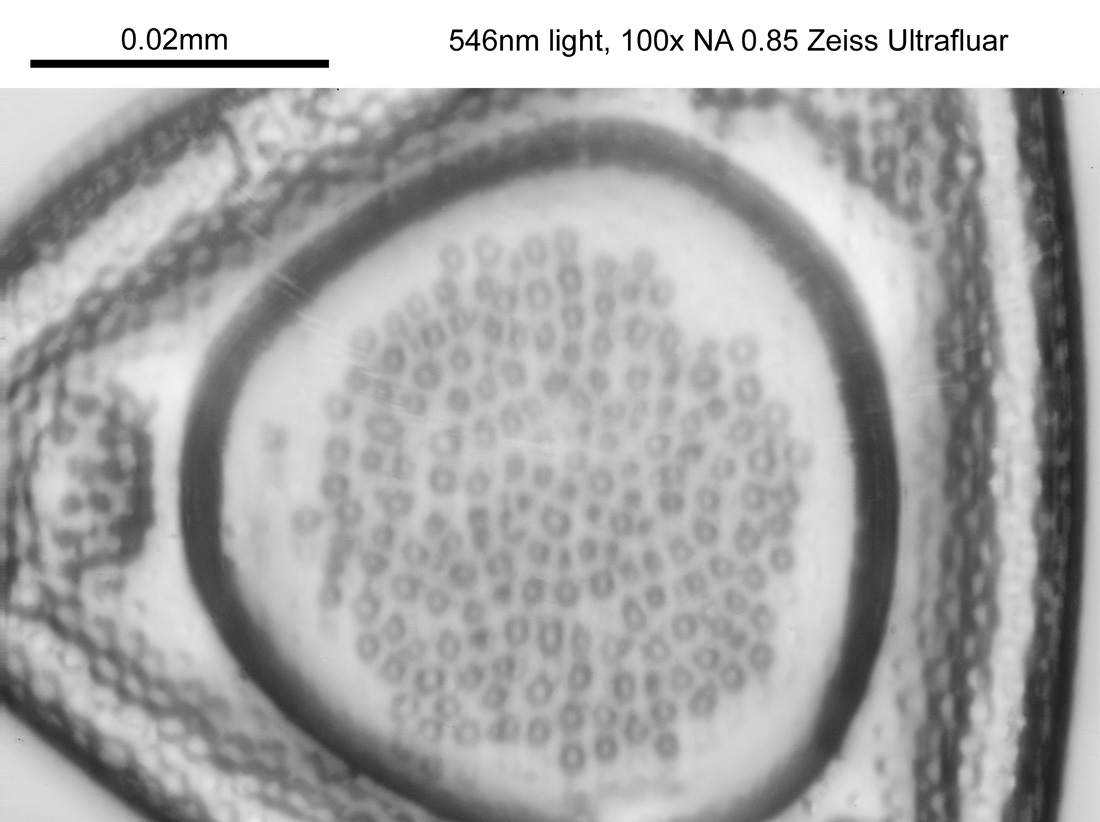
As with the first test, the difference between the 313nm image and the 546nm one is striking. Looking at Abbe’s calculation for resolution, with the 100x NA 0.85 objective, with 546nm light the theoretical resolution is 321nm while with 313nm light it is 184nm. The larger ‘circular’ features in the middle of the images above are of the order of 2 microns across. The smaller ‘dots’ around the outside of the central features are about 500nm across. Theoretical limits for resolution are one thing, but in practice the other components of the optical setup will also influence it, as such I am not surprised that it looks like my limit to resolution is above the theoretical limit. In a perfect world I would get some form of calibrated test chart for ultra high resolution microscopes, but that will have to wait for now as they typically cost about 1000GBP.
I hope you have enjoyed this little journey into the micro world, and an evaluation of how the light we use to look at things can influence what it is that we see. Thanks for reading, and if you’d like to know more about this or other aspects of my work, I can be reached here.