
One of the original reasons for moving to UV for microscopy was that of improved resolution – the shorter the wavelength, the better the resolution for a given numerical aperture. I’ve discussed this effect before (for example see here) but in my earlier work, I was limited to 313nm as my lower limit for wavelength. With my new work using 254nm I thought I would do a little test with one of the diatoms on my test slide and see how it looked as the wavelength changed. Today I am sharing those results.
For this test I used a 32x Zeiss Ultrafluar NA 0.4 objective. For now this is highest magnification objective I can use at 254nm. This was used without any glycerin immersion (it’s labelled as being for glycerine immersion, but can also be used without). Camera is a monochrome converted Nikon d850 from MaxMax. Light source for 546nm to 313nm was a mercury xenon lamp, and for 254nm a low pressure mercury lamp. Images are the full size, but reduced in resolution for sharing from the originals (which were nearly 50Mp). All images saved as RAW files and processed in Darktable, and all have had the same degree of sharpening. Simple brightfield images. Wavelength of light used shown in the bottom left of the images.
I’ll show them in the order going from long wavelength to short.
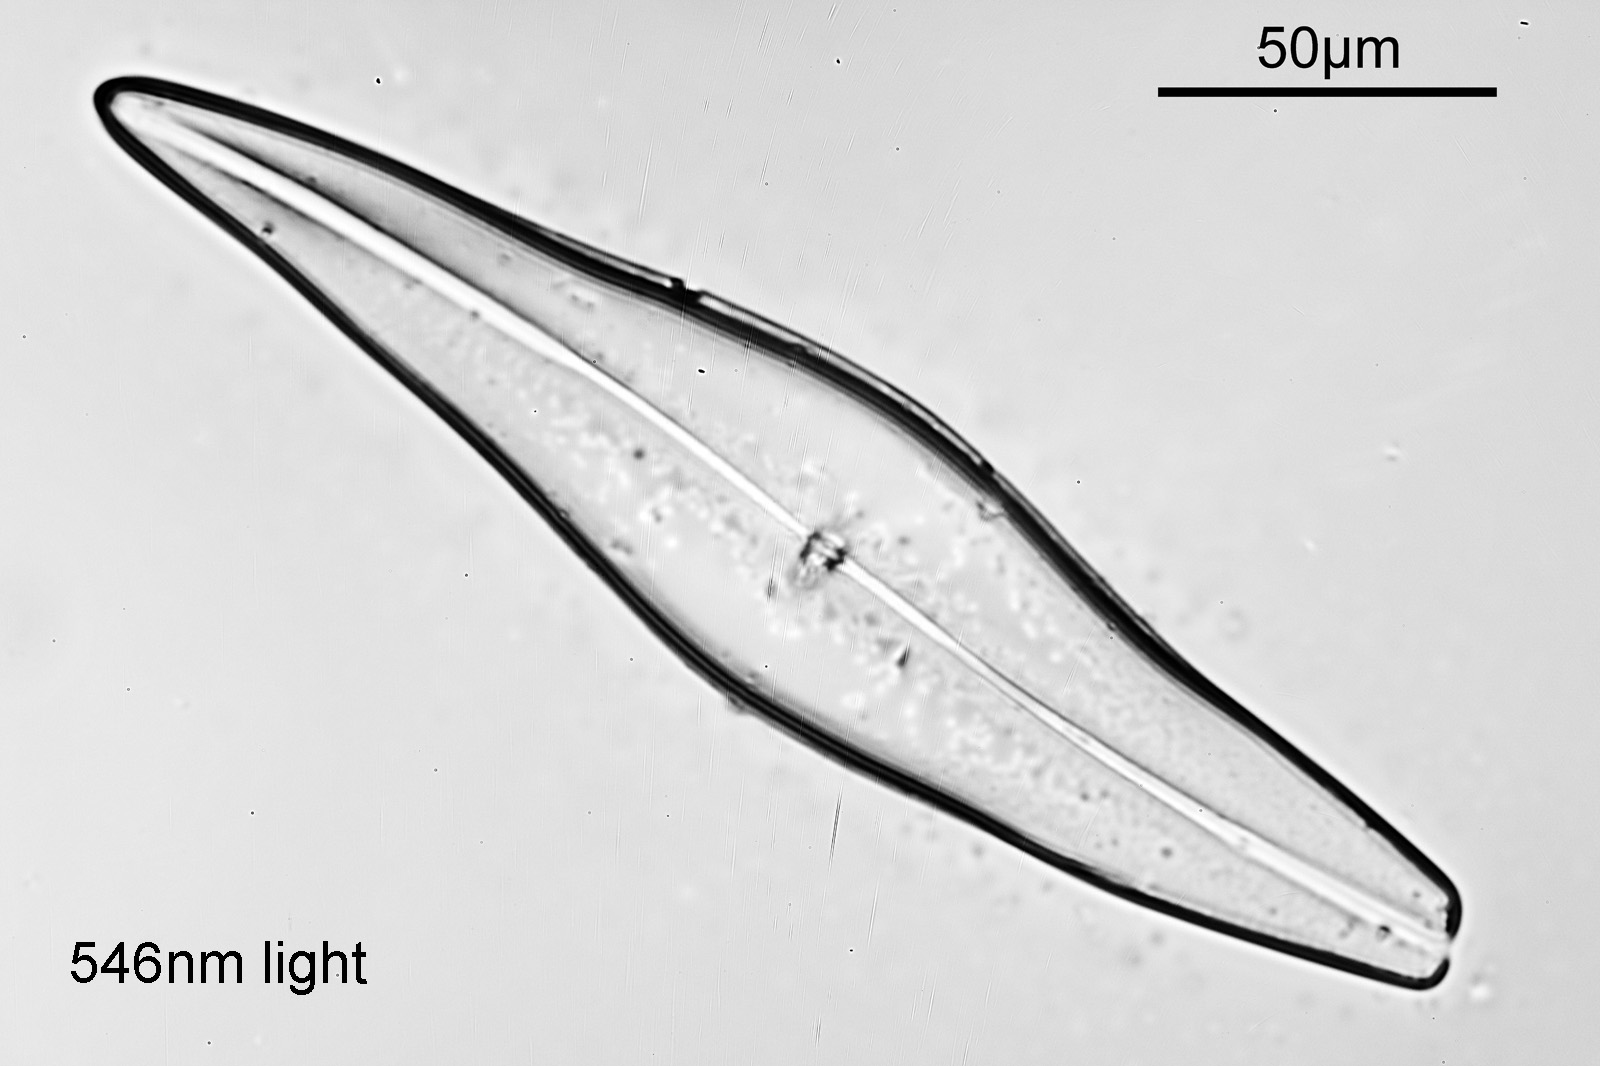
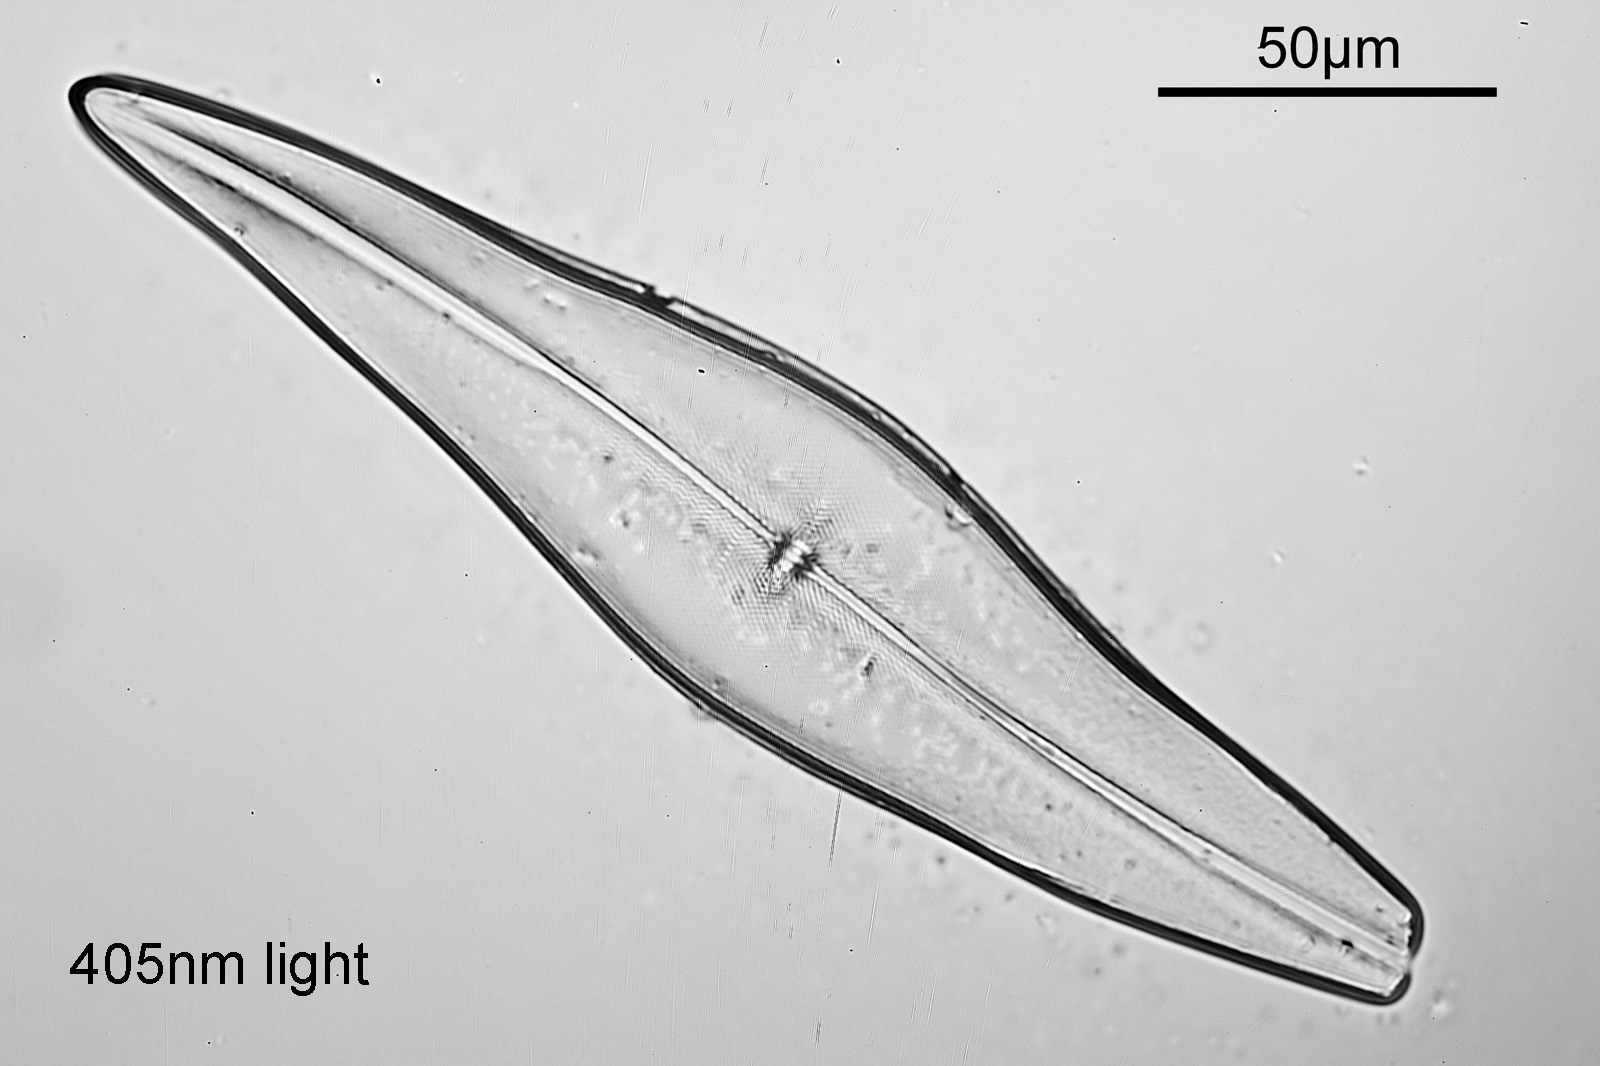
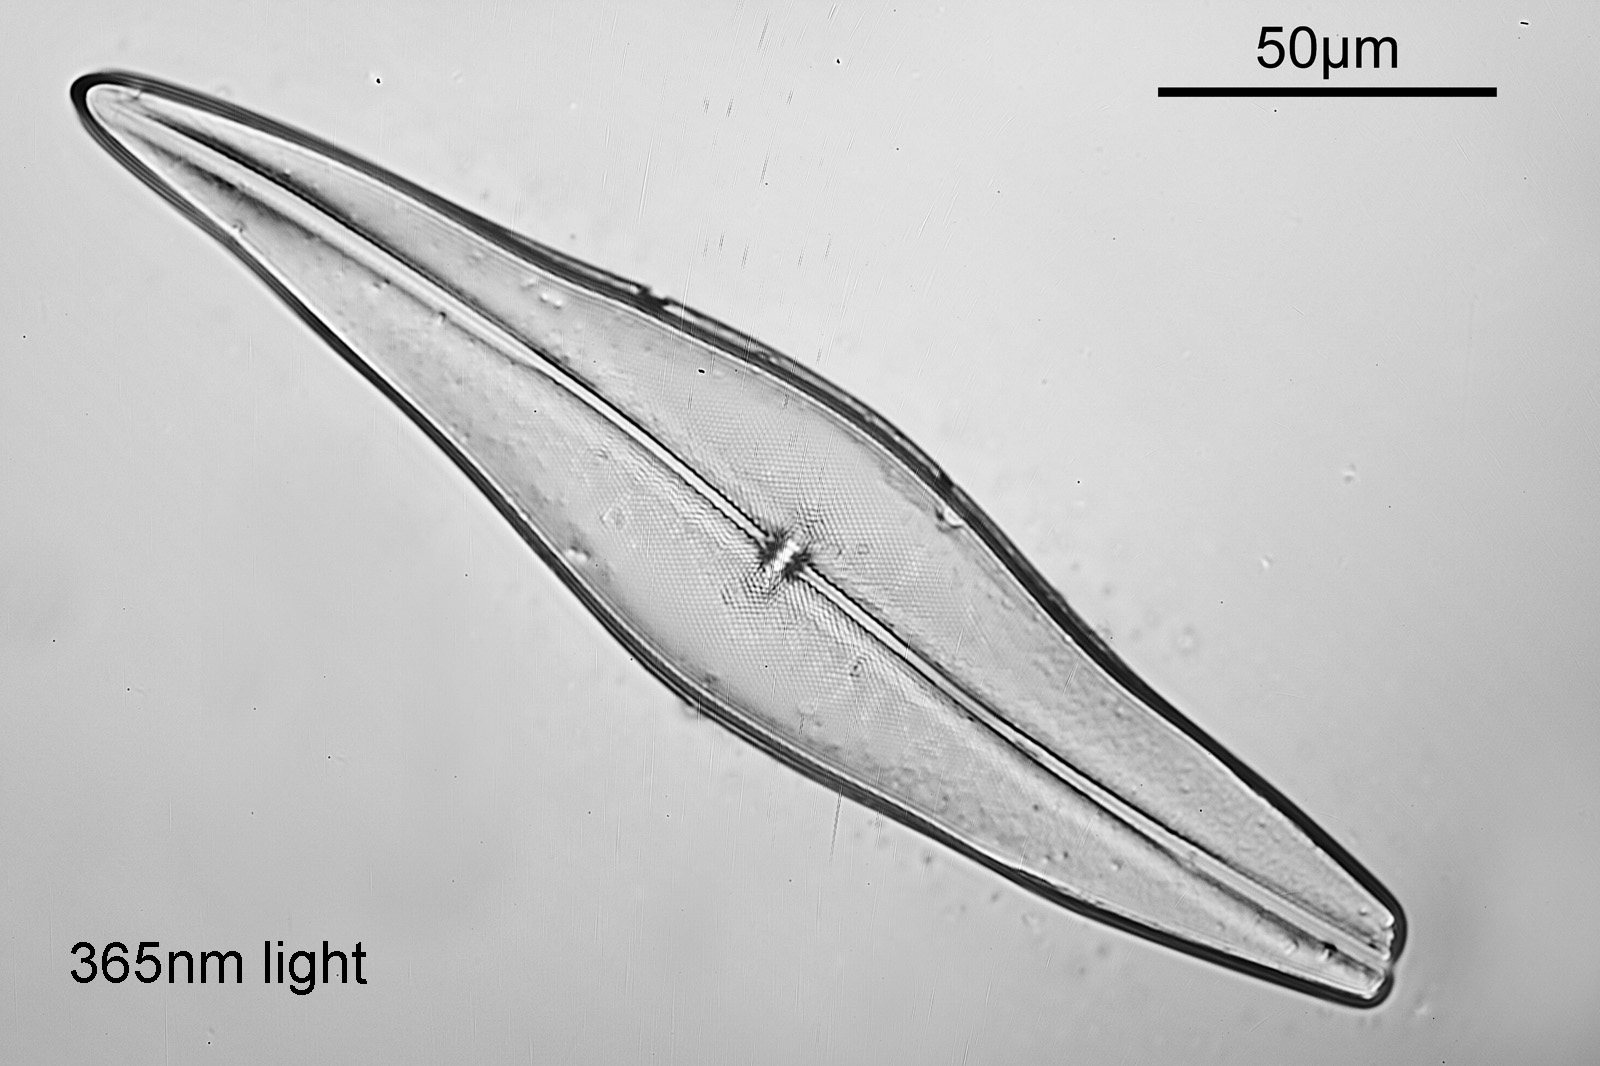
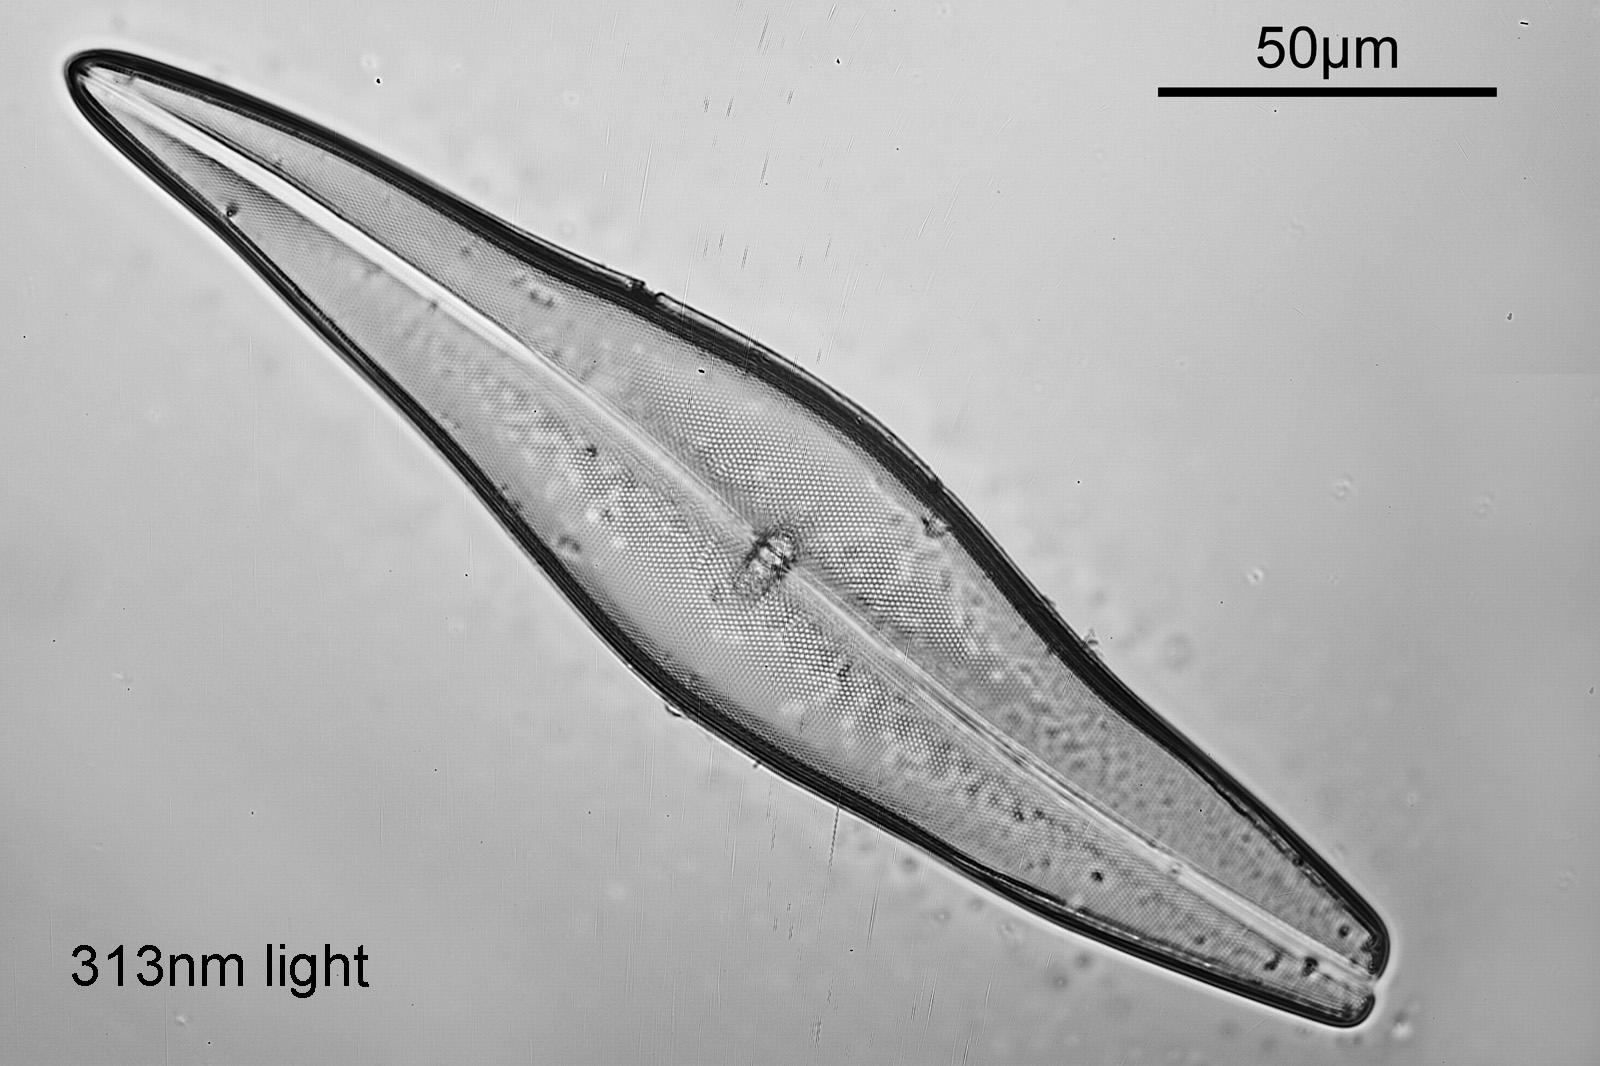

Even with the small images used here, the improvement in resolution as the wavelength is reduced is quite obvious. The diatom (a Pleurosigma angulatum) has features on it which are not visible when viewed with 546nm light with this objective – the dots or punctae. They are too small to be resolved with the NA 0.4 objective at 546nm. At 405nm they start to become faintly visible. They become more obvious at 365nm and even more so at 313nm. At 254nm, they might even be more apparent, but the nature of the image makes it harder to be certain. I also had to up the ISO for the 254nm image from 200 to 400, as the camera has virtually no sensitivity that far down. Even doing this it needed a 15 minute exposure at 254nm vs a 4 second one at 313nm. The silica based structure of the diatom also becomes darker at the shorter wavelengths, as it absorbs more of the light. This helps with contrast and is in itself a good reason for me to keep pursuing this technique.
There is however a big and obvious issue with the 254nm image – the heavy ring artifacts. I saw this to a lesser extent with the 10x objective, and I am not 100% certain as to the reason for it. One possibility is something called window etaloning, where incoming light is reflected from the front of the camera sensor, before being reflected back again from the underside of the sensor coverglass. It bounces back and forth and causes these light and dark bands (there’s more info about it here). This could be more of an obvious issue at 254nm as the reflectance of silicon used for the sensor is quite high down there (higher than the longer wavelengths). However with the 254nm light I do not have a diffuser on there, unlike the the light used for the other wavelengths, and I cannot rule that out as a possible contributing factor.
254nm UVC microscopy continues to present some very strong technical challenges, however the improved contrast and resolution for diatom imaging is obvious, and it is something I shall continue to work on as and when I get the chance. As always, thanks for reading, and if you’d like to know more about this or any other aspect of my work, I can be reached here.