UV Microscopy – diatom with 3 different objectives

Testing, testing, testing. As always with new equipment and methods it is helpful to test them to see what they are capable of and where their limitations are. With my UV microscope, I recently had a test slide made using quartz components and which had a variety of diatoms mounted on it. These diatoms have very small features (often sub micron in size) and are great for testing optical setups. Also, being made from quartz it is usable in the UV where glass would block the light.

Todays images were done with 3 different objectives – but before we get into the specifics of the objectives, I’m going to share one of the images produced, because, it is pretty special. This was made with the Leitz 40x NA 0.65 objective which will be discussed below and is a 313nm brightfield transmission image.
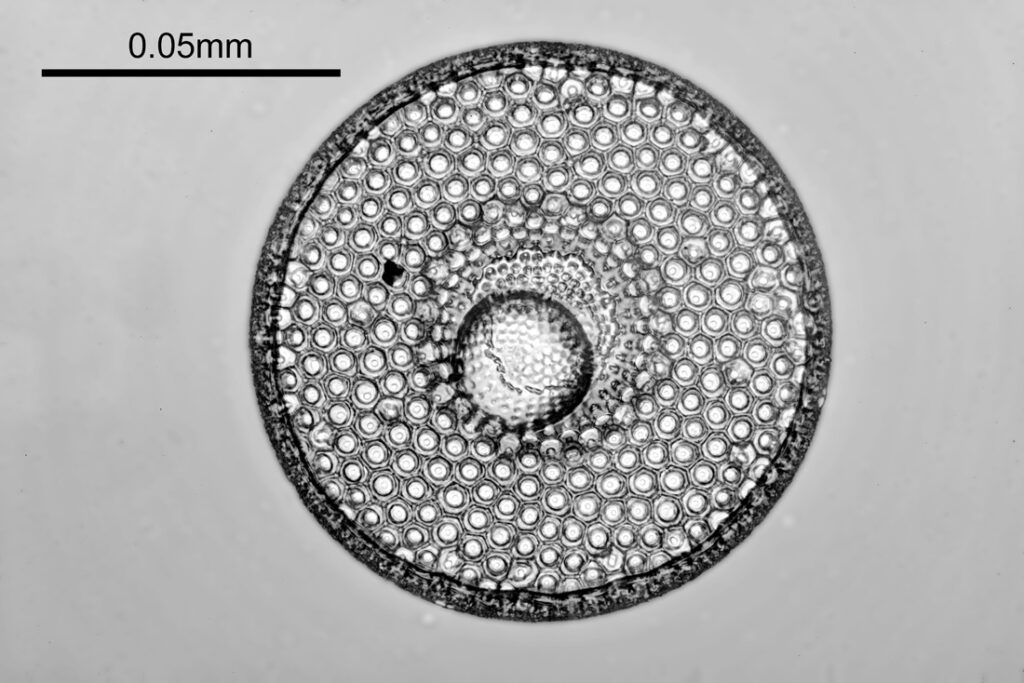
Leitz 40x NA 0.65 objective image at 313nm

Back to the objectives. Three were used for this – a Zeiss 32x NA 0.4 Ultrafluar, a Leitz 40x NA 0.65 UV objective, and a 36x NA 0.5 Beck reflecting objective, all of which are shown below.
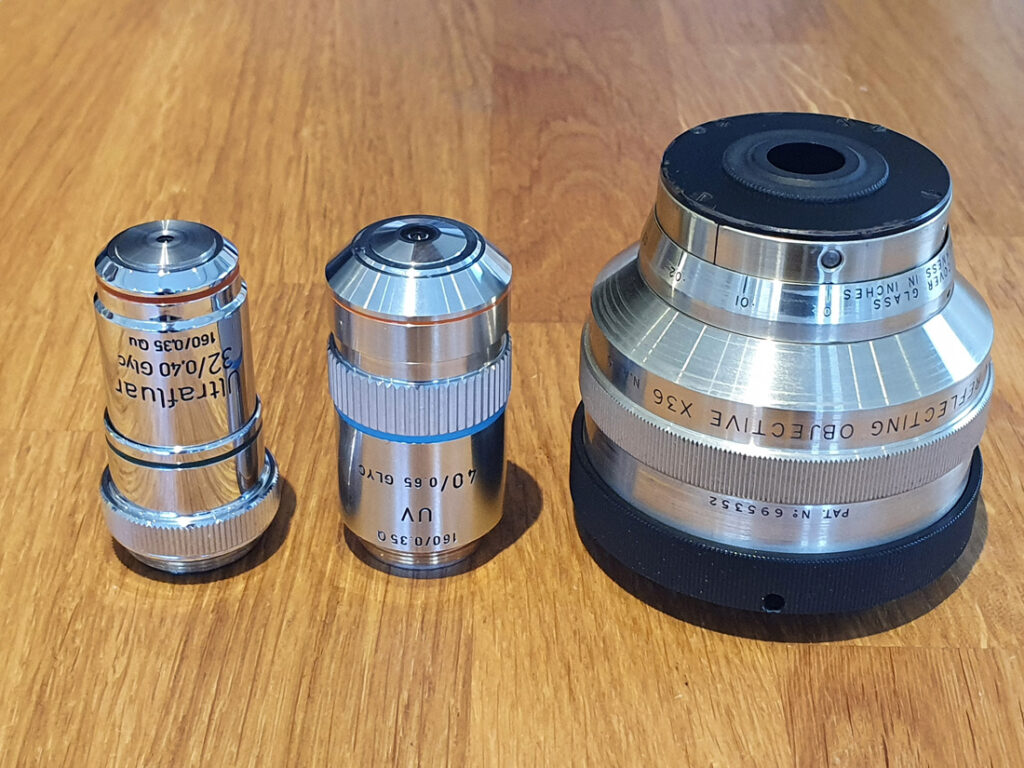
Left to right – 32x Zeiss Ultrafluar, 40x Leitz UV, and 36x Beck reflecting objective

I normally use the Ultrafluar when I need an objective in this sort of magnification range, but wanted to check the other two out. The Zeiss and Leitz were both used with glycerine immersion fluid, and the Beck was used dry. The Beck is very different to the other two being a mirror lens, and I checked the alignment of it before using it. The diatom was imaged at 313nm, and each image is a stack of about 13 images made in Zerene stacker. Some processing of the final images was done in Photoshop, but all images were treated similarly. They have been reduced in size for sharing online.

First the 32x Ultrafluar.
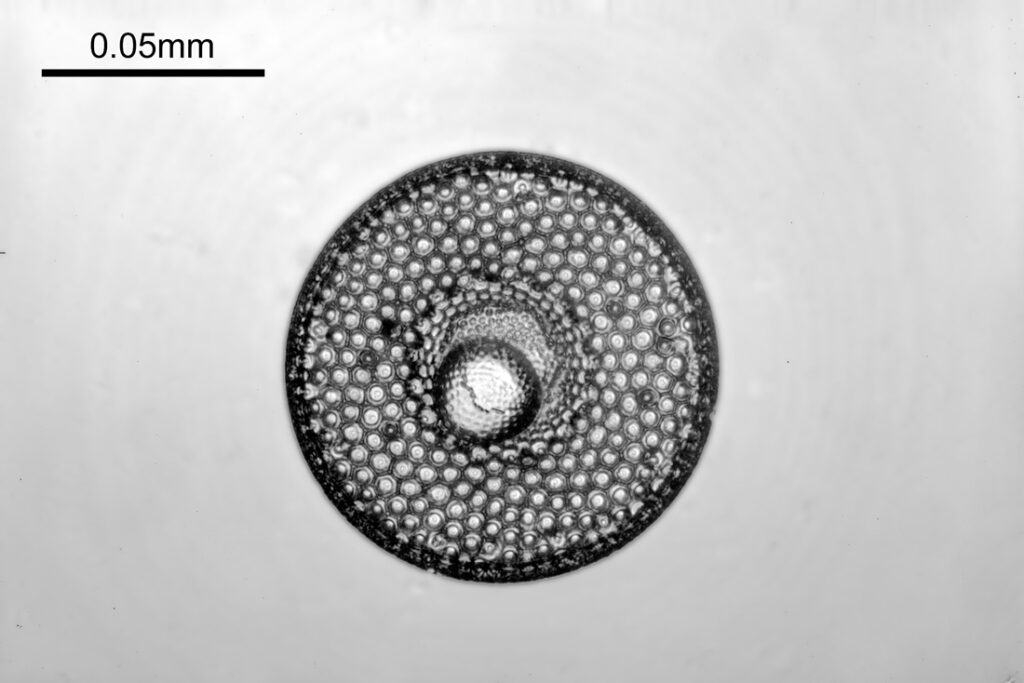
Diatom image at 313nm with the 32x NA 0.4 Zeiss Ultrafluar

Next with the 36x Beck reflecting objective.
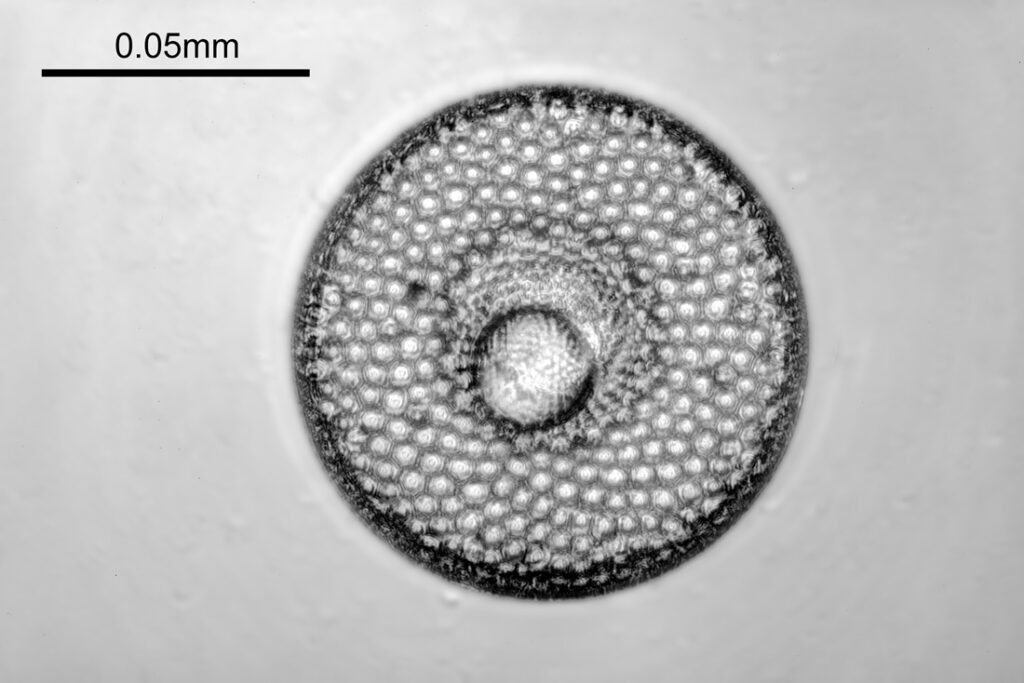
Diatom image at 313nm with the 36x NA 0.5 Beck reflecting objective

And finally with the 40x NA 0.65 Leitz UV objective.
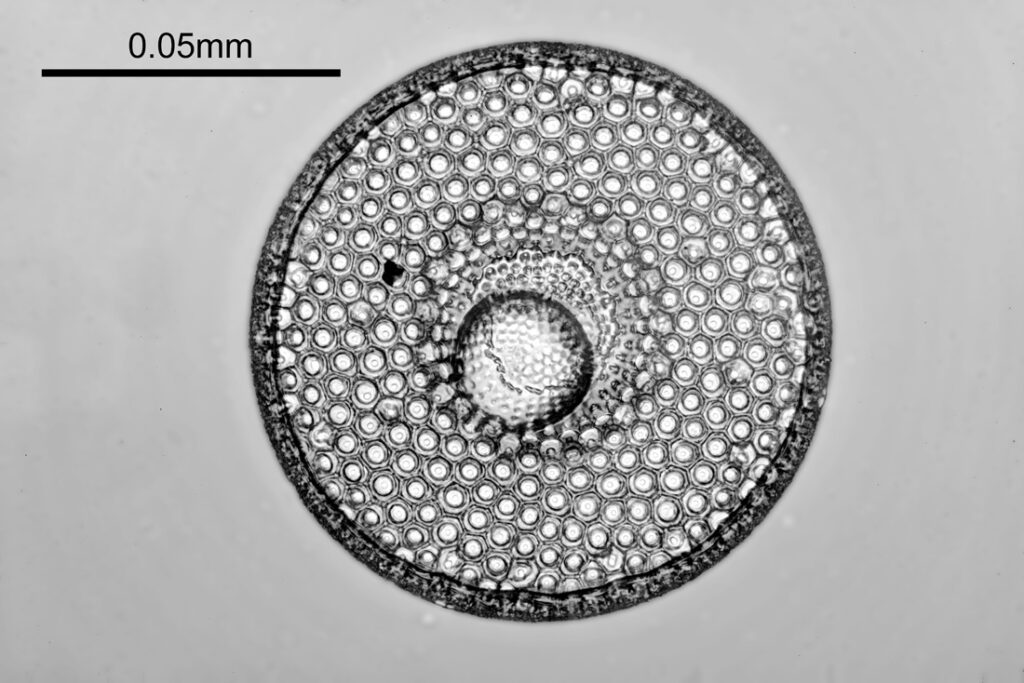
Diatom image at 313nm with the 40x NA 0.65 Leitz UV objective

Obviously the field of view is different with the three objectives as their magnifications are not the same. The 32x Ultrafluar image is certainly very good, especially for a NA 0.4 objective. The 36x Beck reflecting objective image is lower contrast and not as sharp, but still shows a lot of detail. However the star of the show here was the Leitz 40x NA 0.65. The final image it produced was extremely sharp and full of detail.

Not much is known about the Leitz 40x UV objective, certainly nowhere near as much as about the Ultrafluar objectives, however I have written a bit about it here. To try and get a bit more detail on the resolution it was producing I did a crop of the original image in ImageJ and took some measurements. The area assessed is shown below.
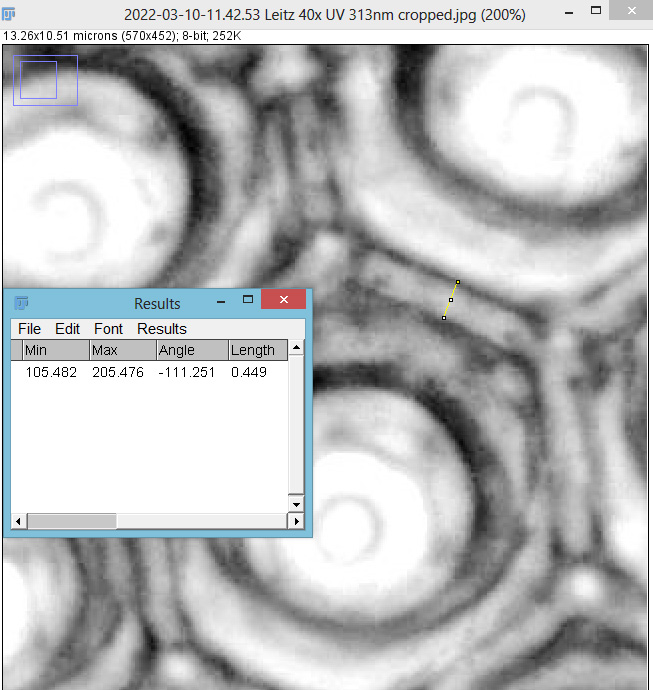
Assessment of cropped image from the Leitz 40x NA 0.65 objective

The yellow line in the image above is 449nm long, so it looks like this objective is easily resolving features below 0.5micron in size. Abbe’s resolution equation says that this objective should have a resolution of 241nm when used with 313nm light, and from the looks of this image it probably isn’t far off that. Makes me wonder what my Leitz 100x NA 1.20 objective is capable of, but that will have to wait for another day….

I’m certainly no diatom expert, but they are beautiful structures and make for great photos, so I will be doing more in the future. It’s been great to finally be able to test some of my UV objectives with samples like this, and to be able to produce some real life images with these historic optical pieces. Thanks for reading, and if you’d like to know more about this or any other aspect of my work, I can be reached here.

UV Microscopy – 6mm Zeiss Monochromat imaging of a diatom

Time for a bit of historical microscopy today. I’ve previously written about the Zeiss Monochromat objectives – quartz objectives originally produced in the early 1900s and designed to be used at 257nm or 275nm (see here). Now the microscope is up and running for UV work, I thought I would try out one of these historical pieces and see what type of image it can produce.

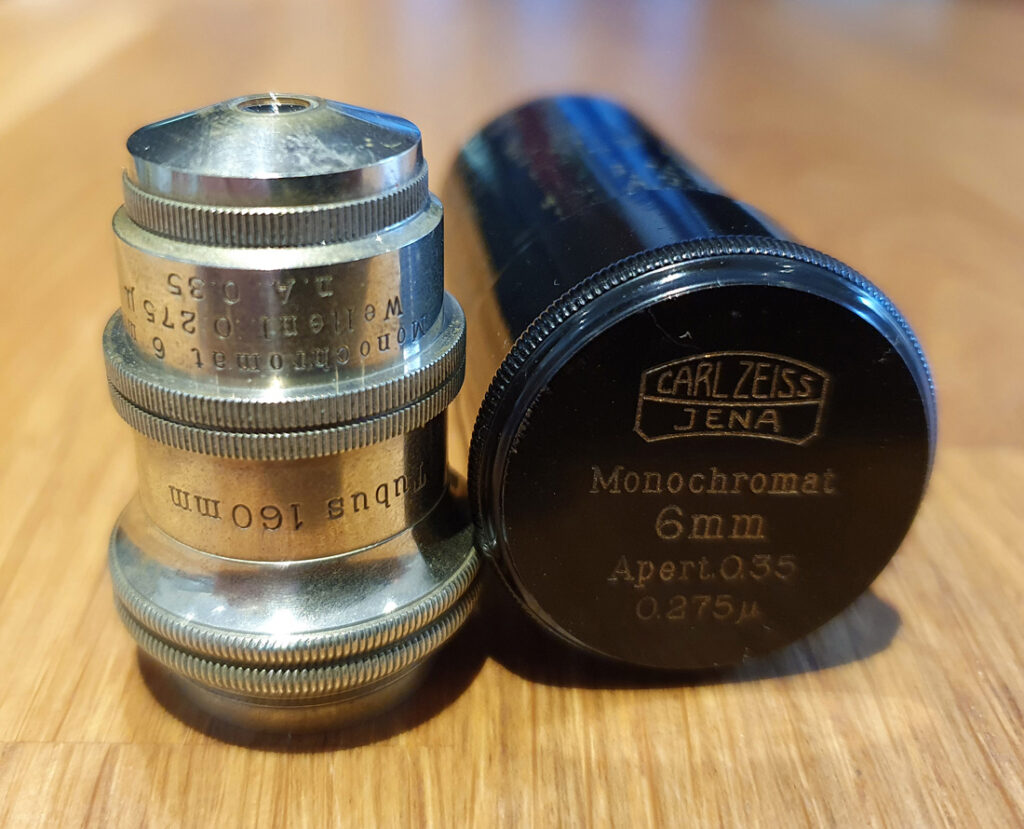
The objective of choice was a 6mm NA 0.35 Zeiss Monochromat designed for 160mm tube length and for imaging using 275nm light from a Cadmium arc source. The objective is shown below.

6mm NA 0.35 Zeiss monochromat objective

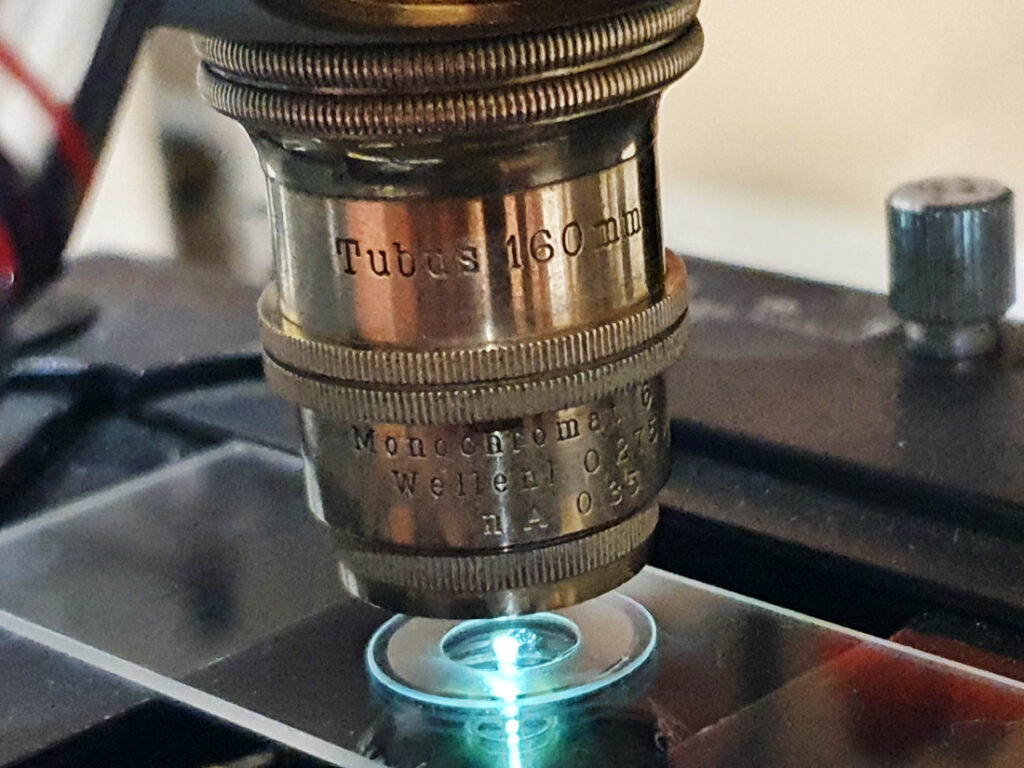
This objective is made from quartz lens elements and has an RMS thread for mounting it. It is also designed for 160mm tube length microscopes which means it is ideal for use on my modified Olympus BHB. Here it is mounted up and in use for imaging a diatom slide.

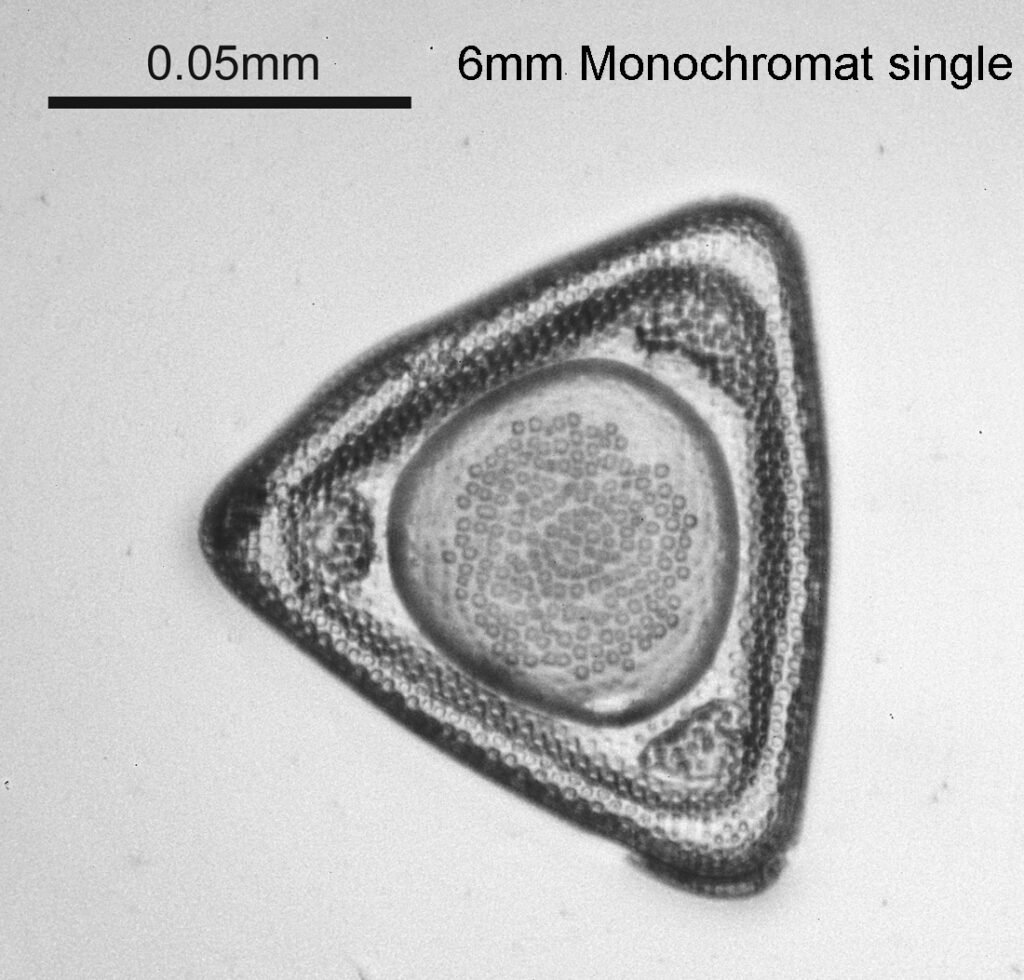
What about the image quality? To test this I did a single picture of a diatom at 313nm with it and compared it with an image produced by a 32x NA 0.4 Zeiss Ultrafluar which is what I use for my UV imaging research. Firstly with with the 6mm NA 0.35 Zeiss Monochromat.

Diatom image at 313nm with 6mm NA 0.35 Zeiss Monochromat objective

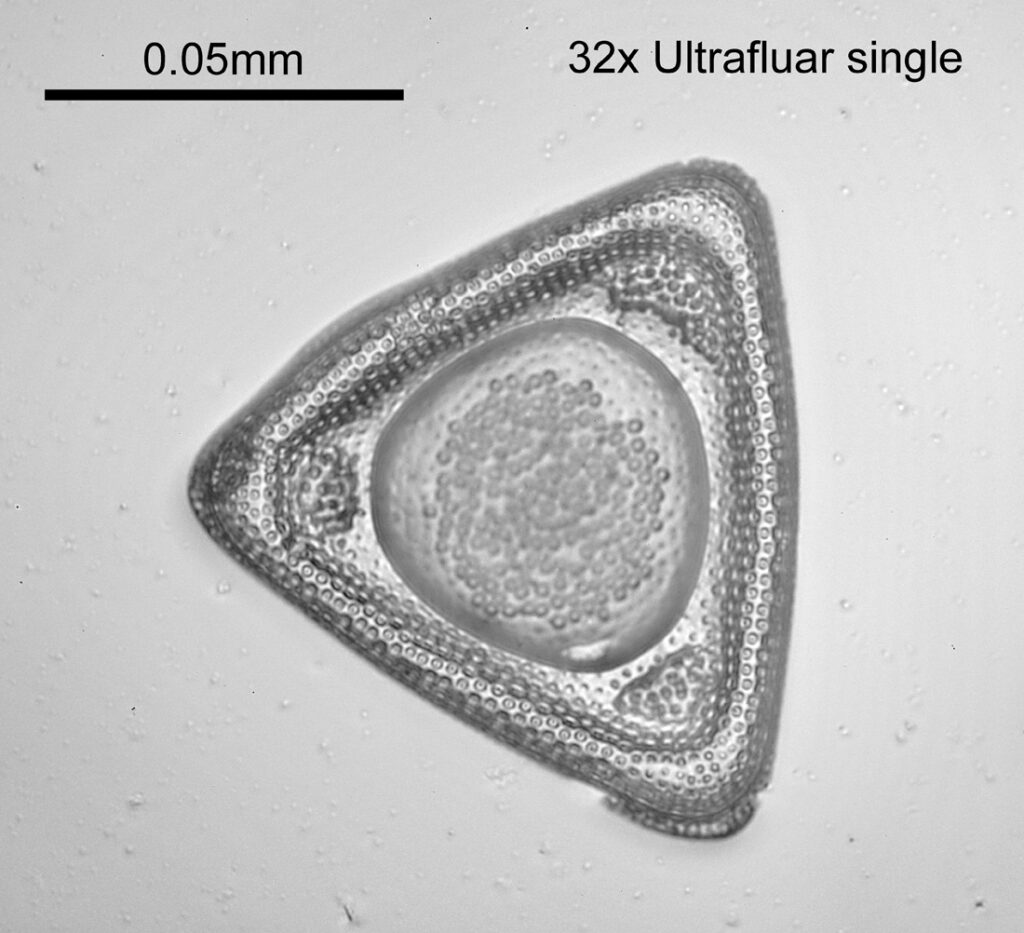
And now a comparison shot with the 32x NA 0.4 Zeiss Ultrafluar at 313nm.

Diatom image at 313nm with 32x NA 0.4 Zeiss Ultrafluar objective

The 6mm Monochromat had almost exactly the same field of view as the 32x objective. It produced a usable image at 313nm, although was not as sharp as the Ultrafluar. This is not a huge surprise – the Monochromat has only quartz elements (the Ultrafluar is quartz and calcium fluoride), it has a slightly lower NA, and is also being used at a wavelength that it wasn’t designed for. It is also a much older design and construction. The Monochromat also had a huge focus shift compare to visible light which the Ultrafluar does not. Again, this is not unexpected, but must have made working with it in the days of film challenging to say the least.

Overall, it was amazing to use such a historical piece in the manner in which it was originally designed for (bearing in mind the wavelength used wasn’t what it is specified for). Over 100 years later and it is still capable of producing images. Thanks for reading, and if you’d like to know more about this or any other aspects of my work, I can be reached here.

UV Microscopy – Imaging of diatoms in the visible, UVA and UVB

Over the past couple of years I have been building a UV transmission microscope, with the main idea being to use this in my sunscreen research (a brief summary of the key points of the build are given here). I’m now using the microscope to look at sunscreen emulsions in the visible, UVA and UVB regions, and I’m now starting to publish the work as well.

However going back over a 100 years, UV transmission microscopy was done in the quest for resolution – as the wavelength is reduced then for a given numerical aperture (NA) the resolution increases. Therefore moving to the UV offered the chance for more resolution.

I thought about using diatoms as a way of testing the resolution of my system. But the issue I had was the normal slides are made from glass and have mountants, both of which block the short wavelength UVB. After a look around I found someone who was willing to make a diatom slide for me, but using a quartz slide and coverslip (so that it wont block the UV) and the diatoms were mounted with gelatin. As it turned out the chap making it thought it could be better (as the mount is too visible) but I still wanted to try it out.

After a lot of experimenting on his behalf (for which I will be forever grateful) the first test side arrived recently, and I wanted to share some very preliminary images. This was of one of the diatoms on the slide.

These were done with with my UV transmission microscope, and with a 32x NA0.4 Zeiss Ultrafluar objective. Images captured at 546nm (visible), 365nm and 313nm using a monochrome converted Nikon d800 camera. Images processed similarly, and collected as stacks in Zerene. They have been reduced in resolution for sharing here.

First, at 313nm in the UVB region.

313nm light diatom image

Next at 365nm in the UVA region.

365nm light diatom image

The finally in normal visible light at 546nm.

546nm visible light diatom image

The increased resolution which comes from using 313nm is quite dramatic. Remember, the same objective (a 32x NA0.4 Zeiss Ultrafluar) was used for all these images. It would be interesting to replicate some of the early work using 276nm and 256nm, but that would require different light sources and filters to the ones I have now. However as they are even shorter wavelengths, there should be more resolution to be had.

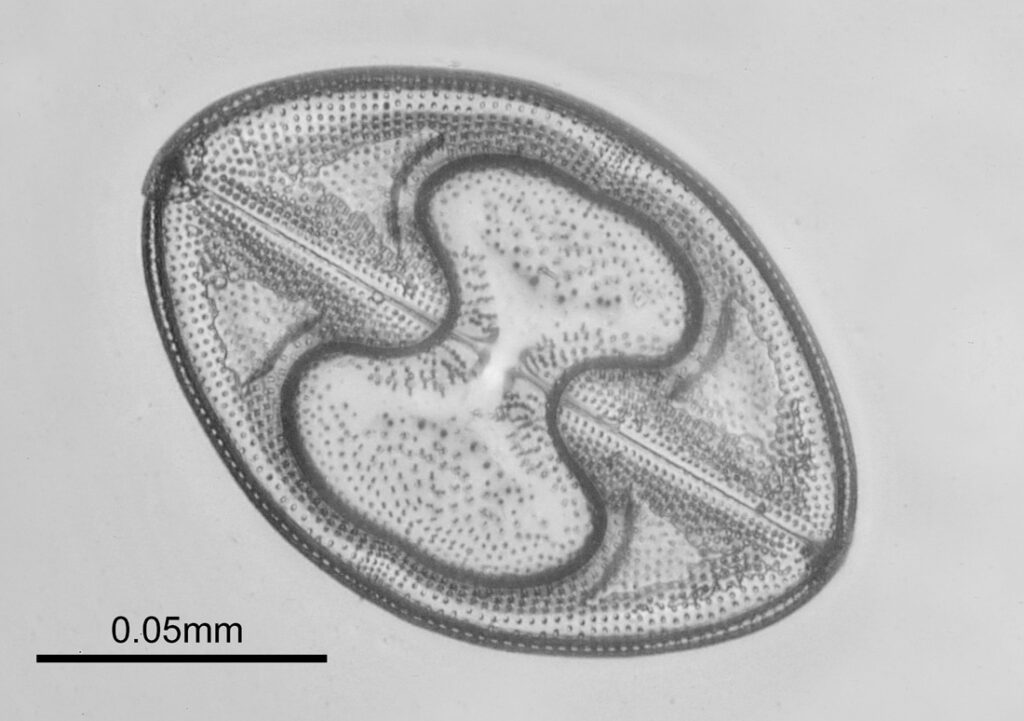
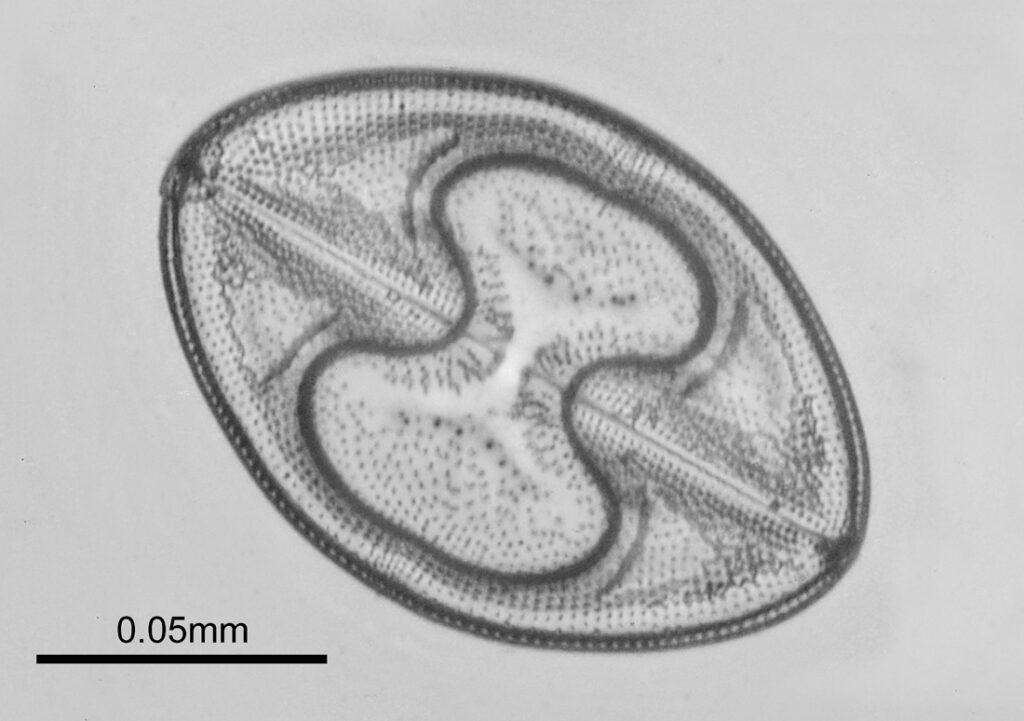
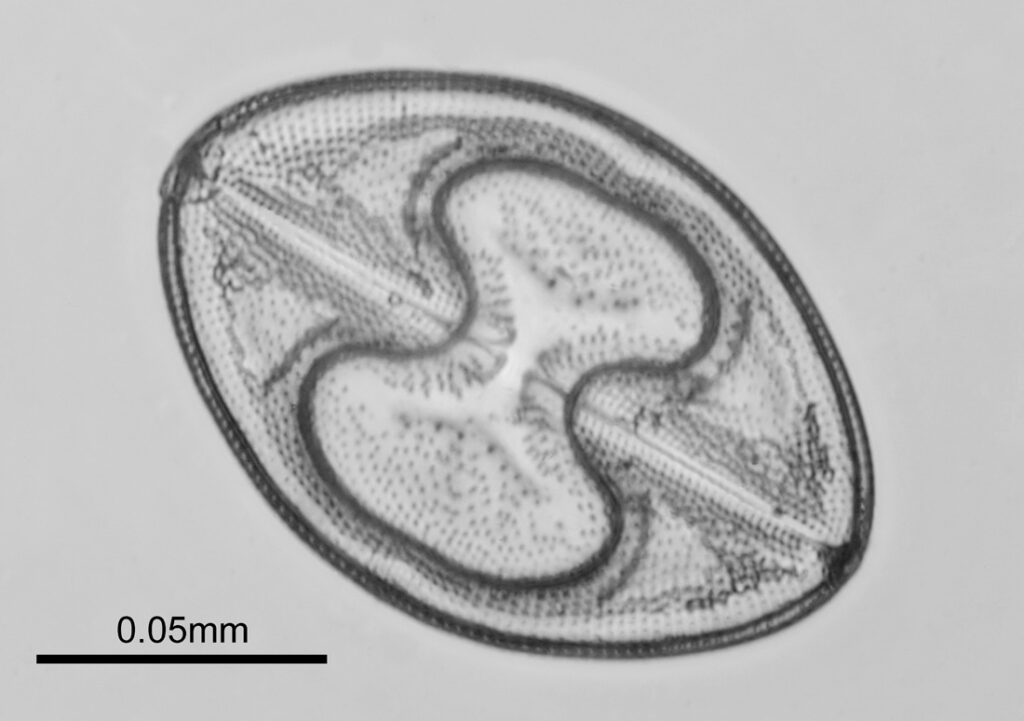
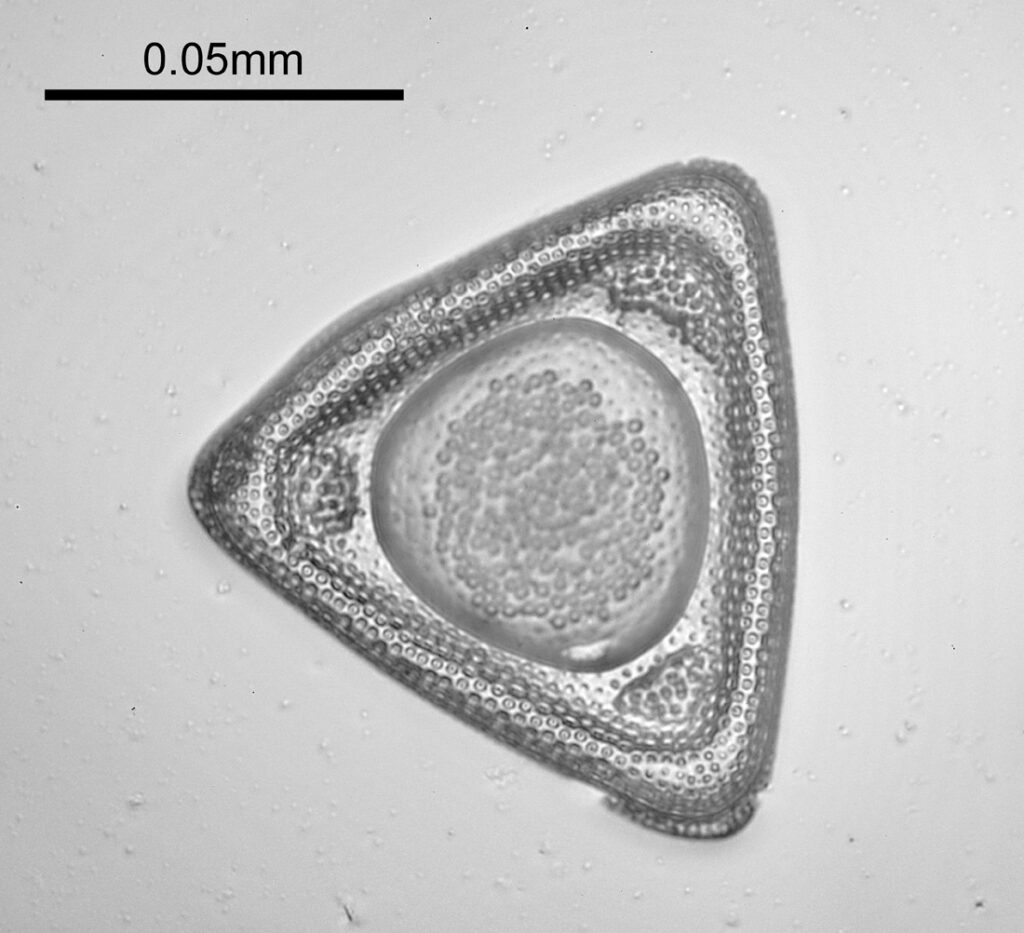
The objective used for the images above (a 32x Zeiss Ultrafluar) had a relatively low NA 0.4. In theory, there would be more resolution to be had with a larger NA objective. I do have a 100x NA 0.85 Zeiss Ultrafluar, so took some images of a different diatom on the slide. Firstly at 313nm using the 32x objective (single shot, no stacking, hence not everything is in focus).

Second test diatom at 313nm

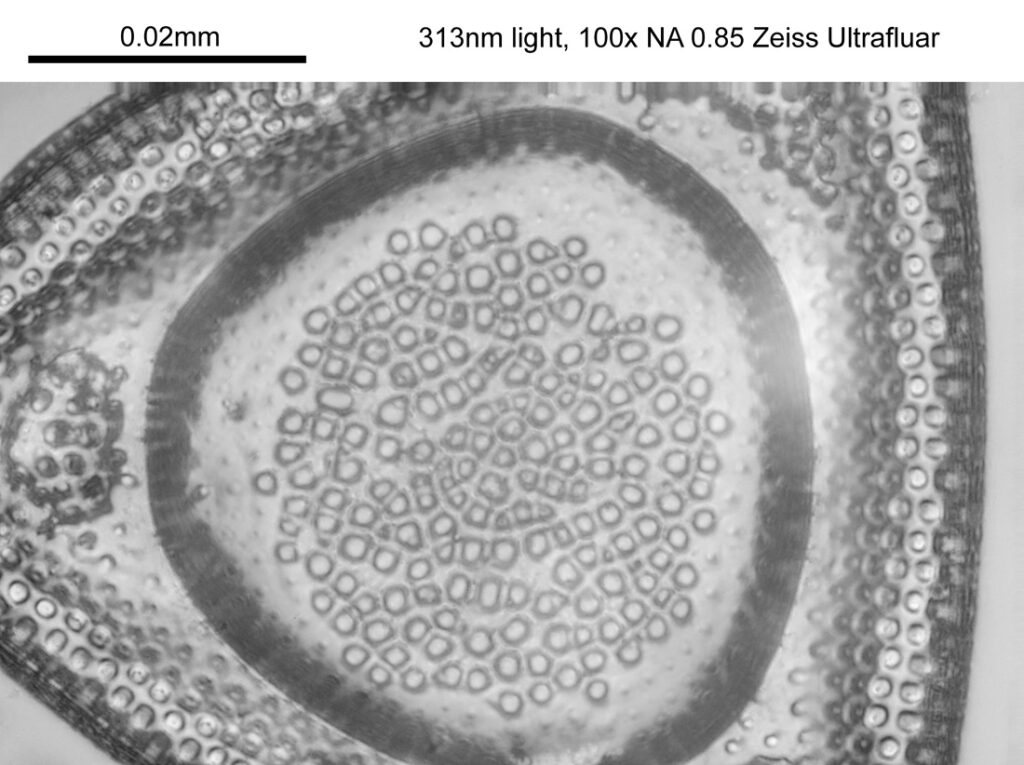
Then at 313nm with the 100x NA 0.85 Zeiss Ultrafluar.

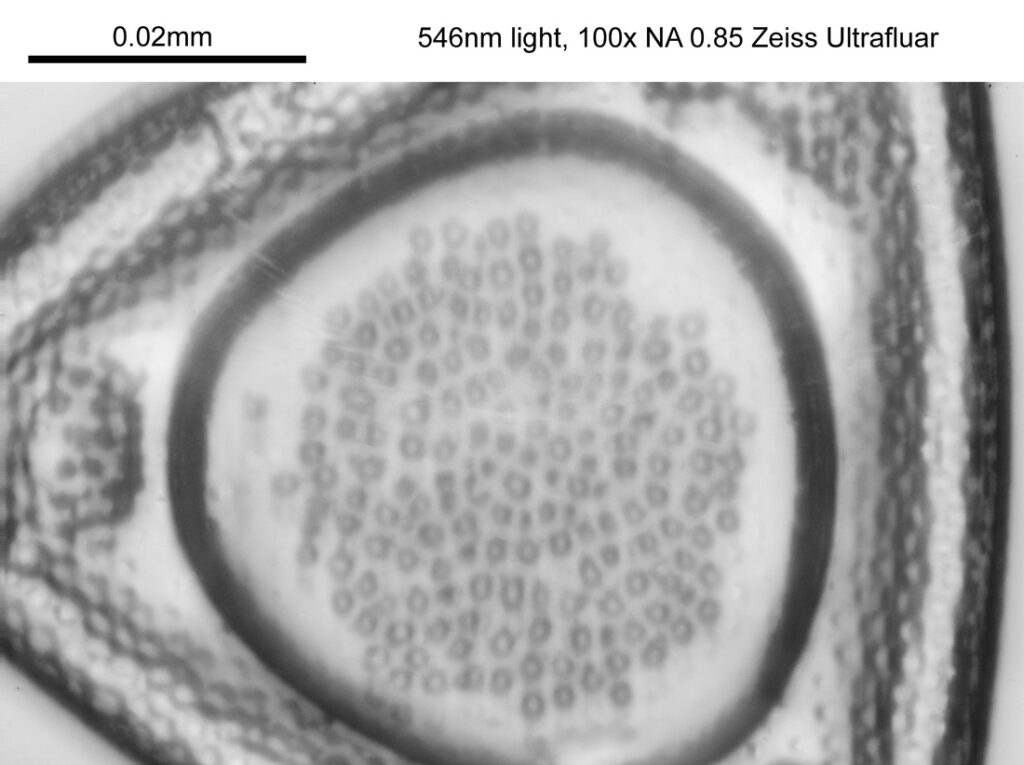
And then finally at 546nm with the 100x NA 0.85 Zeiss Ultrafluar.

As with the first test, the difference between the 313nm image and the 546nm one is striking. Looking at Abbe’s calculation for resolution, with the 100x NA 0.85 objective, with 546nm light the theoretical resolution is 321nm while with 313nm light it is 184nm. The larger ‘circular’ features in the middle of the images above are of the order of 2 microns across. The smaller ‘dots’ around the outside of the central features are about 500nm across. Theoretical limits for resolution are one thing, but in practice the other components of the optical setup will also influence it, as such I am not surprised that it looks like my limit to resolution is above the theoretical limit. In a perfect world I would get some form of calibrated test chart for ultra high resolution microscopes, but that will have to wait for now as they typically cost about 1000GBP.

I hope you have enjoyed this little journey into the micro world, and an evaluation of how the light we use to look at things can influence what it is that we see. Thanks for reading, and if you’d like to know more about this or other aspects of my work, I can be reached here.

UV imaging – Altair Hypercam 26M monochrome camera

‘Jon, you should always be open to new experiences’, is something I get all the time, and to be honest new experiences often make me nervous. New science though, now that is a different matter, especially when it leads to experiments and perhaps new toys to work with. For a while I’ve been wondering about getting a camera for my microscope which wasn’t a SLR or mirrorless one, but it needed to be something I could make work in UV down to 300nm (and ideally below). After consideration of various options, I approached Altair Astro in the UK about their 26M monochrome APS-C camera.

This camera has a BSI Sony IMX571 monochrome sensor, and has the option of cooling as well. Importantly for me, they are UK based, and they were willing to work with me on some adaptations. The window on the camera which is there because of the cooling setup would block the UV so I ordered one without the window and am having a fused silica replacement made instead by one of my regular optics suppliers – UQG Optics. Also was pretty certain that the sensor on the coverglass will be UV blocking (like most modern sensor coverglasses) and be no good down at 300nm, so the plan will be to send it away to my friendly camera modifier MaxMax and get the coverglass replaced with fused silica. I will however be keeping the microlenses on (bit of an experiment, hopefully they will still work in the UV – my experiments say they should, but not everyone is convinced).

I went with the APS-C one for a couple of reasons. Cost – the full frame sensor version was over twice the price. Risk – given it will have the coverglass removed this is a dangerous process and doesn’t always work first time. Damaging this one will be a lot cheaper to replace than the full frame one. I would have loved the 61Mp fullframe one they do (Sony IMX455 sensor), but it was overkill for my microscopy work, and I just couldn’t justify it at this stage. I’ll also be using it on the Questar UV telescope I’ll be getting later this year (from their UK dealer, The Widescreen Centre) and APS-C will be better for that as well.

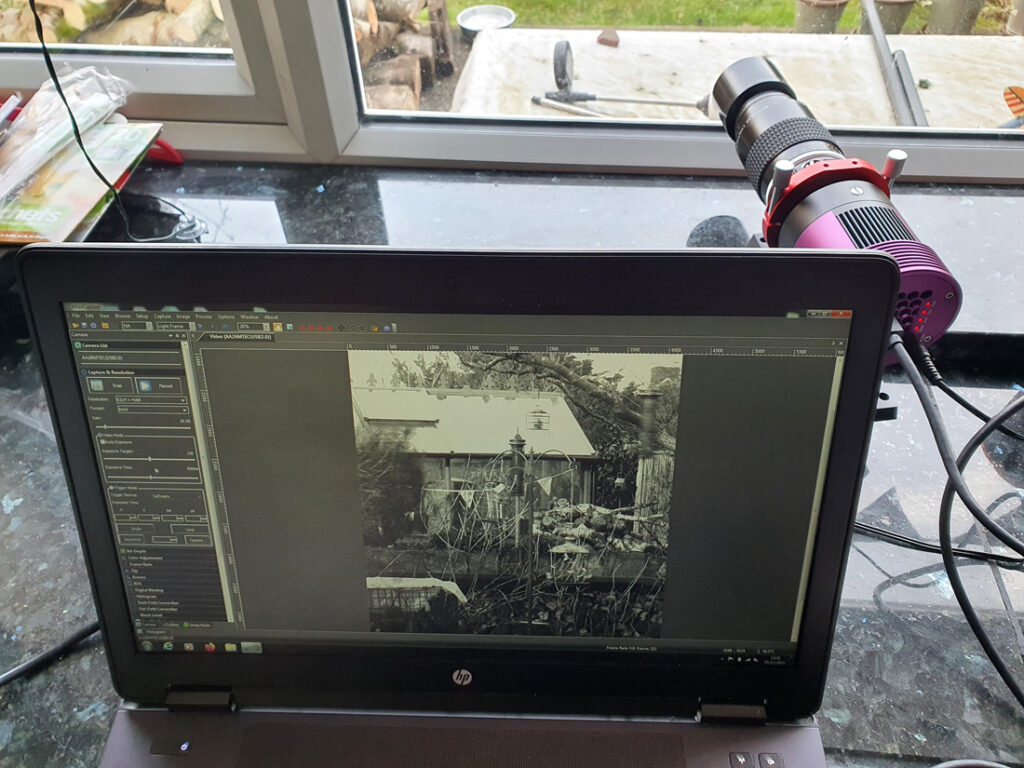
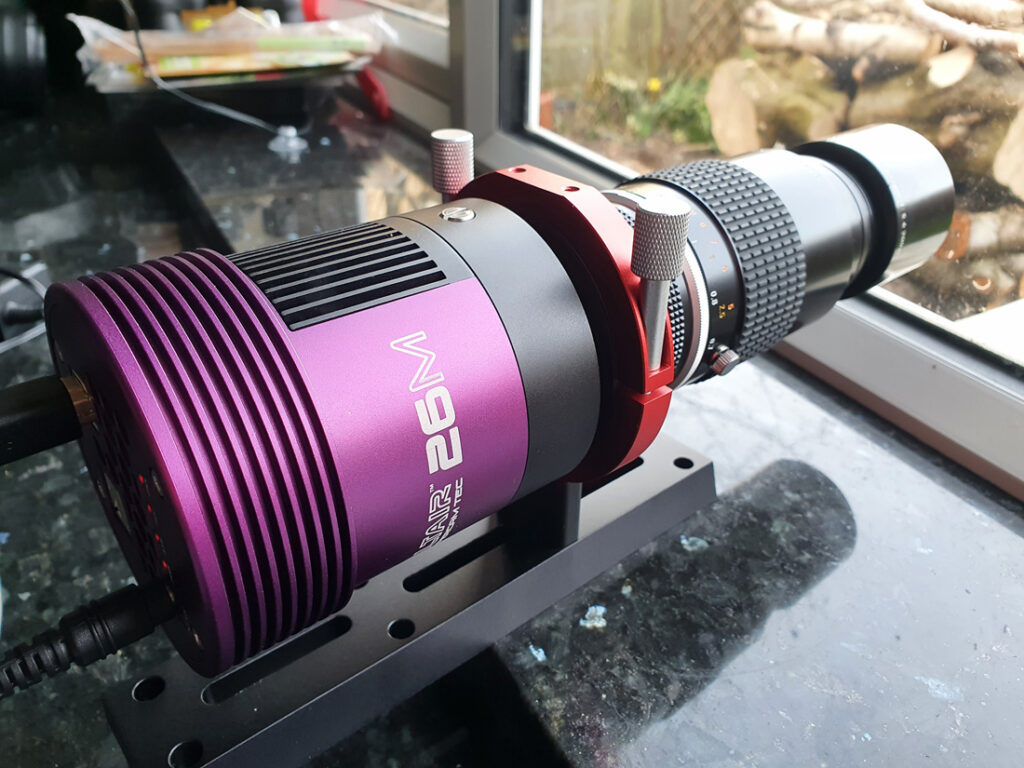
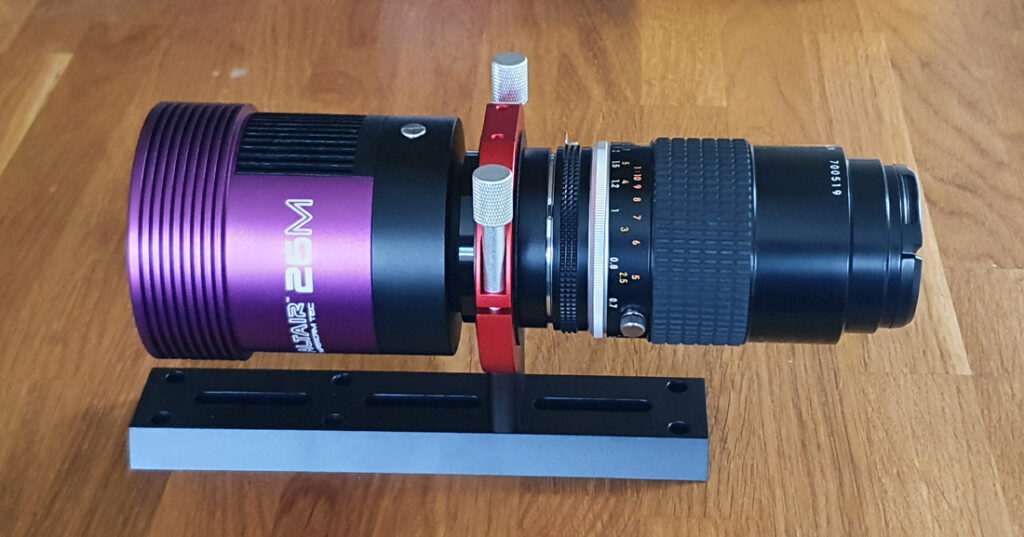
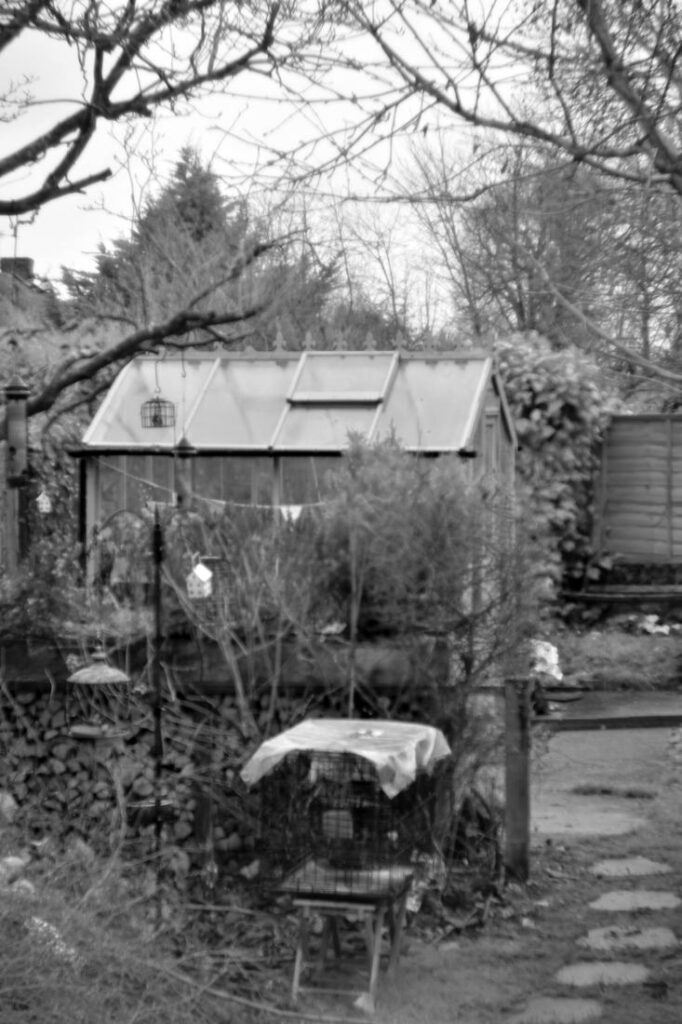
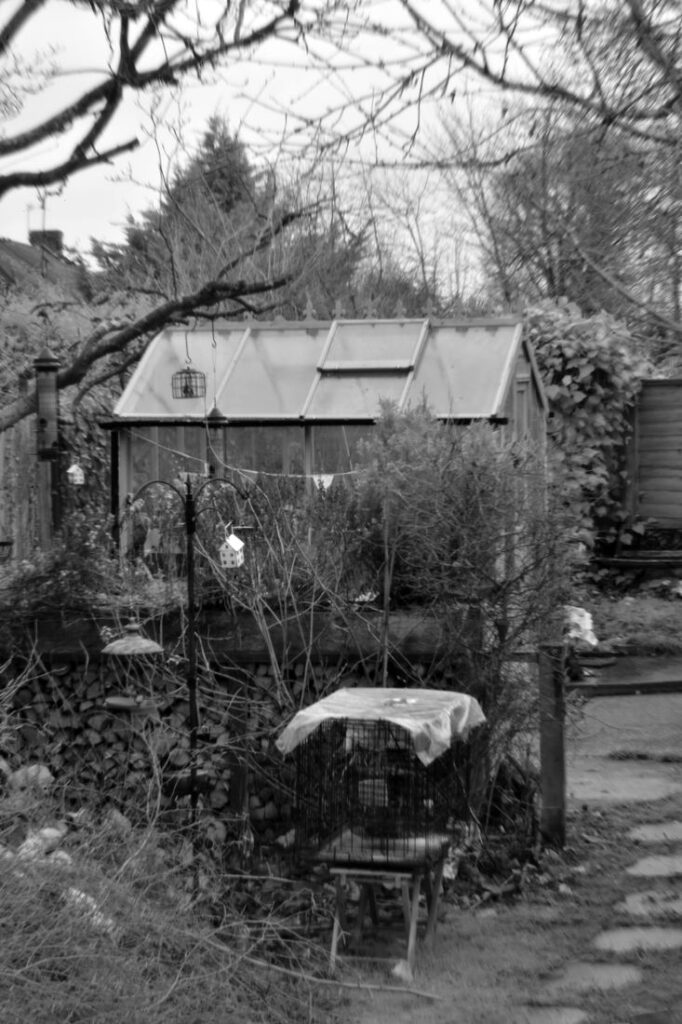
The camera arrived the other day, along with a nice adapter for Nikon lenses and I managed to get it up and running (steep learning curve as I have never used a camera like this before). Some shots of the brief setup and test with the Rayfact 105mm lens (the picture of the garden was taken with the Baader U UV filter on the lens, through the glass of the kitchen window).

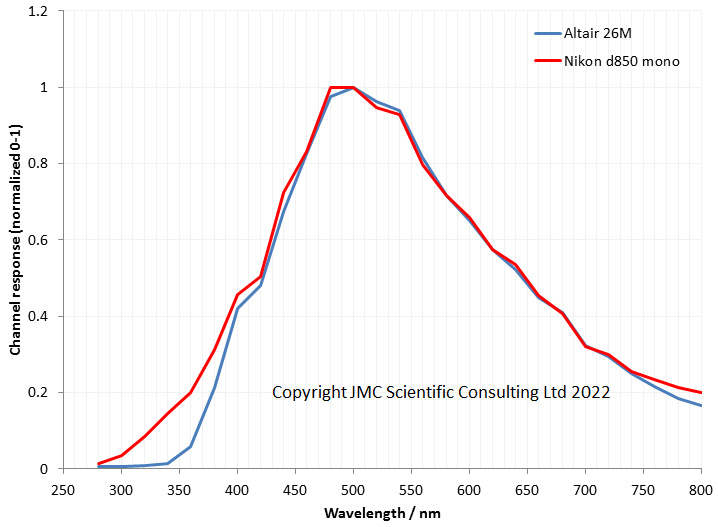
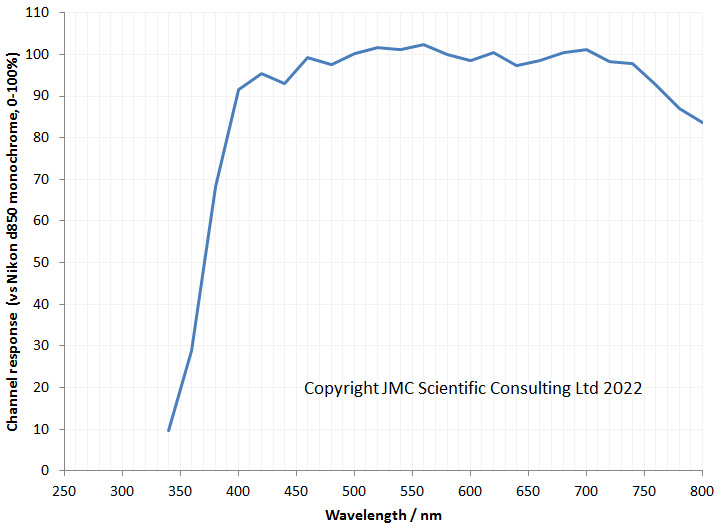
The next stage was to understand more about its spectral response in its unmodified form. For this I used the approach I developed for looking at cameras response in the UV (see here for background). As a reference camera I used my monochrome converted Nikon d850 which also has a BSI sensor. Normalizing and plotting the curves from the two cameras gave the following.

The two cameras have very similar response curves between 400 and 700nm as would be expected. However below 400nm the 26M response drops rapidly, being essentially non-responsive below 340nm. This can be seen more easily if I plot the response of the 26M vs the monochrome d850 and express it as a percentage.

Below 340nm I have not bothered plotting anything as it means dealing with two very small numbers and it all gets a bit noisy.

What’s different between the two cameras (apart from the sensor size)? The monochrome d850 has a fused silica coverglass, and has had the Bayer filter and microlenses removed. The 26M has the stock coverglass, and (I am assuming) has microlenses and something between the microlenses and the sensor. I suspect the drop in sensitivity below 400nm for the 26M is being driven by the coverglass, as I’ve seen a few coverglasses now which are starting to block UV around 400nm before becoming opaque by about 320nm. Not sure as to why the slight drop about 700nm – perhaps AR coatings on the stock coverglass which are optimised to visible?

Now I’ve measured this response curve, the next stage will be for me to send the camera to Dan at MaxMax and have the coverglass removed and replaced with fused silica.

Overall the build quality of the 26M seems impressive, so I am looking forward to having a bit more of a play with this and seeing what it can do once it is fully modified.

Thanks for reading, and if you’d like to know more about this or any other aspects of my work, you can reach me here.

Making camera lenses – Boyer Serie Meniscus Lens

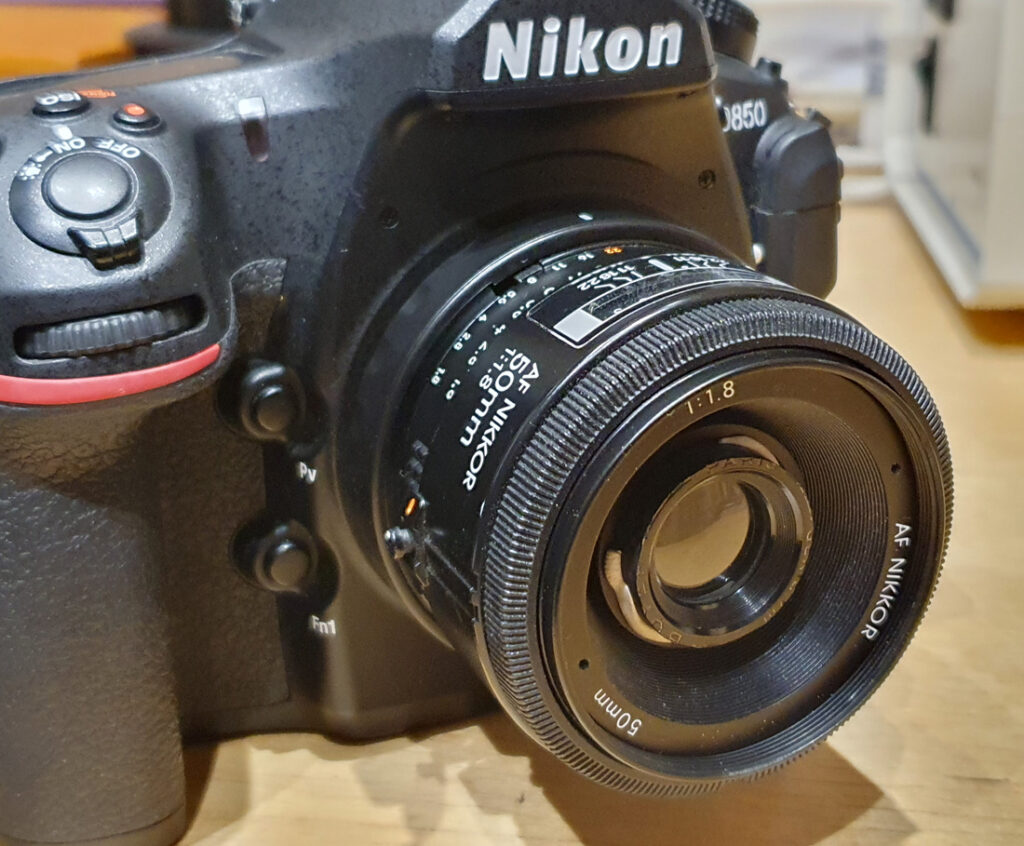
This post follows on from my previous work making an autofocus UV lens using a Nikon 50mm f1.8 lens body (which you can read about here). Having a basic autofocus lens body like this makes it possible to swap other lenses in and out and test how they perform. Camera lenses themselves vary from incredibly simple (a single element, or even a pinhole) through to extremely complicated (up to 20 or more individual glass elements). For UV imaging, simpler is usually better – fewer elements means less glass, and fewer air/glass interfaces. When it comes to simple lenses, there are a few much more simple than a single mensicus lens. This leads us to the one used for the conversion discussed here today – the lens from a Boyer Serie VIII camera. Here is the lens mounted into the Nikon 50mm f1.8 autofocus lens body and on the camera (note the use of white-tac to keep it in place – yes, sometimes simpler is better).

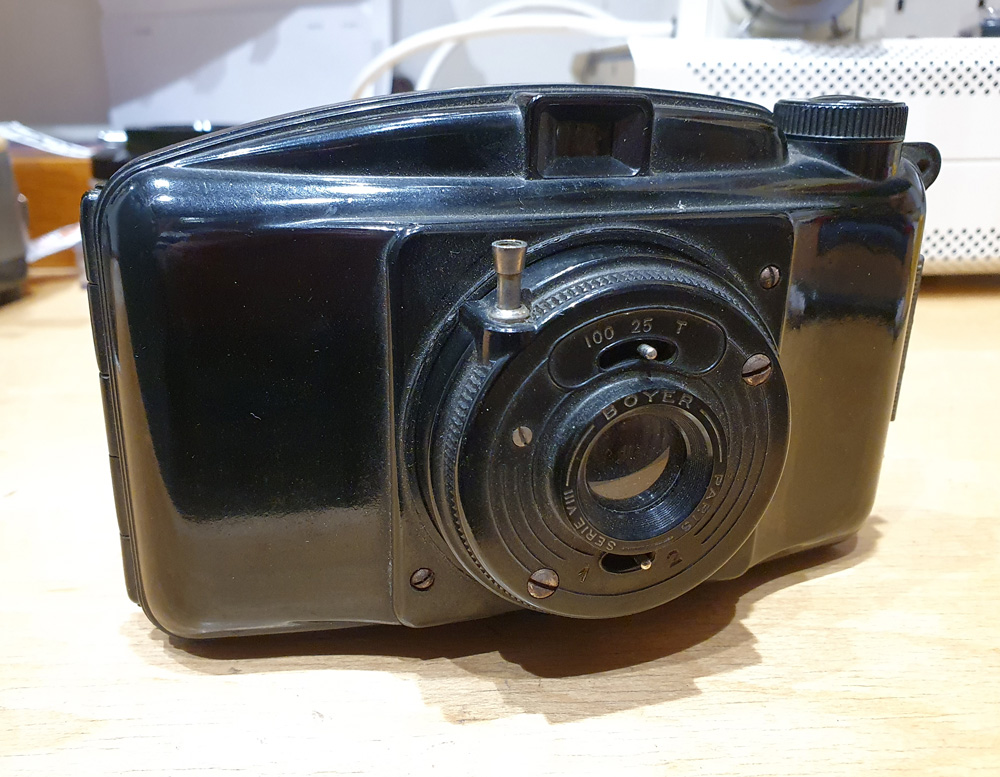
What did this lens come from? Originally it was in a Boyer Serie VIII roll film camera as shown below.

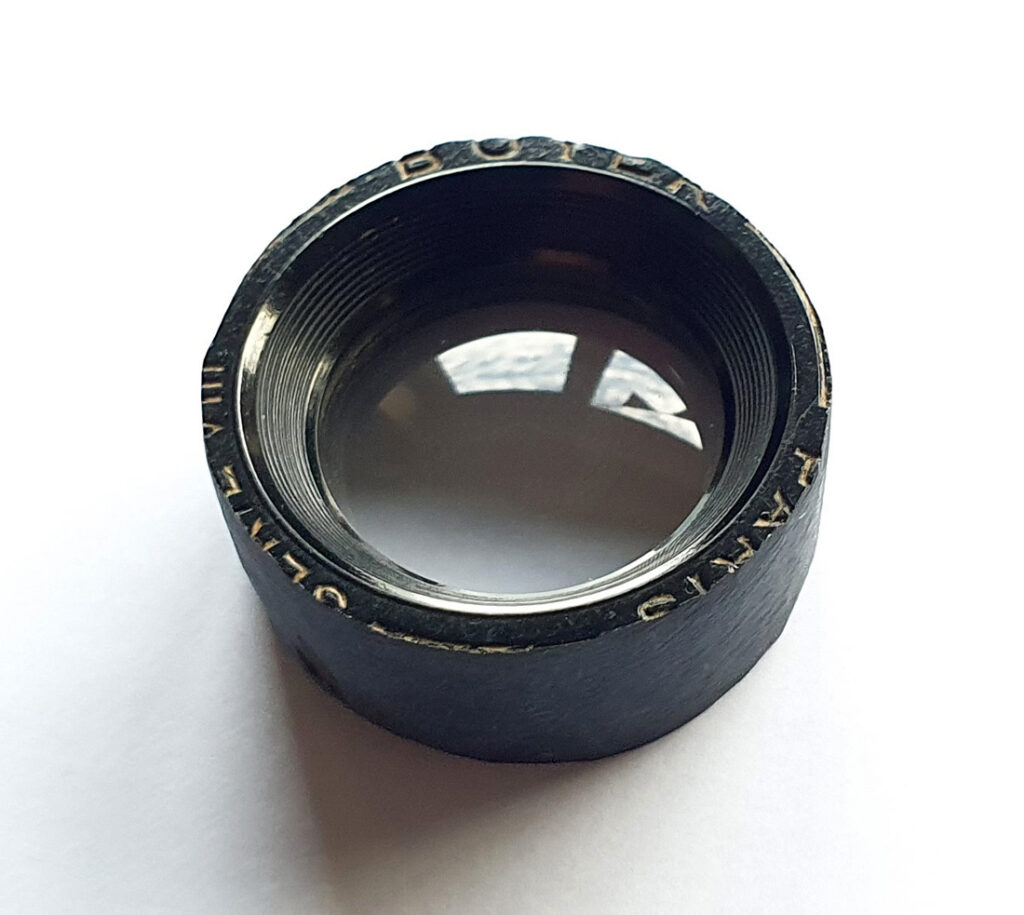
The camera was bought from eBay for about 10GBP and was non functional (the shutter was all gummed up). The fact that it wasn’t working wasn’t an issue for me as I only wanted the lens. After a bit of time with a Dremel and a hand file (and a mask as the dust from cutting the Bakelite was horrendous) the lens was removed.

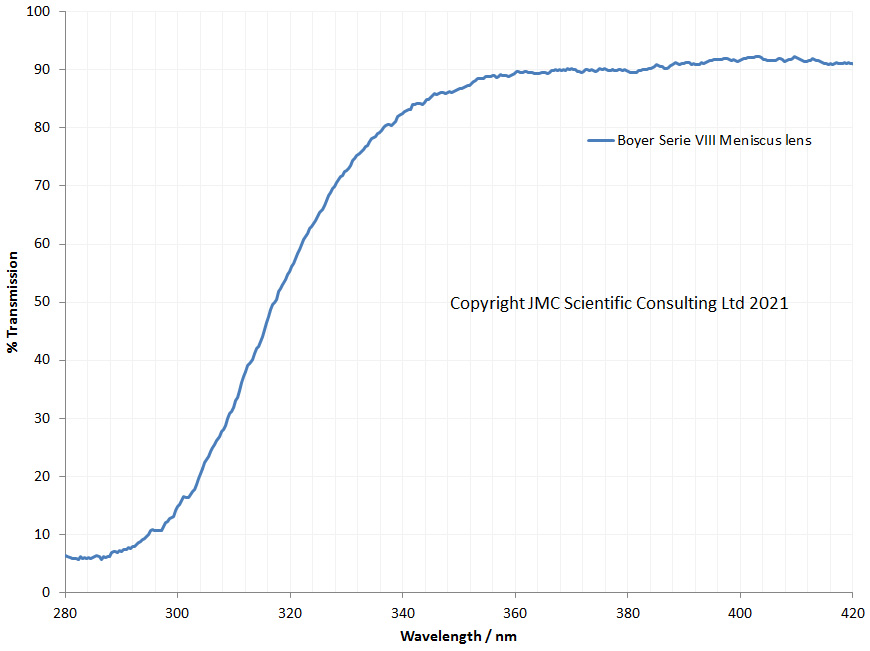
This was cut to the right diameter to fit into a Thorlabs SM1 mount which I’d put on the lens body. The Boyer lens itself seems to have a focal length of around 60mm and is a single meniscus element. I started this little project thinking that it might be handy as a cheap lens for UV imaging, and the transmission spectrum of it looks promising, as it is letting through light down to about 300nm which for a normal glass lens is pretty good (quartz, fused silica or calcium fluoride would obviously go lower, but would not cost 10GBP).

With a 11mm extension tube between the lens and camera body, this will focus from infinity down to about 1m in normal visible light which isn’t too bad for usability. I’d expect some shift of that focus range in UV, and I might need to get rid of the extension tube when using it there.

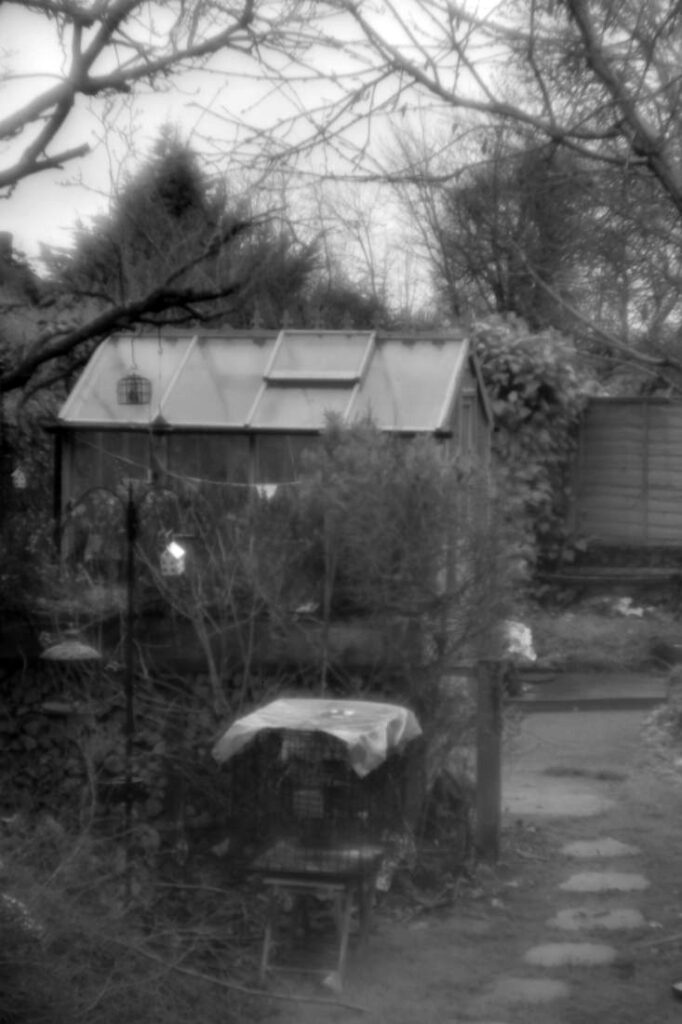
I took a few test shots in the garden today (nice, dull, grey December day, the joys of English winters). These were taken on my monochrome Nikon d850, with no filters (this will be visible and a bit of IR and a little UV) and no lens hood. All at ISO 640 and varying the f stop setting from f1.8 to f22. It should be kept in mind though that the focal length of this lens is not 50mm so the absolute f stop values are not relevant here.

Here’s it wide open at f1.8;

At f1.8 the image is very soft and glowy, which is not a huge surprise.

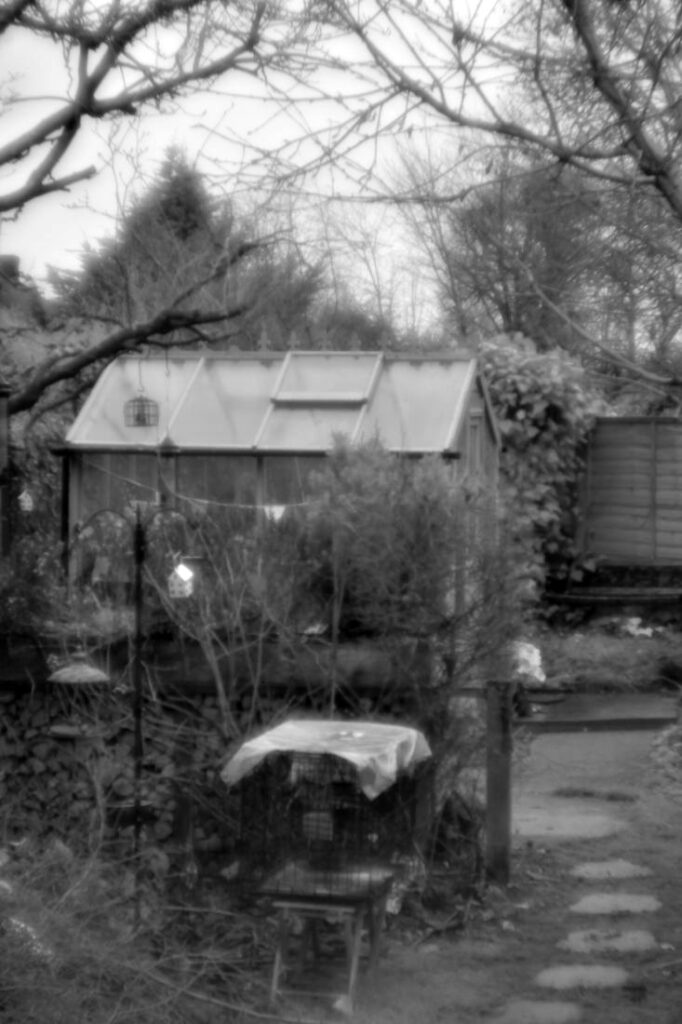
Now at f2.8;

At f2.8 it is slightly less soft, and contrast has improved slightly.

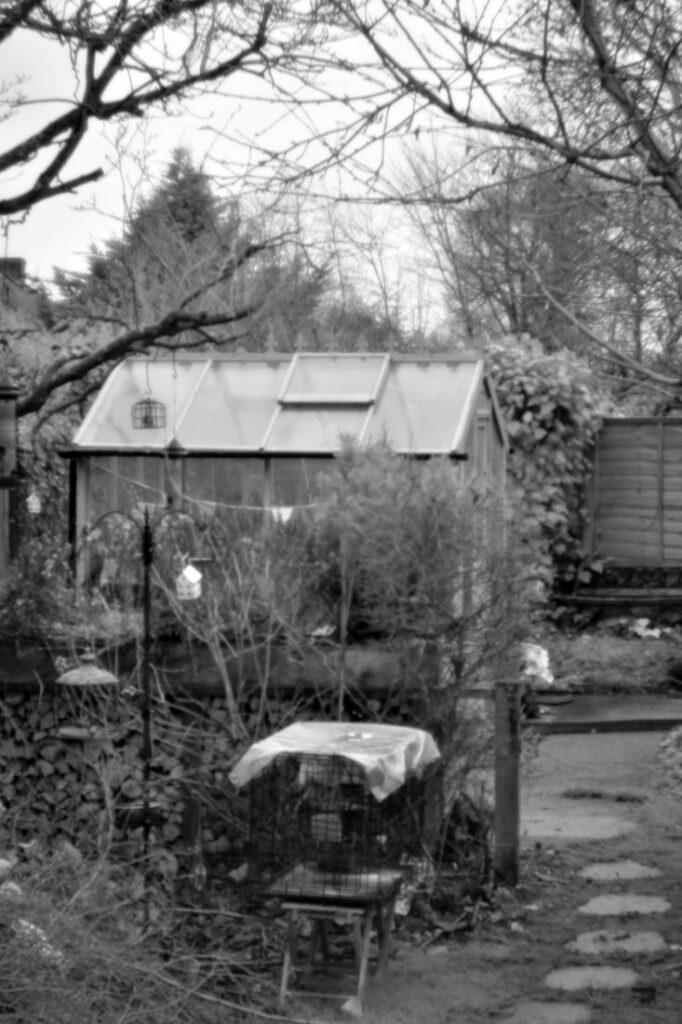
Next f4;

At f4 there is a big increase in contrast.

Now, f5.6;

F5.6 is similar to f4, and this behaviour continues through to f22 along with an increase in depth of field;

The Boyer lens does cover a full frame sensor, and there isn’t any noticeable vignetting at the corners. It certainly isn’t going to win any sharpness prizes, and I think is best described as ‘artistic’. However keep in mind that this is a single element, and in the images above it is dealing with visible, IR and whatever UV is present, so there will be a degree of chromatic aberration contributing to the image softness.

What has this achieved? I put an old camera lens into a modern autofocus body and managed to make a soft, autofocus lens. Great. Fascinating. But that is not the point here. This lens will transmit light down to around 300nm, so this is an autofocus lens with UV capability well down into the UVB region. With a cost of about 10GBP (Ok, granted that does not include the cost of making the Nikon autofocus body which was about 80GBP including the Thorlabs ring) it is at the cheap end of lenses when it comes to UVB capability. Using narrow band pass filters is likely to sharpen things up as well by reducing chromatic aberration. This could actually end up being quite a useful little lens. It was a fun build, and perhaps that is as important as anything else – keep work fun. If you’d like to know more about this or any other aspect of my work, I can be reached here. Thanks for reading and Happy Holidays.

UV Microscope build articles – Royal Microscopical Society and Quekett microscopical club

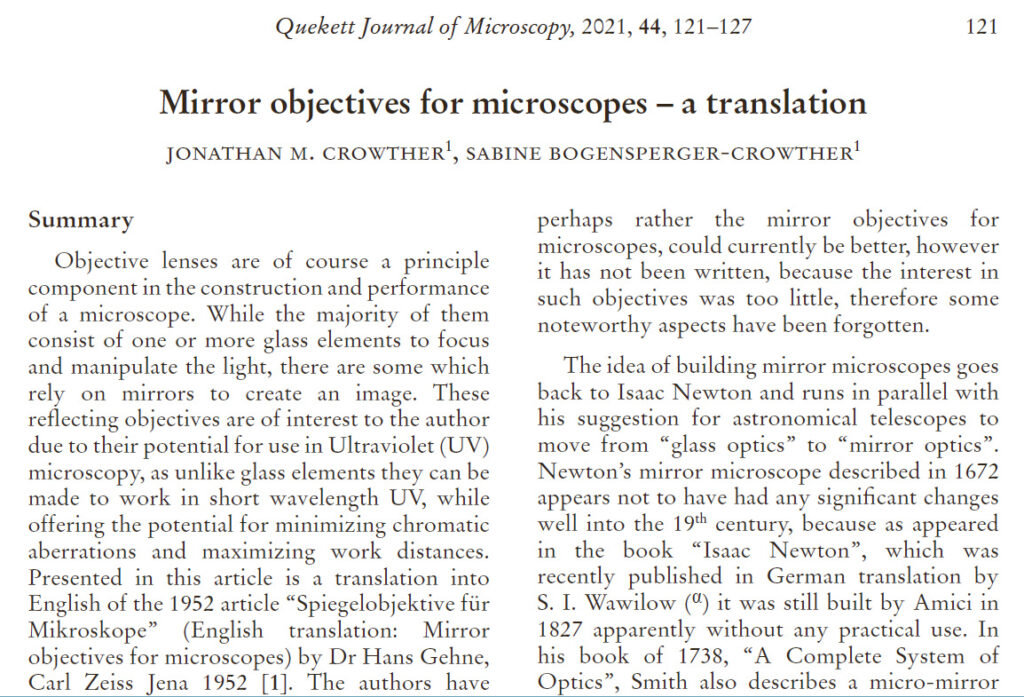
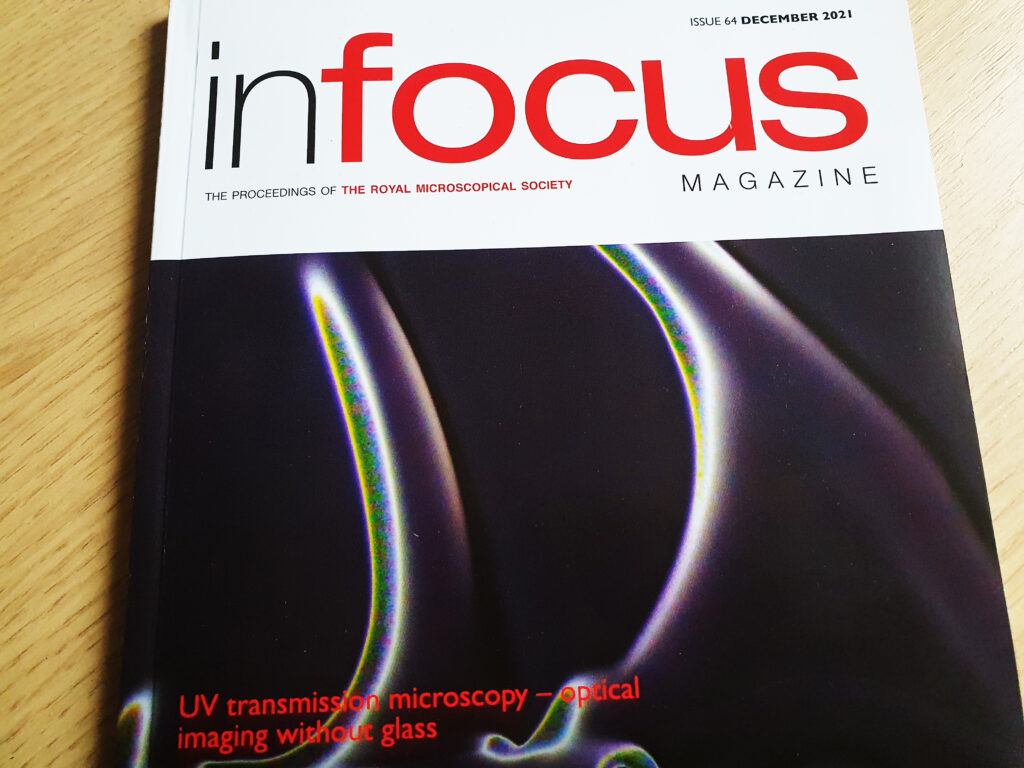
2021 has been an ‘odd’ year to say the least. After the quietness of 2020 when a lot of my clients went out on furlough, this year has returned to being busy again, which is a certainly a good thing. In between the paid work, I still continue to do my own research and write and publish my own papers. Recently I have had 3 papers come out which have all stemmed from research into and building of a UV transmission microscope – two in the Quekett Journal of Microscopy and one with Infocus, the magazine of the Royal Microscopical society.

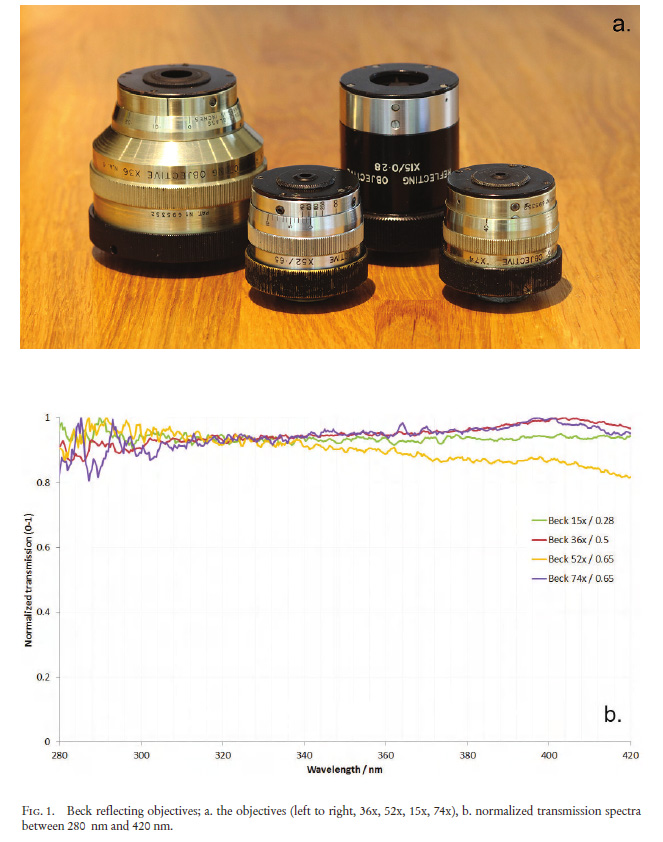
The first was a review and summary of a range of reflecting objectives from different manufacturers. This included their transmission in the UV which I measured using the setup I built for measuring camera lens transmission, and as far as I can tell is the first such comparison between different manufacturers.

The next was a translation into English of a 1952 paper which was published in German about the development of reflecting objectives. The paper was an interesting insight into the research being carried out by Carl Zeiss Jena in the middle of the 20th century.

The final one covered the aspects which needed to be considered when building my UV transmission microscope, including what needed to be changed and modified to make it transmit the short wavelength UV.

It’s great to see these articles come out and be published. But it is worth considering for a moment, why go to the effort of publishing this work like this? In a world where blogs (or whatever the current fashionable term for them is) are freely available and just a click away, is it really worth the effort to try and formally publish an article?

Consider first the effort. It is not unusual for me to spend over 100 hours to prepare an article for publication, and that is on top of of the work done to create the data that goes into it. Then there is the time between submission and publication – sometimes it can be months from submission of an article to getting it published. In fact I have one manuscript which has now been in review for over a year (come on guys, get it sorted). There’s the financial cost to consider as well with some journals – sometimes, and especially if you want colour figures, you need to pay for the privilege of seeing your article in print.

So, it is costly, time consuming, and a lengthy process to go down the formal publication route. Why bother then, when I can just write a blog entry like this and get the work out there to a wide audience? Well, there are a few benefits. Websites can be temporary. While I have no plans on retiring just yet, at some point my work will stop and this site will disappear. When it goes, so does the blog. A formal publication gets around that issue. The Quekett Journal of Microscopy for instance has been around since 1868, and I hope has many more years ahead of it, so my publications there will most likely outlive me.

Next to consider is the furtherance of science. Science progresses when ideas are shared and worked on. By sharing my work in articles in journals and magazines they reach audiences with similar interests, and hopefully sparks some ideas for the readers. There is another side to this of course, in that it helps promote my work, and this is certainly a consideration for me.

Then there is the concept of peer review. I believe in the work I do, and many journals I submit to are peer reviewed, in that the content of the article is reviewed by experts in the field before it can be published. This can be a difficult process and I have had papers which have needed rewriting (sometimes more than once) to get them to a state suitable for publication. Think of it this way though, if you believe in the work you do and the relevance it has, then it could well be of benefit to others and should be published. If you don’t believe in it, then why on Earth are you wasting your time doing it?

At this stage, I would to point you in the direction of both the Quekett Microscopical Club and the Royal Microscopical Society. Both of these offer valuable resources for the researcher and are worth checking out if you have an interest in microscopical imaging.

Publication of research certainly takes effort but the rewards gained from the process can very much outweigh that. I hope you have found this interesting (if you made it this far) and if you want to know more about any of my work covered here, or my other research topics please drop me a message.

15th Sun Protection Conference / IJCS AWARD

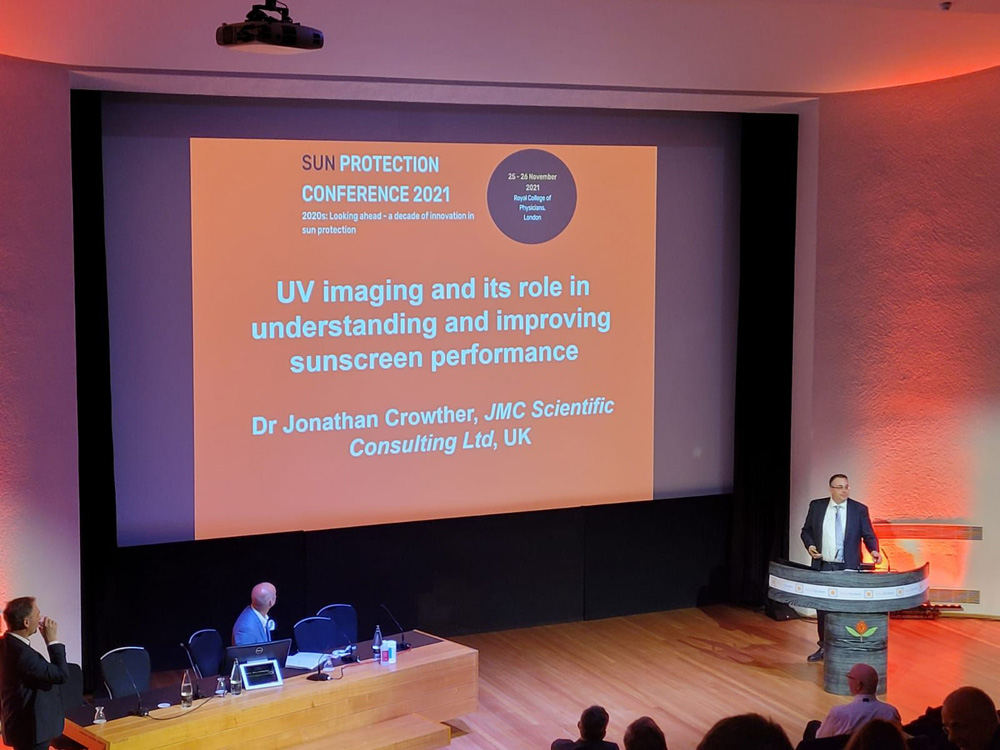
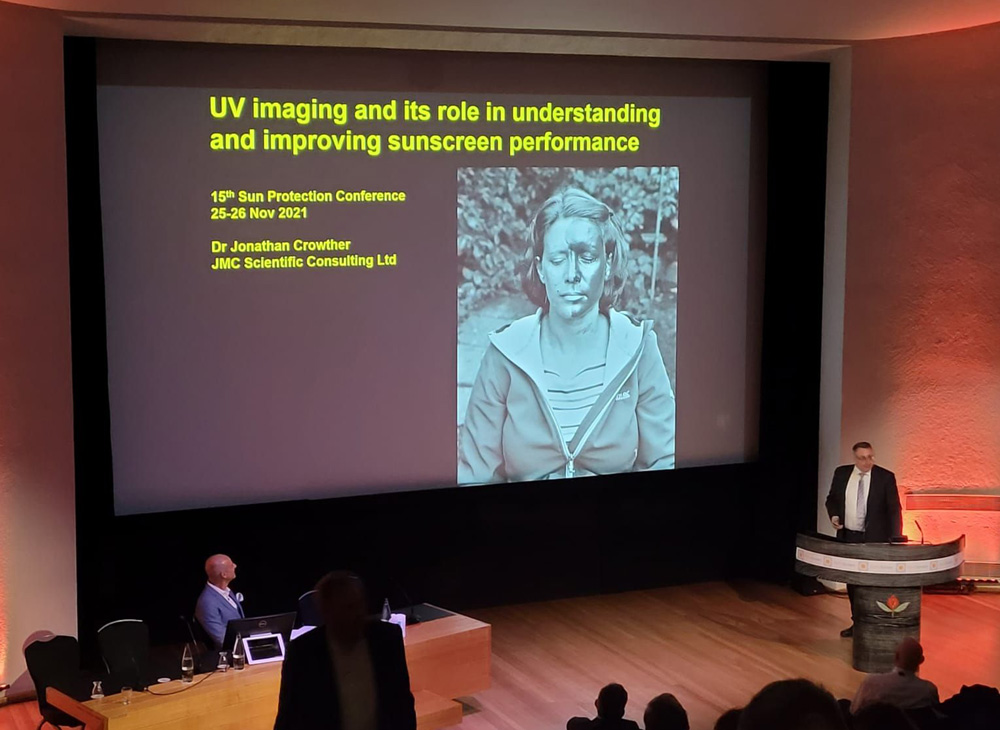
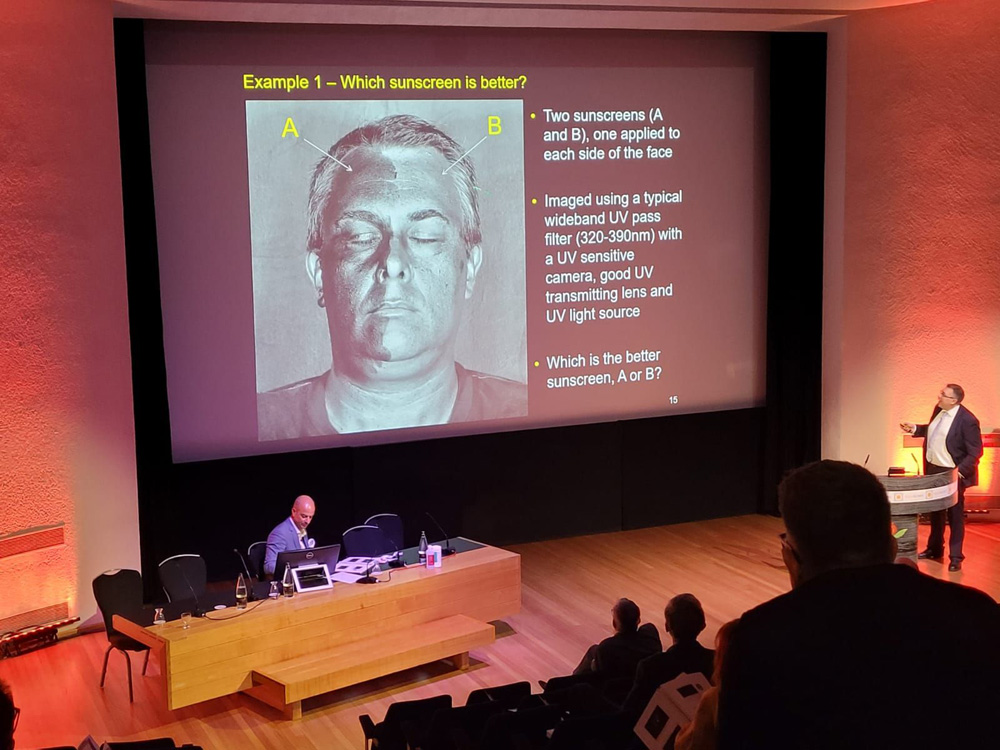
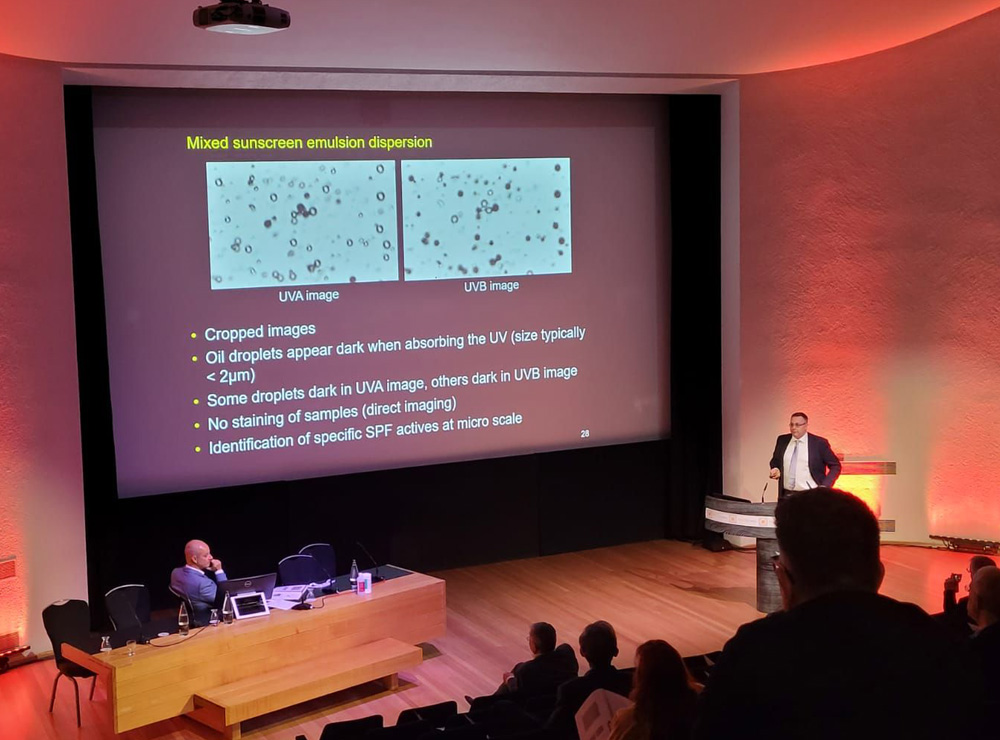
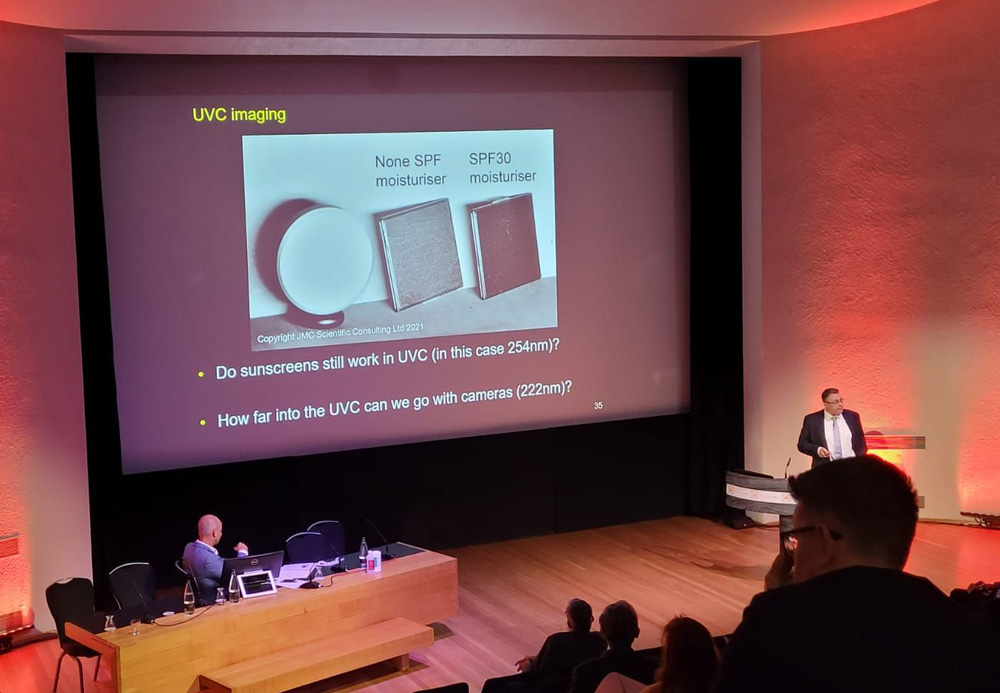
Just had a great couple of days at the 15th Sun Protection Conference held at the Royal College of Physicians in London on the 25th and 26th November 2021. Great selection of speakers talking about a wide range of aspects of sun protection and what the future holds for it. There are certainly challenges ahead for the industry in the next few years, which worryingly seems to be driven by a lack of understanding of what the ingredients in sunscreens are, how they work, and their interaction with us and the environment. Misreporting and/or misunderstanding of science by influencers and the media has done its usual job of stoking fear in the consumer, and sowed seeds of doubt with regards to their safety and benefits. On a more positive note, there was strong science presented on the benefits of sun protection, and the work going into the development of better products and consumer education.

The conference included talks from a range of industry and academic experts as well as physicians. I gave a talk on UV imaging and microscopy, and covered areas such as how to take photographs in the UV, the behavior of melanin at different wavelengths, the importance of knowing the limitations of the methods you use (an area which is far too often overlooked), my UV microscope build and what sunscreens look like when imaged with it and imaging in UVC.

Looking around the conference it made me realise that we need to get new people to give talks and present their work. Don’t get me wrong, it is great to hear from experts who have worked in this field for many years, but we also need new perspectives. It can be very daunting to get up and speak in these types of events, but remember that everyone is there because they have an interest in this area and are passionate about it. With sun protection we are also there to save lives. I strongly recommend anyone who has work they want to share with the world to reach out to conference organizers and see whether there is the opportunity to present their work.

This even turned out to be even more special for me, as I was given the award for the conference for my talk, by the International Journal of Cosmetic Science. As a result I have the opportunity to write and publish a paper covering the work from my talk as an article in the journal (assuming it passes peer review) as an Open Access article. Normally the author has to pay to make the article Open Access, but the award covers the cost for this. This means that the article will be open to anyone to read, rather than people who have subscribed to the journal or who are in a position to pay for the article.

A big thank you to Dr Jack Ferguson and the team at Summit Events for organizing a great event, and I’m already looking forward to the next one in 2 years time. Hopefully we’ll see more of you there.

Autofocus UV photography – making a lens

Some projects I do are directly related to a specific industry related problem. Others are more of the ‘I wonder if if is possible?’ type. Todays post is one of the latter ones. Lenses specifically designed for UV photography such as the Rayfact 105mm UV, Asahi 85mm Ultra Achromatic Takumar, and 60mm Coastal Optics f4, are all manual lenses. This is fine for most applications, but something I have always wondered about is whether it would be possible to make an autofocus UV lens? The end result was compact lens using a Nikon autofocus lens body and a 79mm Thorlabs aspheric UV fused silica element, and this is how I went about it.

The final autofocus UV lens

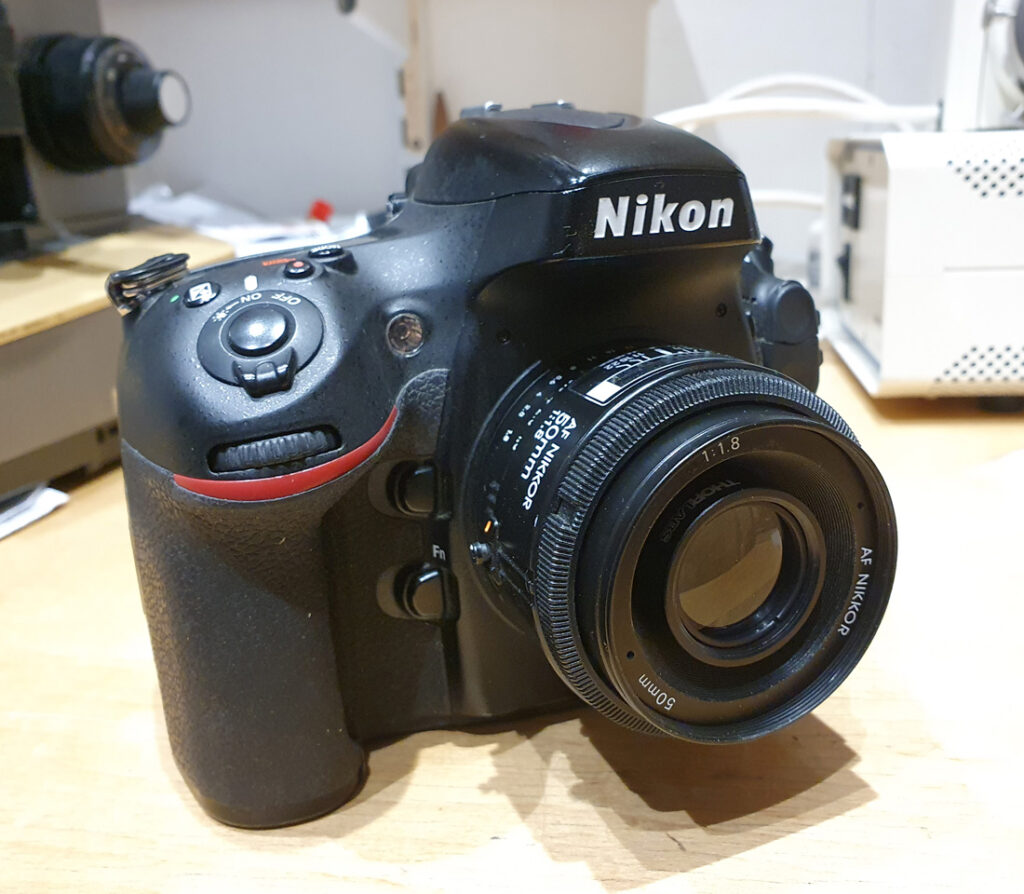
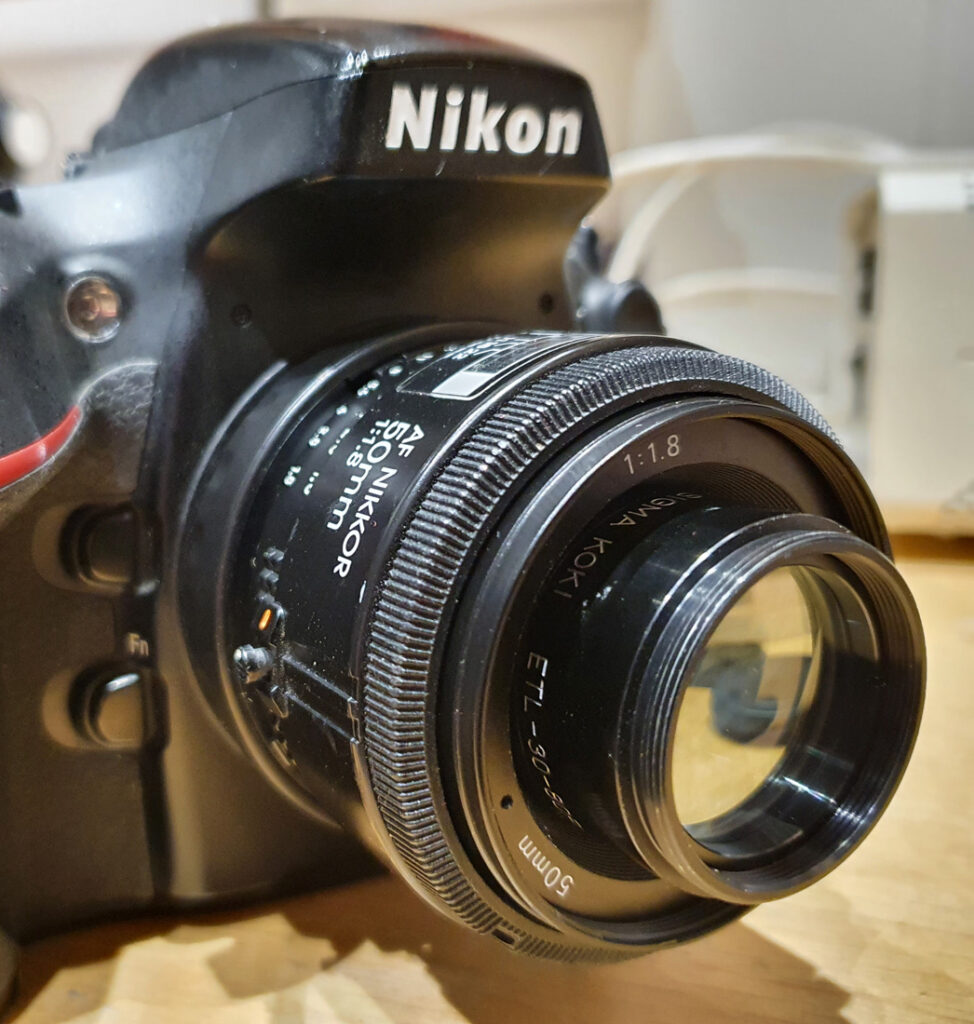
A few weeks ago, a post on the Ultraviolet Photography forum described how someone had taken a Canon EOS 50mm f1.8 lens apart and installed a 75mm plano convex lens in place. The result was an autofocus setup able to be used on Canon cameras. Readily this spurred me on, and I decided to try and do one myself. I wanted to use a Nikon lens body, as they have mechanical aperture dials, and I can use them on my Canon, Nikon and Sony cameras with the adapters I have. I sourced a Nikon 50mm f1.8 AF lens from a charity shop and set about taking it to bits to remove the original lens elements. This was relatively simple, and I managed to get the glass elements out without damaging them.

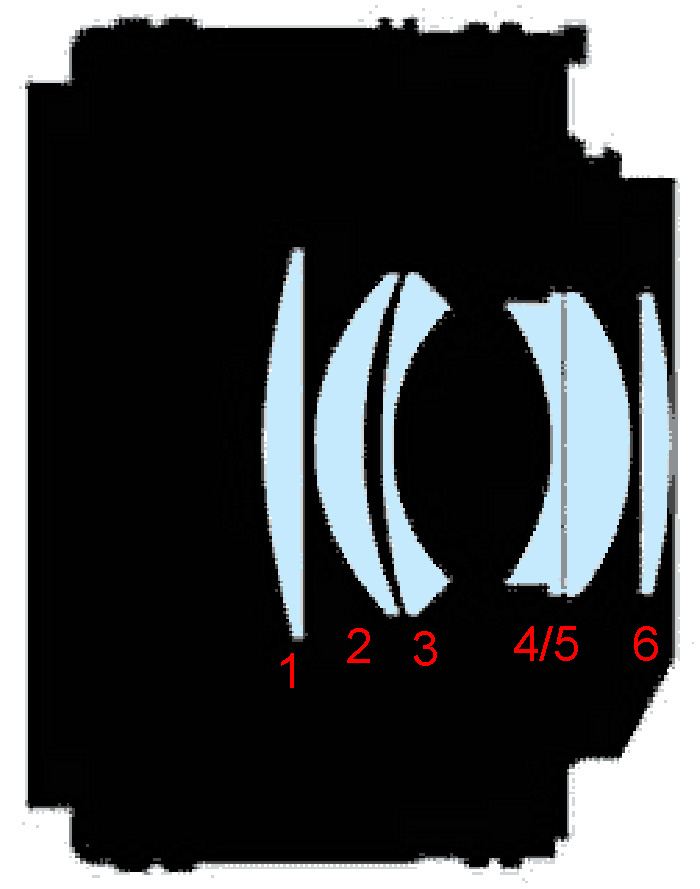
The Nikon 50mm f1.8 AF lens is a 6 element 5 group construction with one cemented group. It’s not multicoated according to Ken Rockwell – https://www.kenrockwell.com/nikon/5018daf.htm

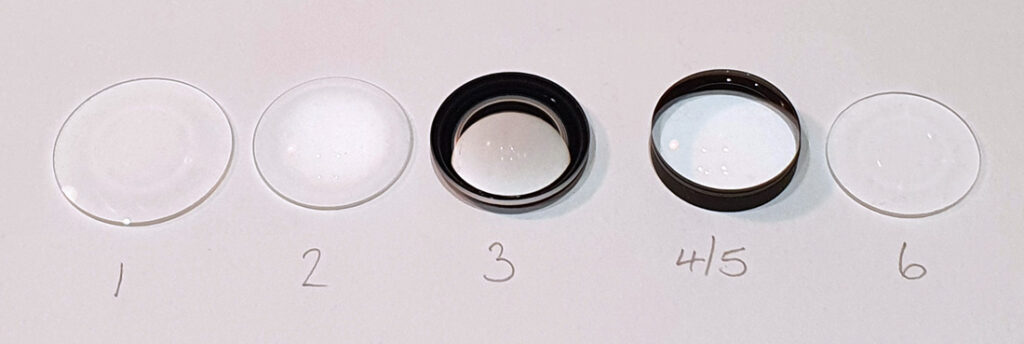
This is the lens design, again from Ken’s page linked above. I’ve added in 1-6 in red for the elements.

Lens elements removed, I got the following.

Lens elements from the Nikon 50mm f1.8 AF lens

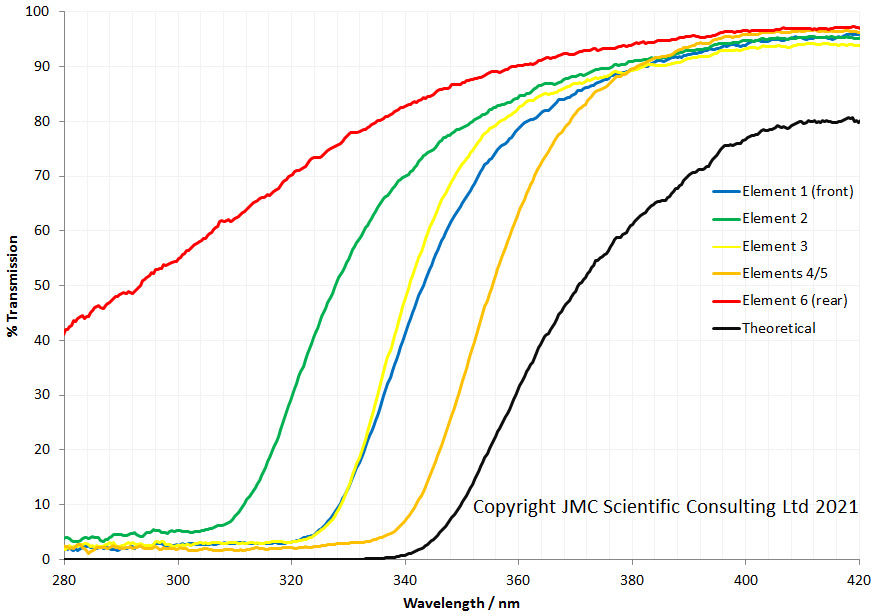
As these came out without damage, I thought it’d be nice to measure their transmission and see what that looked like. This is what I got.

Transmission of the elements from the Nikon 50mm f.18 AF lens

Note, I’ve included a ‘Theoretical’ line in the graph as well, which would be all the elements combined. Unfortunately I was so excited when it arrived that I took it apart before measuring the transmission of the lens, so don’t have an ‘unmodified’ lens graph to compare against. Bad scientist…..

The cemented doublet seems to be the one restricting the transmission the most (as expected). What surprised me though was element 6 (the rear element). This is a plano convex lens with a focal length of about 65mm, and it has a really deep UV transmission unlike the 3 single elements at the front of the lens. I wonder what glass they used for that?

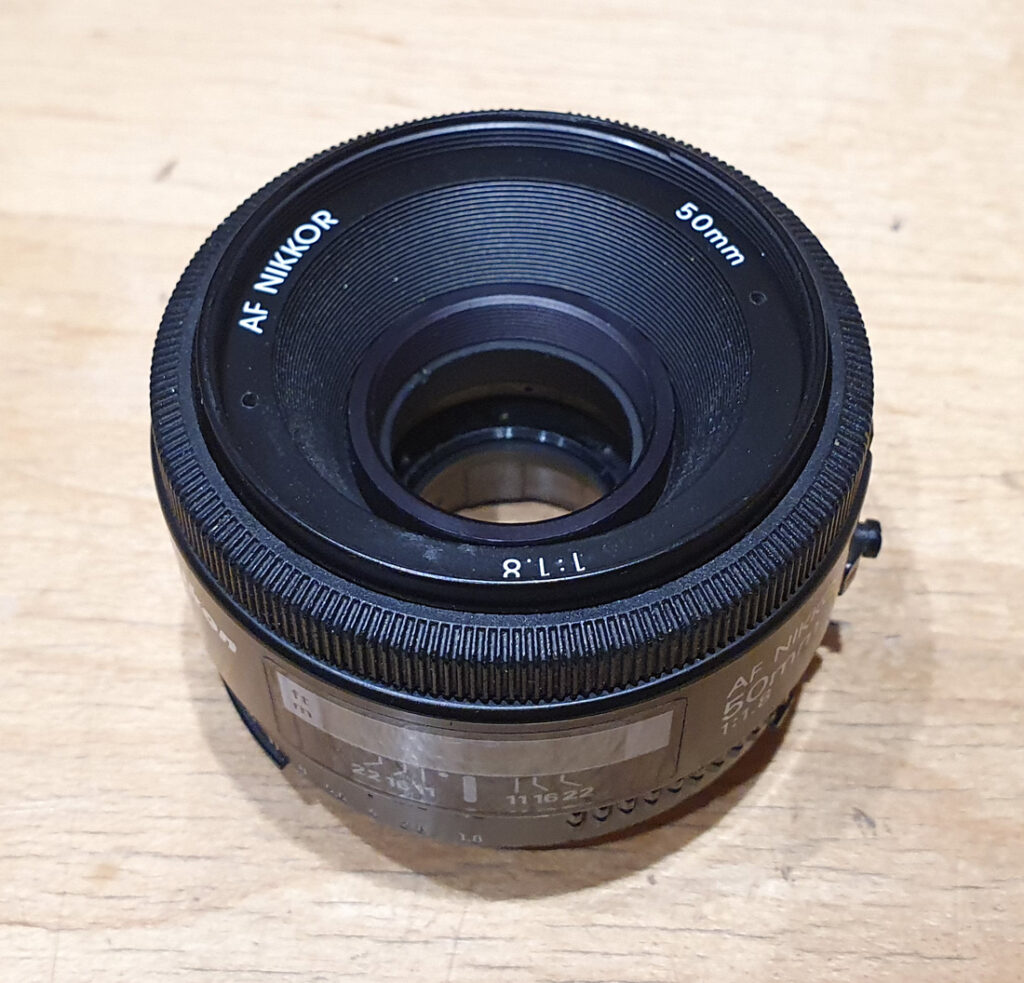
Once the glass was out, I was left with and empty lens body, so I decided to glue in a Thorlabs SM1 tube to the body to act as a mounting point for lenses. This was pretty much a perfect fit, and required very little work to install.

Nikon 50mm f1.8 AF with lens elements removed and Thorlabs SM1 tube installed

I decided I wanted to use my Thorlabs 79mm aspheric UV fused silica lens for this build, and with it screwed in place, in visible light, the lens was able to focus from infinity down to just over a meter. Even better, the autofocus function on my Nikon d800 worked, and the lens did indeed autofocus properly. I can adjust the aperture from the camera, or mechanically on the lens, and I can focus either manually or from the camera. Yay.

Now it should be noted that wide open it is certainly not sharp at the edges of the image, which is to be expected. Also, wide open the contrast is soft, and very prone to flare, so a lens hood is essential.

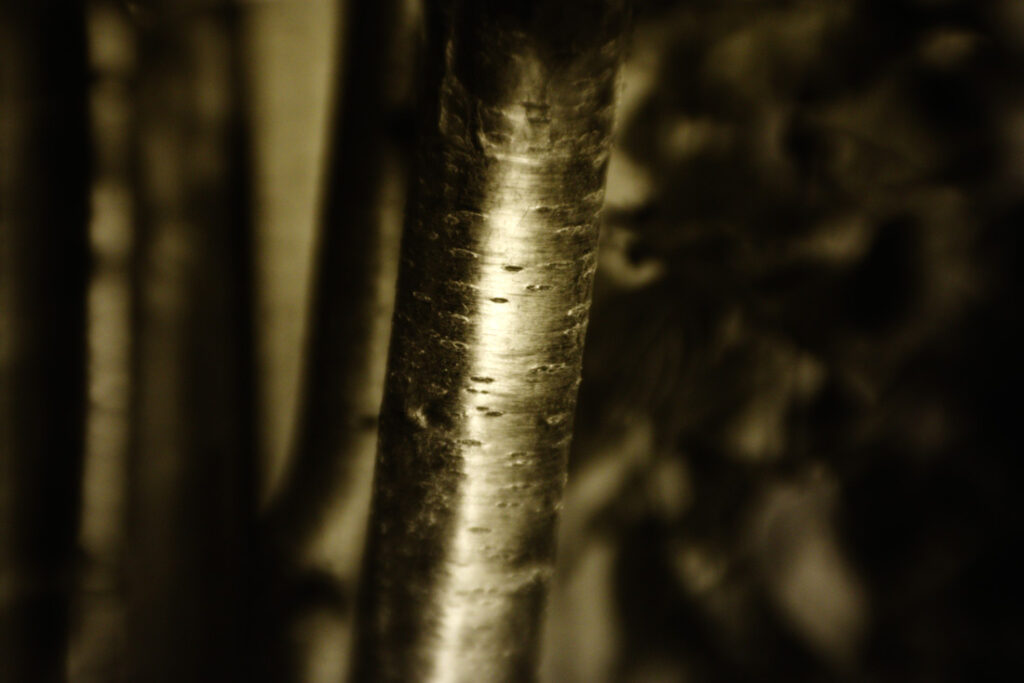
Does it work in the UV? Interestingly, in the UV when using a Baader U filter, the lens no longer focuses to infinity. In hindsight that isn’t a huge surprise, and I’d expect it to be more of an issue the further into the UV I go with it. It does however still focus with more close up subjects. This was a picture of the trunks of cherry trees in my garden, taken in the UV with the Baader U filter and Nikon d800 camera.

UV image taken using the modified Nikon UV lens

The lens will certainly autofocus in the UV (if there is sufficient UV for it to do so). It’ll be interesting to see if this still works even as far into the UV as 254nm.

The good thing about using the Thorlabs SM1 tube means that mounting other lenses becomes quite simple if I want to try them out. For instance this is a rather more chunky OptoSigma80mm excimer lens which is triplet construction. This does fit (as shown below), and the focus system still works despite it being much heavier. In theory this should offer better correction than the single Thorlabs aspheric lens, but that remains to be tested.

OptoSigma UV 80mm lens installed

This was a fun little build, and the result is a very compact UV capable autofocus lens which I can use on a variety of camera bodies (although it will be autofocus only on my Nikons). Will it change how I do my imaging work? I doubt it, but I got to learn about how lenses work, and it showed that it was indeed possible to use existing camera lens bodies to carry new and interesting optical elements. I also got to learn a bit more about the optical properties of the glasses used in commercial camera lenses. Thanks for reading, and if you’d like to know more about this or any other aspect of my work, I can be reached here.
Multispectral imaging of silver in the UV

Some experiments are complex to setup but easy to do, others are in theory simple to attempt but in practice quite time consuming to carry out. This little experiment was not particularly hard to do, but took quite a lot of time to setup and get the images and process the data. Quite a neat result though, so I thought it was worth sharing.

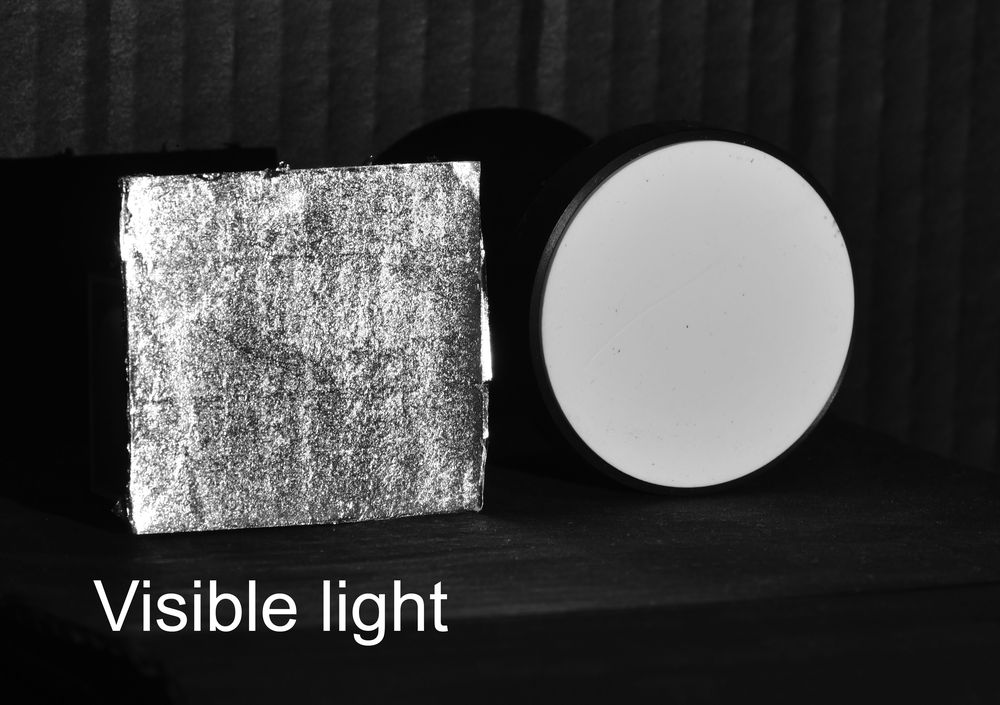
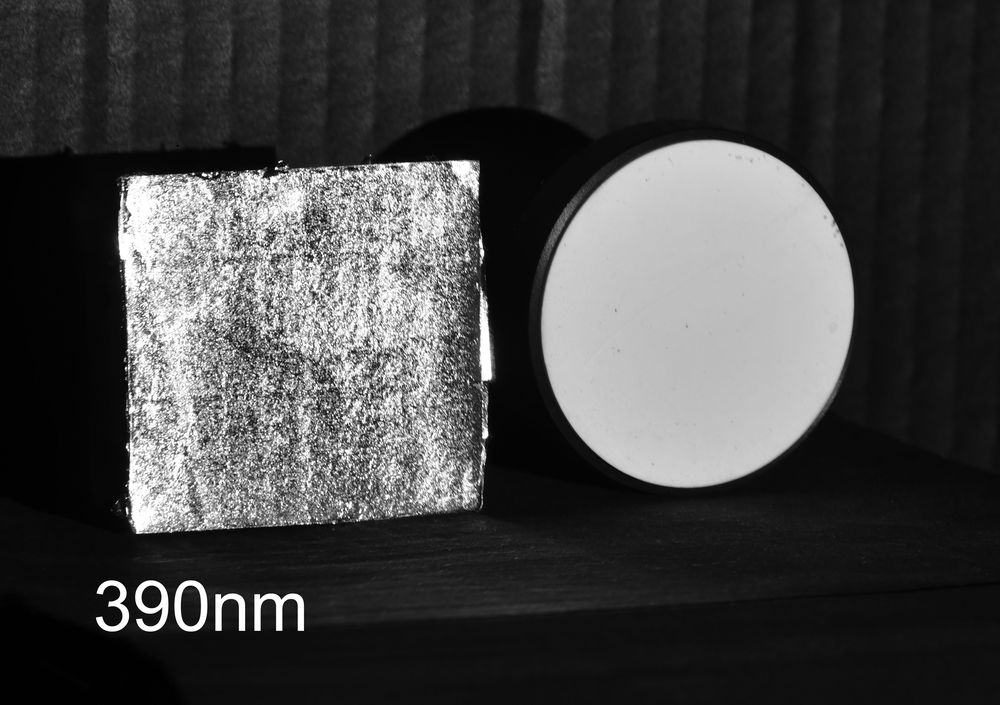
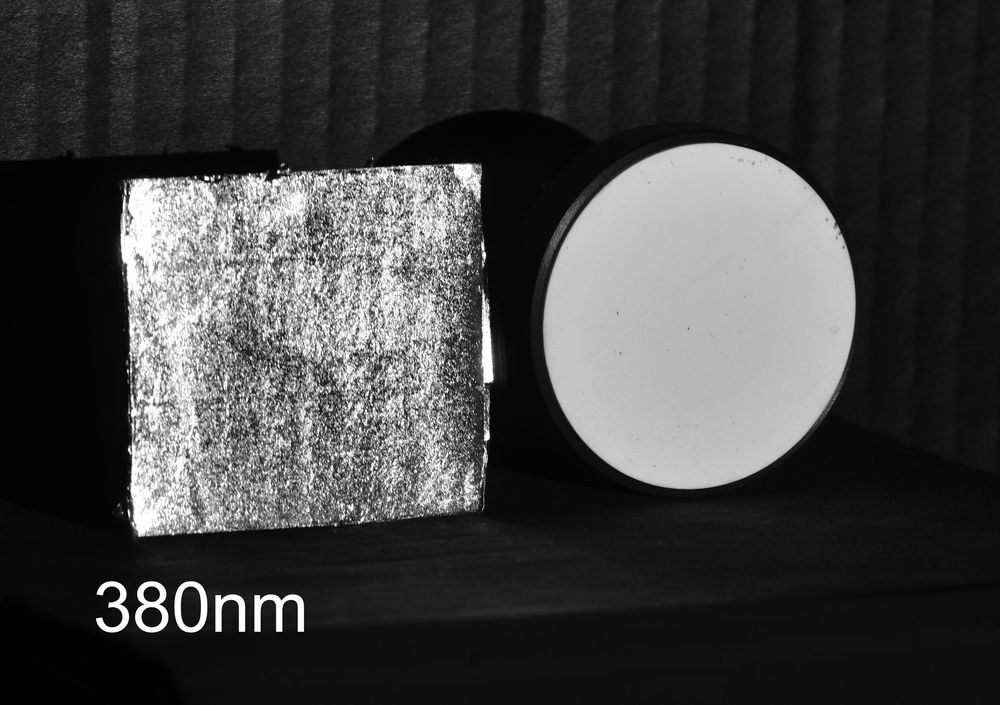
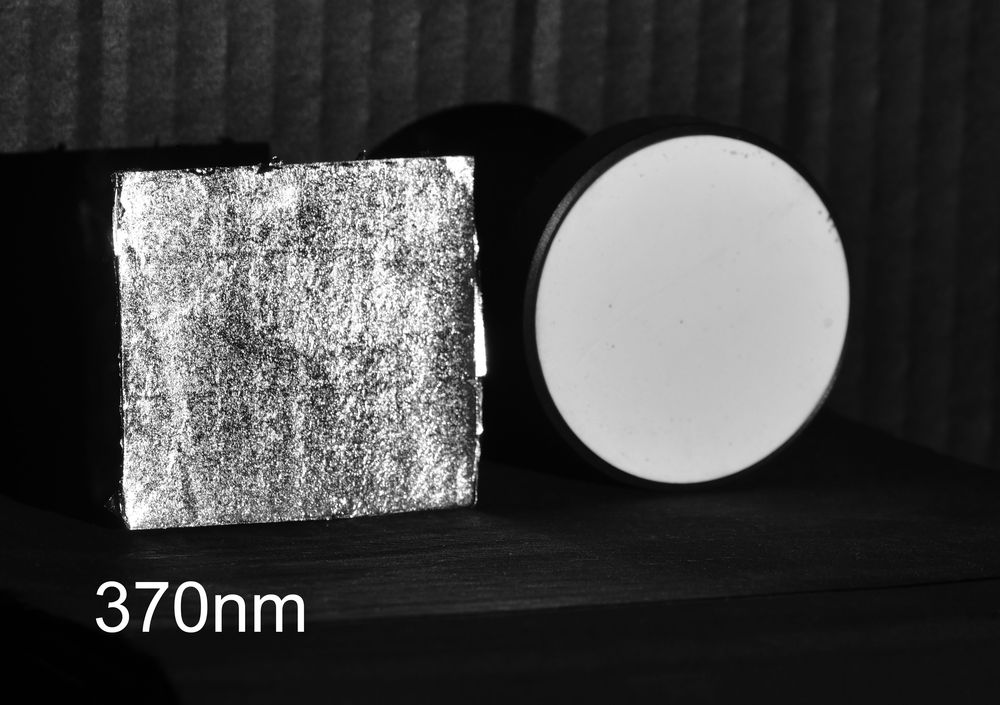
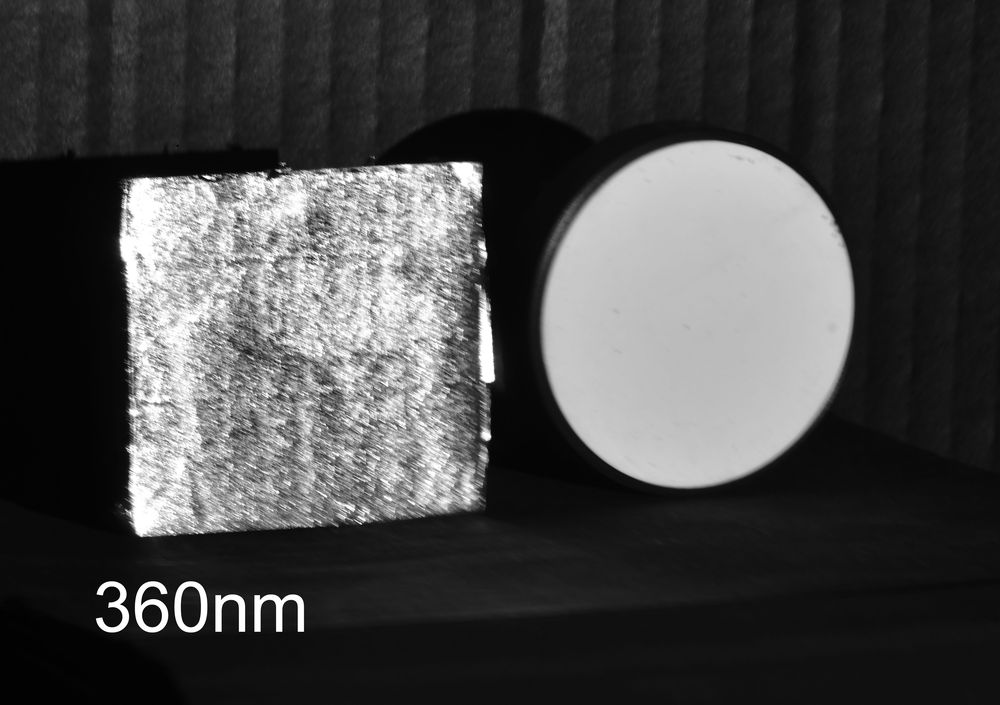
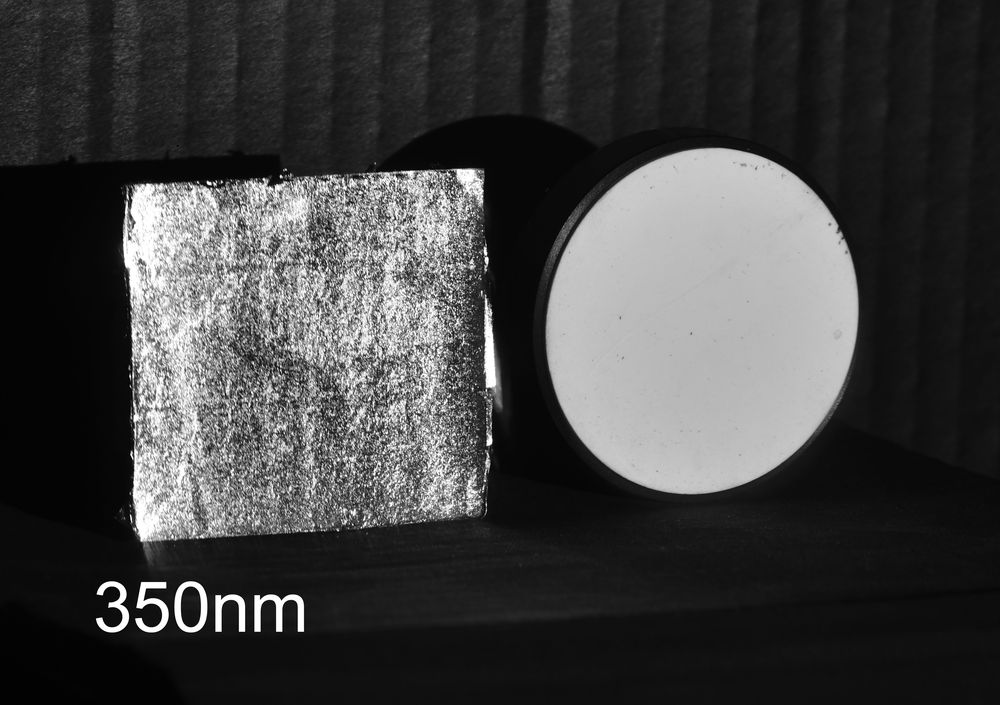
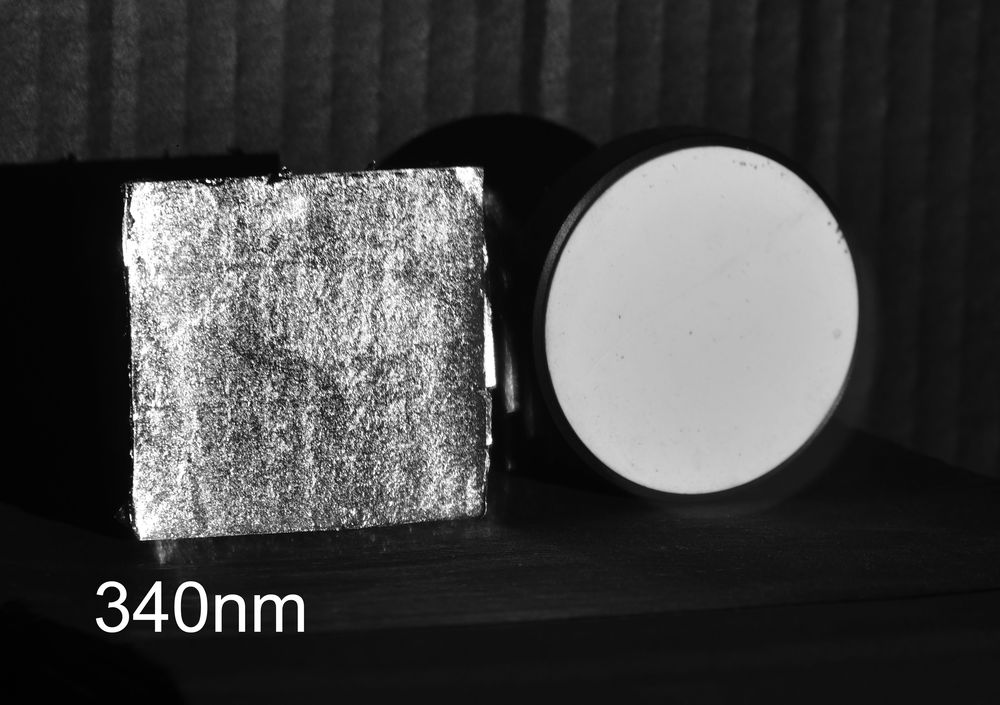
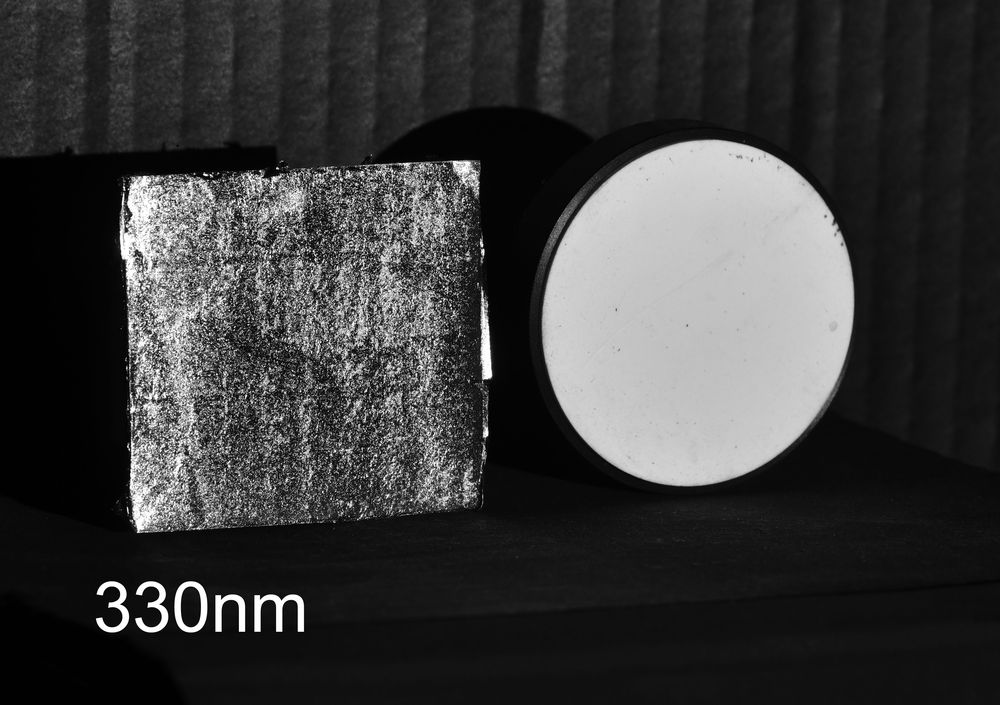
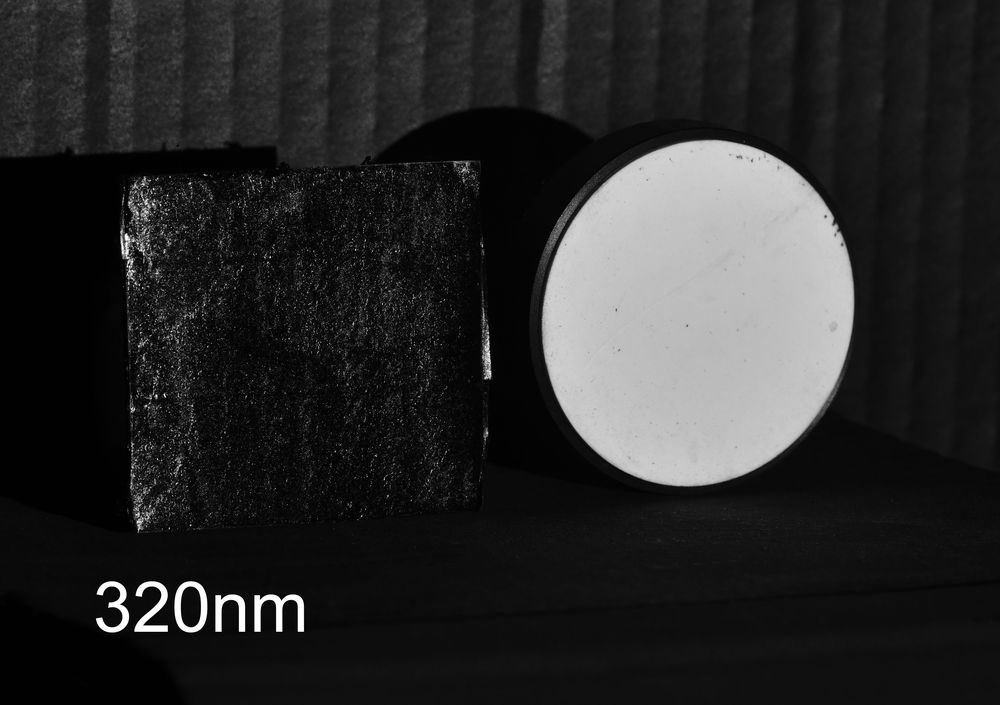
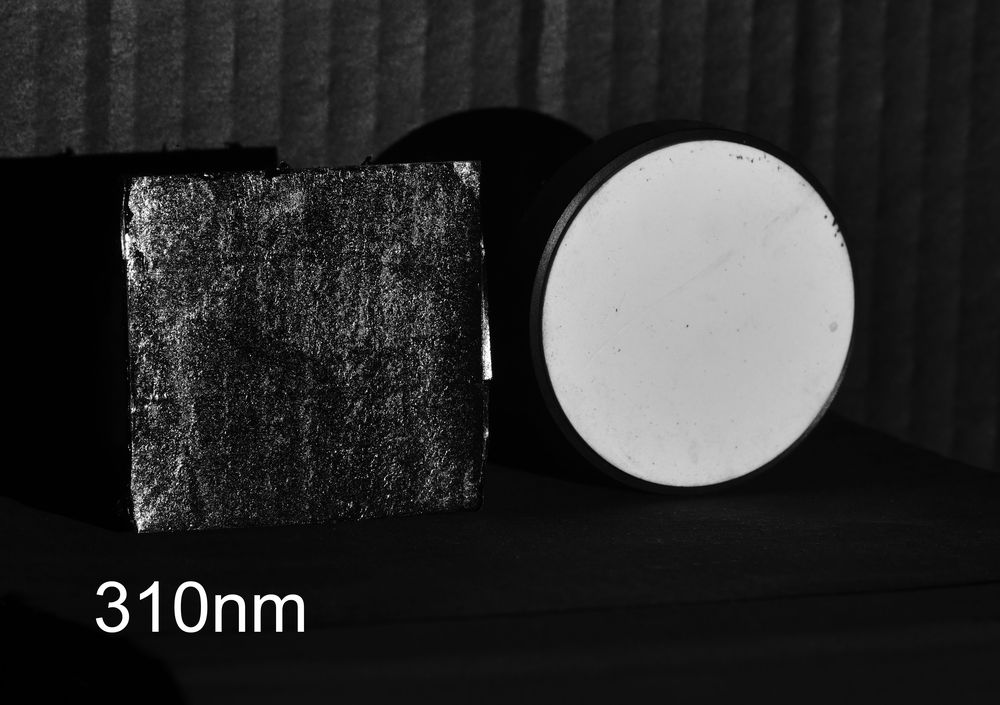
This came about after a discussion on the Ultraviolet Photography forum, about the behaviour of the metal silver in the ultraviolet. Silver should have a strong dip in its reflection curve at around 320nm, as shown here, and it got me wondering whether I could image that with my UV camera setup. Not having loads of silver laying around the house I ordered a couple of sheets of edible silver leaf which is used in cooking, and mounted some on a piece of cardboard.

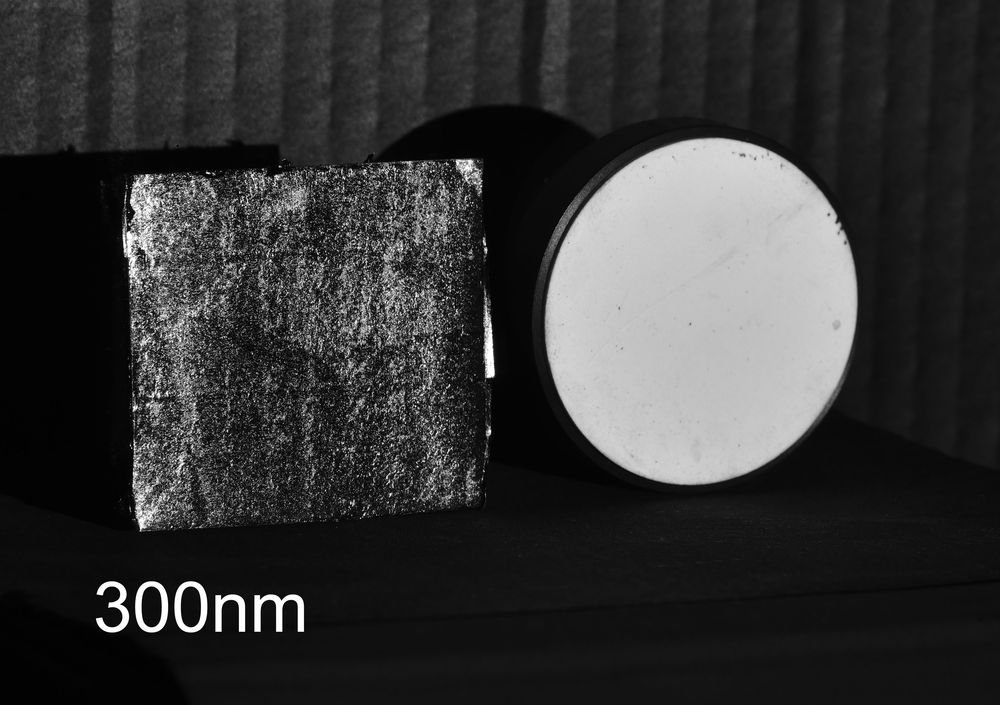
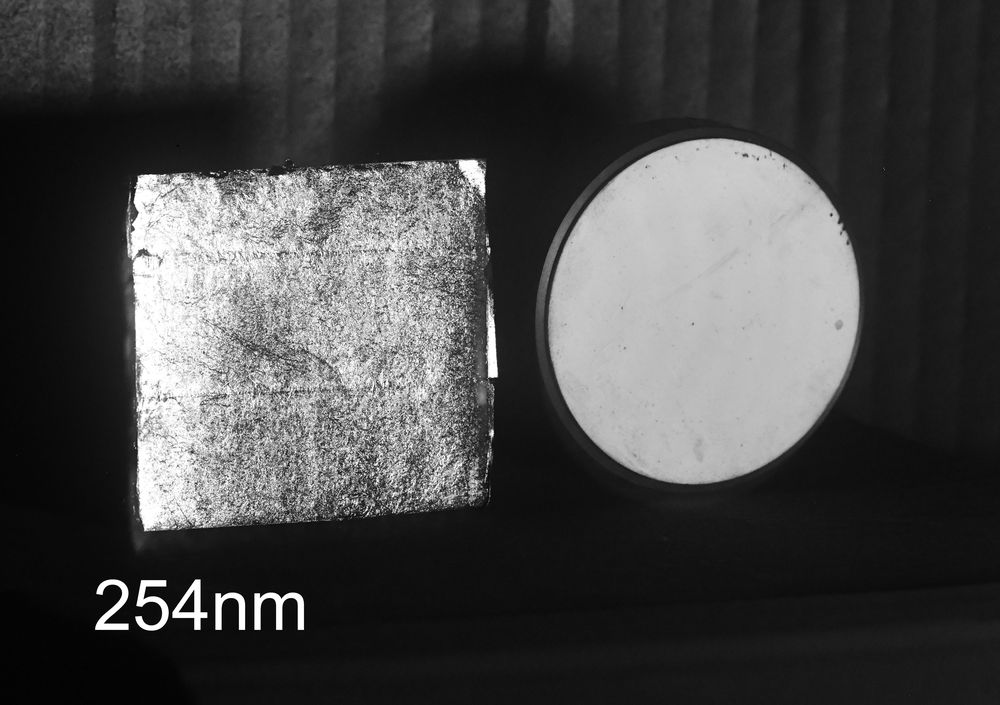
Imaging wise, I placed the sample in a box painted with Semple Black 3.0 paint to keep the reflections down. I also included a 99% Spectralon diffuse reflectance standard along with it. This was so that I could balance the exposures at different wavelengths and loo for differences in how the silver appeared. Camera was a monochrome converted Nikon d850 from MaxMax, lens was a 105mm UV Rayfact. Filters were a mix of Baader UV/IR for visible light, Thorlabs and Edmund Optics bandpass ones for 390nm to 300nm (along with a Hoya U-340 4mm for the 300nm image as the bandpass filter leaked a bit), and a 254nm bandpass filter from a forensics camera. Light source was a Hamamatsu LC8 200w xenon lamp which I used down to 300nm and a UVP 254nm filter lamp for 254nm. You can see now why it was time consuming.

The images were as follows.

The images did indeed show a very sharp drop in reflectance of the silver at around 320nm. Yay, the images back up the data from the reflectance graph. Good to know the edible silver leaf is indeed silver.

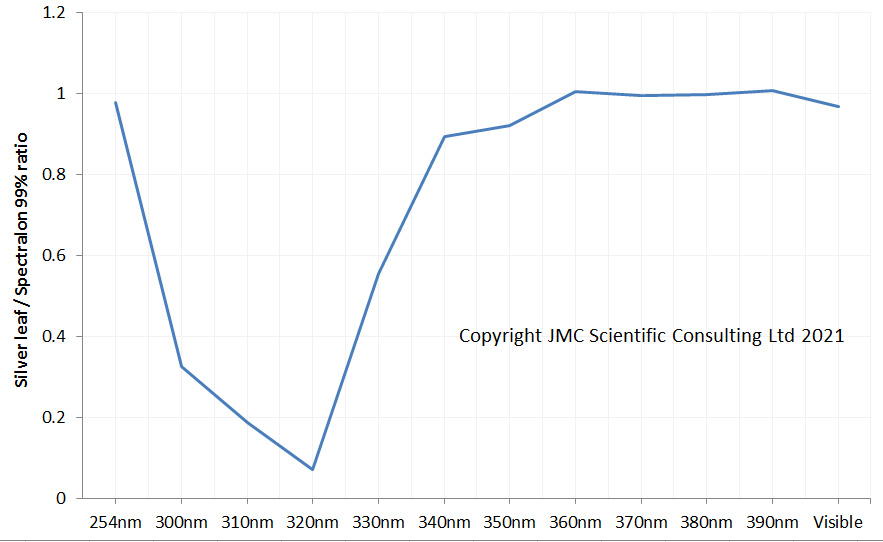
Including the Spectralon standard allowed me to compare the channel response from the silver with that of the Spectralon, and plotting that gave the following.

Plotting out the channel response does indeed show the strong dip in reflectance at 320nm and matched the literature data well down to 300nm. At 254nm though the match is not so good, and I am not 100% sure as to why that is. I believe that Spectralon reflectance starts to drop around 250nm, and I know from imaging at 254nm before that any organic material would be highly absorbing at that wavelength. As a result the 254nm image of Spectralon may be darker than it should be as my sample certainly could do with a clean. If this is darker than expected then it would make the silver seem more reflective than it is. It should also be stressed that at 254nm camera sensitivity is extremely low so of all the data points this is the one I am least confident in. More work needed on that from me to understand it better….

Why bother doing this you may ask, why use a camera in this way? Well, that lovely antique you are interested in buying that is supposedly silver, do you really know that it is? This type of technique can be used to check what materials actually are, and can sometimes be simpler to implement than x-ray methods and less damaging to the samples. However my main interest was curiosity – could I use a camera to see the behaviour of silver in the UV trying something to see what will happen. After all, a lot of research starts with a a curious scientist. Thanks for reading, and if you’d like to know more about this or my other work, you can reach me here.
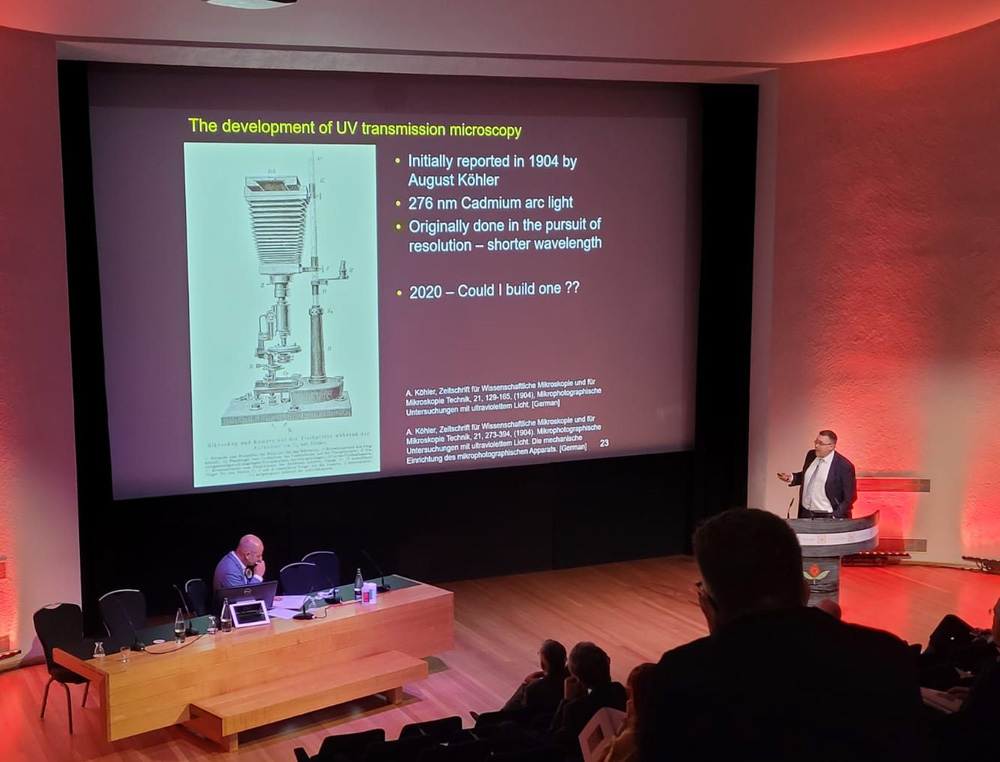
Royal Photographic Society talk – “Imaging the skin – UV, Visible and IR”

Had a great time yesterday giving a talk to the Royal Photographic Society Imaging Science Group about imaging skin with ultraviolet, visible and infrared light.
Active for over 100 years, you can read more about the Imaging Science Group and their activities here, as well as finding out about their upcoming talks for October and November. My talk covered cross polarization, UV and IR photography of skin as well as applications of UV fluorescence in dermatology. The talk was recorded, and can be viewed on the RPS Imaging Science Group website, along with the other talk from the evening on UV reflected and fluorescence imaging of plants by my fellow speaker Adrian Davies, if you’d like to view it.

Thanks again to the folks of the Imaging Science Group for inviting me to talk to them.