
Very often I get caught up in showing my microscope images, and while they are nice to see the magnifications can sometimes be so extreme it is difficult to get a feel for what it is you are actually looking at – for example see below, which shows part of a diatom taken using 313nm light on my UV microscope.
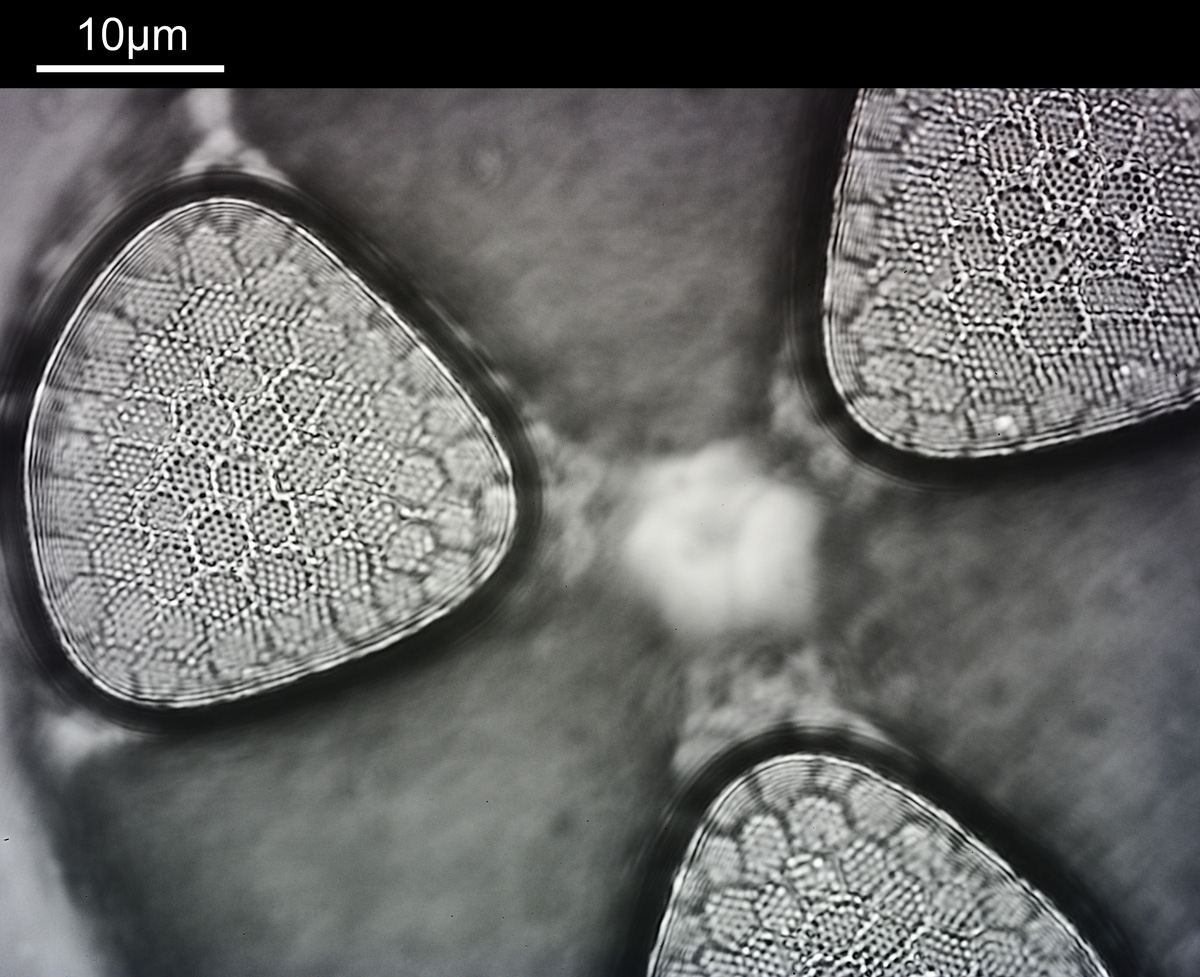
I’m not too good on naming diatoms yest, but I think the one above is an Actinophycus senarius. Today I want to go on a bit of journey with you, from large scale down to the very small. We will go from ‘centimeter’ down to ‘nanometer’ and take a look at the images at those different scales. Note, the images being shared here are low resolution ones of the originals, and and as a result are less sharp than the originals, but ideal for sharing online.
We start on the large scale with the microscope slide itself. This is standard sized one of 7.5cm by 2.5cm and the image was just taken with my camera phone.
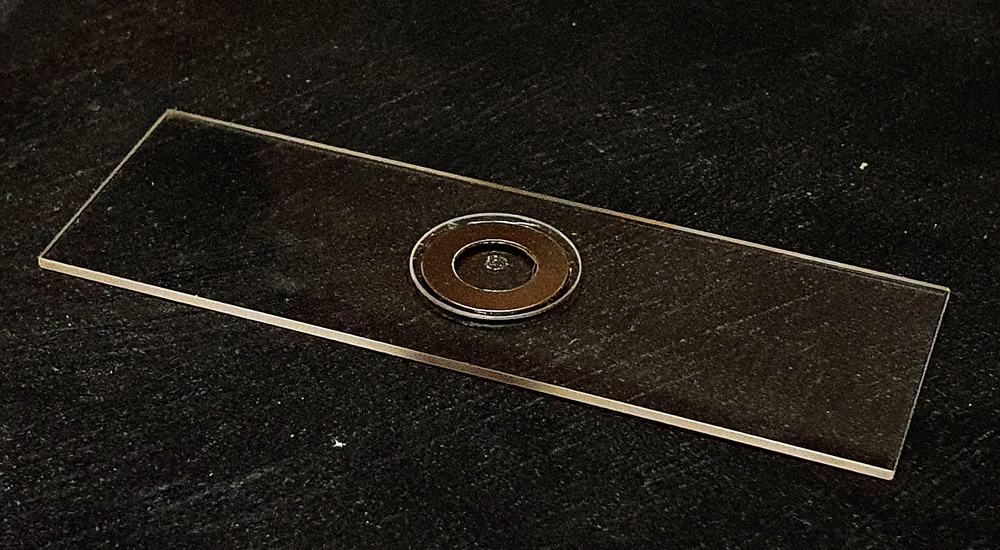
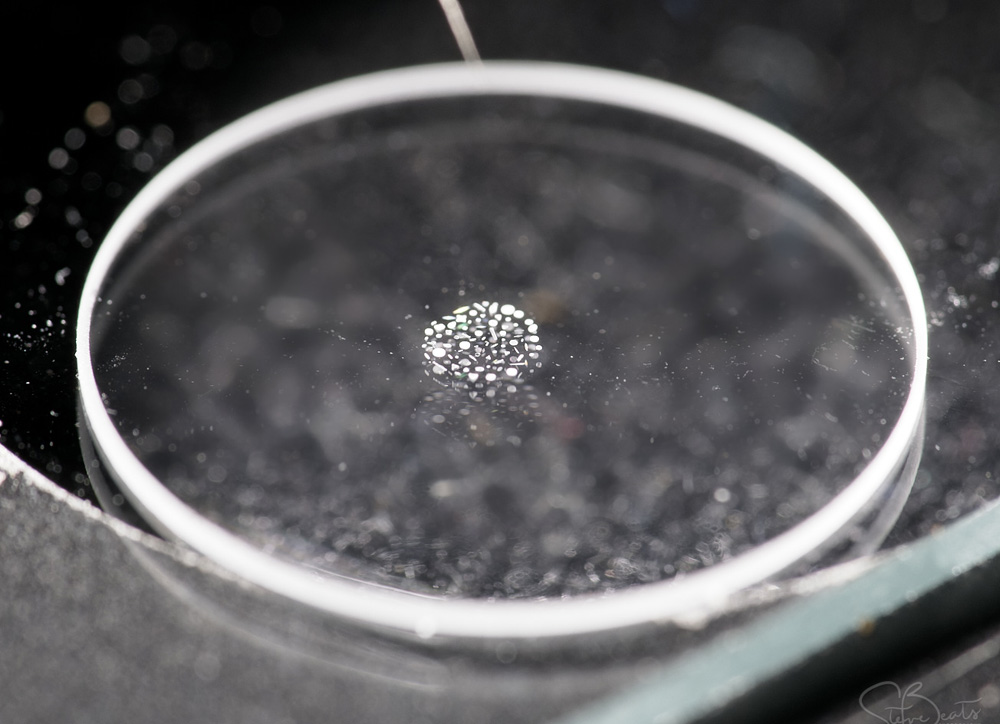
This slide and coverslip is quartz rather than glass to allow me to use short wavelength UV light to look at the sample – glass would be essentially opaque down at 313nm. The diatoms are in the middle of the slide surrounded by a metal washer and with a coverslip on top, and in the image above you can just about see it. It becomes easier to see if we zoom in a bit – the image below was from the gentleman who very kindly made the slide for me and you can make out the individual diatoms in the arrangement. This cluster of diatoms is about 2mm across.
Next, I thought it would be good to get an overview of the diatom arrangement using the microscope. I should say at this point that all the microscope images which are shown below were taken using a monochrome converted Nikon d800 (conversion done by MaxMax in the US). This has very good UV sensitivity and tends to be my ‘go to’ camera for the microscope.
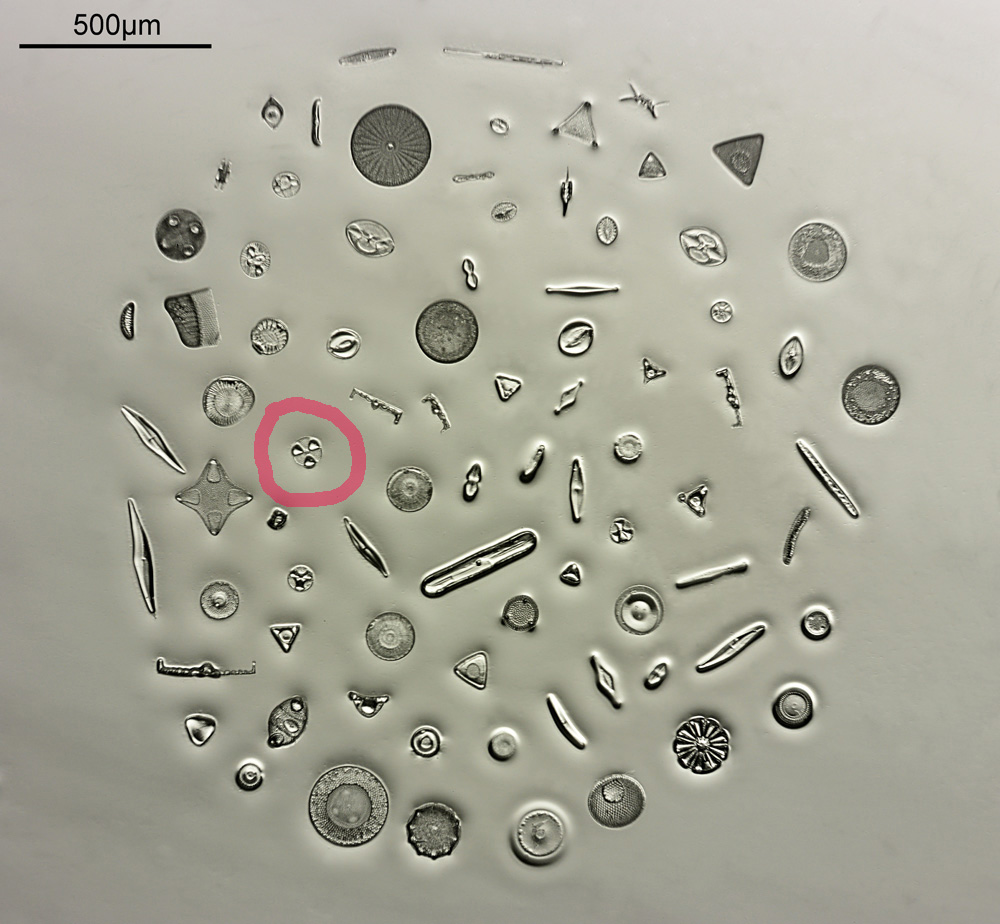
The image below was taken using white light bright field imaging using a 4x Zeiss Planapo objective, and with oblique lighting.
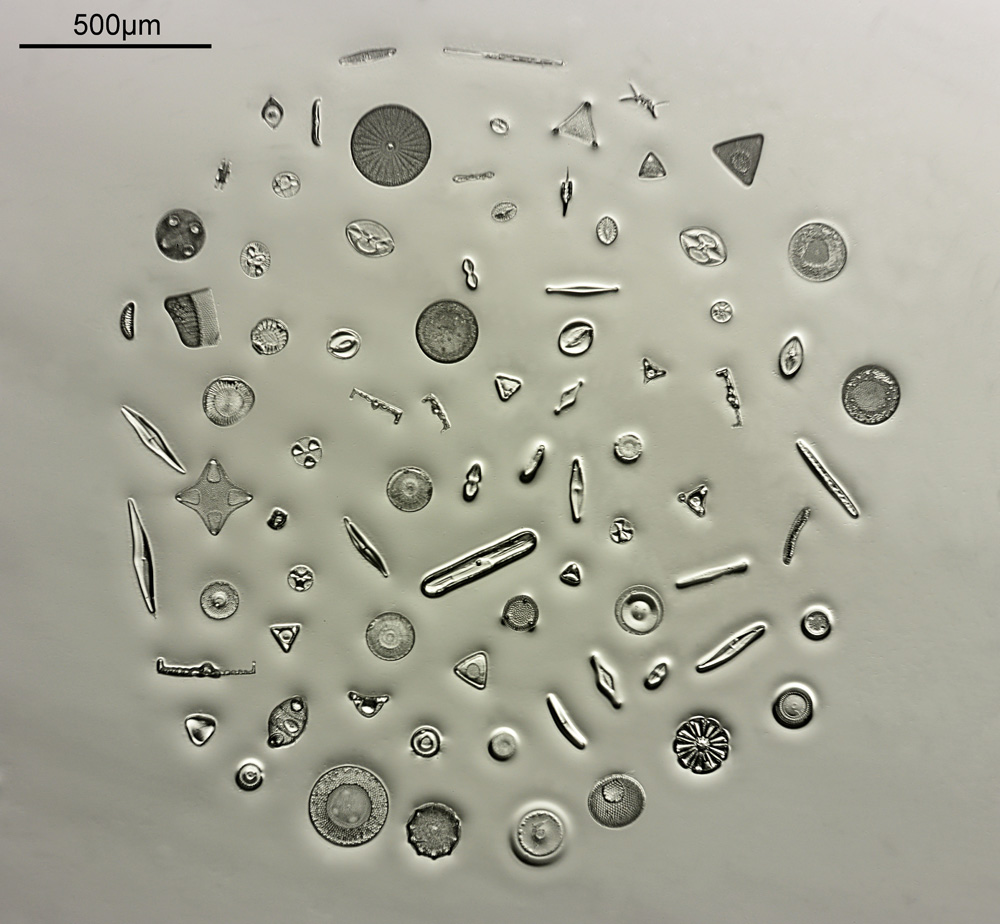
With the image above you can see the individual diatoms, but it is difficult to make out structures. As you can see the whole arrangement is about 2mm across. The objective has a relatively good Numerical Aperture (NA) for the magnification – the NA is 0.16 – but it is not going to be enough to show fine structure. Using oblique lighting (I used an Olympus Aplanat condenser which has this ability built in to it) gives an almost 3D appearance to the image.
The next stage is to highlight a specific diatom and look closer with a higher magnification. The one I’ll be looking is highlighted in red in the image below.
To look closer it’s time to go to a higher magnification (a 40x objective) and use 313nm light – the shorter wavelength gives better resolution for a given numerical aperture. The objective of choice was a Leitz 40x UV objective with an NA of 0.65. I used a Zeiss quartz condenser with an NA of 0.85, and the image was straight bright field. First I’ll show two images of the diatom in question.
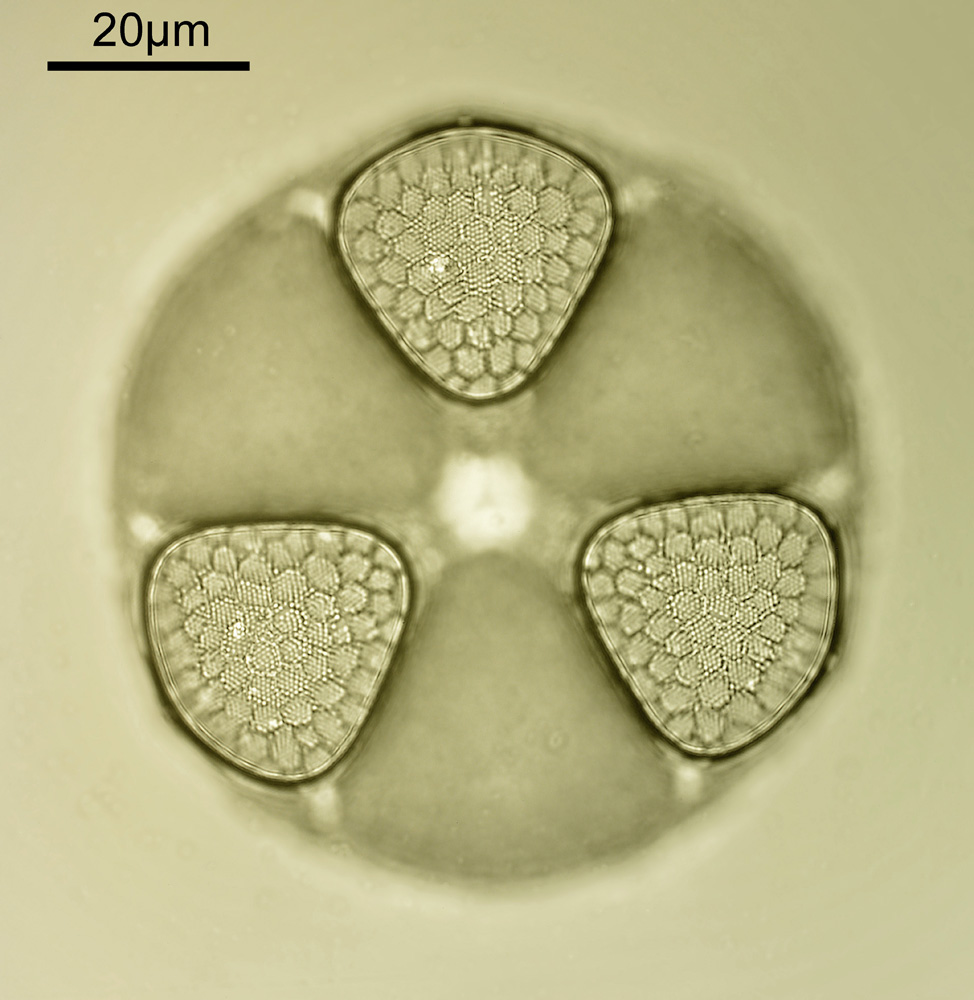
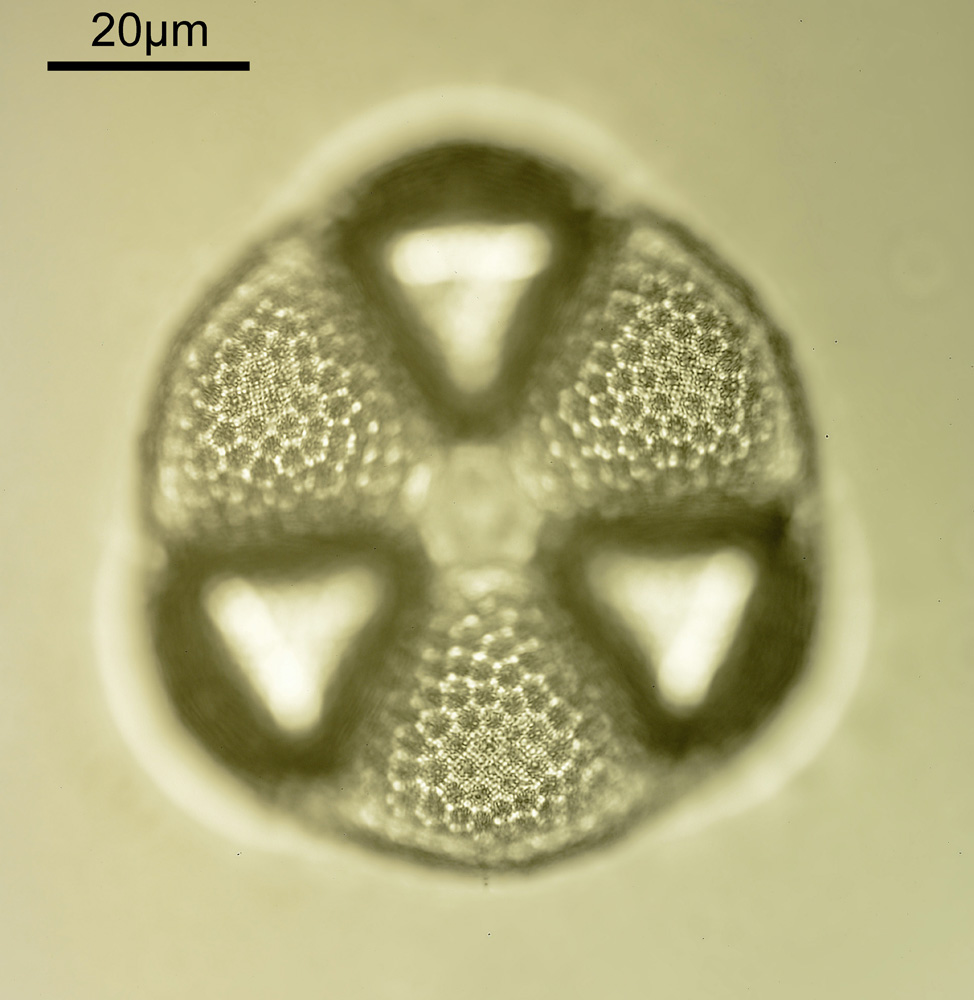
As can be seen, even at this magnification, the depth of field is very shallow, and the height of the sample needs to be changed to get the high and low parts of the top surface of the diatom in focus. When the top of the sample is in focus, it is very sharp – this part of the diatom is what is fixed to the coverslip using gelatin. It is possible to combine the two images above using stacking software (I use Zerene Stacker), to produce the following.
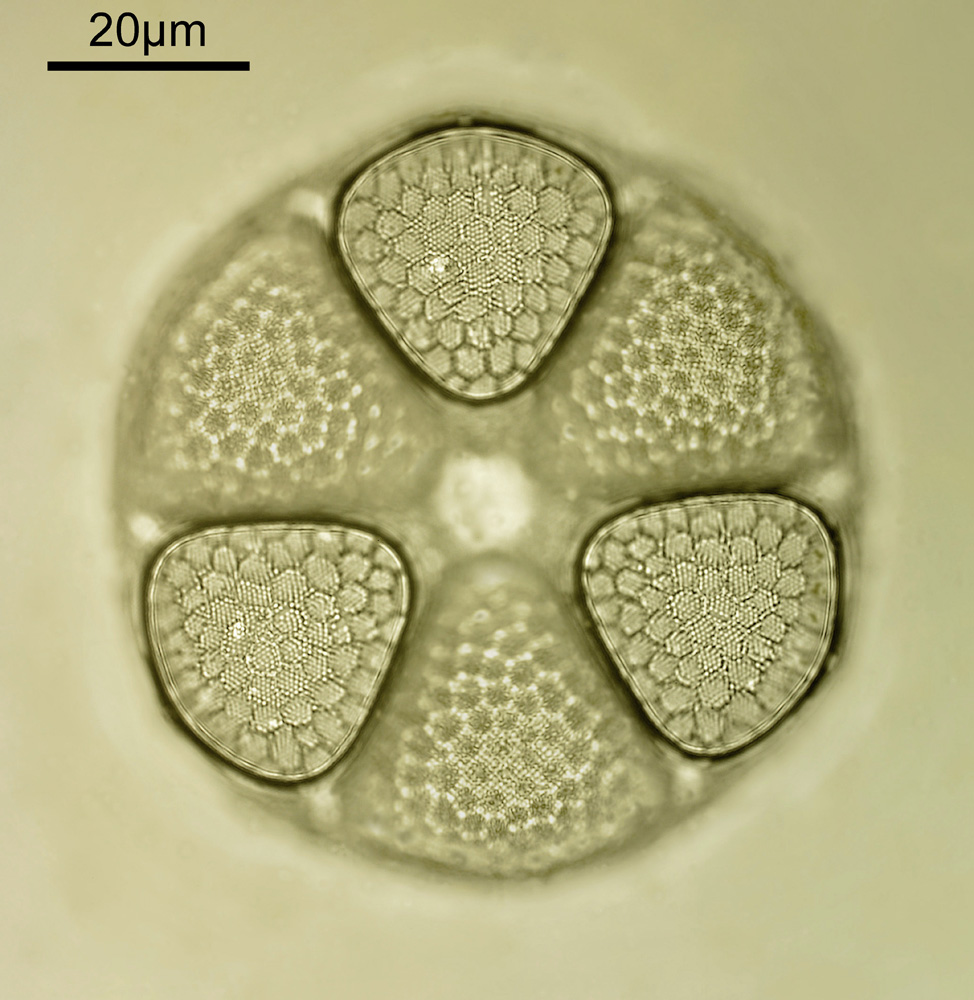
With this magnification, it is possible to make out some small features on the diatom, and it shows it in its entirety, so it is a good intermediate magnification to use. But I can go to even higher magnifications and with an objective with a larger NA to get even more detail.
Next, we have an image showing part of the diatom using a Leitz 100x UV objective and Zeiss quartz condenser with an NA of 1.25, again at 313nm. The image is now shown as monochrome rather than sepia toned and has been rotated 90 degrees. This is the same image as at the top of this article.

At this magnification and with such a high NA, the depth of field is now tiny, and the best focus is on the parts of the diatom with the gelatin which are attached to the coverslip. The observant amongst you will have noticed that there is any array of dots on the parts of the diatom which are in focus. In the 100x image, these look black, and in the 40x image they look white. I’ve noticed this with diatom images, as you slightly change the focus, what looks to be dark dots go white, and then dark again. I believe this is to do with the size of the dots and diffraction of the light as it comes through the holes – as the light comes through it diffracts and then as you change focus you get constructive and destructive interference, and the features change from light to dark. For the 40x image, it happened to be where thy looked light, and or the 100x image, it was sharpest where they were dark. As they are holes, it makes sense to me for them to look dark.
For a final image the one above can be cropped, focusing in on the top right had part. This is shown below.

In the cropped image the holes themselves become quite clearly resolved. Those ‘holes’ are about 300nm across. Normally to get images with this type of resolution, it’d be easier to use scanning electron microscopy, and while it would be possible to resolve these features with optical microscopy without using 313nm UV light, it becomes complex, relying on either more involved lighting setups, or more processing, or even different ways of preparing the sample. With UV, because of the short wavelength involved the resolution for a given NA increases (as per Abbe’s equation), and in fact this was originally why UV microscopy was invented – the pursuit of resolution. While it is an old technique now (and I have even had some microscopists describe as a ‘dead technique’ than no-one would use these days) it still has its uses in the 21st century. As a technique it is actually relative simple to do (once you have the equipment), and means that simple bright field imaging can be used making image capture and processing less complex.
I’ll be giving a talk on the design and building of my UV microscope at the Royal Photographic Society Imaging Science Group Good Picture Symposium 2022 in London in December (for details see here) where I will go into the challenges with the technique and share more high resolution images taken with it, including some of my work on the imaging of sunscreens, which is what got me started on this journey.
It’s been fun going from something that is large enough to be seen by the naked eye, all the way down to the nanometer level, and I hope you have enjoyed it as well. As always, thanks for reading, and if you’d like to know more about this or any other aspects of my work, I can be reached here.