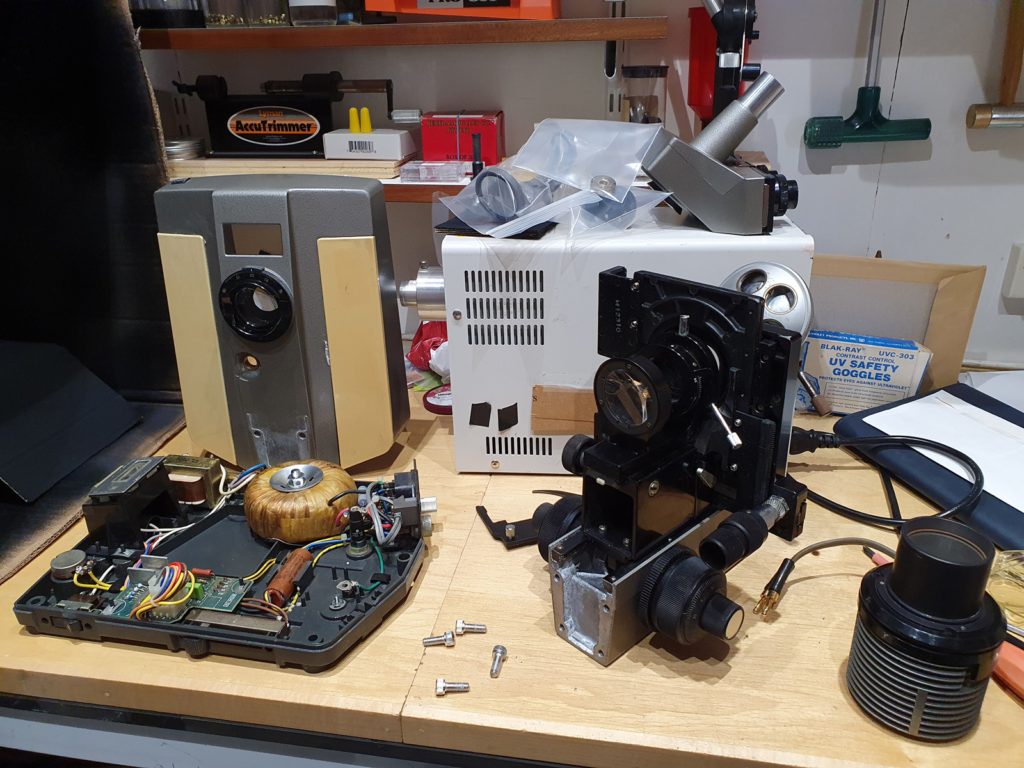
I’ve bought myself an Olympus BHB microscope to learn a bit more about microscopy, and while the price was good it’s in pretty poor condition. The work has begun to get it operational again. Thankfully these older microscopes are fairly easy to dismantle, and after an hours work, it’s currently looking like this…..
Microscope teardown has begun….
For those born after 1980, those things on the left are electronic components from before the advent of integrated circuits.
So far, I haven’t identified too many more issues with it. Taking it to bits enabled me to get at various bits which needed cleaning and lubricating (and boy, did they need cleaning).
Thankfully the optics look to be in pretty good shape, so with a little bit of tender loving care I should be able to get it working again.
So, what to do when work goes a bit quiet because of what’s going on with Covid-19? Learn a new skill of course. Given my interest in all things imaging, it is perhaps surprising that I have very little experience with optical microscopy. In previous jobs and projects there were always microscopy experts as part of the team, and I used to look on in awe when they’d create these amazing images.
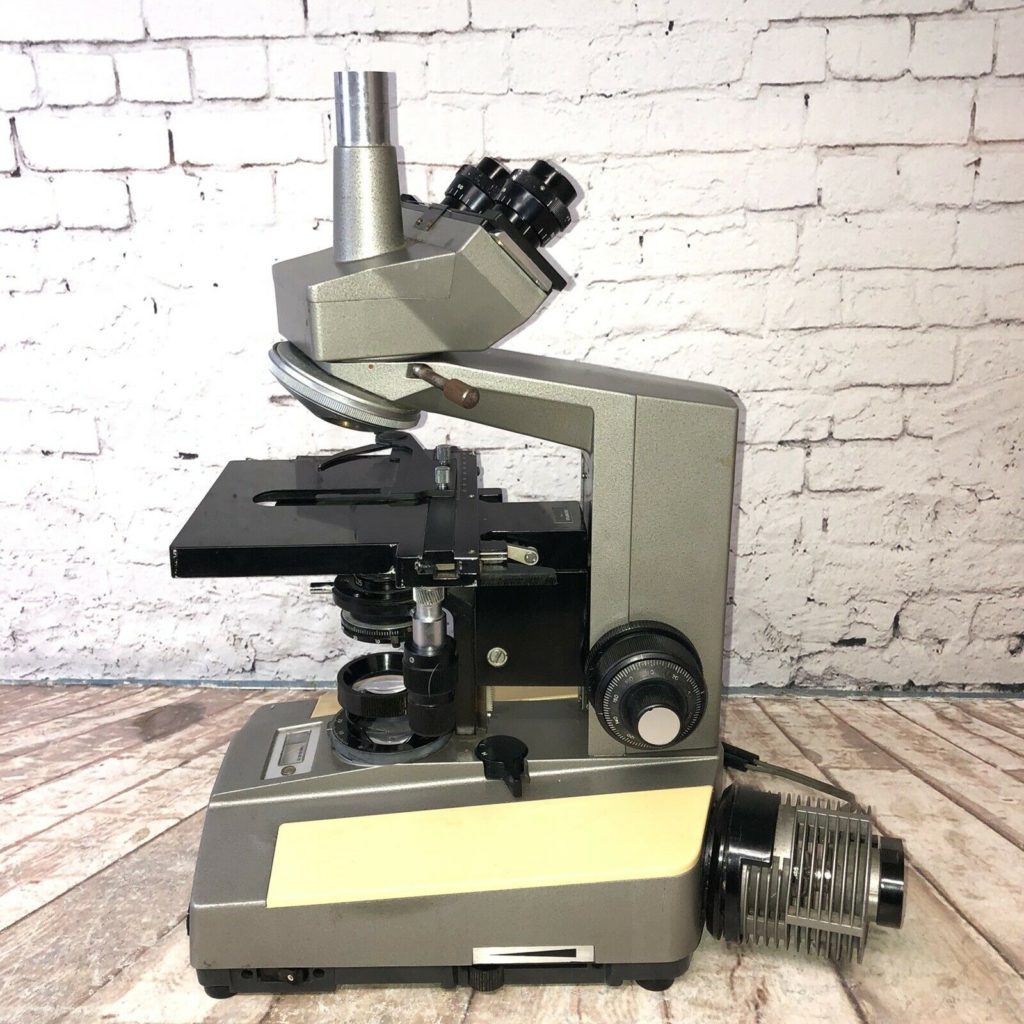
A few days ago I thought it was time to jump into the world of optical microscopy, learn something new, and perhaps put together a system which I can use for UV imaging at the same time. Instead of buying a new, ‘plastic fantastic’ microscope, I decided to get an older one which would hopefully be simpler to work on. As I found out though, older microscopes still command quite high prices, presumably because they were so well made. After a quick search on eBay, I found an Olympus BHB from the 1970’s, with no lenses, and advertised as ‘not working’. The price however was low, so I contacted the vendor and we agreed on an even lower price. So begins the journey of discovery I’m calling ‘Project Beater’, and the name will become obvious later…..
Project Beater – the start point.
Surely, if it’s not perfect now, how hard can it be to get running again……. Oh, how ignorance is bliss.
The microscope arrived yesterday, well packaged, and pretty much as shown in the pictures in the advert (one of which is above). Once unwrapped, and on the bench, the areas that needed working on started to become apparent, and then more things became apparent, and more, and more. The snag list so far stands at;
There are no eyepiece lenses. This was mentioned in the advert, so some old 10x ones are on order.
There are no objective lenses. Again this was in the advert, and isn’t a problem, as I have a few on order. Given my interest in UV imaging, I wanted to source some very specific objectives anyway, so this was actually a benefit as I wasn’t buying ones I didn’t need.
The light source bulb has blown, so a new one will be sourced. Also, the cable for the light source has been modified to run from an external power supply, rather than the one in the microscope itself. So I need to either get an original plug for the cable, or just run it from an external power source. I’d like to get an LED source up and running for this at some point anyway, so this isn’t a huge issue.
The light path selector in the observation tube was stuck, and wouldn’t slide freely. This has been fixed now after loosening off the mounting screws, and a bit of jiggling, as there was something blocking it.
The high/low magnification light source selector was stuck, as the grease used in it had gone very sticky. All these bits are now out ready to be cleaned.
The field iris diaphragm adjustment ring is extremely stiff. I haven’t figured out how to get this out yet to loosen it off (this could be tricky).
While it has a trinocular head, I have no way of attaching a camera yet, although I have some ideas for that.
Overall, it is filthy and in places some of the metal in the body is quite corroded. I get the feeling this has been dumped in the back of a cupboard for 20+ years, and has been generally neglected. So an overall clean and lube is needed.
Welcome to Project Beater, and given the snag list above, the name now becomes obvious. I hope over time to get this up and running again into a usable microscope. However if not, there is a fall back option. The focus block would make a good macro photography focus rail, so if the microscope proves to be beyond resurrection, the hacksaw will be coming out, and it’ll get cut up and reused. In the current climate where reuse and recycle are becoming more and more important, just trashing this is not an option.
Why bother doing this? Why not just buy a new microscope? Other than the obvious of not going with a new deice, these are valid questions. One of the reasons for me was to get something that required a bit of work, to get me to learn something new, as it’s only by learning how something works that you can figure out their limitations and where things can be improved. If I can get it working again even better.
At this point I would like to give a quick shout out (that’s such a corporate phrase) to Best Scientific in Wiltshire, UK. They didn’t supply me with the microscope itself, but they have been great regarding getting hold of the objectives I was after, and in general advice on all things microscopy.
If you’d like to know more about any aspect of my work on imaging and skin, you can reach me here.
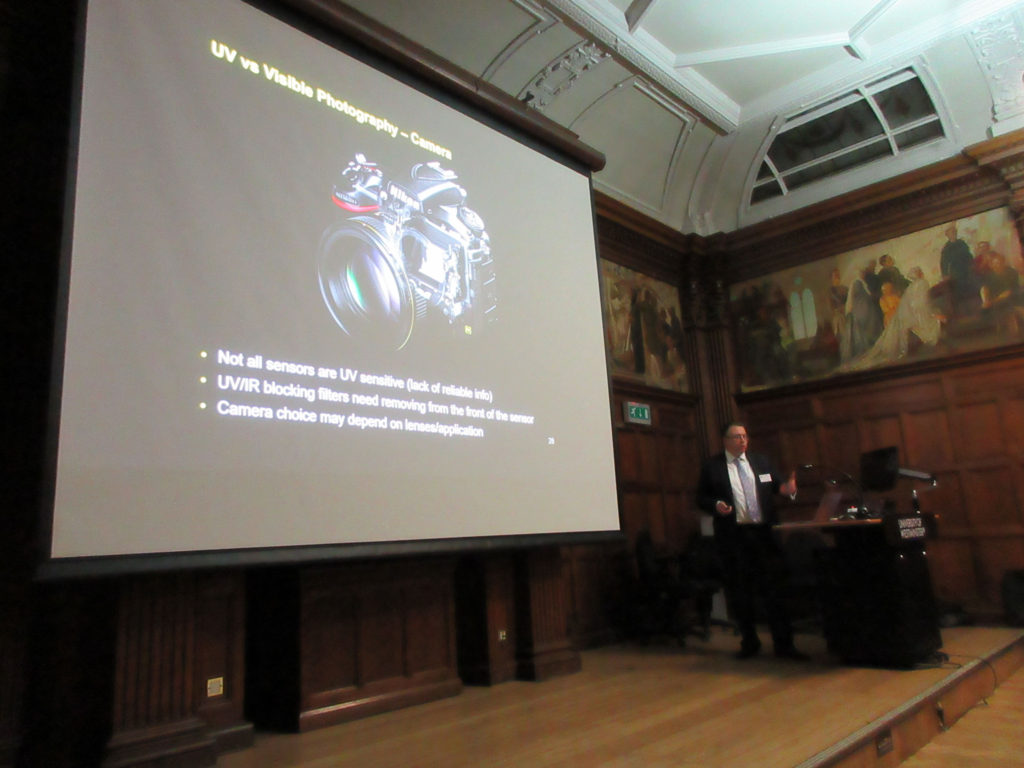
Had a great day on December 14th when I gave a talk on skin imaging with UV, IR, and fluorescence photography, to the Royal Photographic Society, Imaging Science group at University of Westminster London (link to the event here). Fun day with some very knowledgeable fellow imaging geeks. #RPS
Some new photographic products have obvious uses and markets, others, well, other that come along, can be a little more difficult to categorise. I came across this recently, a company in the US making a large format digital camera back, which to me falls in to that latter definition;
What they are doing is taking the concept of a type of photography with its roots in wet plate gelatin and bringing it bang up to date. Imagine being able to use those fantastic old plate camera lenses, and to be able to control the perspective and plane of focus through the use of manual controls, combined withe the convenience of digital imaging.
Of course you may well be asking, why bother? For me the key thing is pixel size, and the increase in the signal to noise ratio that goes along with that. Add to that the fact that they are making monochrome cameras with no Bayer filter or microlenses, and this is getting very close to a digital emulsion layer. The monochrome camera should be great for IR and even UV (depending on the cover glass they end up using for the sensor), making this a tool with huge potential.
So, taking all that into account, very much a purists camera. However if the purist wants one, they will need to be well funded, as they are not cameras that will be made in huge numbers or be cheap to buy.
To be honest I find the concept amazing – to see someone push the boundaries of what can be developed like this gives me hope in the future of the art. I wish LargeSense LLC all the success in the world, and I hope they continue to push at the edges of what is possible.
Need a rapid and cost effective measurement of the optical transmission properties of something? Maybe a camera filter for a graph to provide data for a paper you’re writing, or do you want to know whether your product you’re interested in marketing which is supposed to block UV is actually doing so? I now offer a light transmission measurement service. Read more about it here, along with some examples of the type of things I can measure. Contact me to find out more…..
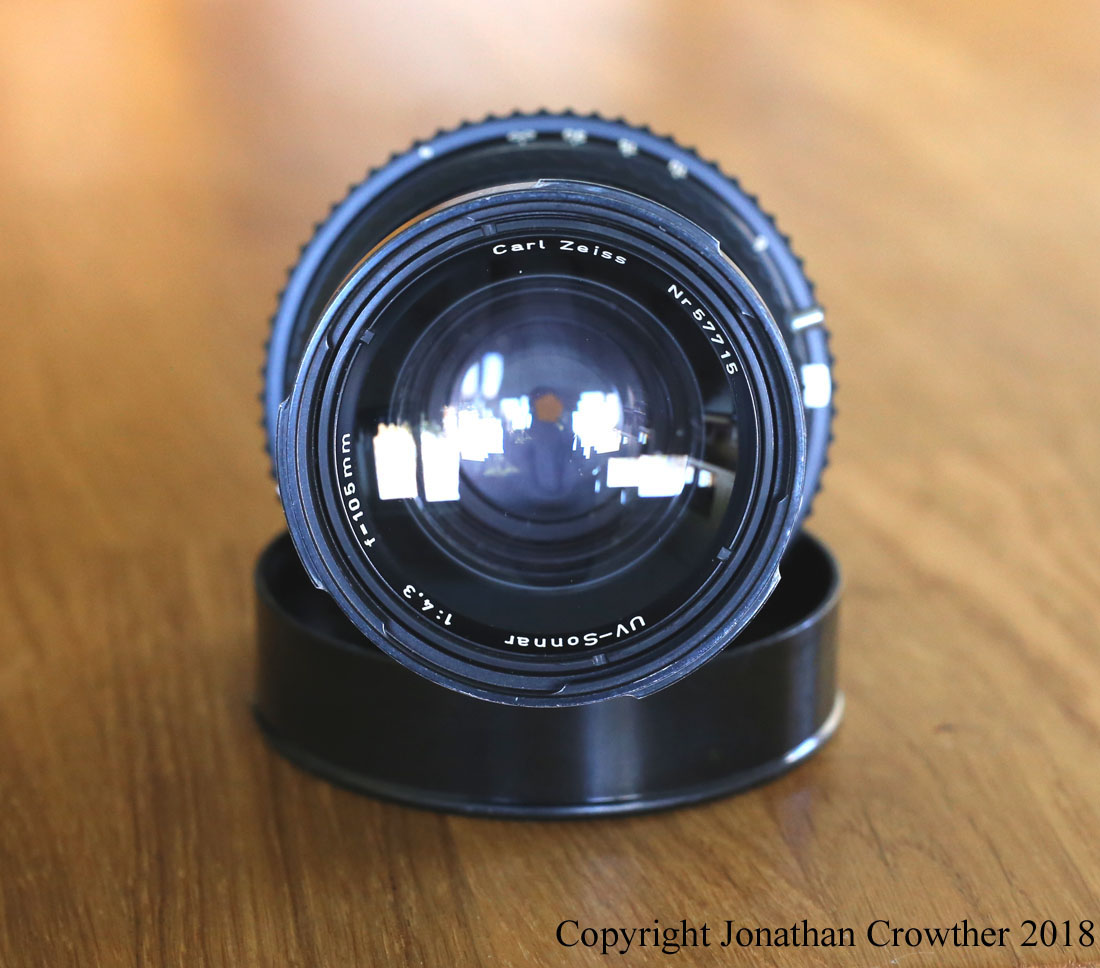
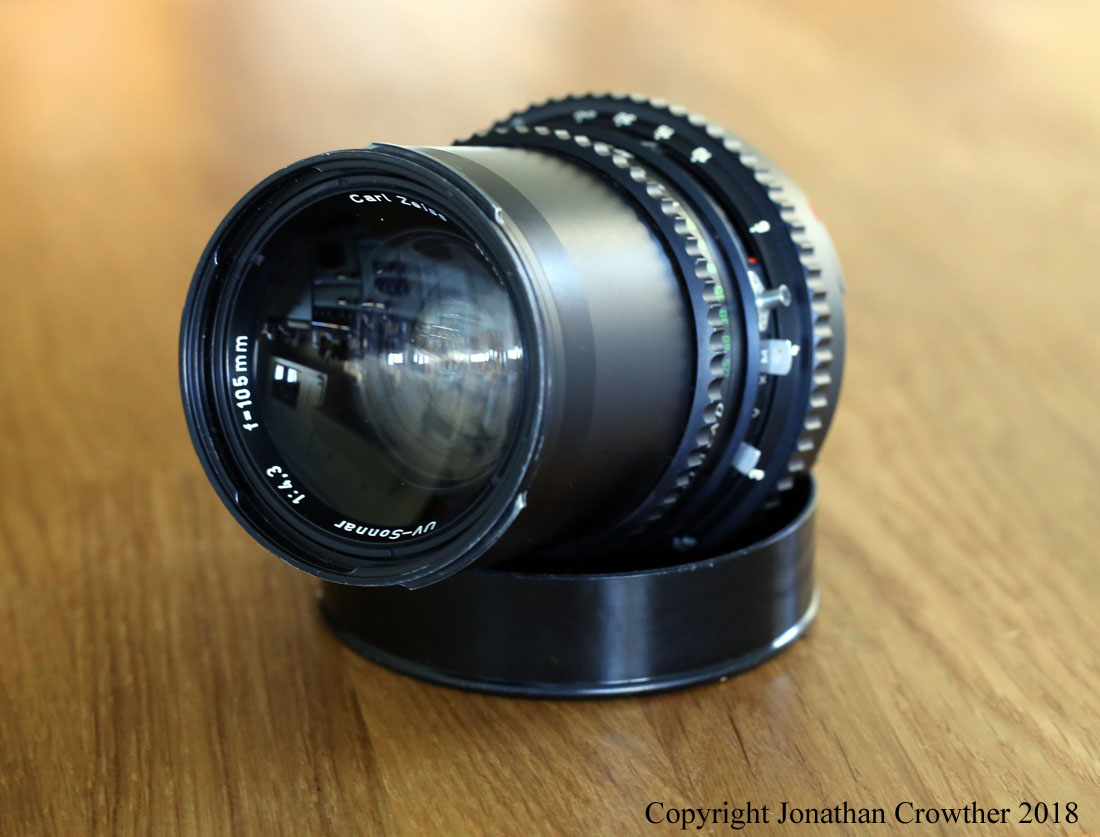
A very special lens has arrived in the lab, a Zeiss Hasselblad UV Sonnar 105mm f4.3. Consisting of quartz and calcium fluoride lenses, this was one of the ones designed for space exploration work with NASA. An amazing piece of history (manufacturing date shows this is one month younger than I am, so unfortunately it would have never made it to the moon), and now to be used for my UV imaging work.
Having recently acquired a Multispectral Monochrome converted Canon EOS 5DSR camera for my imaging work, check out my new article on Monochrome camera photography where I cover the technique along with it’s pros and cons;
I recently found myself needing a black paint for a project I was working on that would be a) very absorbent of light, b ) as neutral as possible over a wide range of wavelengths, and c) be cheap and readily available. A chance conversation with a colleague put me on to Black 2.0, which is a paint developed by a UK artist Stuart Semple (http://stuartsemple….k-art-material/). This is supposedly extremely matt black, and there’s a fascinating story behind the development of it, which is highly typical of the art world and makes for a great read (put simply, it was developed to provide the wider art world a really black paint, after a UK company developed something called Vantablack which absorbs more than 99% of light, and then restricted who could buy it to scientists and one artist in the UK).
Anyway enough of the back story – just how black is Black 2.0? Given I have access to a nice UV Vis spectrometer I got hold of a sample of this material, painted it onto some white card, and compared the amount of light it reflected to a the black tile on a X-rite/Gretag Macbeth Colour Checker chart (old version, pre November 2014). And this is what it looks like;
I was very surprised to see Black 2.0 reflected less light than the X-rite/Gretag Macbeth Colour checker chart black (GM black in the graph). So it’s blacker than a black photographic standard – the proverbial black cat in a coal cellar. Needless to say I was very impressed with it, as it fitted my key requirements (neutral, low reflectivity, cheap and readily available), oh and smells of cherries too. All for the princely sum of £12 for 150ml, which they reckon is enough to cover about 1-1.5m2.
Fluorescence photography is a valuable tool for visualising and documenting the skin, giving details not visible under normal visible light imaging. Check out my new article showing how UV induced visible light fluorescence can be used to provide valuable information about skin dryness and and the presence of bacteria, here.