When it comes to UV fluorescence photography, setting up of the lighting, subject and imaging system are key to getting good results. An important part of this is knowing how your equipment works, along with its limitations. Today I’d like to share the results of testing which show how UV is leaking through the internal filter stacks of some of my cameras, and how that effect can be rectified.
This all came about when I first measured the transmission spectra of the filters which were removed from a camera I was having converted to multispectral imaging (a Canon EOS 5DSR). The filter stack consisted of a green IR blocking filter, and a dichroic ICF filter which is supposed to block UV and IR. However when I measured the transmission through the two filters I got the following spectra.
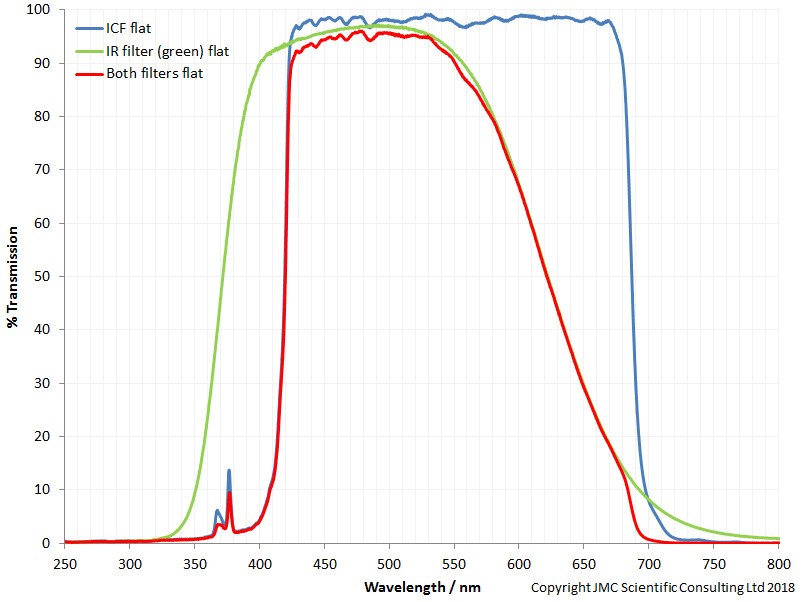
What was worrying was the ICF filter had a significant UV transmission peak at around 365nm, which means that UV light can actually reach the sensor in a stock camera (the red line is the combined transmission through both filters). This got me wondering what the end result of this type of leakage would be in a fluorescence image.
Fast forward about a year, and I was doing some fluorescence imaging for an article, which was using UV light to look at the fluorescence of a glass vase, and seeing what the effects of different blocking filters on the camera lens were. A quick guide to the setup. Light source was a Hamamatsu LC8 with a 200W Xe lamp. A Baader U was used on the output of the light source, to make it UV only and remove the small amount of visible and IR light being emitted. Subject was a painted glass vase, placed in a box painted with Semple Black 2.0 paint which I’ve found to be both highly light absorbing and very low fluorescence making it ideal for UV imaging work. Camera was a stock, unmodified Canon EOS 6D with a Rayfact 105mm UV lens. Imaging was done in the dark apart from the UV light source (obviously). All exposures where for the same length of time.
Firstly, the vase imaged with no filtration on the camera lens.
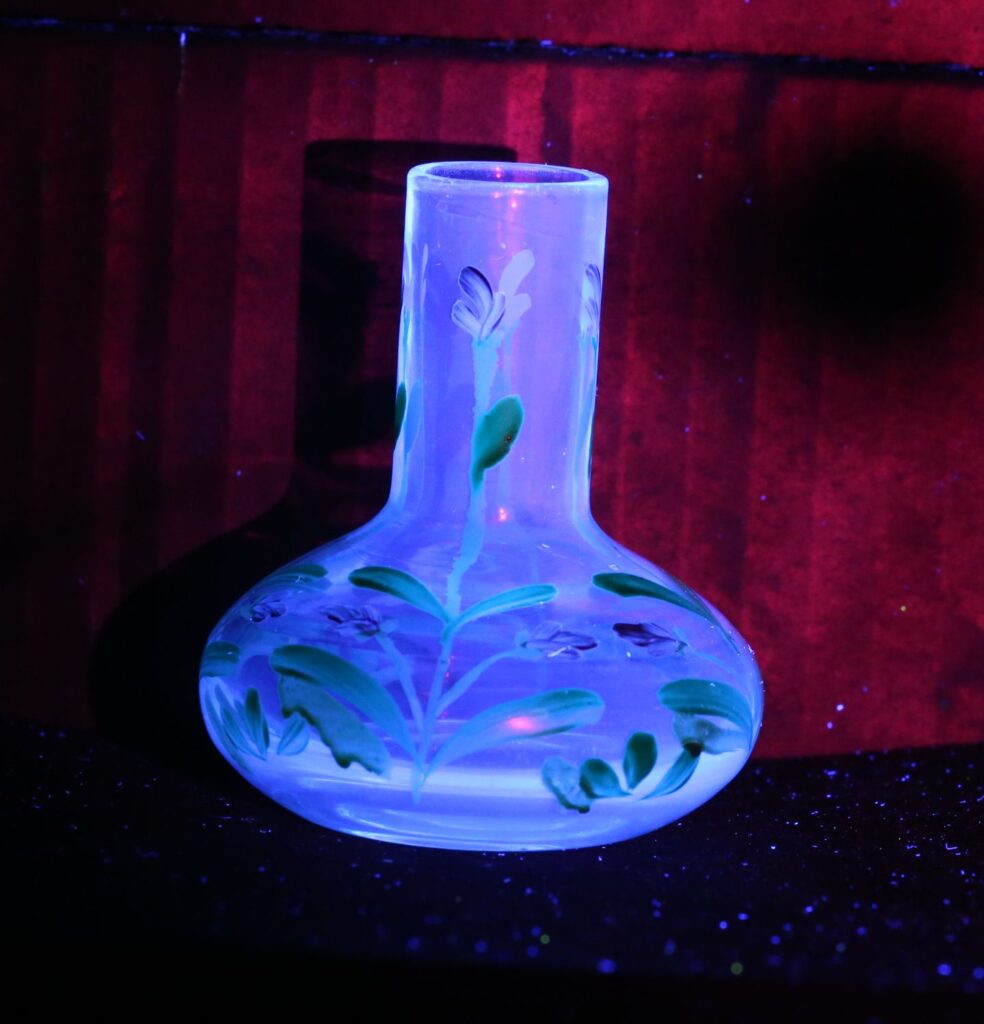
The vase shows the expected blue fluorescence, but there seem to be red areas in the image and they look to be reflection rather than fluorescence based on the parts of the glass they are showing up on. It is also red on some of the black painted cardboard. The ever present dust also shows up with blue fluorescence (damn you, optical brighteners).
The next stage was to add a UV blocking filter to the front of the camera lens. First one was the Schott KV418 which is well known in the UV fluorescence imaging world as having good UV blocking and low inherent fluorescence.
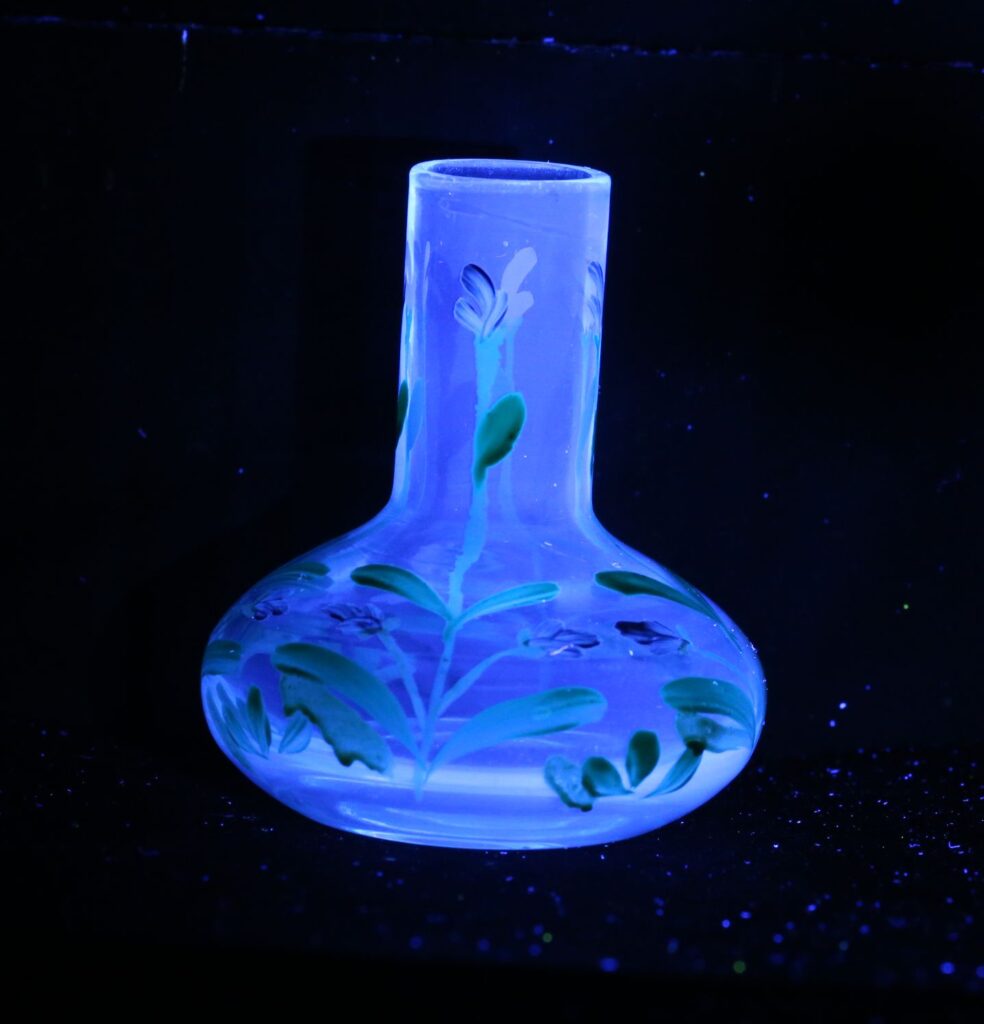
Adding the Schott KV418 to the front of the camera lens removed the areas which appeared red in the unfiltered image, confirming my suspicions that those areas where to do with UV reflection which was making its way through the stock internal camera filters and hitting the sensor.
As a final confirmation that reflected UV was indeed the cause of the red highlights in the unfiltered image, I removed the Schott KV418 filter and replaced it with a LaLa U filter from UVIROptics. This filter lets UV through, but very effectively blocks visible and IR light, and is a great choice for UV photographers. Doing so, gave this image.
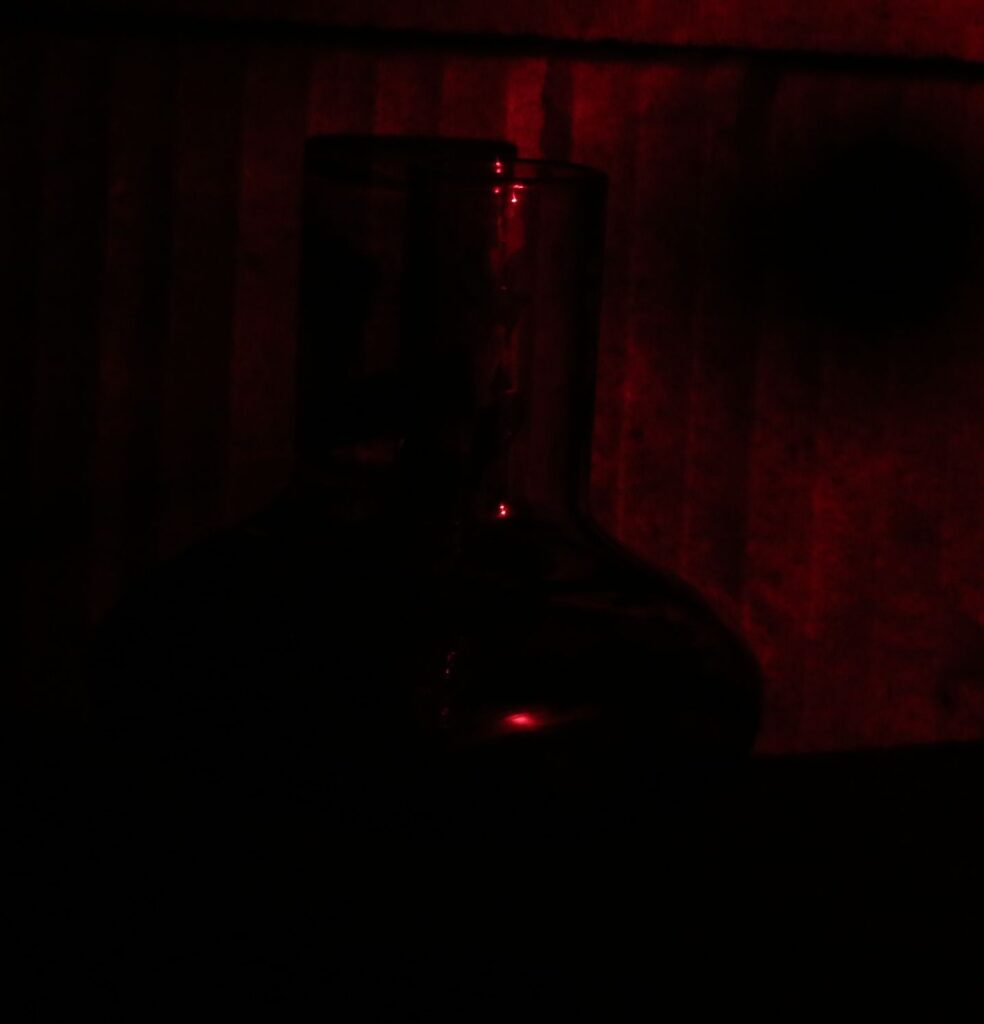
Using the LaLa U filter, the blue fluorescence is now gone (as expected as the filter is blocking the visible light), but the red still remains in the areas shown in the original unfiltered image. It is a little darker as the LaLa U filter is absorbing around half of the UV light, due to its transmission curve. Remember, this is a stock camera with internal filters which are supposed to be blocking UV.
Ok, so it is fairly obvious that the stock Canon EOS 6D filtration is not enough by itself to block reflected UV light with the fluorescence images. Schott KV418 is good at blocking that reflected UV, but, Schott KV418 is no longer widely available (and do you homework on anyone claiming to be selling it – the only legitimate source I know of was ITOS in Germany, and I’m not even sure they have any anymore). However I found that Zeiss T* UV filters also did a good job of blocking the UV and were themselves low fluorescence. This is what the vase looked like when imaged with using a Zeiss T* filter on the camera lens.
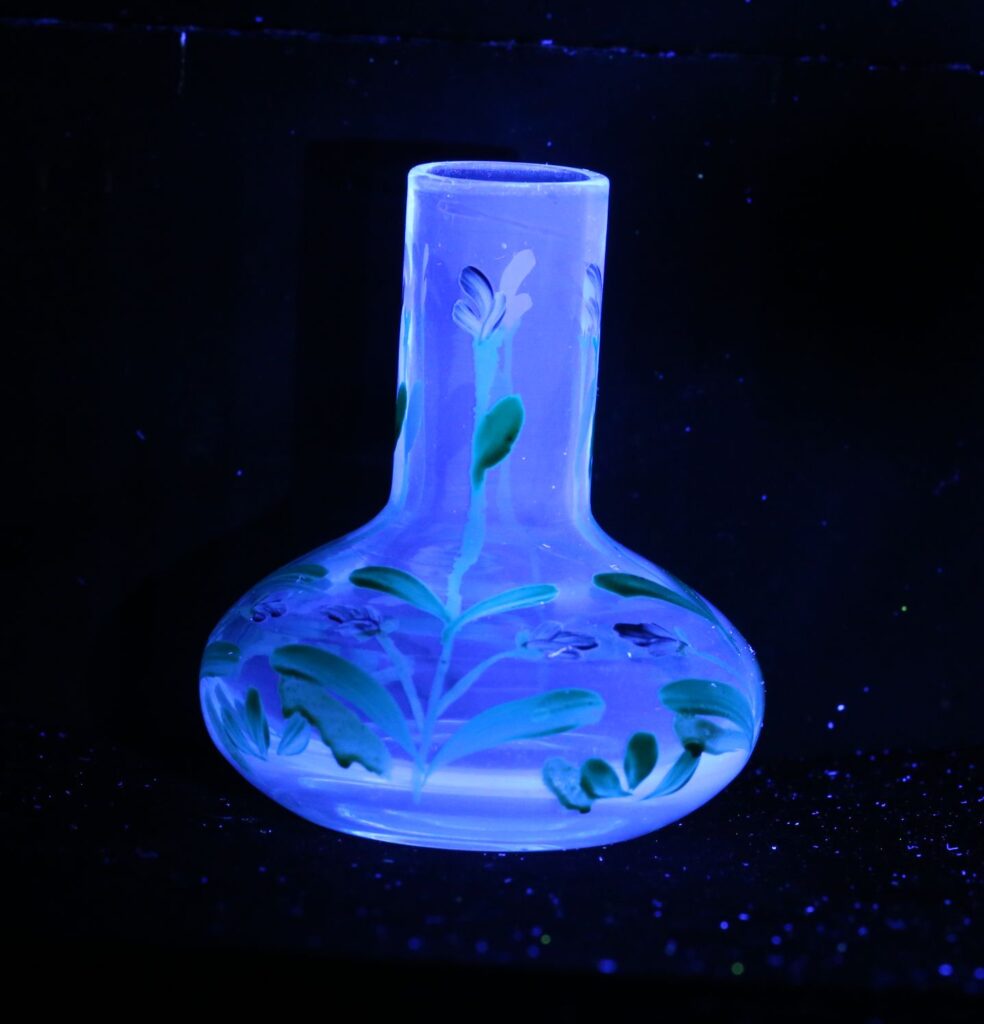
As a final image, and why not, here is the vase imaged using a Tiffen 12 yellow filter, as the blocking filter.
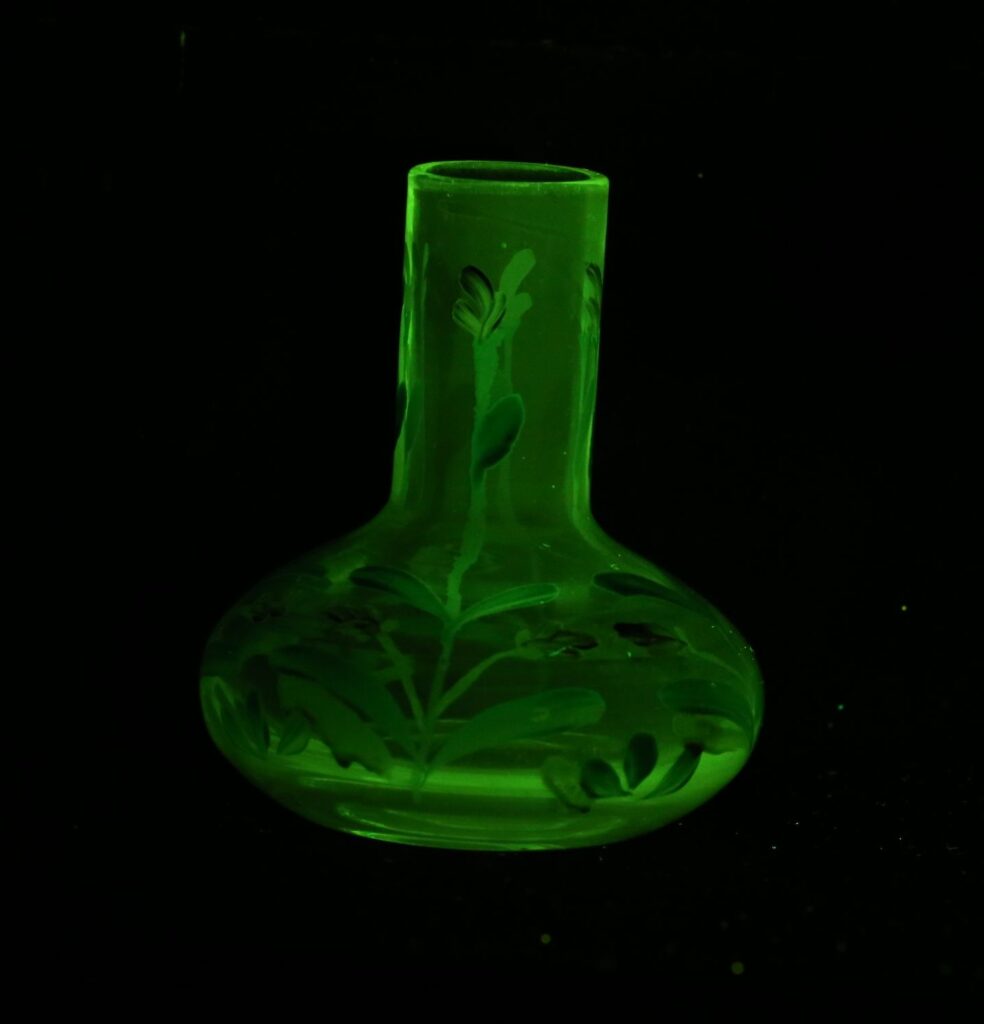
The Tiffen 12 image doesn’t really add to the story, I just think it looks funky.
So, some comments on the images and the experiment above. The transmission spectra for the filters I have was for a Canon EOS 5DSR, and the photos were taken using a Canon EOS 6D. The cameras were different, and I do not have the filter stack from a 6D to check. I therefore cannot be sure that it would be exactly the same as the 5DSR one. However the images back up the hypothesis that the stock filters are leaking some UV. I used a Rayfact 105mm UV lens for the images. That is a nice sharp macro lens, but has high UV transmission, which emphasizes any UV leakage. I have done some other work with different (normal) camera lenses, and the effect is still visibly, although reduced in intensity. I used a Zeiss T* UV filter for one of the images. Not all UV filters block UV – some are just plain glass. Unfortunately this is an example of where marketing trumps science, and claims are made about products which do not stand up to testing. In the absence of owning a spectrometer, if you shine a UV torch (which has the black looking filter on it to remove visible light) through a UV filter onto white paper, if the UV filter is not blocking the UV light then the paper will fluoresce. If the paper does not fluoresce then the UV filter is blocking the UV light, giving you a rough indication of how good a blocking it has. This of course needs to be done in the dark.
I should note that I have tested some Nikon and Sony sensor filters stacks for transmission, and the ones I tested at least showed much less UV leakage than the Canon ones, so not all cameras behave the same.
My message to you here, is that it is good practice to ALWAYS use an external UV blocking filter in front of the camera lens when doing UV fluorescence imaging. While it is easy to say that the internal filters on digital cameras are designed to block UV light, that internal filtration setup is not always sufficient. Knowing how your kit works is vital to generating good reliable scientific images for your work, as is understanding its limitations. When you understand what it can and can’t do, you are in a much better place to explain any unusual or unexpected results. I hope you enjoyed reading this, and if you’d like to know more about this or other aspects of my work, you can reach me here.
