Category Archives: General

Imaging with the Zeiss Luminar 100mm f6.3

A while ago I got a 25mm Zeiss Luminar lens which turned out to be a really useful lens for UV imaging (you can read about that here). As the 100mm is a triplet (even simpler than the 25mm), I had high hopes for its potential as a UV lens. Turns out that hope was misplaced, but the lens is still an interesting one….

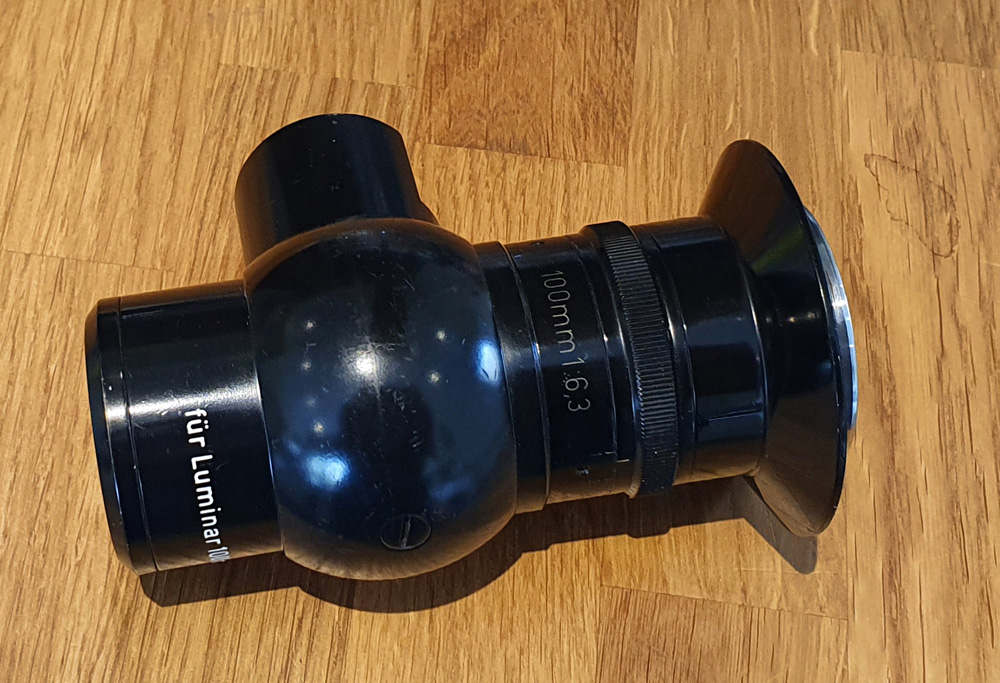
I bought my copy as a microscope unit, consisting of the lens and a few other parts. This is what it looked like as the complete unit.

Zeiss Luminar 100mm f6.3 microscope setup

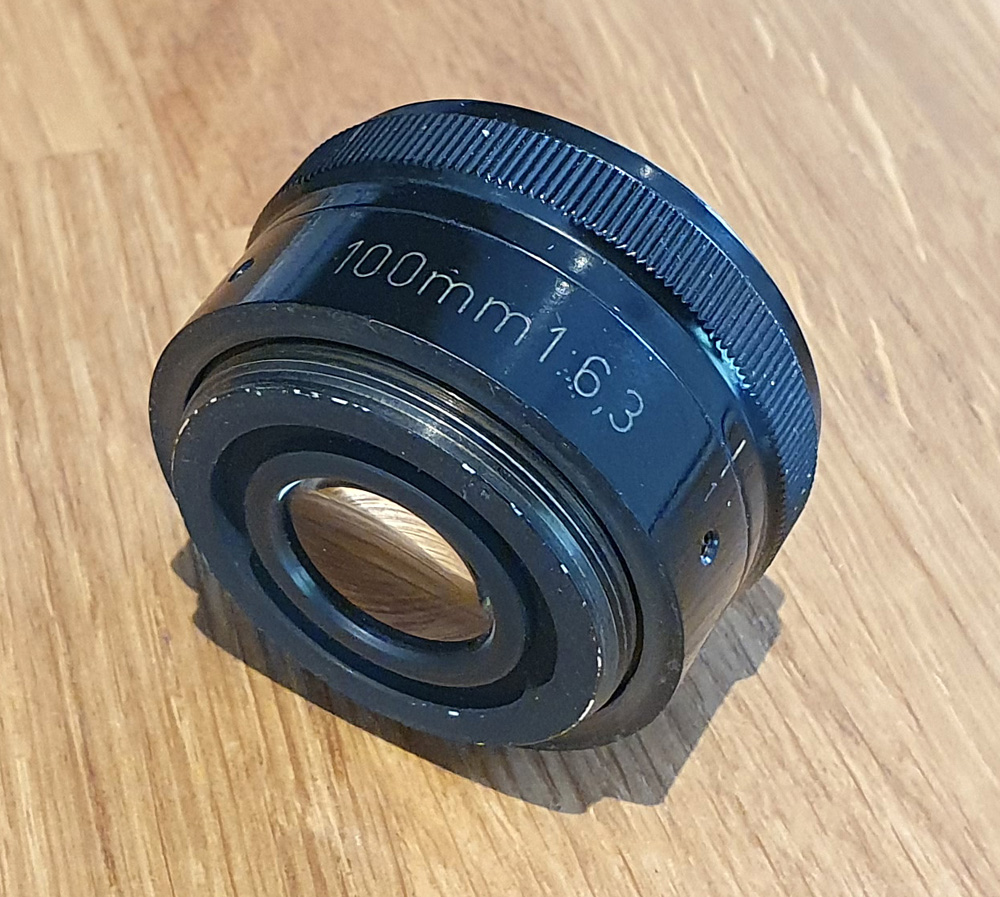
The lens itself has a 35mm screw thread, and removing the extraneous parts of the setup above leaves this.

Zeiss Luminar 100mm f6.3 lens

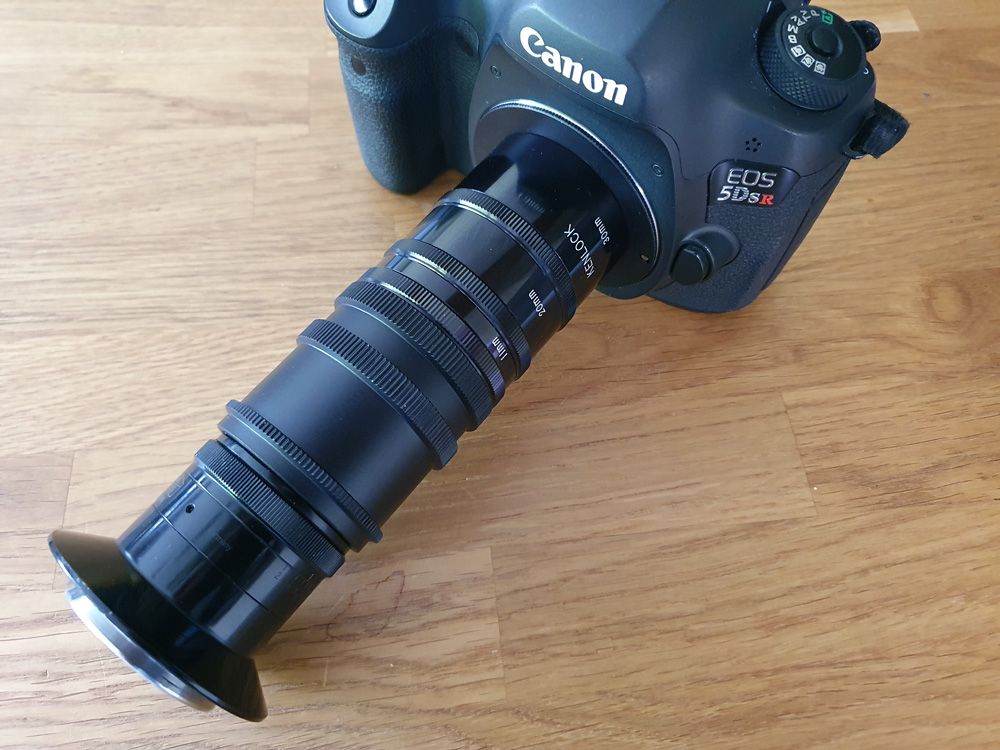
The lens elements protrude on this lens and mine had been put down on one of them, leaving a tiny mark (<0.5mm) in the middle of one of them. Even so I still wanted to give it a go for photography. The thread size is 35mm, so I bought a 35mm x 0.75 to M42 adapter from eBay. I then mounted this on a range of extension tubes (up to 11cm in total) and on to my Eos 5DSR. I use part of the original unit as a makeshift hood.

Zeiss Luminar 100mm f6.3 on extension tubes

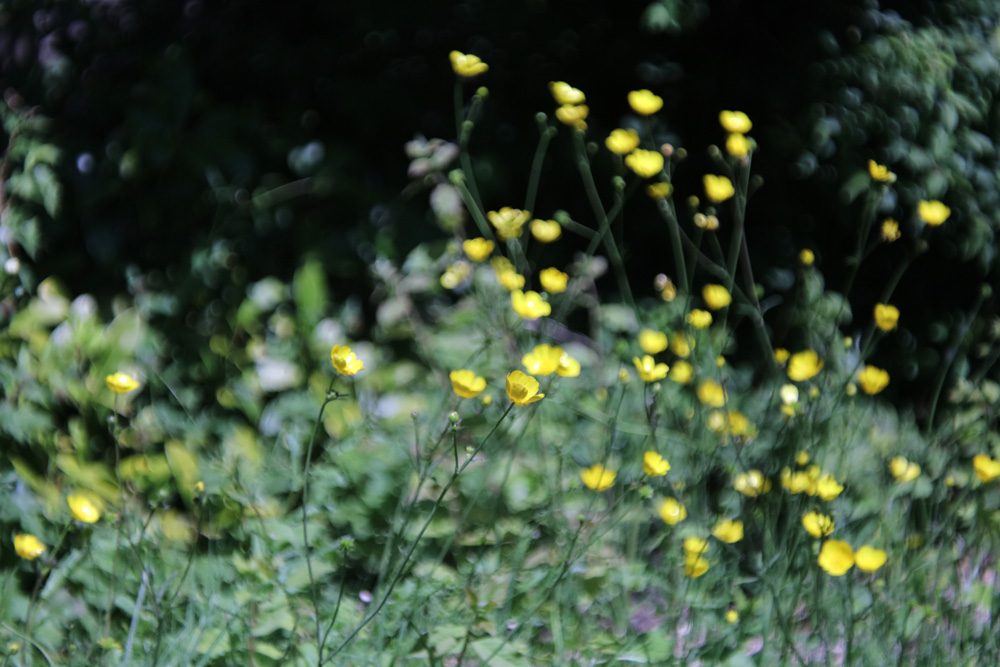
Here’s some shots from the garden, all hand held. First with about 6cm extension, wide open, and full frame image (but reduced in resolution for sharing).

Zeiss Luminar 100mm wide open on about 6cm extension

The short extension gave a focus distance of about 3m, and a really nice swirling bokeh in the background of the image. Then with 11cm extension, and slightly stopped down, again resized for sharing.
Zeiss Luminar 100mm on 11cm extension stopped down slightly

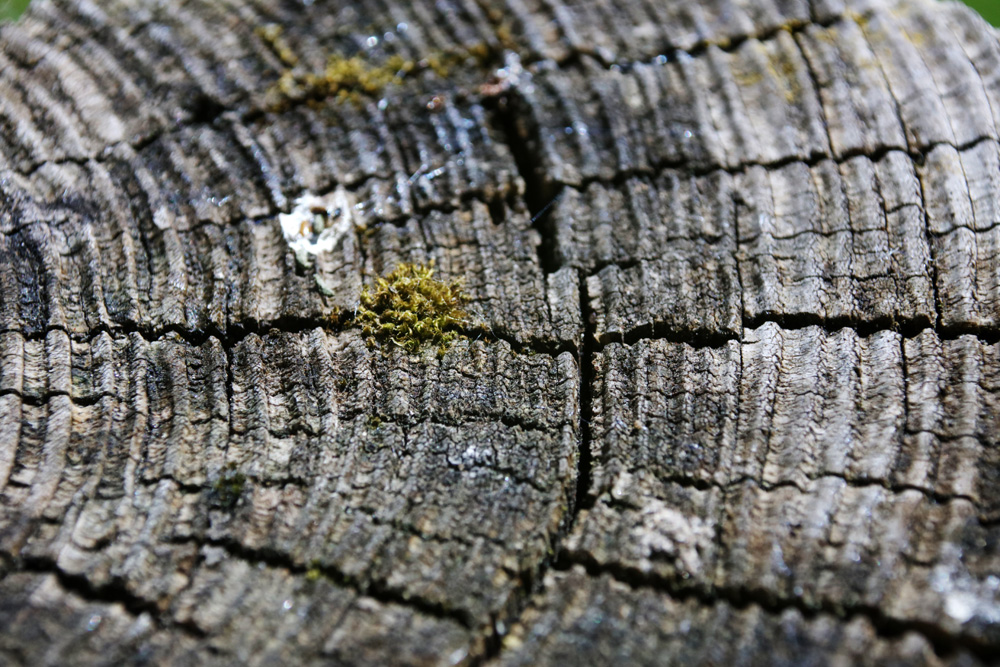
And finally, this was taken as a crop from the image above before resizing, and is shown as actual pixel resolution.

Actual pixel resolution from the Zeiss Luminar 100mm

Even with a tiny mark on the lens there looks to be plenty of sharpness there. Could make for a really interesting portrait (with a short extension) or macro lens (with longer extension tubes).

Reusing older lenses can give your imaging a unique look, impossible to replicate digitally. If you want to know more about my work, you can reach me through my Contact page.

Project Beater – lights, camera, stacking…

My Olympus BHB microscope refurbishment (affectionately know as Project Beater, given the state it was in when I got it) is coming along during the Covid-19 lockdown.

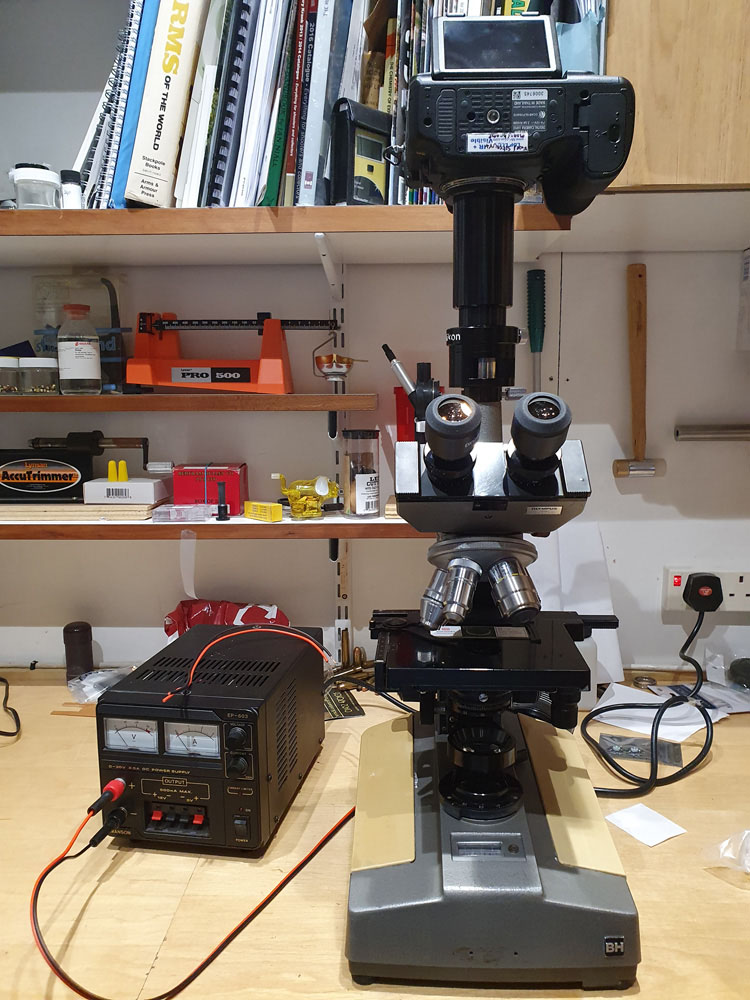
Initially I thought that changing the lighting to LED would be the way to go. Longer bulb life, and brighter light for much lower power sounded like a win-win. However my initial attempt left me a bit disappointed. C-, more work needed there. So back to the original Tungsten filament bulb. 6V and 30W means a 5A power supply, and my benchtop unit wasn’t up to the job, so a quick ebay purchase of an adjustable 3-12V, 5A supply (for the princely sum of £12), and a couple of 4mm banana plugs, and I has a suitable power supply. This gives a more even light spread than the LED, and is easily adjustable for brightness.

After my initial attempt, it became obvious the focus stacking was going to be needed. I downloaded Zerene stacking software, as it gave a 30 day free trial, and it seems to be the go-to package. Now, to set about trying it out.

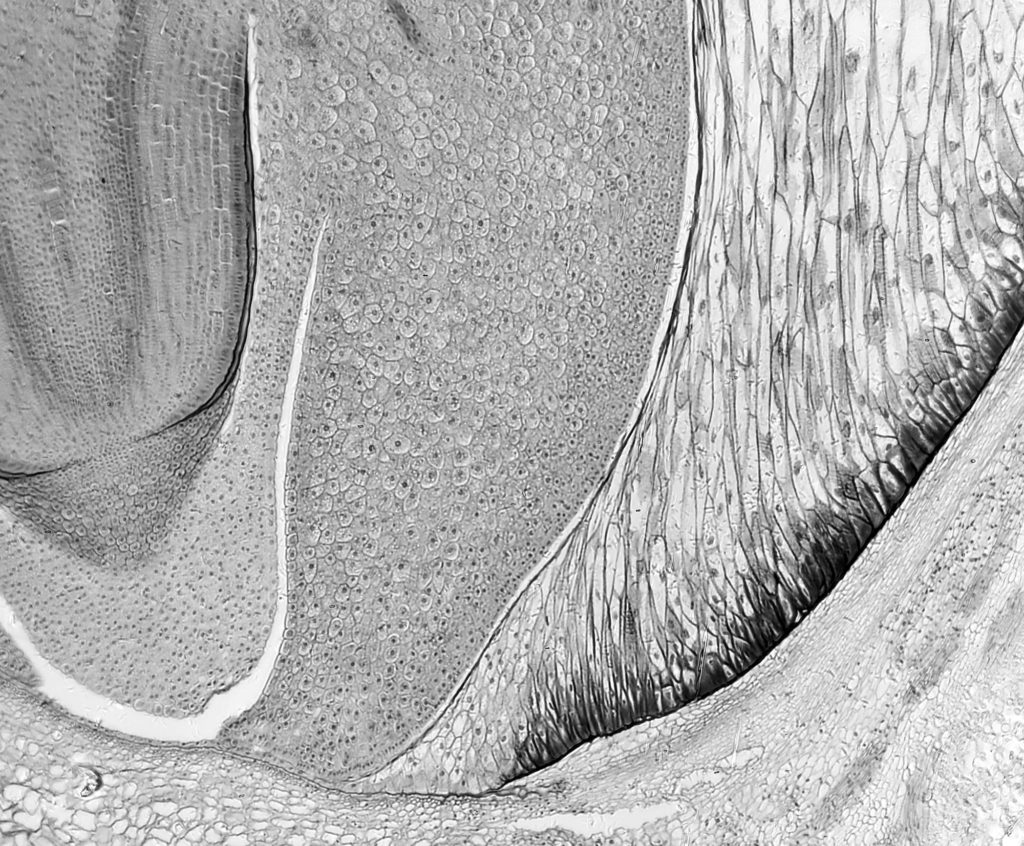
My slide prep kit came with a few pre-prepared slides, so these are great for practice, as I don’t have to worry about preparing something. One of these is a Corn seed cross section. Lots of detail, so a simple one to start imaging with. Below is the result of a stack of 22 images, taken with the 4x SPlan objective, through the camera adapter and captured on my monochrome Nikon d850 (final magnification about 80x).
Corn seed cross section, approx 80x magnification

It’s fairly obvious that focus stacking improves things a lot compared to a single image, although it’s not completely fool proof. Certainly a piece of software which requires practice to get the best out of.

My journey into microscopy has been fascinating, and something I will continue to play with moving forward. If you want to know more about this or my other work, you can reach me through my Contact page.

Leitz 16x UV microscope objective imaging

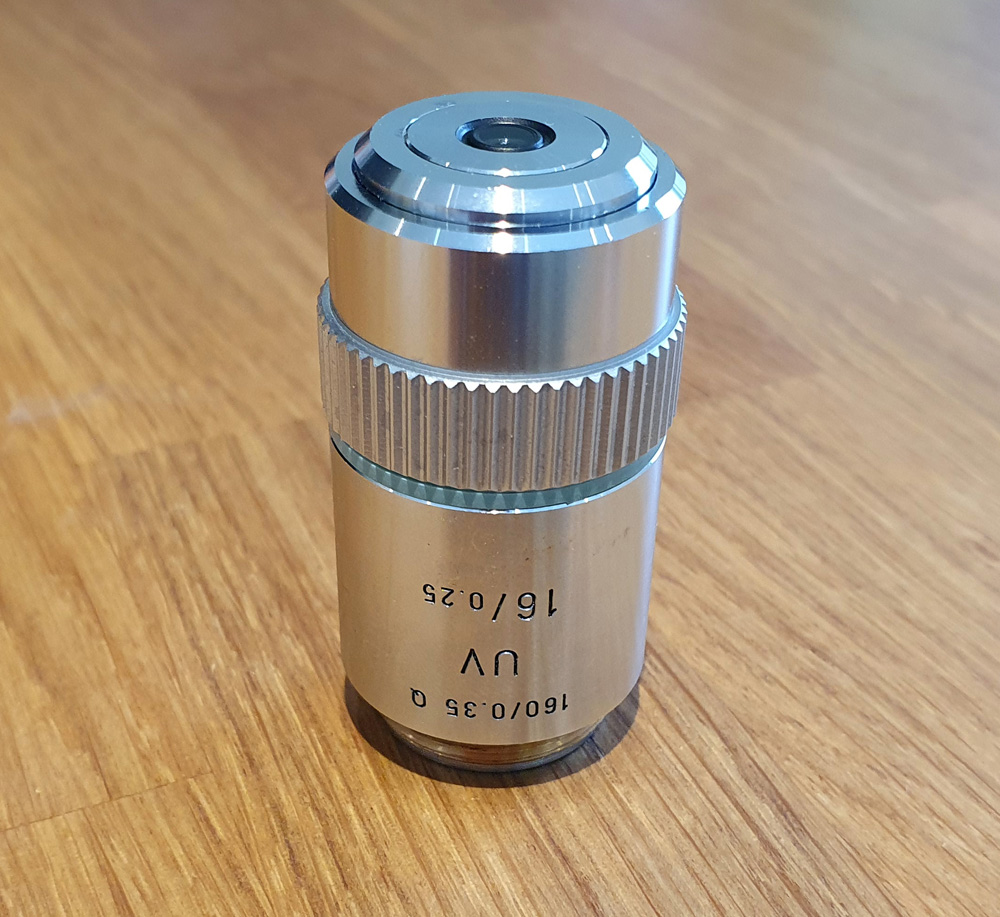
For my UV imaging research I regularly look out for second hand equipment, as new UV imaging stuff, especially UVB capable kit, can be hugely (eye-wateringly) expensive. I recently saw this one advertised. It’s a Leitz 16x microscope objective, marked up as UV on the barrel of the lens.

Leitz 16x UV objective

Interestingly for my work, the markings said it was designed for 160mm tube microscopes (which is what I have) and for 0.35mm Quartz coverslips. Now, quartz coverslips aren’t your normal microscope equipment, and would imply that this is meant for deep UV work (at 300nm and even below). The vendor wasn’t able to tell me much about it, other than it came from a piece of equipment he had stripped for selling a while ago. So I made and offer which was accepted, and it started the long journey of making it here to the UK from the US. I wasn’t able to find anything out about this lens online, so it was a bit of a gamble, although the lack of information often indicates how rare something is.

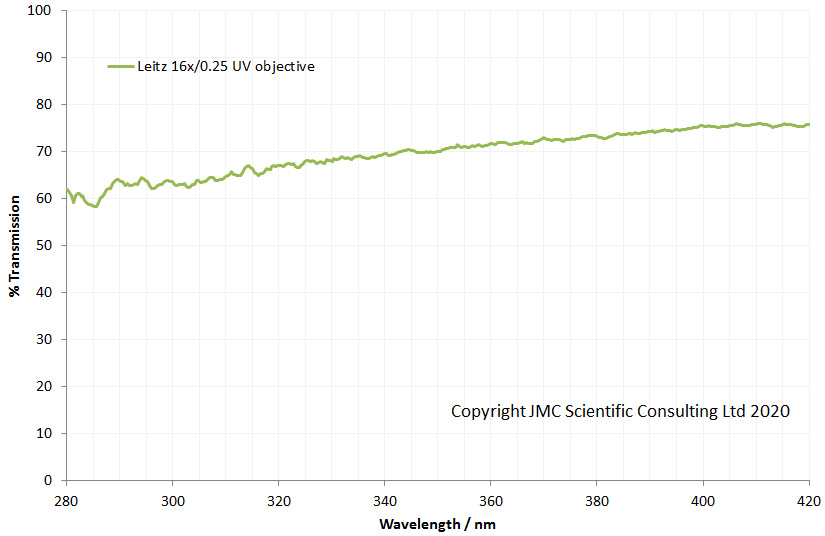
When it eventually arrived, after the lovely Customs fees had been paid, the first thing I did was measure the transmission through it. And to my excitement this is what I got….

Leitz 16x objective transmission from 280nm to 420nm

The transmission curve was very flat from 280nm to 420nm, indicating that this was indeed a lens designed for use at short wavelengths. Quite a few lenses will transmit light in the UVA region from 400nm down to around 350nm, but below that things get tricky. This Leitz lens doesn’t have any actual glass in it, and the elements are probably either quartz or calcium fluoride (or perhaps both) which is why it transmits so far into the UV.

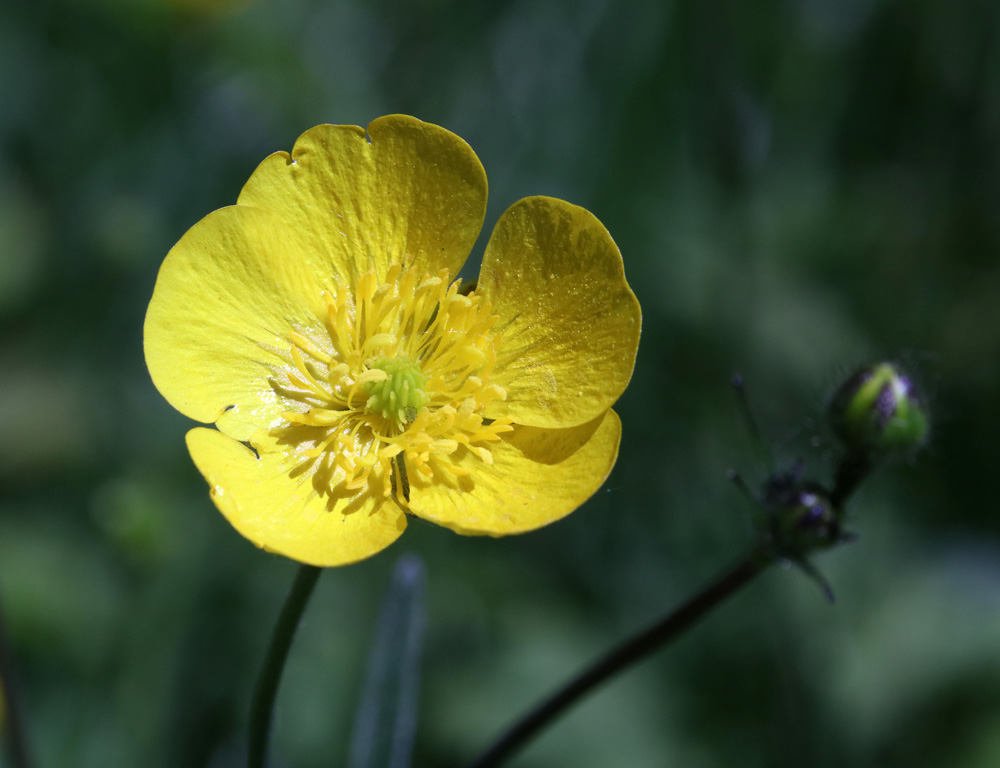
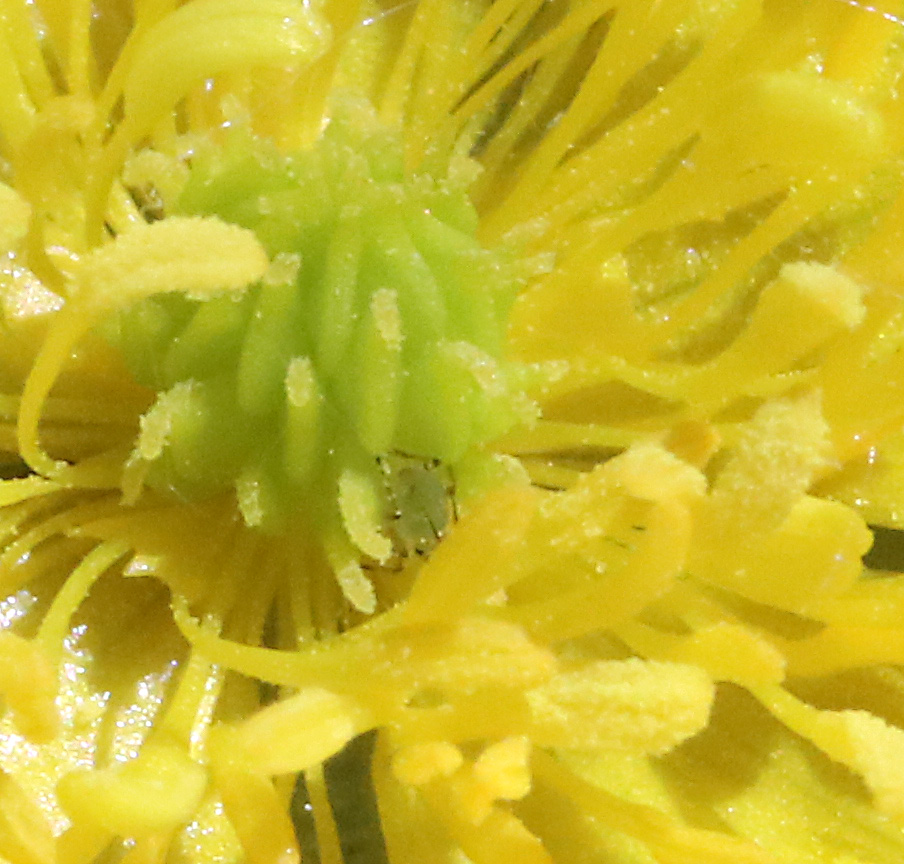
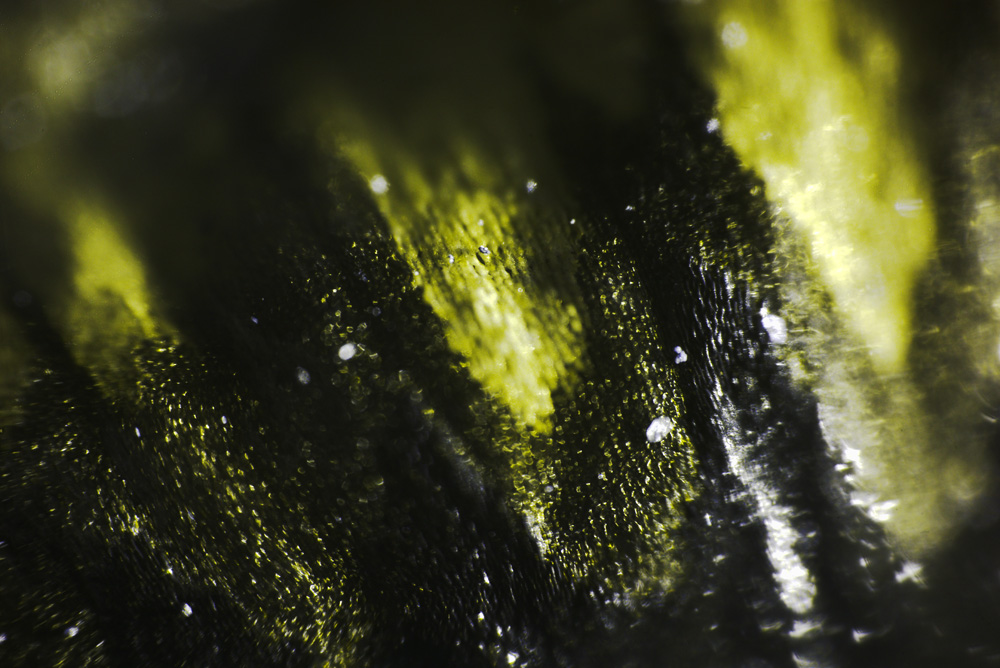
The next step for me was to mount it on a camera and see what the images were like. I mounted this on my UV converted Nikon d810, and imaged a Buttercup flower using my Hamamatsu LC8 Xenon light source for illumination. Using 6.5cm of extension tubes meant that the final magnification was about 9x, rather than the full 16x. I focused in on the part of the Buttercup petal where it goes from black to yellow in the UV image (the UV world looks very different to the visible world for many things), and this is what I saw.

Buttercup petal in UV with the Leitz 16x UV objective

The first thing to note is that the lens does indeed transmit the UV well, and the region of the petal which absorbs UV strongly (in black) can easily be seen. This is a single image, not stacked, and there is some pretty severe field curvature on it, which is not surprising given there are no other compensating optics being used. Also the magnification would be higher with the correct length extension tubes, which would crop the field of view and flatten the image. Focus stacking would help as well by creating a much sharper image. Amazingly the objective seems to be achromatic between the UV and visible, as almost no focus shift was needed between using the camera viewfinder to focus it and taking the picture in UV. This is very handy for using it and a nice feature to have.

The UV converted d810 camera I have is mainly UVA sensitive, however I also have monochrome converted cameras which are UVB sensitive. So the next thing will be to build an inline optical filter system, so I can start using it in the UVB region. Not a simple task, but science is all about challenges and finding ways to overcome them isn’t it….

I certainly got a bit lucky finding this one. It just goes to show, that sometimes it’s worth taking a gamble to push your work forward. They wont all pay out, but that’s not the point. Without pushing the edges of your research, how can you expect to learn anything new. If you want to know more about my work and the areas I am researching, please contact me here.

Polarisation in the UV to reduce shine

I’ve been playing around with polarisation in my photography for years, originally in visible light imaging of skin to reduce shine and aid in colour assessment, and more recently in the UV when I designed the first cross polarised UV imaging system for looking at sunscreens (published here). For pictorial purposes, full cross polarisation can be quite harsh, making the subject look flat and lifeless. Sometimes you just need to dial down the reflections, rather than completely eliminate them. You can do this by changing the angle between the 2 polarisers.

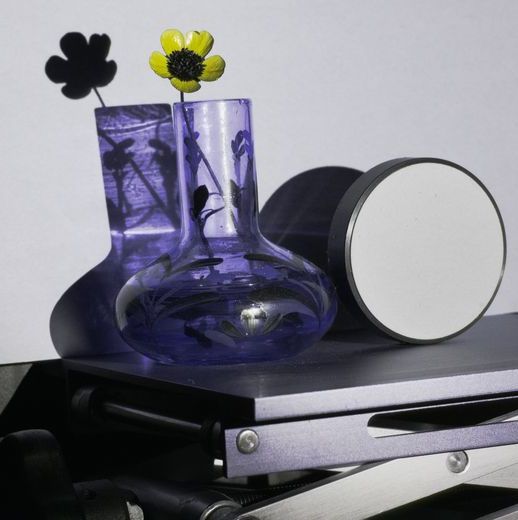
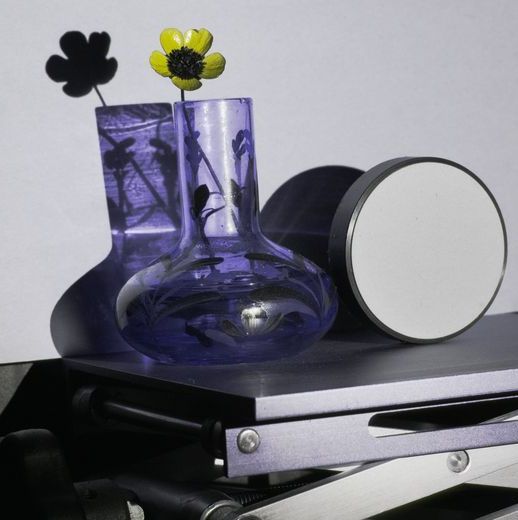
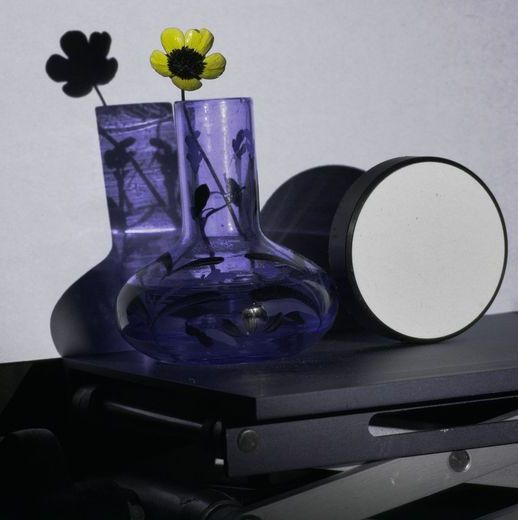
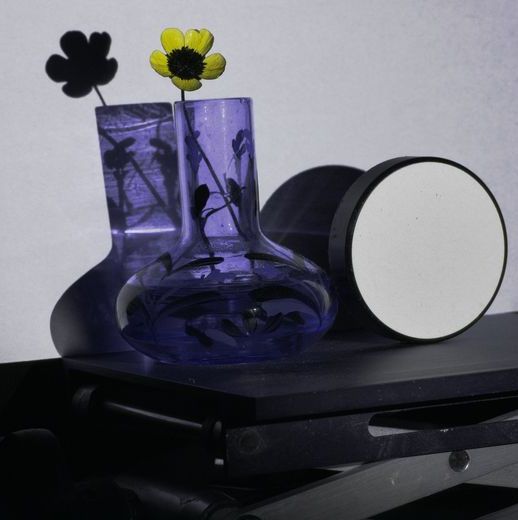
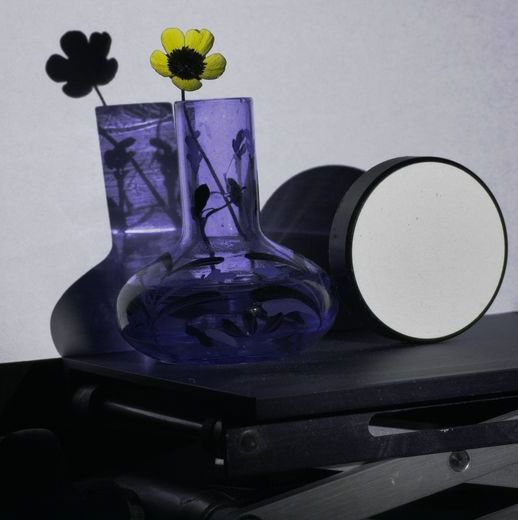
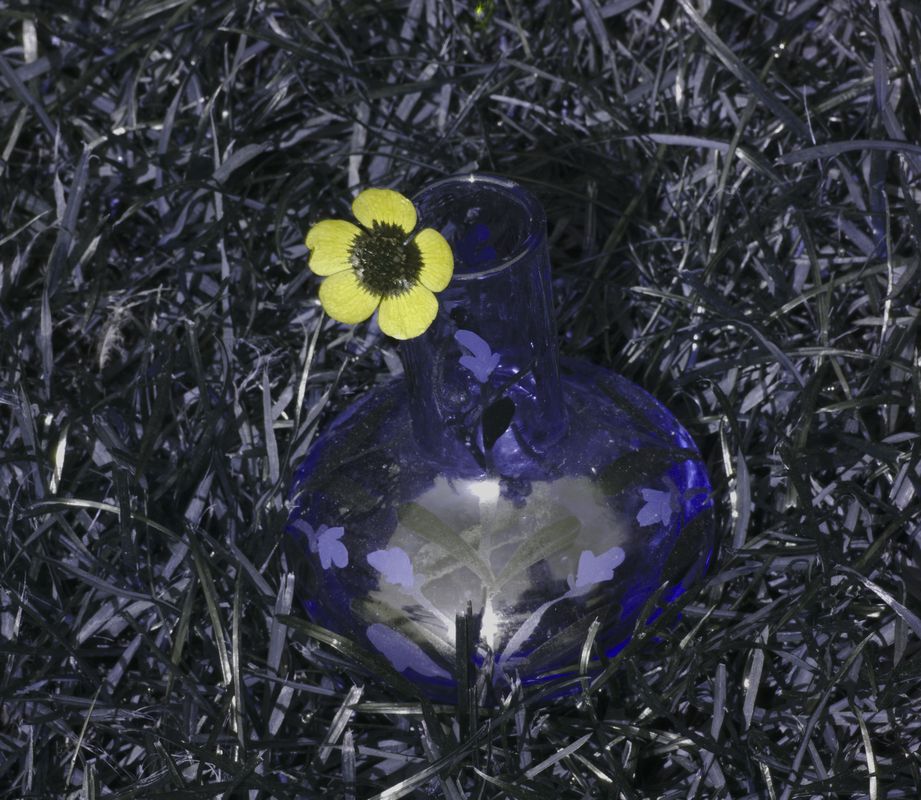
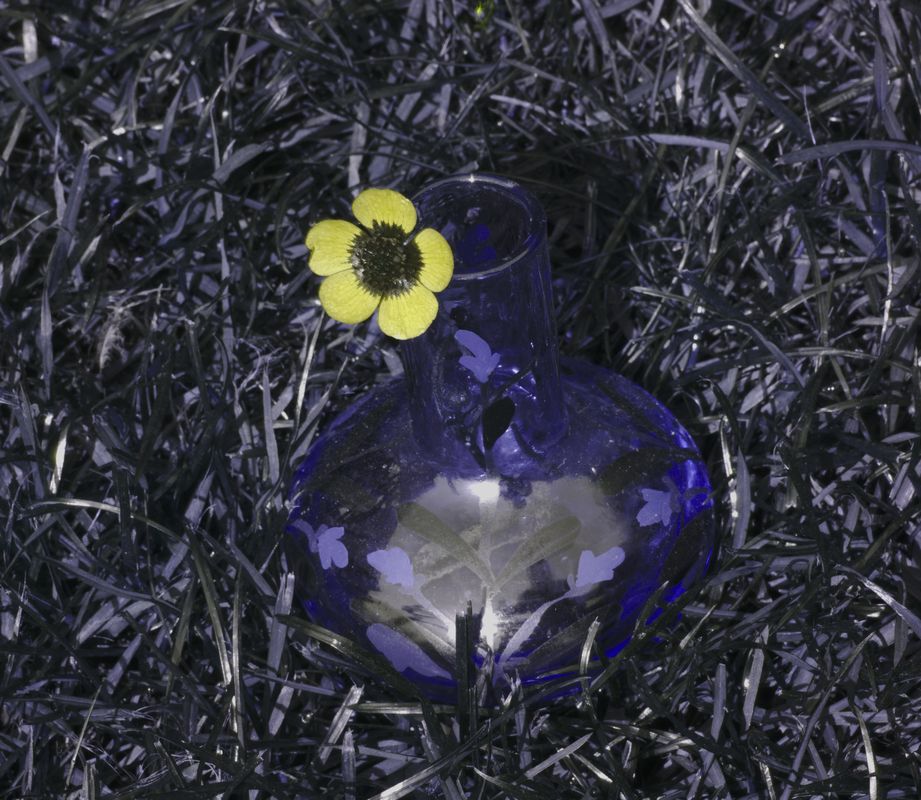
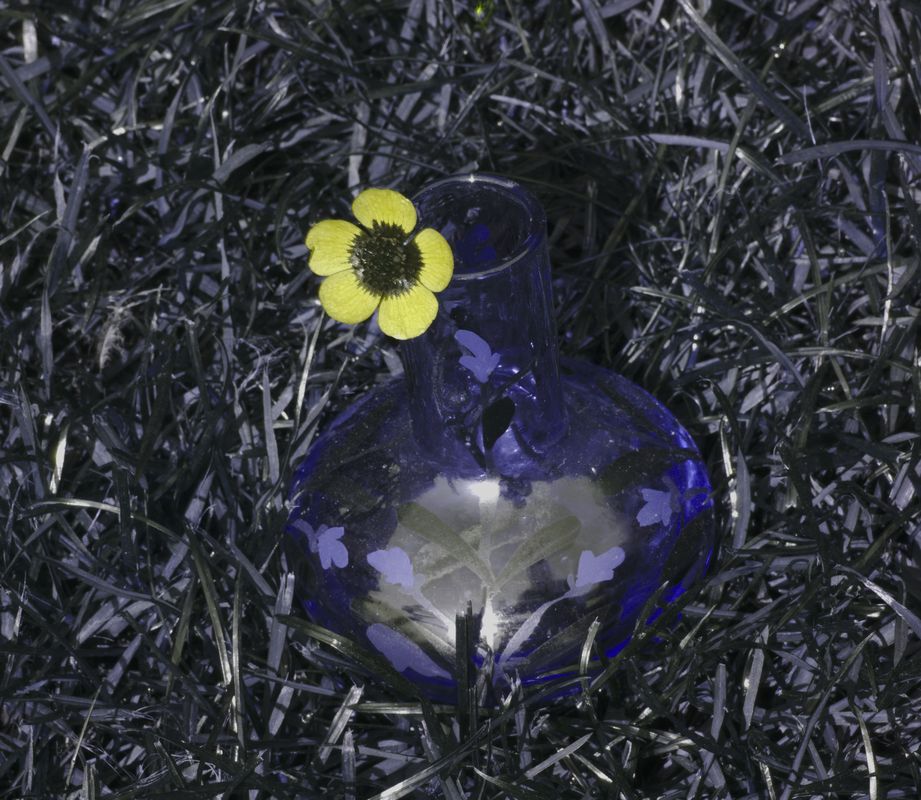
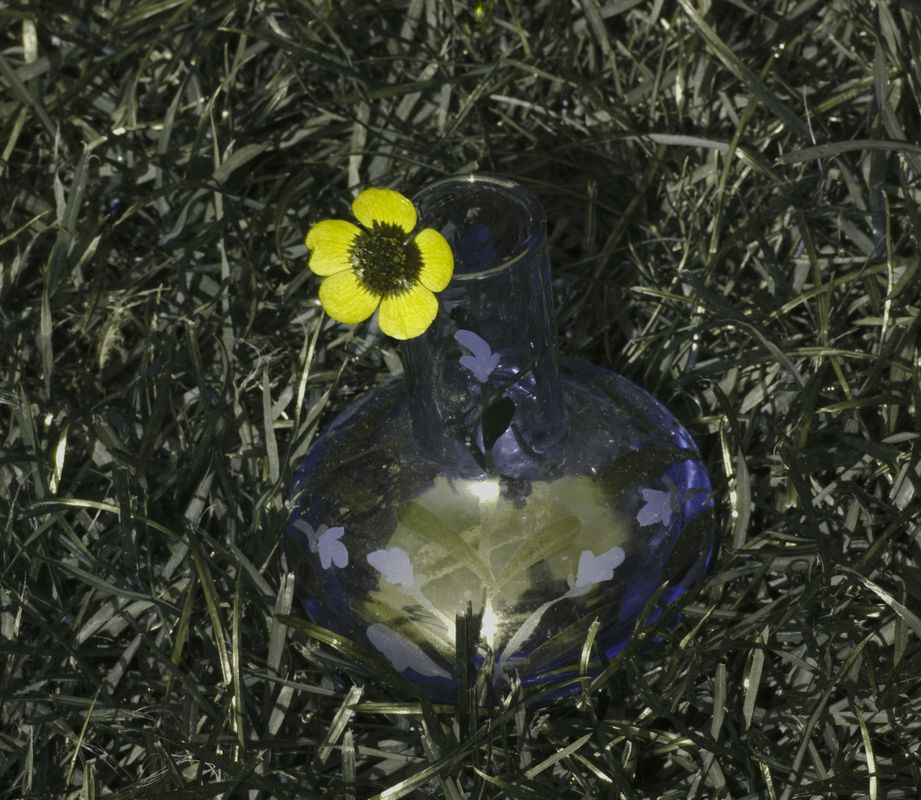
To show how this works, and how it can be done in UV, I’ve done a sequence of images of a Buttercup flower, using my UV modified Nikon d810. Buttercups in the UV are notorious for showing specular reflection, so are always a test for lighting setups. The lighting I used was a Hamamatsu LC8 with a UV collimating lens. Polarisers are Moxtek UV linear polarisers, although the principle applies to other polarisers too.

Firstly, no polarisers at all – normal image, at 0.6s exposure.

Non polarised UV image

The Buttercup shows its usual shine bands in the UV image, and shine is evident on the glass vase as well, and the edge of the 20% diffuse reflectance standard on the right hand side of the image. In fact there is shine in various parts of the image, anywhere there is direct specular reflection occurring.
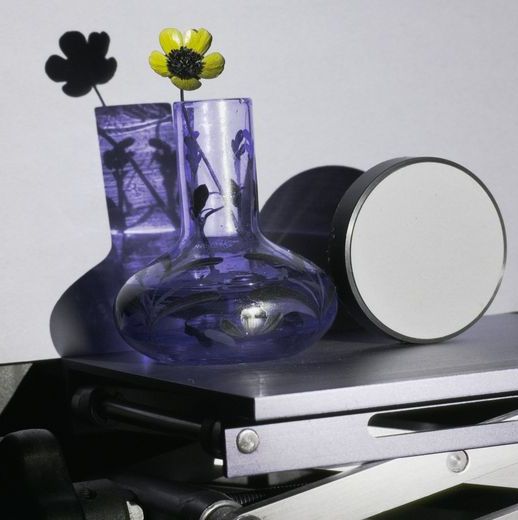
Now, adding the polarisers, one on the light source and one on the lens. The exposure has been upped to 4s due to light being absorbed by the polarisers (there is about 1.3 stops loss of light for each polariser with these two).
Parallel polarised
45 degree cross polarised
70 degree cross polarised
80 degree cross polarised
90 degree fully cross polarised

As can be seen from the images above, as the polarisers are moved from parallel to crossed (90 degrees to each other) the degree of specular reflection reduces, reducing the visibility of any shine. While specular reflection is removed by cross polarisation, diffuse reflection isn’t. You can see this as the 20% diffuse reflection standard on the right hand side of the image hardly changes as the polarisers are moved.

Control (and more importantly, understanding) of every aspect of the imaging process is vital when you’re trying to do reproducible scientific photography. When you do understand it, the setup can be designed to image just what you need to, whatever it is you are trying to image.

If you’re interested in this or any other aspect of my work, you can reach me here.

white balancing UV photos with Culture Hustle Black 3.0 paint

I’ve been a big fan of the Black paint that Culture Hustle make for ages (see here), as it has great light absorption from UV to IR, is easy to apply, is easily available and importantly given I’m a Yorkshire man, a good price. I’ve used it to paint the insides of various optical devices I’ve built to cut down on reflections, and I use it for making enclosures for UV imaging.

I got to wondering whether it would make a good white balance standard for UV imaging, and whether it could be mixed with white paints or pigments to make greyer versions with different reflectances. While cheap, normal photo colour charts aren’t great for UV imaging, as they change in reflectance with wavelength. At the other end of the price range is Spectralon, which is available in a range of different reflectances, but is very expensive, and easy to damage if not looked after.

To test out the idea I settled on 5 different white balance targets to try;

  1. Spectralon 10% diffuse reflectance
  2. Culture Hustle Black 3.0 paint
  3. Culture Hustle Black 3.0 paint mixed with their white paint (about 50:50 mix)
  4. Culture Hustle Black 3.0 paint mixed with magnesium oxide powder to make a grey paste
  5. Brown cardboard the paints were applied to

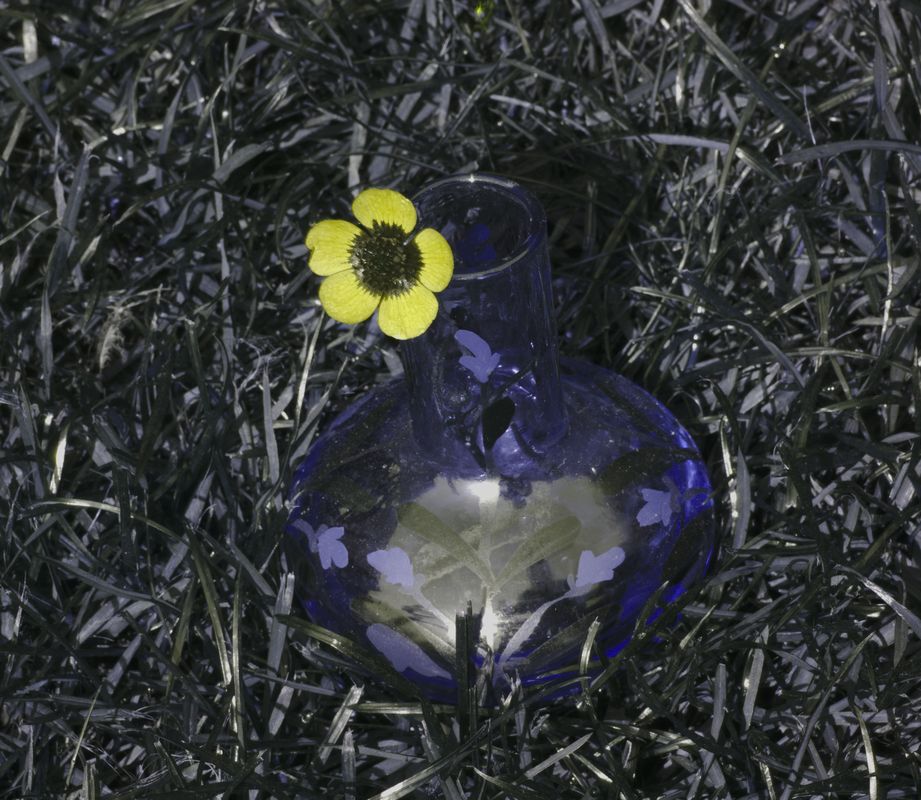
The target subject was a Buttercup in a glass vase on a grass lawn. Images were captured in bright sunlight with a Nikon d810 camera converted to UV by Advanced Camera Services Ltd and a Rayfact 105mm UV lens. A RAW image was taken of the Buttercup, and the white balance targets and then white balanced in Darktable before exporting as reduced size JPEGs. No further processing was done.

Here’s what they all look like.

1. Spectralon 10% diffuse reflectance standard
2. Culture Hustle Black 3.0 paint
3. Culture Hustle Black 3.0 paint mixed with magnesium oxide
4. Culture Hustle black and white paints mixed
5. Cardboard

As per usual in the UV, the Buttercup looks black in the middle as it absorbs the UV very strongly there. Overall white balancing with the Black 3.0 paint, and with the Black 3.0 paint mixed with magnesium oxide powder to make a grey paste, gave almost identical results to the Spectralon 10% diffuse reflectance standard.

Mixing the black and white paint together and white balancing with that gave a different colour balance to the image, making it more yellow and cutting the blue back (very obvious if you look at the grass). Also, the black centre of the flower has taken on a yellow hue. Using the cardboard itself for white balance resulted in a slight yellow shift in the colour balance compared to Spectralon, but not as much as the black/white paint mix.

What’s going on here? The Spectralon has a pretty flat reflectance curve in the UV which is why it makes a good white balance target. The Black 3.0 also has a pretty flat response in the UV, which is something I have tested before, which is why it also is acting as good white balance target. However by itself it is very dark, so might not be suitable for including in images as a white balance target. Mixing it with magnesium oxide powder, made a paste which had about 10% refectance. The magnesium oxide works well, as again it has a fairly flat reflectance in the UV. Mixing the black and white paints, resulted in a grey paint which looked in the UV region to have about 10% reflectance, but resulted in a very different white balance. What is most likely happening here is that the reflectance of the white paint varies in the UV as a function of wavelength. This will lead to an uneven reflectance curve in the UV, and as a result when used for white balancing a different colour balance (a bit like the normal photo calibration charts).

The cardboard surprised me a bit. I thought the final white balance would be way off. It was not the same the Spectralon and was still a little too yellow though.

Overall, I was very impressed with the Culture Hustle Black 3.0 paint for use as a white balance standard for UV photos, and the results compared very well with Spectralon. Adding in a some magnesium oxide powder to make a grey version also worked well, although mixing it with white paint did not.

If you have over 500USD burning a hole in your pocket, by all means go for the Spectralon. However for a small fraction of that the Black 3.0 paint will do the job and do it well, and if mixed with some magnesium oxide powder to make a paste can be made to be grey as well as black, making it more versatile.

If you want to know more about this or any other aspect of my work, you can reach me here.

Reichert 40x reflecting objective for UV imaging

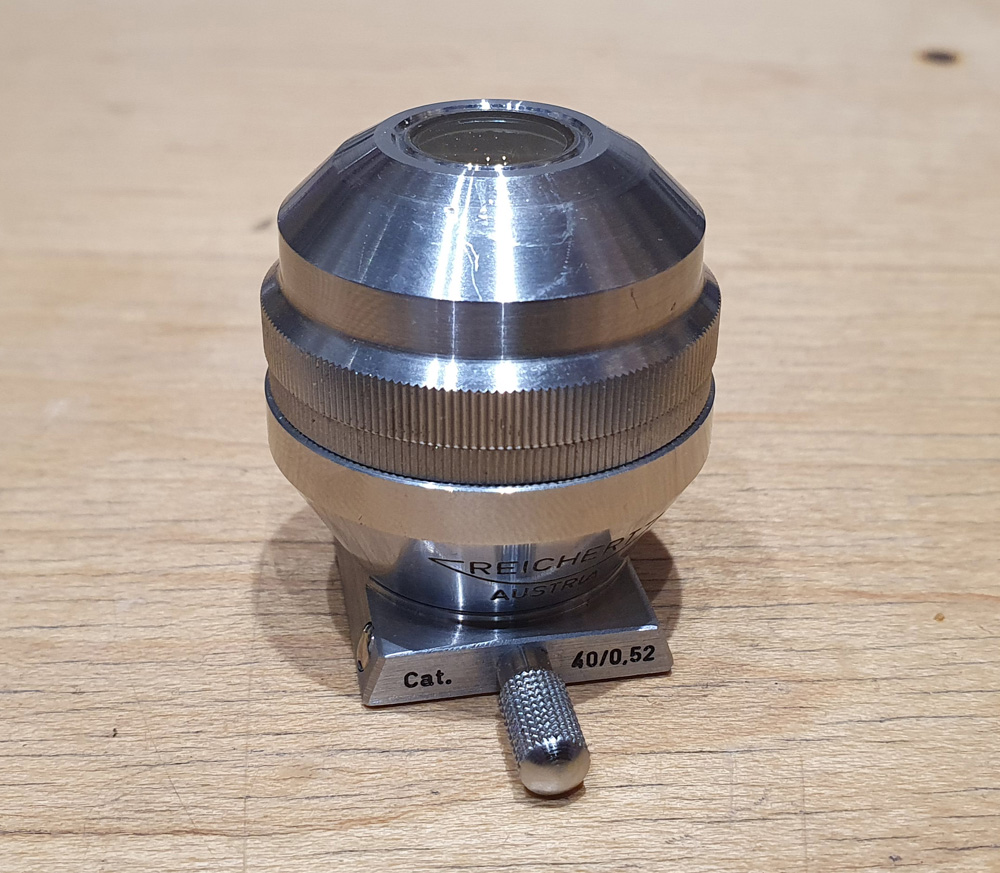
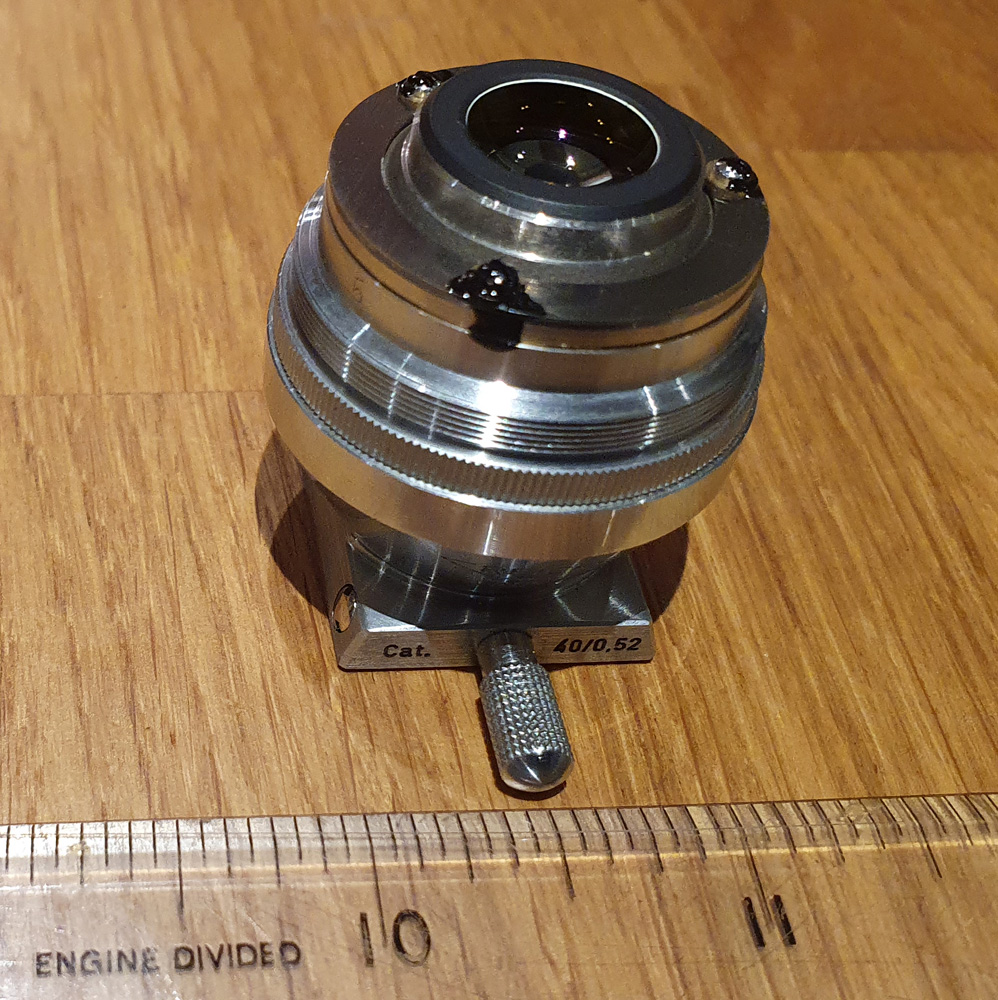
I’ve recently been doing a bit of microscopy (bringing an old Olympus BHB microscope back from the grave – Project Beater), and while buying bits for it I came across an odd objective lens – the Reichert 40x reflecting objective. I was the only person to bid on it, and a few days later it arrived. It’s a funny little thing. It has a dovetail mount for use on a Reichert microscope, but that mount unscrews to reveal a standard RMS screw thread. Here’s the lens.

Reichert 40x reflecting objective

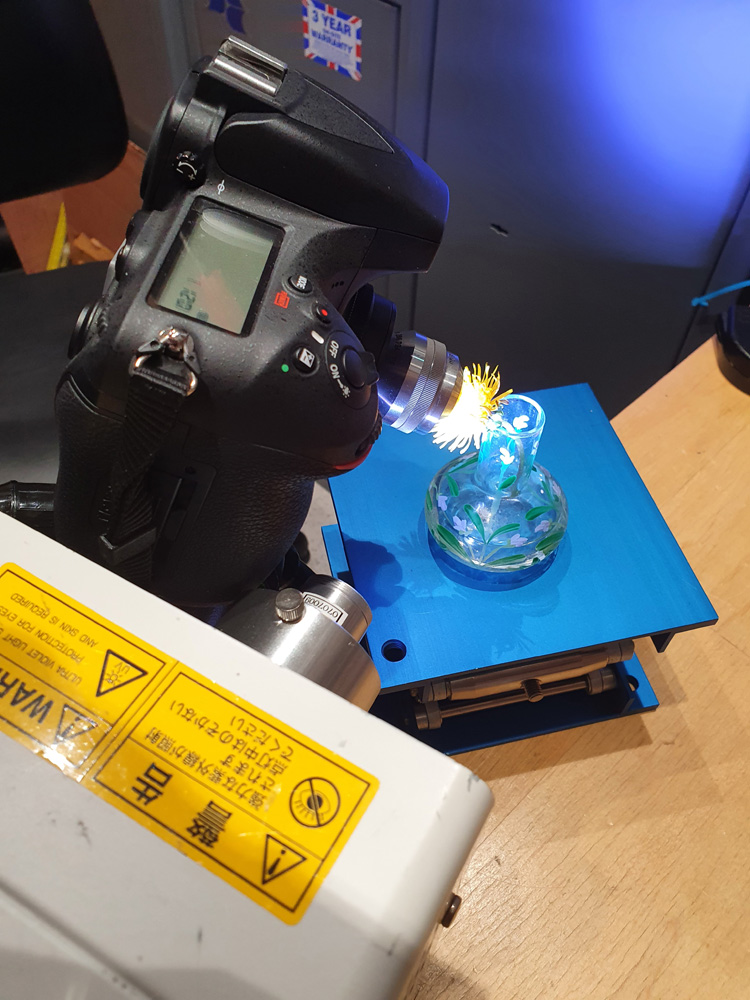
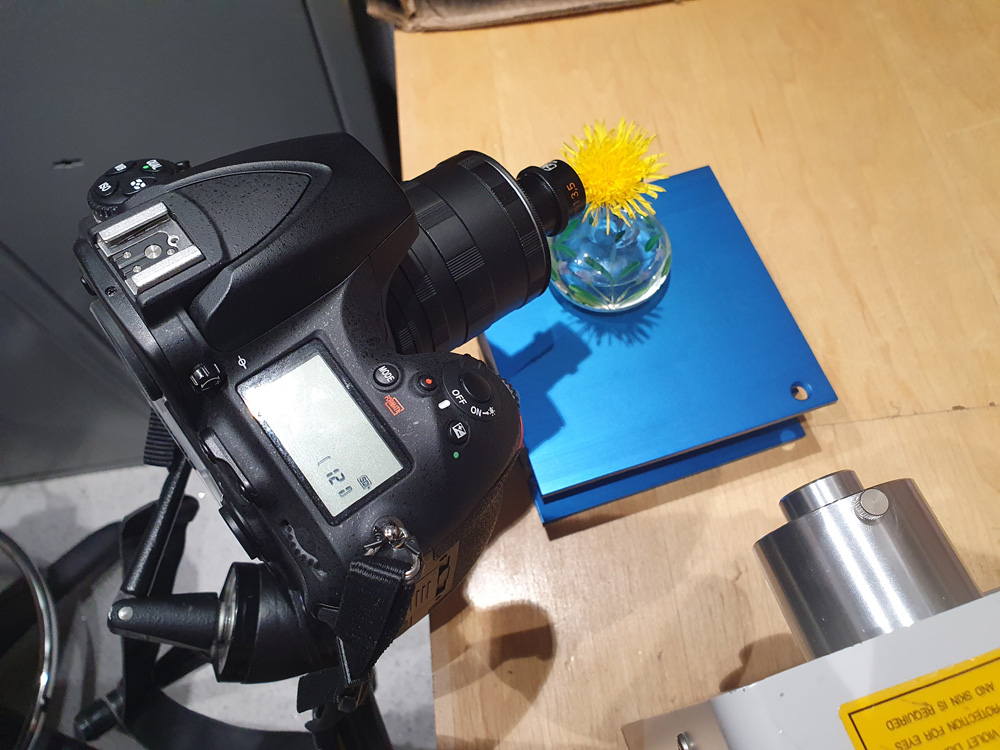
In theory it should be useful for multispectral imaging, and I was wondering what it’d be like for UV photography. I mean, what could possibly go wrong?? On the lens it says 250/1.5Qu, which as I understand it means it’s meant for a tube length of 250mm and quartz coverslip of 1.5mm. I mounted it on a range of extension tubes to get me out to 250mm, and I could see….. absolutely nothing, couldn’t get any focus at any distance. Back to basics, about 10mm extension and straight on to my UV modified d810. Amazingly, moving it back and forth I could see something come in and out of focus. Very quickly in and out of focus. Very, very quickly. Subject is a Dandelion and lighting using my Hamamatsu LC8 200w xenon lamp and collimating lens, setup shown below.

Imaging setup with Reichert 40x reflecting objective

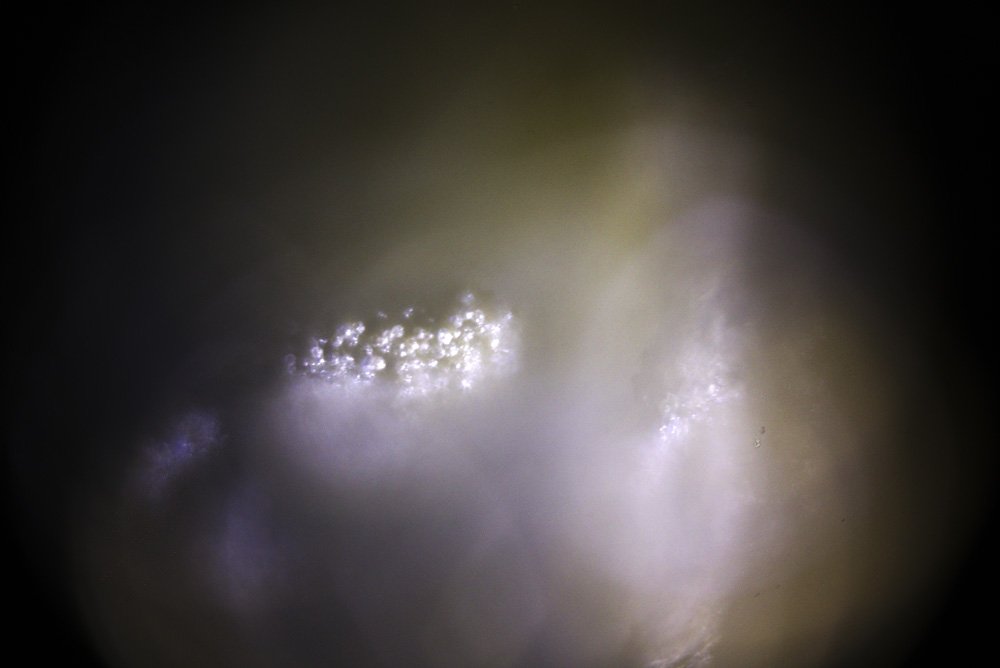
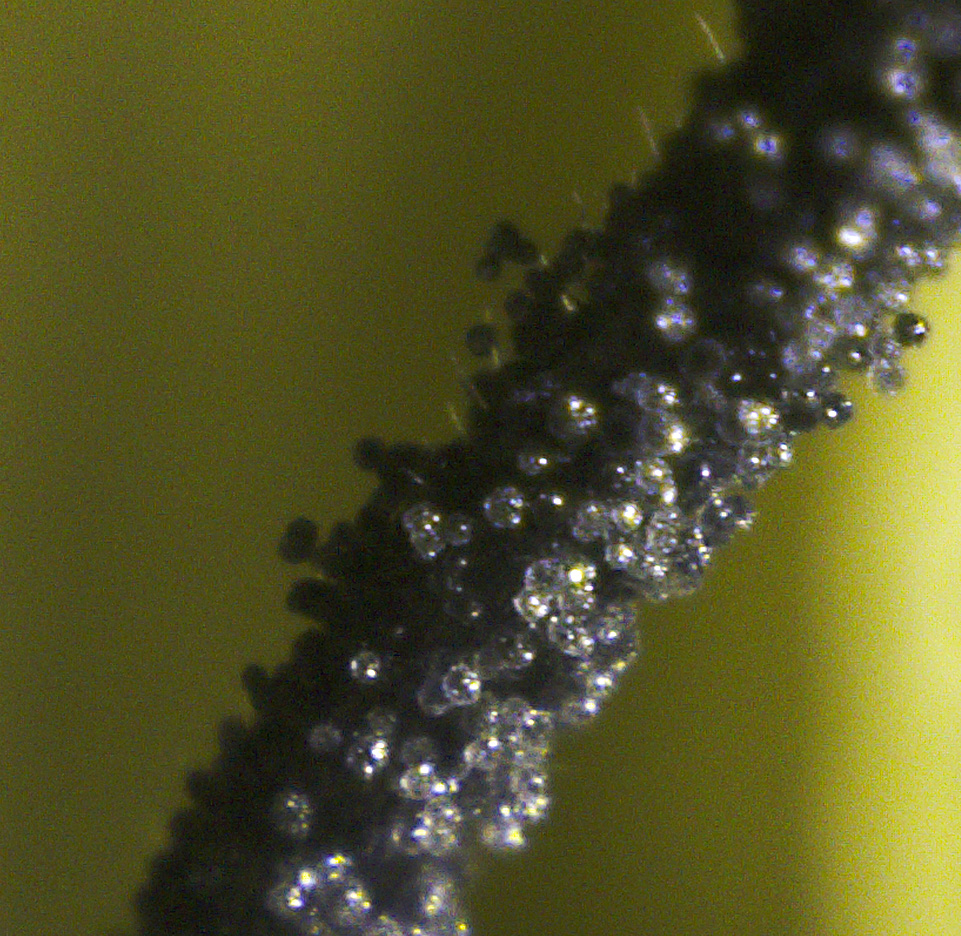
And what did it show? Here is a UV image taken with it, full frame (no cropping) and whitebalanced in Darktable. I’ve upped the contrast and boosted the saturation slightly (and reduced the size for sharing), but other than that its is unmodified.

UV imaging of Dandelion using the Reichert 40x reflecting objective

This is part of the style of the Dandelion, showing some pollen grains, with another part of the flower out of focus towards the right hand side of the image. Pretty trippy stuff, with some crazy reflections and flare.

There doesn’t seem to be much info on these online, but there was this; “Reichert 40/0.52 (catalog number), 250/1.5 Qu is a special purpose objective for Zetopan MeF-1 and MeF-2 Inverted Metallurgical Microscopes. This objective designed to use with heating stage. Because of the extreme high temperature involved (up to 1700° C) the sample chamber is water cooled and observation done in a vacuum. The window to the chamber is of 1.5mm quartz glass, hence the 1.5 Qu nomenclature. The front lens of objective is very large in diameter to achieve a relatively large numerical aperture (0.52) given the exceptional working distance the heating stage required. This objective has concave mirror at the front end; it is cardioid-type objective configuration. It has 20.2mm threads sizes – RMS (Royal Microscope Society) standard and comes with 24mm dovetail sliding bracket.” The front part of the lens unscrews, to show the lens itself.

Lens without front window, and including a ruler for scale

The front element of the lens is a concave window, with a dark spot in the middle. I suspect the underside of this is mirrored, and that the light then bounces off a second, larger mirror before passing out of the rear of the lens. This thing is tiny, and an amazing piece of engineering.

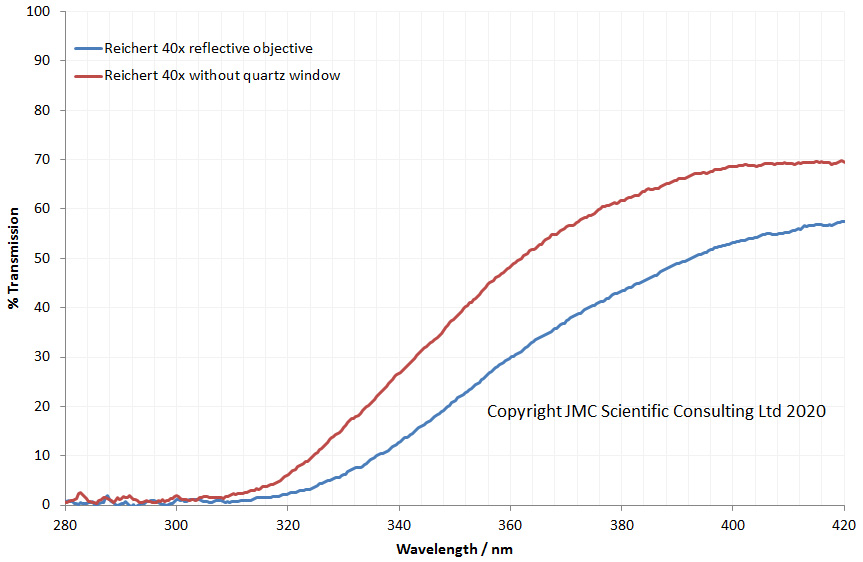
How does it transmit the UV light? I had high hopes here, so measured the transmission spectra in the UV (with and without the front quartz window in place), and got this…..

Transmission through the Reichert 40x reflecting objective

Hmmm, not as good as I’d hoped. While suitable for UVA, it’s not good for UVB imaging. In this case the thick quartz coverslip described on the side of the lens indicates it is aimed at high temperature work rather than UV.

Will it be useful? I’m struggling to think how I’d use this for photography. Lighting is a nightmare, and fitting a hood would be ‘challenging’ to say the least. While it’s marked as being designed for a 250mm tube length, I had no joy with long extensions. Depth of field is essentially zero, so stacking would be a must. I am planning on building a photomacrography rig in the future, and when I have stacking capability, I shall have another play with it. However despite all this, it is a cool little lens and a piece of optical history, so thought I would share what I had found. I hope you enjoyed it, and if you want to know more about this or any other aspect of my work, you can reach me through my ‘Contact‘ page.

Project Beater – first signs of life

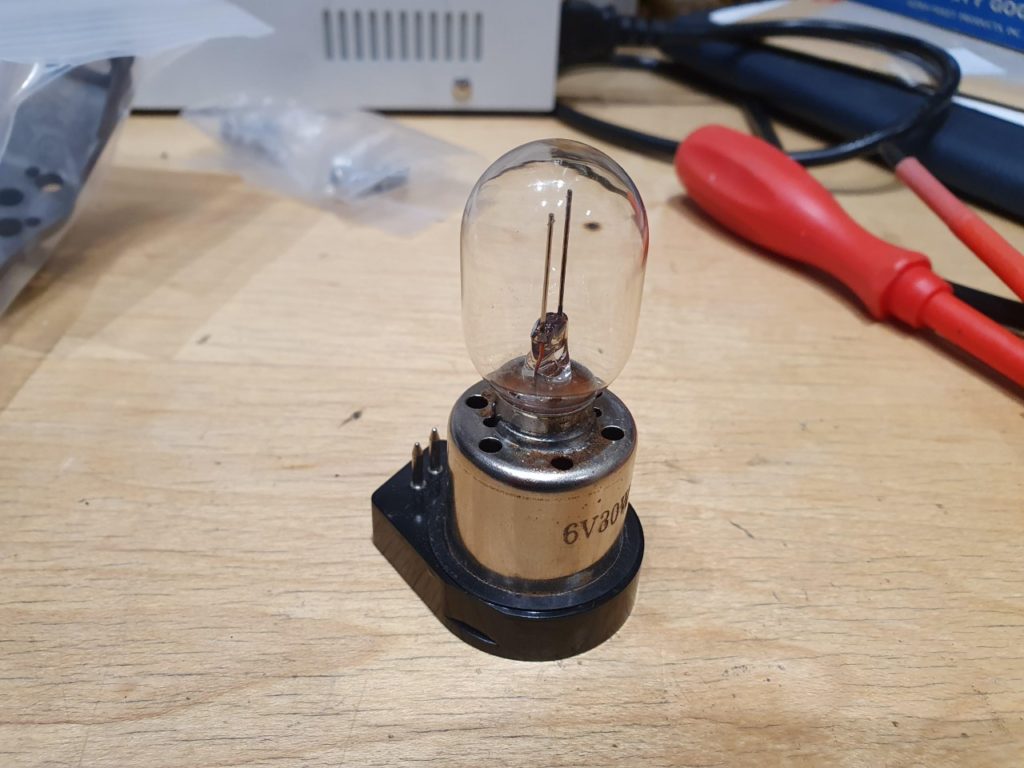
‘Project Beater’ – my Olympus BHB microscope rebuild is progressing nicely. The list of issues with it continues to be worked through. After sourcing a new fuse, I discovered that the electrics are fried. Rather than fixing 40 year old electrics to power the light source I decided to modify the light to LED instead. The original bulbs were 6V and 30W, and were soldered into a special mount.

Original 6V 30W bulb

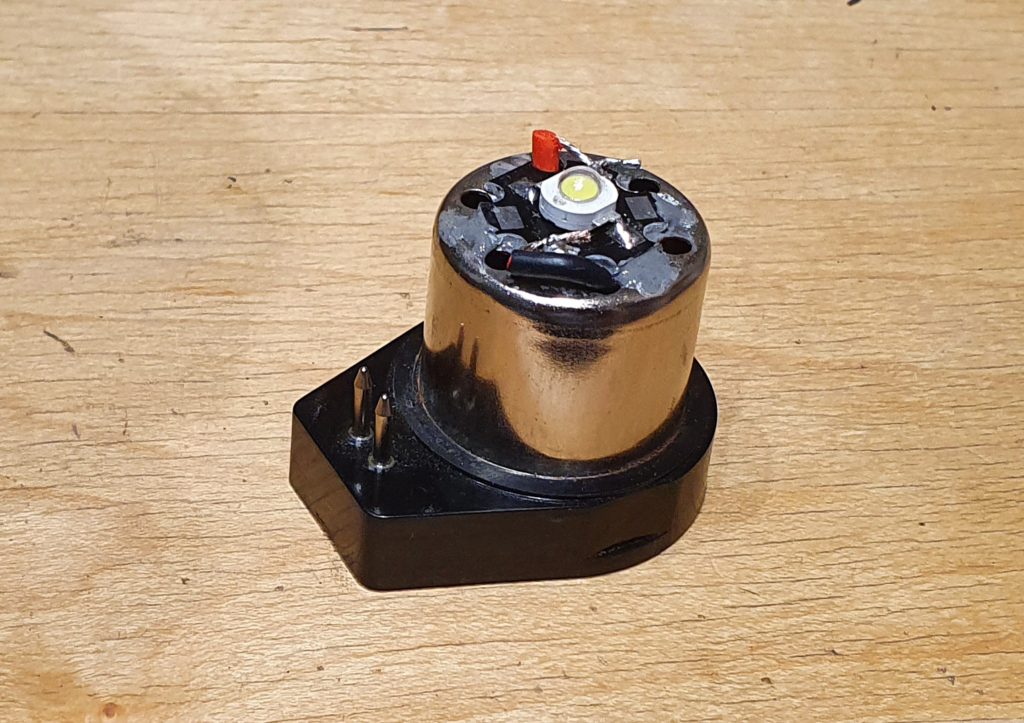
As my bulb was broken, I cut it out from the mount, and attached a 3W 6500K daylight LED on the bulb base in its place.

LED replacement on the original mount

This LED bulb could be powered from the bench top power supply I have, so I connected it up, and yes, we have light!!!

Light on!!!

Next, how to attach a camera. The microscope is trinocular, with a camera port on the top. I sourced an Olympus 3.3x NFK photo eyepiece, and an old Nikon F Mount to microscope adapter, and they fitted straight on, giving me about 20x magnification (about 2x my eyepieces).

Monochrome Nikon d850 on the microscope

For a camera I fitted my monochrome converted Nikon d850. As I’m planning on doing mainly black and white images, this is the ideal camera for it, as it has a moveable LCD screen on the back, and electronic first curtain shutter. The setup is almost parfocal between the eyepieces and the camera, requiring only a small amount of refocusing.

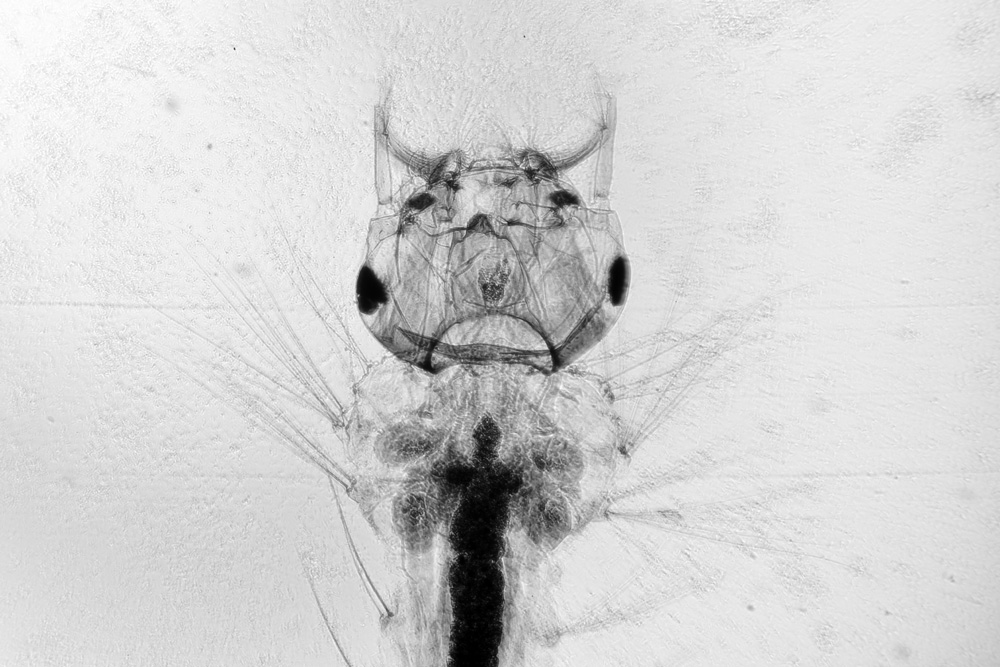
With the slide prep kit I got, there were a few mounted specimens. Here’s a shot of the Mosquito larvae, taken with the 4x Olympus SPLan objective (overall magnification about 80x).

Mosquito larvae at about 80x magnification

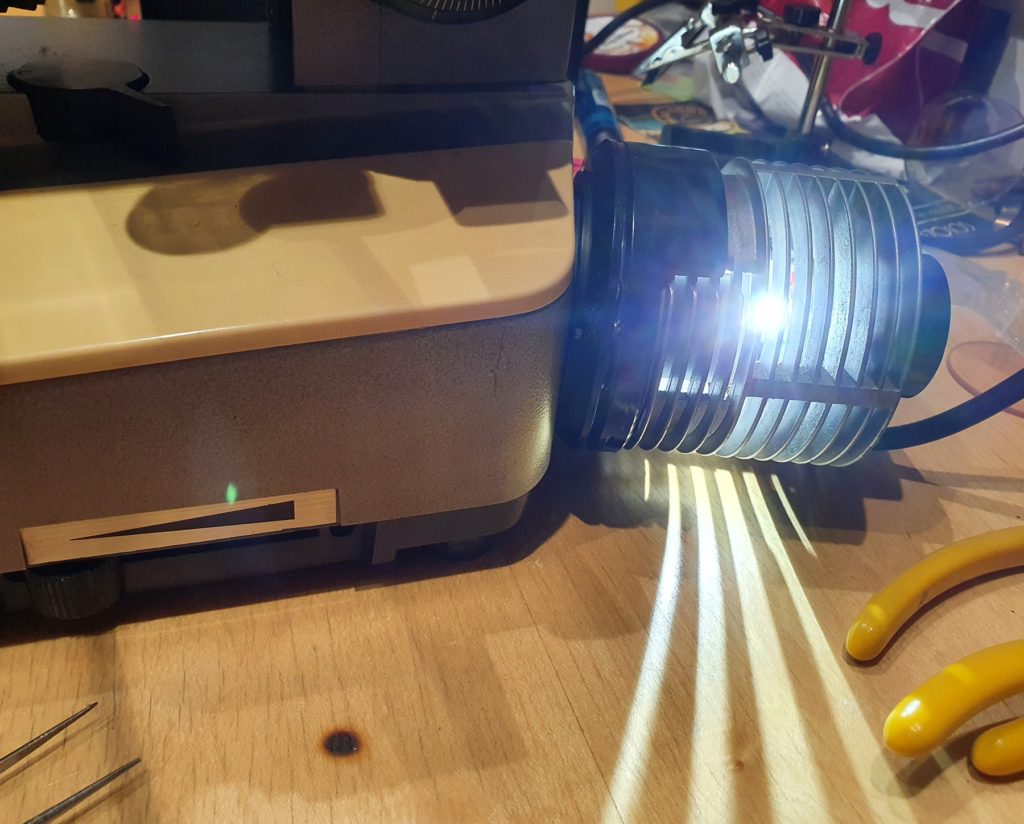
Given I’ve not really setup the light properly yet, this is encouraging. Next steps. I’ll probably rebuild the LED light source a little differently. The LED is not in the same position as the filament from the bulb would have been, which could be impacting how its focusing through the microscope. I also need to make sure its properly aligned. I have a green LED bulb, which I may make into a light source. As that would be a more monochromatic light source, I should get slightly sharper images due to reduced chromatic aberration. The photo eyepiece is a bit strong, so I may try and find a lower power one.

It’s been a fun build so far, and I’ve learned quite a lot about how microscopes work. More work to come, but for now, time for a coffee…..

UV Macrophotography with a Zeiss Luminar 25mm f3.5

While pulling together parts for my microscope build, I also saw that the supplier I bought some of my lenses from (Best Scientific, Wiltshire UK), had a Zeiss Luminar 25mm f3.5 lens available. It was an early lens (version 1), but the price was good so I bought it.

The Zeiss Luminars are renowned as pretty special lenses for macro work, and cover a huge image circle, so are great for full frame sensor cameras (and much larger sensors too if you have deeper pockets).

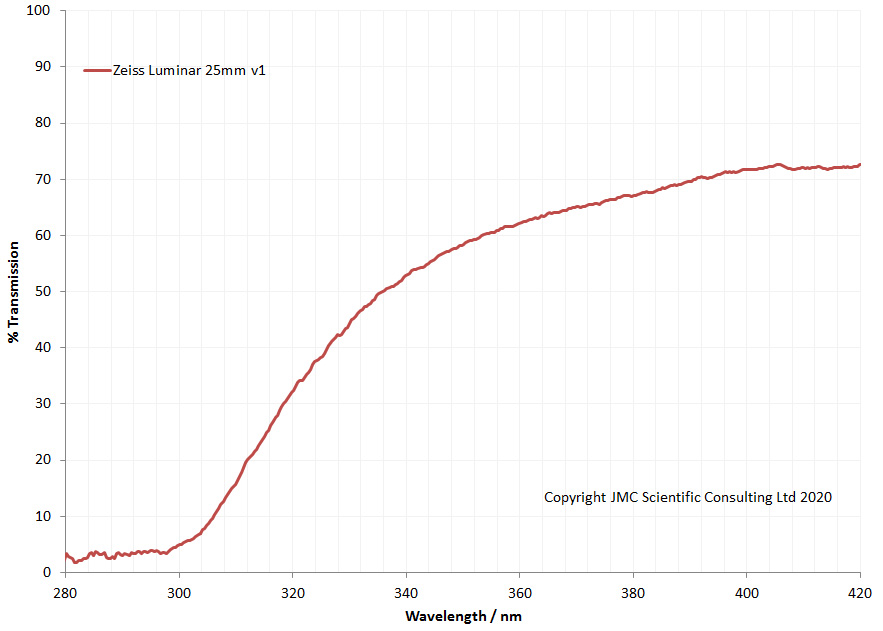
I got to wondering whether it would be any good for UV work, so I ran a transmission test on it using my UV transmission rig, and was amazed to see it had great UV transmission, letting light through down to about 300nm.

Transmission of the Zeiss Luminar 25mm f3.5 from 280nm to 420nm

This type of transmission is fairly unusual without resorting to specialised UV lenses, and it made me wonder what UV images using this would be like. I attached the lens to my modified Nikon d810 (modified for UV imaging by ACS, UK), using an 80mm extension tube, resulting in a magnification of about 4x. The camera sensor has been modified to be sensitive to UV between 320nm and about 380nm. For lighting I used a Hamamatsu LC8 200w Xe lamp, about 12cm from the subject, in this case a Common Dandelion from the garden. Setup is shown below.

As you can see from the image above working distance is small. Very small. Of course depth of field is tiny too, although the Zeiss Luminar does have an adjustable aperture which is very handy.

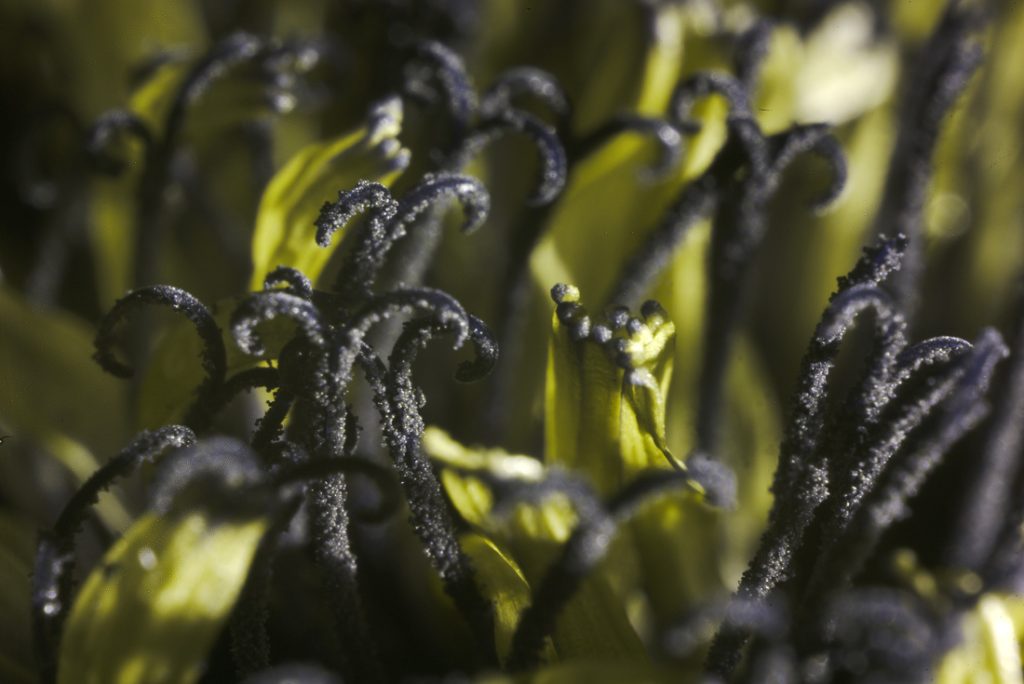
How do the images look? I took some images of the middle part of the flower, and then whitebalanced them in Darktable, after also taking some images of a Labsphere diffuse reflectance standard under the same UV lighting. Examples below, taken with an aperture setting of about 8 on the lens.

Dandelion flower head in UV with Zeiss Luminar 25mm f3.5

Now you may be wondering why some parts of the flower look black. This is because they strongly absorb UV, hence they come out black. What isn’t obvious on the images at the resolution here, is that this type of macro work shows up every little bit of dirt on your sensor. The sensor is filthy, and needs a damn good clean……

The images above were reduced in resolution for sharing (the originals from the Nikon d810 are massive – 8674×5792). How about up close within the image at higher resolution? Below are some crops from the images above, shown at actual pixel resolution.

Actual pixel resolution with the Zeiss Luminar 25mm f3.5

The round features on the parts of the Dandelion are individual pollen grains. In the middle image of the above three, towards the left of the shot in the out of focus region, you can see small round dots. This is some of the dirt on the sensor.

Now you may think, “well those aren’t that sharp”. This was done with a camera on a tripod, on wooden floor boards, and the light source on the same bench as the subject (the light source has a massive fan in it to try and keep it from overheating), and the exposure times were about 2s. As you can imagine, at this level of magnification, trying to keep things from not moving is a huge problem. Every little bit of vibration is amplified. Also, these were single shots, no focus stacking, taken with the lens at about f8, so the depth of field is absolutely tiny. Focus stacking would help get more of the subject in focus, but that is something I have yet to play with.

Another thing to note is the 25mm Luminar exhibited virtually no focus shift between the visible and UV regions. I was able to focus it using the view finder, and then take the shot in UV, and the same parts of the flower were in focus.

Overall, I’m really impressed with the Zeiss Luminar 25mm f3.5 in UV, and it has huge potential for macro photography (I’m sure it’ll be great for visible light work too). If you want to know more about this or my other work, you can reach me here.

Project Beater – Olympus microscope teardown

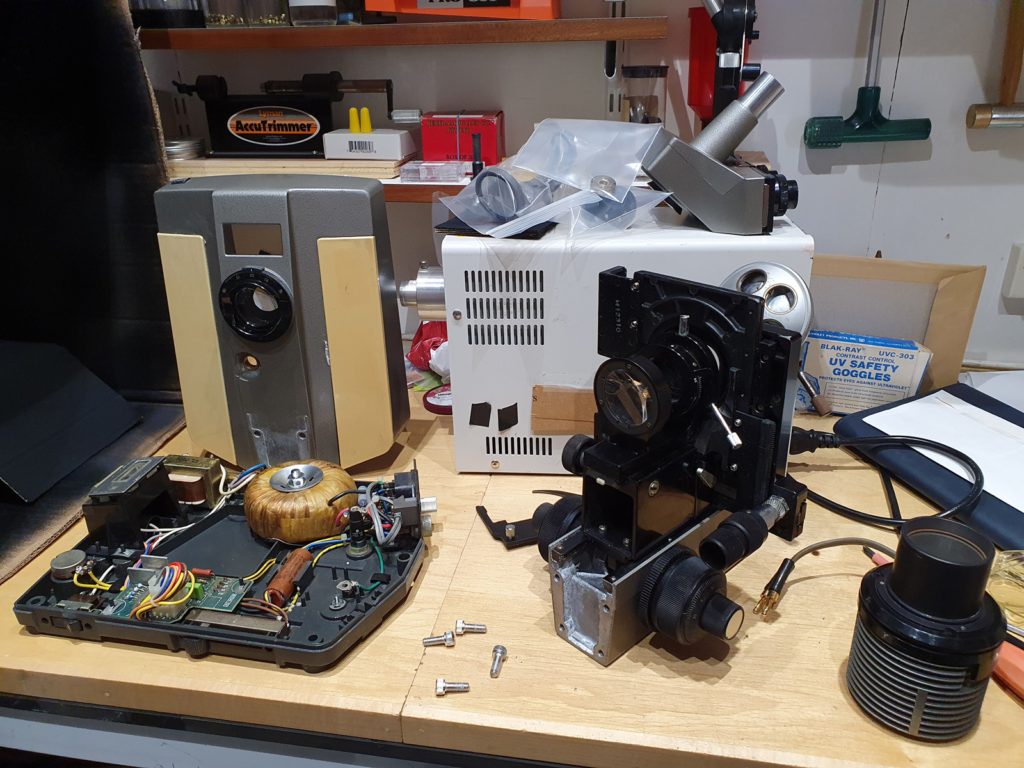
I’ve bought myself an Olympus BHB microscope to learn a bit more about microscopy, and while the price was good it’s in pretty poor condition. The work has begun to get it operational again. Thankfully these older microscopes are fairly easy to dismantle, and after an hours work, it’s currently looking like this…..

Microscope teardown has begun….

For those born after 1980, those things on the left are electronic components from before the advent of integrated circuits.

So far, I haven’t identified too many more issues with it. Taking it to bits enabled me to get at various bits which needed cleaning and lubricating (and boy, did they need cleaning).

Thankfully the optics look to be in pretty good shape, so with a little bit of tender loving care I should be able to get it working again.

Now then, back to the cleaning…..

Olympus BHB Microscope refurbishment – Project ‘Beater’

So, what to do when work goes a bit quiet because of what’s going on with Covid-19? Learn a new skill of course. Given my interest in all things imaging, it is perhaps surprising that I have very little experience with optical microscopy. In previous jobs and projects there were always microscopy experts as part of the team, and I used to look on in awe when they’d create these amazing images.

A few days ago I thought it was time to jump into the world of optical microscopy, learn something new, and perhaps put together a system which I can use for UV imaging at the same time. Instead of buying a new, ‘plastic fantastic’ microscope, I decided to get an older one which would hopefully be simpler to work on. As I found out though, older microscopes still command quite high prices, presumably because they were so well made. After a quick search on eBay, I found an Olympus BHB from the 1970’s, with no lenses, and advertised as ‘not working’. The price however was low, so I contacted the vendor and we agreed on an even lower price. So begins the journey of discovery I’m calling ‘Project Beater’, and the name will become obvious later…..

Project Beater – the start point.

Surely, if it’s not perfect now, how hard can it be to get running again……. Oh, how ignorance is bliss.

The microscope arrived yesterday, well packaged, and pretty much as shown in the pictures in the advert (one of which is above). Once unwrapped, and on the bench, the areas that needed working on started to become apparent, and then more things became apparent, and more, and more. The snag list so far stands at;

  1. There are no eyepiece lenses. This was mentioned in the advert, so some old 10x ones are on order.
  2. There are no objective lenses. Again this was in the advert, and isn’t a problem, as I have a few on order. Given my interest in UV imaging, I wanted to source some very specific objectives anyway, so this was actually a benefit as I wasn’t buying ones I didn’t need.
  3. The light source bulb has blown, so a new one will be sourced. Also, the cable for the light source has been modified to run from an external power supply, rather than the one in the microscope itself. So I need to either get an original plug for the cable, or just run it from an external power source. I’d like to get an LED source up and running for this at some point anyway, so this isn’t a huge issue.
  4. The light path selector in the observation tube was stuck, and wouldn’t slide freely. This has been fixed now after loosening off the mounting screws, and a bit of jiggling, as there was something blocking it.
  5. The high/low magnification light source selector was stuck, as the grease used in it had gone very sticky. All these bits are now out ready to be cleaned.
  6. The field iris diaphragm adjustment ring is extremely stiff. I haven’t figured out how to get this out yet to loosen it off (this could be tricky).
  7. While it has a trinocular head, I have no way of attaching a camera yet, although I have some ideas for that.
  8. Overall, it is filthy and in places some of the metal in the body is quite corroded. I get the feeling this has been dumped in the back of a cupboard for 20+ years, and has been generally neglected. So an overall clean and lube is needed.

Welcome to Project Beater, and given the snag list above, the name now becomes obvious. I hope over time to get this up and running again into a usable microscope. However if not, there is a fall back option. The focus block would make a good macro photography focus rail, so if the microscope proves to be beyond resurrection, the hacksaw will be coming out, and it’ll get cut up and reused. In the current climate where reuse and recycle are becoming more and more important, just trashing this is not an option.

Why bother doing this? Why not just buy a new microscope? Other than the obvious of not going with a new deice, these are valid questions. One of the reasons for me was to get something that required a bit of work, to get me to learn something new, as it’s only by learning how something works that you can figure out their limitations and where things can be improved. If I can get it working again even better.

At this point I would like to give a quick shout out (that’s such a corporate phrase) to Best Scientific in Wiltshire, UK. They didn’t supply me with the microscope itself, but they have been great regarding getting hold of the objectives I was after, and in general advice on all things microscopy.

If you’d like to know more about any aspect of my work on imaging and skin, you can reach me here.